TL;DR

Get baking supplies delivered free with Prime
- Fast, free delivery on millions of items
- Prime Video, Amazon Music and more included
- Member-only deals all year
Properly tempering eggs involves gradually warming them with hot liquid while whisking to prevent curdling. Using a thermometer and gentle heat sources ensures a silky, smooth custard every time. Modern techniques like sous vide offer even more control for perfect results.
Imagine pouring a rich, golden custard into a dish, only to find it grainy and scrambled once baked. That’s the heartbreak of not tempering eggs properly. Tempering is the secret handshake of custard making—an age-old technique that, when done right, guarantees silky results. It’s not magic, just patience and precision.
In this guide, you’ll learn exactly how to master tempering eggs—step by step, with real-world tips and modern tricks—so you can stop worrying about scrambled custard and start enjoying perfectly smooth desserts every time.
Always use a thermometer to monitor temperature—aim for 160°F to 170°F (71°C to 77°C).
Add hot liquid gradually while whisking vigorously to prevent scrambling.
Use gentle heat sources like a double boiler or sous vide for consistent results.
Rushing the process or adding hot liquid too fast is the most common cause of scrambled custard.
Strain your custard after cooking to remove any cooked egg bits for a silky finish.
What is tempering, and why does it matter for custard?
Tempering is a simple but vital technique that prevents eggs from curdling when exposed to heat. It involves slowly raising the eggs’ temperature by adding hot liquid little by little while whisking constantly. This gradual process ensures the proteins in the eggs don’t coagulate too quickly, which causes scrambled eggs.
Think of it like warming a delicate blanket—too fast, and it gets bunched up; too slow, and it fits perfectly. For custards, this means silky, smooth texture without lumps or graininess. If you skip tempering or rush the process, you risk ending up with a gritty, scrambled mess instead of the velvety finish you want.
Understanding why tempering is so crucial helps you appreciate the tradeoffs involved. Rushing the process might save time but increases the risk of curdling, leading to a less desirable texture. Conversely, taking your time with tempering ensures the eggs integrate smoothly, resulting in a luscious, uniform custard. This patience pays off in the quality of your final dessert, making it worth the extra effort.
Products Worth Considering

Instant Pot Duo Crisp Ultimate 6.5-Quart 13-in-1 Pressure Cooker and Air Fryer

Le Creuset Signature Enameled Cast Iron Round Dutch Oven, 5.5 qt, Deep Teal

Traeger Woodridge Pro Wood Pellet Grill and Smoker, 970 sq. in., WiFIRE
As an affiliate, we earn on qualifying purchases.
How to temper eggs in 4 easy steps — no more scramble!
- Warm your milk or cream until just steaming—around 160°F (71°C). Use a thermometer for accuracy. This temperature is critical because it’s hot enough to gently warm the eggs without causing immediate coagulation, which could scramble them if added too quickly.
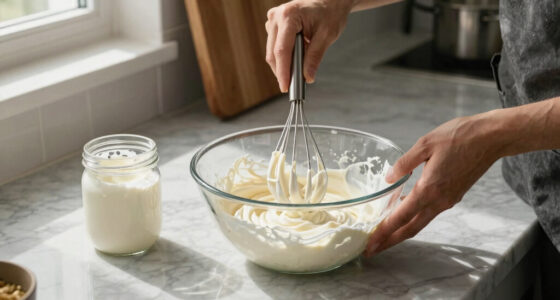
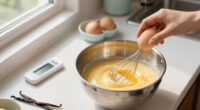
- Beat your eggs thoroughly in a bowl. Having the eggs ready makes the process smoother and helps ensure even temperature distribution, reducing the risk of hot spots that can cause curdling.
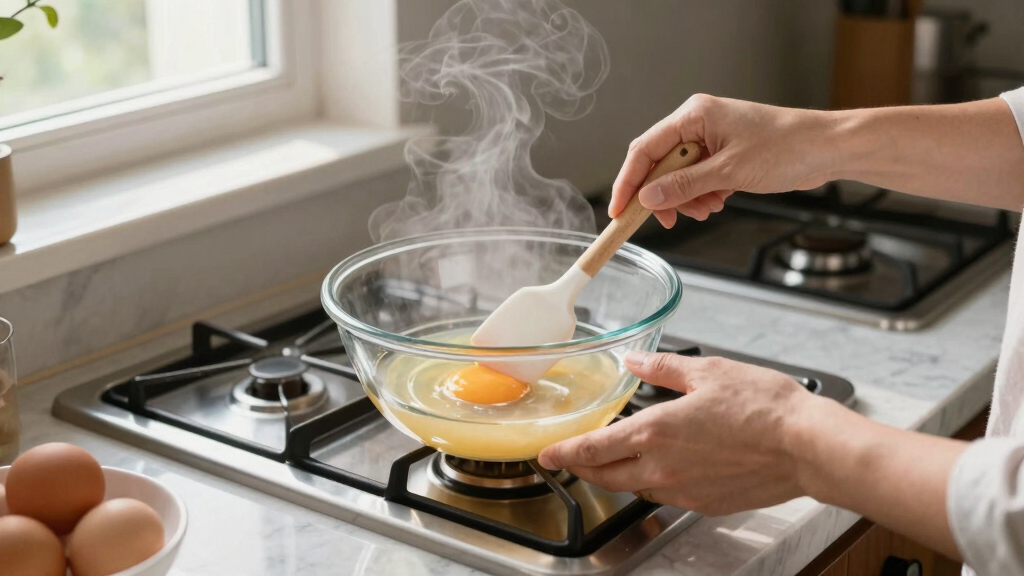
- Slowly pour about a quarter of the hot liquid into the eggs while whisking vigorously. This initial small amount gradually raises the eggs’ temperature, helping them acclimate without shocking their proteins into coagulation.
- Gradually add the rest of the hot liquid in a thin stream, whisking all the while. Once combined, pour the mixture back into the pot or bowl to finish cooking. This method allows you to control the heat transfer meticulously, preventing sudden temperature jumps that can cause scrambling.
Pro tip: Use a double boiler or a heatproof bowl over simmering water to keep temperature controlled and gentle. Keep whisking to distribute the heat evenly and prevent hot spots. This careful approach minimizes the chances of curdling, especially when working with delicate eggs.
Why temperature control is your secret weapon
Egg proteins start to coagulate at around 140°F (60°C), but for custard, you want to aim for about 160°F to 170°F (71°C to 77°C). This temperature range is a delicate window—hot enough to thicken the custard without pushing the eggs over the edge into curdling. Maintaining this precise temperature is essential because it directly influences the texture and smoothness of the final product.
Using a good digital thermometer is like having a trusted chef’s hand guiding you. It helps you catch the moment when the custard reaches that perfect silky spot—before it turns grainy or curdled. This control allows you to strike a balance: cook the custard enough to achieve the desired thickness without sacrificing creaminess.
For example, I once watched a friend rush her custard, thinking it was done at 160°F. It was just enough for the eggs to start scrambling, resulting in a grainy texture. A quick read on her thermometer saved her from tossing the batch and taught her the importance of patience and precise temperature monitoring in achieving a flawless custard.
Understanding this temperature window and the tradeoffs involved—such as the risk of undercooking versus overcooking—empowers you to make better decisions during cooking, ultimately leading to consistently better results.
Tools that make tempering foolproof
- Digital instant-read thermometer – for accurate temp checks, ensuring you stay within the ideal range.
- Double boiler or bain-marie – for gentle, even heat distribution that prevents hot spots and rapid temperature changes.
- Whisk – to continuously incorporate hot liquid into the eggs, promoting even warming and preventing hot spots that cause curdling.
- Fine-mesh sieve – to strain out any cooked egg bits or curdled particles after cooking, resulting in a smooth custard.
Imagine gently floating a bowl over simmering water, whisking steadily, while the thermometer keeps you in the sweet spot. These tools turn tempering from a gamble into a guaranteed success, allowing you to focus on technique rather than guesswork. Investing in quality tools ensures consistency, reduces frustration, and elevates your baking game.
Modern twists: sous vide and stabilizers for perfect custard
New tech like sous vide cooking takes the guesswork out of tempering. You set the water bath to a precise temperature—say, 165°F (74°C)—and let the custard cook gently, avoiding sudden heat shocks that scramble eggs. This method provides unparalleled control over both temperature and cooking time, resulting in an ultra-smooth, evenly cooked custard with minimal effort.
Some chefs add a teaspoon of cornstarch or a splash of lemon juice to help stabilize the eggs. These aren’t replacements but enhancements—making the process more forgiving, especially for beginners. Cornstarch acts as a thickening agent that can prevent curdling if the temperature slightly exceeds the ideal range, while lemon juice can help break down proteins for a smoother texture.
For example, sous vide custards can stay perfectly smooth for hours, making them ideal for advanced desserts or large batches. The consistent temperature environment ensures that each egg protein coagulates uniformly, resulting in a silky, custard that is impossible to overcook or scramble.
What often goes wrong — and how to fix it
Adding hot liquid too quickly, not whisking enough, or heating the custard too fast causes curdling. If your custard looks grainy or separates, don’t panic. Instead, gently whisk or pass it through a fine sieve to smooth out the texture. Sometimes, a gentle reheat over low heat can help bring it back together, but this isn’t always guaranteed. If the custard is severely curdled or scrambled, it’s best to start over—patience and slow, controlled heat are your best allies here.
Remember, slow and steady wins the smooth, silky custard race. Rushing the process increases the risk of proteins coagulating too quickly, leading to undesirable lumps or curdling. Learning to recognize the signs of overcooking and acting promptly can salvage your custard or prevent future mishaps.
In essence, understanding the common pitfalls and their solutions helps you develop a more intuitive sense of control, resulting in consistently perfect custard every time.
Frequently Asked Questions
Why did my custard scramble even though I tempered the eggs?
It’s usually because the hot liquid was added too quickly, or the mixture was heated too fast without proper whisking. Also, not using a thermometer can lead to overheating, causing the eggs to coagulate prematurely. Rushing the process or neglecting temperature control can cause proteins to seize up, leading to scramble. Understanding the importance of gradual heat and constant whisking helps prevent this mishap.
How can I tell when the custard is done?
When it thickens enough to coat the back of a spoon and reaches about 170°F (77°C), it’s ready. Always check with a thermometer for accuracy—overcooking will cause graininess and curdling. Recognizing the right consistency and temperature ensures a smooth, silky finish rather than a grainy or scrambled one.
Can I fix curdled custard?
Sometimes, whisking gently or passing it through a fine sieve can smooth out slight curdles. But if it’s severely scrambled, it’s best to start fresh and take your time with tempering. Proper control of heat and gradual addition of hot liquid are key preventative measures.
Is there a shortcut to avoid scrambling eggs?
The best approach is slow, gradual addition of hot liquid while whisking constantly. Using tools like a double boiler or sous vide offers even more control, reducing risks significantly. These methods minimize rapid temperature changes that cause proteins to coagulate too quickly.
What tools are best for tempering eggs?
A digital thermometer, a heatproof bowl or double boiler, a good whisk, and a fine-mesh sieve are your best bets. These tools help you keep control and achieve that silky custard finish by ensuring precise temperature management and smooth mixing.
Conclusion
Perfect custard isn’t about luck; it’s about patience and control. Mastering the art of tempering eggs means you’ll never face grainy or scrambled desserts again.
Next time you make custard, focus on slow, steady temperature rises. That silky, smooth texture is just a whisk away—your taste buds will thank you for it.