
TL;DR
Dough often won’t rise due to inactive yeast, incorrect water temperature, or poor proofing conditions. Checking these basics and adjusting your process can turn flat dough into fluffy bread.
Ever had your bread dough stubbornly refuse to rise? You’re not alone. It’s frustrating to put in time and effort, only to end up with dense, flat bread. But often, the cause is something simple — a missed step, a temperature slip, or expired yeast. Understanding what’s going wrong can save your baking day and turn that flat dough into fluffy, airy loaves.
This guide walks you through the most common reasons dough doesn’t rise and shows you how to fix each issue. With these practical tips, you’ll transform your baking mistakes into delicious successes and get that perfect rise every time.
Always test your yeast before using it — fresh yeast is key to good rising.
Water temperature should be around 105°F (40°C) for optimal yeast activation.
A warm, humid environment is essential for dough to rise properly.
Proper kneading develops gluten and helps trap gas, making your bread fluffy.
Avoid common mistakes like overproofing or using expired ingredients to improve results.
Why Your Dough Won’t Rise—and What to Do About It
Flat dough is usually a signal, not a disaster. Test the yeast, control the temperature, build the gluten network, and give fermentation the warm, humid environment it needs.
Start with life and warmth.
Before changing the recipe, confirm that your yeast is active and its environment supports fermentation.

SAF Instant Yeast Red for Baking Cake, Bread and Dough, 1 Pound (1 Pack)
The outstanding performance of its fermentation action and its speed of use are the main benefits of saf-instant…
As an affiliate, we earn on qualifying purchases.
As an affiliate, we earn on qualifying purchases.
Six reasons dough stays stubbornly flat
Yeast produces carbon dioxide. Gluten traps it. Warmth keeps the process moving. A failure in any part of that system reduces volume.
Inactive yeast
Expired, overheated, or poorly stored yeast cannot generate enough gas. Proof a small sample before mixing.
Water too hot or cold
Hot water can kill yeast; cold water leaves it sluggish. Aim near 105°F / 40°C.
Weak gluten
Under-kneaded dough leaks gas instead of holding it. Knead until smooth, elastic, and slightly tacky.
Cold or drafty proofing
Low or fluctuating temperatures slow fermentation. Use a warm, covered, draft-free spot.
Excess salt or sugar
Too much salt inhibits yeast; heavy sugar can draw away moisture. Measure the recipe carefully.
Proofing misread
Underproofing limits gas; overproofing weakens the structure until it collapses. Look for roughly double the volume.

GIYUDOT Folding Bread Proofing Box with 50-113℉ Temp Control & 48H Timer, Dough Proofer with Metal Rack, Humidor, Recipes, Ideal for Sourdough, Bread Baking, Pizza, Yogurt, Kombucha, Precise Control
RESISTS COLD ENVIRONMENTS: Achieve perfect dough every time with our bread proofing box, featuring 3 heating zones (front,…
As an affiliate, we earn on qualifying purchases.
As an affiliate, we earn on qualifying purchases.
Water wakes the yeast—or ends the rise
A small kitchen thermometer removes the guesswork and improves consistency across seasons, kitchens, and recipes.
The practical sweet spot
Use water around 100–110°F (37–43°C). At the center of that range, yeast activates efficiently without heat damage.
Cold water is not always fatal, but it can stretch fermentation far beyond the expected schedule. Excess heat can make recovery impossible.
From dormant to damaged
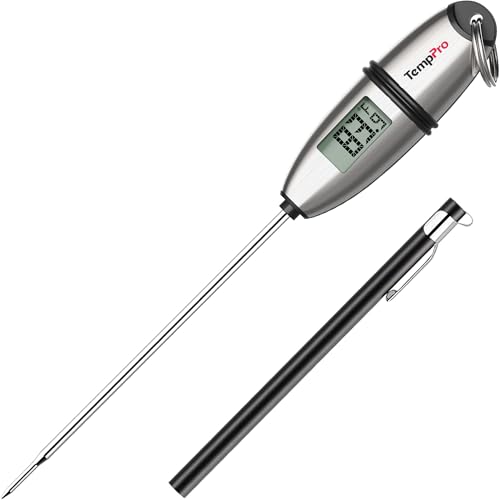
TempPro TP02S Digital Food Thermometer for Cooking Bread Baking Sourdough Liquids, Meat Thermometer Digital with Super Long Probe for Kitchen Candy Making Gift for Dad Husband (Previously ThermoPro)
Fast and Accurate Reading: Kitchen thermometer for cooking features a 1 second readout speed and high accuracy of…
As an affiliate, we earn on qualifying purchases.
As an affiliate, we earn on qualifying purchases.
The five-step path to an airy loaf
Use the clock as a guide, but let the dough’s size, surface, and resilience determine when proofing is complete.
Wake the yeast
Warm water, a pinch of sugar, and 5–10 minutes.
Knead the dough
Work 8–10 minutes by hand until elastic.
Cover the surface
Use a damp cloth or wrap to retain humidity.
Choose the right spot
Target 75–80°F in a draft-free area.
Wait for volume
Proceed when the dough roughly doubles.

Saint Germain Bakery Premium Round Bread Banneton Basket with Liner – Perfect Brotform Proofing Basket for Making Beautiful Bread (9 inch)
"EXCELLENT CRAFTSMANSHIP: Beautiful handmade using natural rattan, absolutely free from dye and free from chemicals. Made with love…
As an affiliate, we earn on qualifying purchases.
As an affiliate, we earn on qualifying purchases.
Gluten is the net that catches the gas
Fermentation can be active and still produce a flat loaf if the dough lacks enough structure to retain carbon dioxide.
Gas-retention potential
The goal is a resilient network that stretches without tearing. Both too little and too much kneading can reduce the final lift.
Read the dough
Texture is more informative than a strict minute count. Look for a combination of strength, stretch, and surface smoothness.
Match the symptom to the fix
Start with the least disruptive correction. Temperature and time can often rescue slow dough; dead yeast usually means starting again.
| Mistake | What happens | Status | Best response |
|---|---|---|---|
| Old or expired yeast | No meaningful gas production; dough stays dense. | ✗ START FRESH | Test a new batch of yeast before remixing. |
| Water too hot | Yeast cells are damaged or killed. | ✗ HIGH RISK | Use fresh yeast and water near 105°F. |
| Water or room too cold | Fermentation slows and timing becomes unreliable. | ~ RECOVERABLE | Move the covered dough to a warmer location. |
| Underproofed dough | Low volume and a tight, dense crumb. | ~ MORE TIME | Continue proofing until volume noticeably expands. |
| Overproofed dough | Structure weakens; the dough deflates or collapses. | ~ RESHAPE | Gently degas, reshape, and proof briefly again. |
| Warm, humid, covered proof | Yeast works steadily while the surface stays flexible. | ✓ ON TRACK | Bake when the dough has roughly doubled. |
When your dough looks like a brick
A stalled dough may still contain living yeast. Give it warmth, renewed structure, and a little more time before abandoning the batch.
Try one controlled rescue.
If there is still no visible expansion after an additional 30–60 minutes in a warm environment, restart with tested yeast.
Different lift, different rules
Sourdough and chemical leaveners can raise dough, but they do not behave—or taste—the same as commercial yeast.
Instant yeast
Fast, consistent, and less finicky for new bakers. It can usually be mixed directly into dry ingredients.
Best for: dependable everyday bread.
Sourdough starter
Wild yeast and bacteria produce complex flavor but require a healthy starter and longer fermentation.
Best for: patience, flavor, and craft.
Baking soda + acid
Produces bubbles quickly with buttermilk or another acid, without developing a yeast-style crumb.
Best for: quick breads, not direct substitution.
Test the yeast, measure the water temperature, knead for elasticity, cover the dough, and proof by volume in a warm place. Those five checks solve most rising failures.
Is Your Yeast Dead? How to Tell and Fix It
Yeast is the engine behind your dough’s rise. If it’s dead or expired, your bread won’t puff up no matter what you do. The easiest way to check? Mix a teaspoon of yeast with warm water (around 105°F or 40°C) and a pinch of sugar. If it bubbles and froths within 5-10 minutes, it’s alive. If not, it’s time to replace it.
Using old yeast is a common mistake. Even if it’s not expired, improper storage — like exposure to heat or moisture — can kill yeast cells. Always keep your yeast in a cool, dry place, and buy smaller packages if you bake infrequently.
Pro tip: switch to instant yeast for more reliability, especially if you’re new to baking. It activates faster and is less finicky about temperature.
Temperature Troubles: Why Water Matters More Than You Think
Water temperature is a game changer for yeast activation. Too hot, and you risk killing the yeast; too cold, and it won’t activate at all. The sweet spot? Around 100-110°F (37-43°C). You can test this with a kitchen thermometer — no guesswork needed.
Imagine trying to wake up a sleepy friend with a lukewarm cup of coffee versus a steaming hot one. Yeast reacts similarly. Proper water temperature ensures that yeast cells are activated without being damaged, which directly influences how much the dough will rise. If the water is too hot, it denatures the proteins in yeast, rendering it inactive; too cold, and the yeast remains dormant, delaying or preventing fermentation. This delicate balance impacts not just rise, but also the flavor and texture development, as fermentation is a key flavor contributor.
Tip: Keep a small thermometer in your baking toolkit. It’s worth the extra step for consistent results.
The Secret Life of Gluten: Kneading and Environment
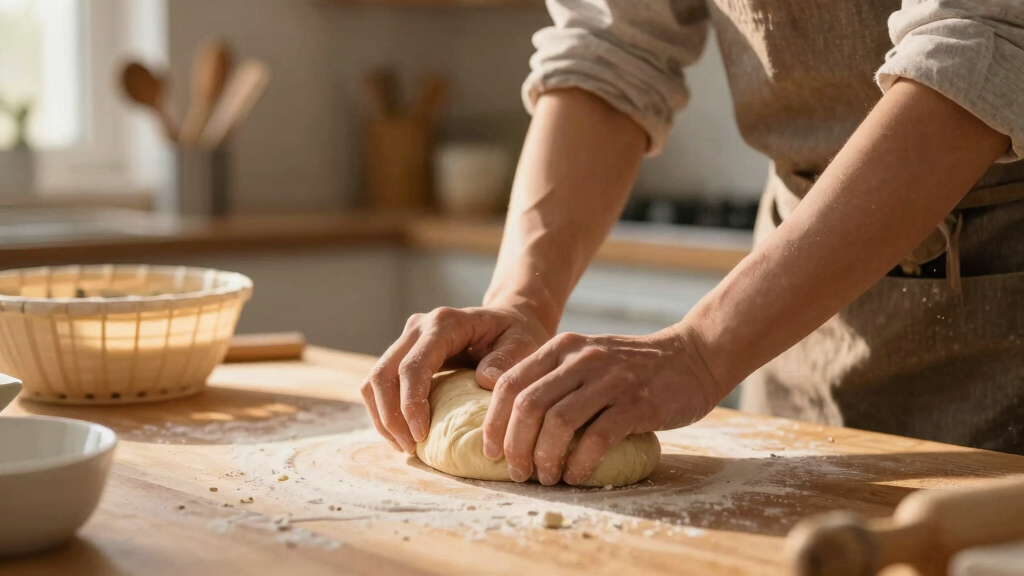
Proper kneading develops gluten, which is essential for trapping gas and rising. If your dough is under-kneaded, it’s like a balloon with a tiny opening — it can’t hold the gas. Knead until the dough feels smooth, elastic, and slightly tacky, usually about 8-10 minutes by hand.
But even perfect kneading isn’t enough if the environment is cold or drafty. Dough needs warmth and humidity — think of it as giving your yeast a cozy blanket to work through.
Gluten development creates a resilient network that traps carbon dioxide, the gas produced during fermentation. This network is what gives bread its structure and volume. Without adequate gluten, the gas escapes, resulting in a dense, flat loaf. Over-kneading can make the dough tough, impairing its extensibility and ability to stretch without tearing, which can also hinder rise. The environment plays a crucial role: a cold or drafty space slows gluten relaxation and yeast activity, leading to poor fermentation and less rise. Conversely, a warm, humid proofing environment allows gluten strands to relax properly and yeast to ferment efficiently, producing a light, airy texture. Achieving the right balance in kneading and environment ensures your dough develops the necessary structure and conditions for optimal rising.
Pro tip: Cover your dough with a damp towel and place it in a warm spot, like near a radiator or inside a turned-off oven with the light on. It makes a big difference.
How to Recognize and Correct Poor Proofing Conditions
- Pick a warm, draft-free spot — around 75-80°F (24-27°C). This temperature range allows yeast activity to proceed at an optimal rate without risking overproofing or drying out the dough.
- Cover your dough with a damp cloth or plastic wrap to maintain humidity, which prevents the surface from drying and forming a crust that can inhibit expansion.
- Let it rise until it roughly doubles in size — usually 1 to 2 hours. This timeframe allows enough fermentation for flavor development and volume increase.
- If it doesn’t rise well, try a different warm spot or increase proofing time. Sometimes, environmental factors like drafts or fluctuating temperatures can slow the process, so patience and observation are key.
Imagine your dough as a balloon filling with gas. If it’s in a cold room, it struggles to inflate because yeast activity is sluggish. Moving it into a warm environment energizes the yeast, encouraging the dough to puff up. If it still doesn’t rise, give it more time or double-check your yeast’s activity and ingredient freshness. A proofing box or oven with the light on can create a controlled microclimate, ensuring consistent proofing conditions that help your dough reach its full potential.
Common Mistakes That Kill Your Dough’s Rise
| Mistake | Impact | Fix |
|---|---|---|
| Using old or expired yeast | No gas production, flat dough | Use fresh yeast, test before mixing |
| Water too hot or cold | Yeast kills or doesn’t activate | Use a thermometer, aim for 105°F (40°C) |
| Cold proofing environment | Slow or no rise | Find a warm spot or use a proofing box |
| Overproofing or underproofing | Collapse or underdeveloped dough | Watch for double in size, follow timing |
Think of your dough like a delicate plant. Too much sun or shade stunts growth, but proper care helps it flourish. Avoid these common pitfalls for a fluffy result.
Quick Fixes When Your Dough Just Won’t Rise
Sometimes, your dough looks like a brick. Before starting over, try this:
- Gently punch down the dough to release any gas.
- Re-knead briefly, then place in a warm spot covered with a damp cloth.
- Give it an extra 30-60 minutes to see if it puffs up.
If it still refuses to rise, it’s better to start fresh with new yeast. But often, these small adjustments can salvage your baking effort.
Imagine turning a stubborn, flat loaf into a fluffy masterpiece with a few simple steps — it’s possible when you understand what’s happening behind the scenes.
Natural Alternatives to Yeast for Rising
Sourdough starters and baking soda are natural options, but they behave differently from commercial yeast. Sourdough relies on wild yeast and bacteria, which need longer fermentation times. Baking soda, combined with an acid like buttermilk, produces quick bubbles but doesn’t develop the same airy structure.
If you want a more forgiving rise, a well-maintained sourdough starter can be your best friend. Just remember, it takes patience and practice.
For quick fixes, baking soda with an acid can give a temporary lift, but don’t expect the same flavor and texture as yeast-leavened bread.
Frequently Asked Questions
Why is my dough not rising even though I used fresh yeast?
Check the water temperature first. If it’s too hot or cold, yeast can’t do its job. Also, ensure your dough is in a warm, humid spot. Sometimes, yeast can be fresh but still inactive due to improper storage or handling. Test your yeast before mixing to be sure.
How can I tell if my yeast is still active?
Dissolve a teaspoon of yeast in warm water with a pinch of sugar. If it bubbles and froths within 5-10 minutes, it’s active and good to go. If not, it’s time to replace it to avoid flat, dense bread.
Can I fix dough that hasn’t risen?
Sometimes, giving it more time in a warm spot helps. Gently punch it down, re-knead briefly, and let it proof again. If it still doesn’t rise after several hours, starting fresh with new yeast is your best bet.
What if my dough overproofs and collapses?
Gently punch it down to release excess gas, reshape, and proof again if time allows. Overproofed dough often loses structure, but a second proof can help salvage it for baking.
Are there natural alternatives to yeast for rising dough?
Sourdough starters are a natural, slow-fermenting option that can produce excellent rise and flavor. Baking soda combined with an acid like buttermilk offers quick leavening but won’t give the same airy texture as yeast. Both require some adjustments and patience.
Conclusion
Getting dough to rise isn’t magic — it’s about paying attention to the basics: fresh yeast, warm environment, and patience. When you master these, even stubborn dough can turn into a beautifully risen loaf.
Next time your bread falls flat, remember: a little troubleshooting goes a long way. Your perfect loaf is just a few small adjustments away.