TL;DR

Get baking supplies delivered free — and shop member deals
- Fast, free delivery on millions of items
- Access to Prime Big Deal Days deals on October 6–7
- Prime Video, Amazon Music and more included
Cheesecake cracks mainly due to overbaking, uneven heat, or rapid cooling. Using gentle baking techniques and proper cooling can keep your cheesecake smooth and beautiful.
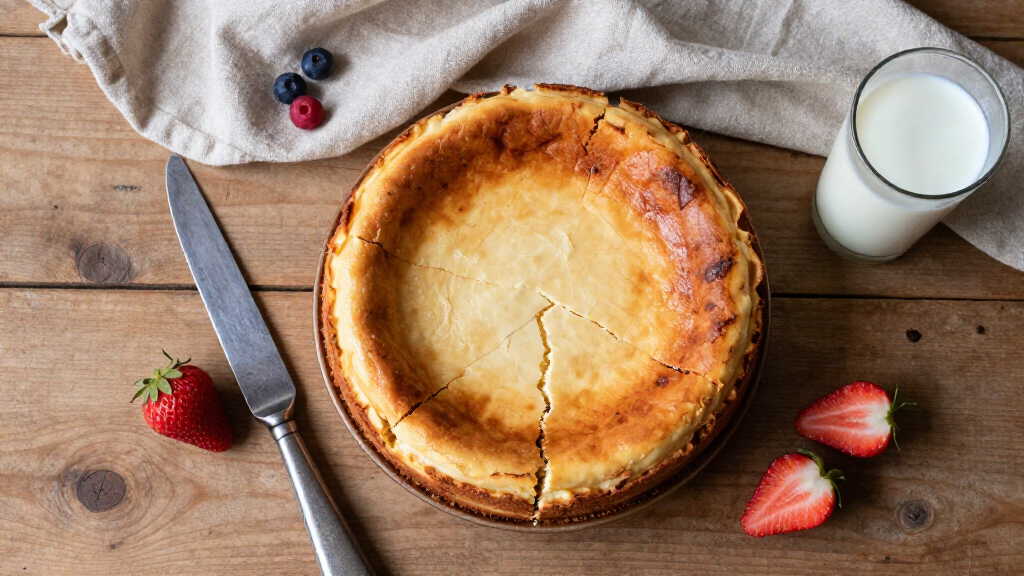
Picture this: you pull your cheesecake out of the oven, and it’s perfect—until the surface splits right down the middle. Frustrating, right? Cracks happen more often than you think, but the good news is, they’re usually fixable and often preventable.
In this guide, you’ll learn why cheesecakes crack, what causes those unsightly lines, and most importantly, what steps you can take to keep your next cheesecake smooth, creamy, and crack-free. Whether you’re baking your first or hundredth, understanding these common pitfalls makes a real difference.
Avoid overbaking: pull the cheesecake when the edges are set but the center still wiggles slightly.
Mix gently to prevent excess air bubbles that cause puffing and sinking.
Control oven temperature with a thermometer and rotate pans for even baking.
Cool gradually—never rush the cooling process—to reduce contraction stress.
Use a water bath selectively—it’s most helpful for thick, creamy cheesecakes that need gentle heat.
Why Your Cheesecake Cracked Down the Middle
Cracks happen when the filling expands during baking and contracts during cooling — usually because of overbaking, uneven heat, or rapid cooling. The good news: they’re cosmetic, usually fixable, and almost always preventable.
Six Reasons the Surface Splits
A central crack can result from several overlapping problems — the location alone never identifies the cause. Here is what’s actually happening inside your pan.
Overbaking
Cheesecake is a custard. Egg proteins tighten as they cook — too long in the oven and the filling turns firm and brittle, unable to flex without splitting.
Overmixing the Batter
Vigorous mixing — especially after adding eggs — whips in air bubbles that expand in the oven, puffing the cake up, then sinking and cracking it as they escape.
Uneven Oven Temperature
Hot spots and ovens that run hot set the edges while the center is still cooking. That tension pulls the surface apart as the cake cools.
Rapid Cooling
The filling contracts as it cools. A sharp temperature drop causes uneven shrinking that rips the surface apart and can sink the center.
Filling Stuck to the Sides
If the sides cling tightly to the pan, they pull on the contracting filling like a stretched rubber band — until the surface snaps.
No Gentle Heat Source
Dense, custard-like fillings exposed to direct, dry oven heat bake unevenly — the classic setup for a crack down the middle.
Timing Tells You What Went Wrong
When the crack appears is your best clue to its cause. Use this quick diagnostic before your next bake.
| Symptom | Likely Cause | Water Bath Helps? | Fixable After Baking? |
|---|---|---|---|
| Cracks during baking | Excessive heat, overbaking, or substantial puffing from excess air | ✓ Yes | ~ Hide only |
| Cracks during cooling | Uneven contraction, often combined with sticking to the pan | ~ Partially | ~ Hide only |
| Sinking center | Structure never set properly — puffing then collapse from air bubbles | ✓ Yes | ✗ No |
| Firm all over before cooling | Overbaked — egg proteins tightened past the flexible point | ~ Partially | ~ Hide only |
| Crack despite water bath | Overbaking or overmixing — a bath can’t rescue those | ✗ Already used | ~ Hide only |
Your Next Bake, Step by Step
Follow this chain from mixing bowl to refrigerator to dramatically cut your crack risk.
Mix Gently
Low speed, stop when combined. No bubbles, no puff-and-sink.
Prep the Pan
Grease or line the sides; wrap in foil if using a water bath.
Bake Low & Even
Verified temperature, middle rack, rotate halfway through.
Pull It Jiggly
Edges set, center wobbles slightly — cohesive, not liquid.
Cool Gradually
Off oven, door ajar → room temp → fridge. Loosen sides early.
What Contributes Most to Cracks
Not every factor carries equal weight. Based on established baking principles, here’s how the main culprits compare.
How Much Should the Center Jiggle?
The single most important visual check happens the moment you open the oven door. Read the wobble.
Liquid Slosh
Center flows freely when shaken. It needs more time in the oven.
Gentle Wobble
Edges set, center jiggles slightly as one cohesive unit. Pull it now.
Firm All Over
No movement at all. Egg proteins have tightened — cracks incoming.
Water Bath or Not?
A water bath provides a stable, moist environment that smooths out temperature fluctuations. But it isn’t essential for every recipe — and a pan of water on another rack is not equivalent: it adds moisture but no direct temperature moderation.
Best For
- Thick, dense, creamy New York–style cheesecakes
- Ovens that run hot or bake unevenly
- Recipes where a smooth top matters most
- Slow, gentle, custard-like setting of the filling
Skip It When
- Baking no-bake cheesecakes — different method entirely
- Making Basque-style — a deeply browned, rustic surface is expected
- Your recipe specifies dry heat or alternative appliances
- You can’t guarantee a leak-proof foil wrap
Yes — You Can Hide a Crack
Chilling firms the filling but doesn’t reliably repair a split. The good news: a crack changes nothing about safety or taste. Cover it with confidence.
Fruit Topping
A layer of glazed berries or compote turns the crack line into a design feature.
Ganache
Warm chocolate ganache poured over the top levels and seals any fissure.
Sour Cream
A classic thin sour-cream layer, briefly re-baked, hides everything beneath.
Whipped Cream
Piped or spread generously — the timeless, no-fail camouflage.
Overbaking Is the Top Cause — Here’s How to Stop It
Overbaking is the leading reason your cheesecake cracks down the middle. Think of a cheesecake as a custard—egg proteins tighten as they cook. When you leave it in the oven too long, the filling becomes too firm and brittle, unable to flex or expand without cracking.
For a perfectly baked cheesecake, look for a gentle, jiggly center when you remove it from the oven. The edges should be set but not hard. If the center is still liquid, it needs more time. If it’s firm all over, it’s overdone—and that’s when cracks often appear.
According to experts, removing the cheesecake just as the edges are set and the middle has a slight wobble prevents overbaking. Remember: residual heat continues to cook it even after you pull it out.
As an affiliate, we earn on qualifying purchases.
Too Much Air in the Filling? How Beating Less Keeps It Smooth
When you vigorously mix your batter, especially after adding eggs, you introduce tiny air bubbles. These bubbles expand in the heat, causing the cheesecake to puff up like a balloon. As it cools and the air escapes, the shrinking can cause cracks to form.
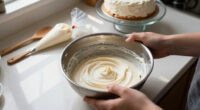
To keep your filling smooth and crack-free, mix at low speed and stop as soon as the ingredients come together. Think of it like gently folding in whipped cream—less is more for a tender, even texture.
One simple trick: use a spatula or a gentle hand mixer setting instead of high speed. This reduces air incorporation and results in a more stable, less crack-prone cheesecake.
It’s important to understand that overbeating not only introduces excess air but also affects the texture and stability of the filling. Excess air creates weak points that can expand during baking and contract during cooling, leading to surface cracks. Striking a balance in mixing technique ensures a dense, creamy filling that resists cracking and maintains a uniform appearance.
As an affiliate, we earn on qualifying purchases.
Heat Stress: Why Uneven Oven Temperatures Lead to Cracks
Uneven or excessive heat creates stress on your cheesecake’s delicate structure. The edges may become firm and dry while the center is still soft, leading to tension that causes cracks. An oven that runs hot or hot spots makes this worse.
Always use the recipe’s specified temperature and pan size. An inexpensive oven thermometer can help you monitor actual temperature—many home ovens are off by 10-20°F.
If your oven is uneven, consider rotating the pan halfway through baking or baking on a middle rack. These small adjustments can make a big difference in even cooking and crack prevention.
Understanding oven temperature variability is crucial because inconsistent heat distribution can cause parts of the cheesecake to cook faster than others. This uneven cooking introduces internal stress and tension, which manifests as cracks once the cake cools and contracts. Using an oven thermometer and rotating the pan are effective methods to promote uniform baking, reducing the risk of cracks and ensuring a smooth surface.
As an affiliate, we earn on qualifying purchases.
Cooling Too Fast? Why Patience Prevents Cracks and Sinks
Cooling your cheesecake rapidly invites cracks. As it cools, the filling contracts. Sudden temperature drops cause uneven shrinking, which pulls the surface apart.
Follow the recipe’s advice: let the cheesecake cool gradually—usually in the turned-off oven with the door slightly ajar, then at room temperature before refrigerating. This slow transition helps the filling contract evenly.
Think of it like a glass of hot liquid cooling down slowly—a gentle process prevents stress and cracks. Skipping this step often results in a cracked, sinking cheesecake.
Rapid cooling causes the filling to contract unevenly, creating tension on the surface that can lead to cracks. It also increases the likelihood of sinking in the center because the structure hasn’t had time to set properly. Implementing a slow cooling process allows the filling to contract uniformly, reducing internal stress and maintaining a smooth, crack-free surface. Patience during cooling is a small step that makes a significant difference in the final appearance of your cheesecake.
As an affiliate, we earn on qualifying purchases.
Pan Contact and Sides: How to Prevent the Surface from Splitting
If the sides of your cheesecake cling tightly to the pan, they can pull on the filling as it cools and contracts, causing the surface to crack. Proper greasing, lining, or careful release can stop this from happening.
Use parchment paper or a buttered foil collar around the springform pan’s edges. When the time is right, gently loosen the sides—don’t pull the cake out immediately. This gives the filling room to settle without stress.
Imagine pulling a tight rubber band—it’s more likely to snap. Loosen the sides carefully and gradually for a crack-free surface.
Ensuring that the sides of the pan are not overly adhered to the cheesecake is critical. When the sides are too tight, they exert stress on the delicate filling during cooling and contraction, increasing the likelihood of surface cracks. Using a parchment collar or properly greasing the pan helps prevent this adhesion. Allowing the cheesecake to cool slightly before gently loosening the sides prevents sudden tension, giving the filling space to settle evenly without cracking. This careful handling preserves the smooth surface and prevents splitting caused by pan contact stress.
Water Bath or Not? Pros and Cons for a Smooth Finish
Using a water bath is a tried-and-true way to promote even baking and prevent cracks. The water’s heat moderates the oven temperature, reducing hot spots and slow baking the filling.
However, a water bath isn’t always necessary. Some recipes, like no-bake or certain New York-style cheesecakes, don’t call for it. If you choose to use one, wrap your springform pan tightly in foil to prevent leaks and place it in a larger pan filled with hot water.
In many cases, a water bath can make a significant difference for thick, creamy cheesecakes that benefit from gentle, even heat—especially if your oven runs hot or uneven.
From a scientific perspective, a water bath provides a stable, moist environment that mitigates temperature fluctuations and hot spots, leading to a more uniform bake. This consistency is especially important for dense, custard-like cheesecakes that are prone to cracking if exposed to uneven heat. While not always essential, employing a water bath can significantly improve the texture and appearance of your cheesecake by reducing the risk of surface cracks and sinking, making it a valuable technique for delicate recipes.
Can You Fix or Hide Cracks? Yes — Here’s How
A crack on your cheesecake isn’t a sign of failure—just a sign to tweak your technique. Often, you can conceal it with toppings or decorations. Fruit compote, whipped cream, or a glossy ganache can hide cracks and add visual appeal.
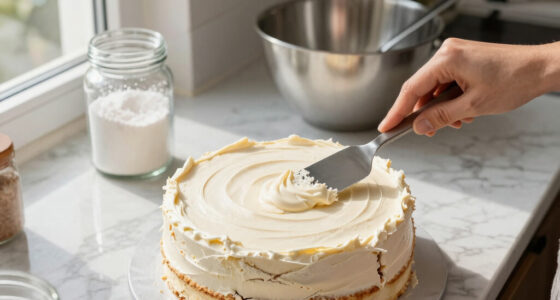
If you want a perfectly smooth top, a common method is to gently level the surface with a spatula while it’s still slightly warm. Or, cover the crack with a decorative topping—think berries or a drizzle of caramel.
Chilling the cheesecake also firms up the filling, making it easier to cover imperfections with minimal cracking during presentation.
Additionally, some bakers use smoothing techniques like a hot spatula or heated metal spatula to gently melt and level the top, creating a seamless surface. Applying a thin layer of fruit glaze or whipped topping can also disguise minor imperfections, transforming a cracked surface into a visually appealing dessert. These methods are practical and can enhance presentation, especially when the cake has some unavoidable cracks despite careful baking.
Traditional vs. Modern Baking Techniques — What Works Best?
Traditional water bath baking is the gold standard for even heat and crack prevention. But newer methods like pressure-cooker or air-fryer baking are gaining popularity. These change how heat reaches the filling but don’t eliminate the core principles.
For example, pressure-cooker cheesecakes cook under steam pressure, reducing direct heat stress. Air fryers circulate hot air rapidly, requiring recipe adjustments.
Regardless of method, controlling oven temperature, cooling slowly, and not overbaking remain key. The technique you choose depends on your equipment and recipe, but understanding those core principles helps you adapt successfully.
While alternative methods like pressure cooking or air frying can offer convenience and speed, they often require adjustments to traditional baking times and temperatures. The fundamental principles—preventing overbaking, controlling heat, and cooling gradually—are universal. Recognizing the underlying physics of heat transfer and contraction helps bakers adapt these modern techniques effectively, ensuring a crack-free, smooth cheesecake regardless of the method used.
Frequently Asked Questions
Why did my cheesecake crack even though I used a water bath?
Using a water bath helps control temperature, but cracks can still form if you overbaked or cooled it too quickly. It’s about balancing heat and cooling carefully, not just the water bath alone.Why did it look perfect in the oven but crack afterward?
This often happens because the cheesecake cools rapidly or contracts unevenly. Slow cooling prevents tension buildup, keeping the surface smooth.How much should the center jiggle when it is done?
The center should jiggle gently like a jelly—firm but with a slight wobble. If it’s liquid or too wobbly, it needs more time. If it’s firm all over, it’s overbaked.Did I overmix the eggs?
Overmixing eggs introduces extra air, which can cause puffing and sinking. Mix just until combined, and fold gently for a smooth batter.Can I bake cheesecake without a water bath?
Yes, but it’s riskier. Without a water bath, you need to monitor oven temperature precisely and bake at a lower temp to prevent cracks. Some recipes adapt well to this method.Conclusion
A cracked cheesecake isn’t a sign of failure—just a sign to tweak your technique. With a little patience and attention to detail, you can bake a smooth, creamy masterpiece that looks as good as it tastes.
Remember, gentle baking, slow cooling, and smart handling make all the difference. So next time, keep these tips in mind—your perfect cheesecake is just a crack-free bake away.
Evergreen bestsellers Picks
bestsellers
As an affiliate, we earn on qualifying purchases.