
TL;DR
This guide simplifies bread baking for beginners, highlighting key ingredients, techniques, recent trends, and common pitfalls. Practice makes perfect, and patience is your best friend.
Baking bread at home often feels like a mysterious art, packed with complex techniques and elusive secrets. But here’s a truth: anyone can bake a delicious loaf with basic ingredients and a little patience. It’s about understanding the process, not perfection from the start.
Whether you want a crusty boule, a soft sandwich loaf, or a simple everyday bread, this guide will walk you through each step. By the end, you’ll see that your first loaf isn’t just a beginner’s attempt—it’s the start of a new hobby, filled with aroma, texture, and satisfaction.
Start with simple recipes like no-knead bread to build confidence.
Pay close attention to dough signs—size, elasticity, and windowpane test—to judge readiness.
Patience during fermentation and proofing creates flavor and texture.
Proper baking temperature and steam are essential for crust development.
Keep notes, experiment, and enjoy the learning process.
What Are the Key Ingredients for Perfect Bread?
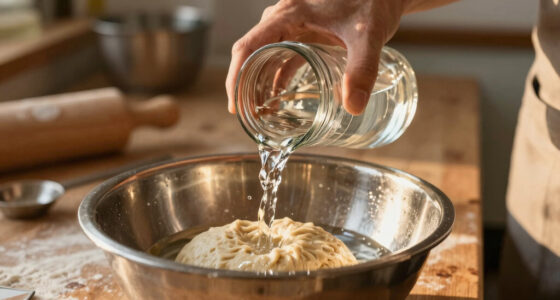
Every great loaf begins with simple, honest ingredients. You need flour, water, yeast, and salt. The quality and proportions of these matter more than fancy add-ins.
For beginners, bread flour is a safe bet because of its higher gluten content, which gives structure. Whole wheat adds flavor and nutrition but can make the dough denser. Use warm water—around 80-85°F (27-29°C)—to activate yeast effectively. Salt enhances flavor and controls fermentation, so don’t skip it.
Example: A simple loaf might use 3 cups bread flour, 1 1/4 cups water, 2 teaspoons salt, and a teaspoon of instant yeast. Start with these, and adjust as you learn.
As an affiliate, we earn on qualifying purchases.
How to Mix and Knead for a Strong Gluten Framework
Mixing and kneading develop the gluten network that traps gas, giving bread its rise and chewy texture. Proper mixing ensures ingredients are evenly distributed, preventing dry spots or uneven fermentation. Kneading aligns the gluten strands, creating a resilient network that can stretch and hold the gases produced during fermentation, which directly impacts the bread’s structure and chewiness.
For a beginner, a simple method is to knead on a floured surface for about 8-10 minutes. You’ll notice the dough becomes shiny, slightly tacky, and stretchable. An example: after 8 minutes of kneading, when you can stretch a small piece into a thin, translucent sheet without tearing, it’s ready.
Tip: If the dough feels sticky, sprinkle a little more flour. If it’s too dry, a splash of water works.
As an affiliate, we earn on qualifying purchases.
Why Fermentation Is the Secret to Better Bread
Fermentation is the magic that transforms simple dough into flavorful, airy bread. It’s when yeast eats sugars, producing carbon dioxide and alcohol, which make the dough rise and develop taste. This process also allows enzymes to break down proteins and starches, enhancing flavor complexity and digestibility. The longer and slower the fermentation, the more developed the flavor and aroma, giving your bread depth and character.
For beginners, patience is key. Usually, a first rise takes 1-2 hours at room temperature, or until the dough doubles in size. An easy test: if you gently press the dough with your finger and the indentation slowly springs back, it’s ready for shaping. Rushing this step can lead to dense bread or poor oven spring, so understanding the timing ensures a lighter, more flavorful loaf.
Example: A typical bulk fermentation at 75°F (24°C) lasts about 1.5 hours, but if your kitchen is cooler, it may take longer. Keep an eye on the dough’s size and texture, not just the clock. This patience allows the yeast to fully develop flavor and the gluten to strengthen, resulting in a better crumb and crust.

Superbaking Sourdough Banneton Bread Proofing Basket, 9" Round, Set of 2
- Bake Two Loaves Simultaneously: Includes two 9-inch round proofing baskets
- Splinter-Free, Smooth Finish: Made of premium Indonesian Rattan with polished surface
- Includes BakeSide App Access: AI baking assistant for guidance and scheduling
As an affiliate, we earn on qualifying purchases.
As an affiliate, we earn on qualifying purchases.
How to Shape and Proof Your Dough Without Frustration
Shaping dough is like giving it a final form—tight, smooth, and ready to rise again. Lightly flour your surface, gently deflate the dough, and shape it into a tight ball or loaf. Use a bench scraper or your hands to create surface tension, which helps the loaf hold its shape and develop a better crust during baking. Proper shaping also encourages even fermentation and prevents uneven oven spring.
Proofing lets the dough rise again before baking, usually 30-60 minutes. You want the dough to look puffy, and when you poke it, it should slowly bounce back. Overproofing can cause the loaf to collapse or spread out, while underproofing can lead to dense bread. Recognizing the right proofing stage is crucial for a light, airy crumb.
Pro tip: Use a proofing basket or bowl lined with a floured towel to support the shape and create a beautiful crust. Proper shaping and proofing are essential for achieving that professional look and texture, making the final loaf not just tasty but visually appealing.

Sourdough Proofing Basket Gift Set, 9" Round and 10" Oval Banneton Bread Baking Supplies, Sourdough Baskets with Bread Lame, Danish Whish, Bowl Scraper, Sourdough Scraper, and Linen Liner
- Complete Baking Gift Set: Includes baskets, lame, scrapers, and liners
- 9-inch Round & 10-inch Oval: Two sizes for versatile proofing needs
- High-Quality Rattan Material: Smooth, splinter-free, non-stick, durable
As an affiliate, we earn on qualifying purchases.
As an affiliate, we earn on qualifying purchases.
Baking Your First Loaf: How to Get That Perfect Crust
Baking is where all your effort pays off. Preheat your oven to around 450°F (230°C). To mimic a professional crust, create steam in the first 10 minutes—place a pan of hot water at the bottom of the oven or spritz water onto the dough before baking. Steam is crucial because it delays crust formation, allowing the bread to expand fully and develop a shiny, crisp crust. Without enough steam, the crust can harden prematurely, limiting oven spring and resulting in a dull crust.
Use a Dutch oven or covered baking vessel to trap steam, which helps develop a crisp, shiny crust. Baking in such a vessel mimics professional steam-injected ovens, leading to a bakery-quality crust. Bake for 30-40 minutes until the crust is deep golden, and the loaf sounds hollow when tapped. Proper baking temperature and steam are essential because they influence crust color, texture, and overall appearance. A well-baked crust also acts as a protective barrier, keeping the crumb moist and tender inside.
Example: A beginner’s loaf baked in a preheated Dutch oven at 450°F for 35 minutes yields a crunchy crust with a tender crumb inside. Adjusting baking time and steam can help you fine-tune your results, but the key is consistent high heat and proper moisture during the initial phase.
Common Mistakes and How to Fix Them
New bakers often face issues like dense crumb, flat loaves, or a pale crust. These problems usually stem from common misunderstandings or missteps. For example, underproofing results in dense bread because the dough hasn’t expanded enough to trap gases, leading to a tight crumb. Overproofing causes the dough to weaken, collapsing in the oven. Under-kneading can produce insufficient gluten, affecting rise and chewiness, while baking at too low a temperature prevents proper crust formation.
Recognizing these issues involves observing the dough’s behavior and the bread’s appearance after baking. For instance, a dense loaf may need longer fermentation or a more active yeast. A flat loaf might benefit from scoring to control expansion or a longer proof. Using an instant-read thermometer to check internal temperature (~200°F/93°C) ensures doneness. Proper scoring allows the loaf to expand evenly, preventing uncontrolled bursting. Adjustments to timing, temperature, and handling can significantly improve your results over time.
Understanding these tradeoffs helps you decide whether to extend fermentation, alter hydration, or modify baking conditions. For example, increasing hydration improves crumb openness but makes handling more challenging, especially for beginners. Learning to troubleshoot these issues enhances your skills and boosts confidence, turning mistakes into valuable lessons for future loaves.
Quick Checklist for Your First Successful Loaf
- Use fresh, high-quality ingredients.
- Follow the recipe’s hydration and fermentation times closely.
- Develop gluten through proper kneading.
- Give your dough plenty of patience during rising.
- Bake with steam at high heat for crusty perfection.
- Let the loaf cool before slicing to set the crumb.
Frequently Asked Questions
What is the easiest bread recipe for beginners?
No-knead bread recipes are ideal for beginners. They require minimal kneading, longer fermentation, and produce excellent results with less fuss. Just mix, rest, shape, and bake.
How do I know when my dough is ready to bake?
Look for the dough to roughly double in size and pass the windowpane test—stretching a small piece into a thin, translucent sheet without tearing. It should feel airy and elastic.
Why did my bread turn out dense or flat?
This usually happens if the dough was underproofed, overproofed, or not kneaded enough. Check your yeast activity, proofing times, and ensure proper shaping. Adjust fermentation if needed.
Can I bake bread without special equipment?
Absolutely. While tools like a Dutch oven help, many successful loaves are baked directly on a baking sheet or in a regular oven. Use a hot oven and add steam with water for crusty results.
How do I get a crusty, golden crust?
Use high oven temperatures (around 450°F), create steam during baking, and avoid opening the oven door too early. Let the bread cool completely before slicing to preserve the crust.
Conclusion
Every master baker started with a single loaf that didn’t quite turn out perfect. The secret is not in instant results, but in embracing each step—learning, adjusting, and savoring the smell of baking bread.
Remember: your first loaf is just the beginning. With patience and practice, your baking will improve, and soon, your kitchen will fill with the irresistible aroma of homemade bread—your very own bakery at home.