
TL;DR
Steam during baking delays crust formation, allowing bread to expand fully and develop a shiny, crispy crust. Using simple household techniques, you can recreate bakery-quality results at home.
Why Steam is the Secret to That Perfect Bread Crust
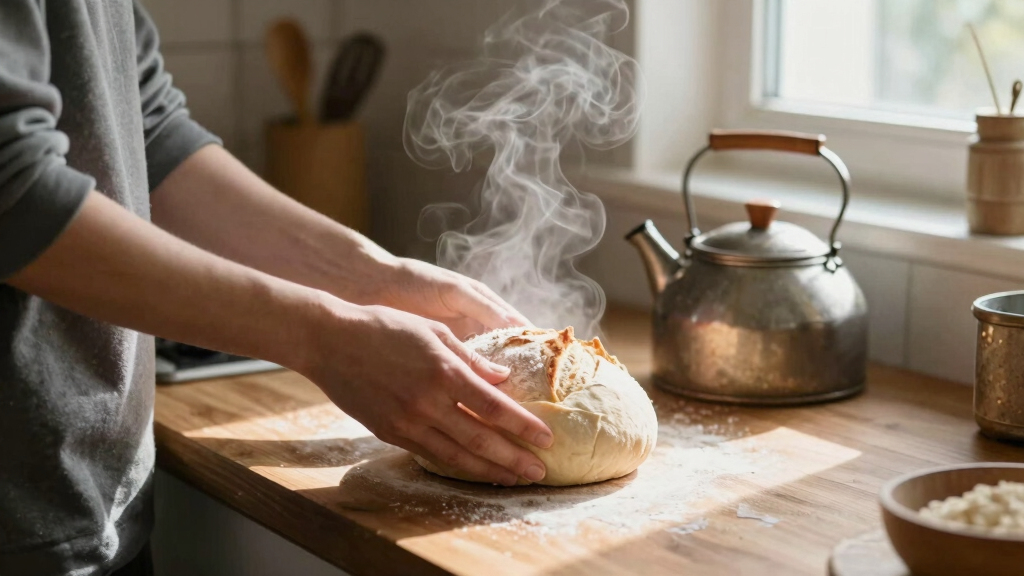
Steam during baking is like a magic wand for your bread’s crust. It keeps the surface moist during the first crucial minutes, allowing the dough to fully expand (called oven spring). This expansion is vital because it creates the airy, open crumb structure that many bakers desire. If the crust forms too early, it can trap gases inside, leading to a dense loaf. Additionally, the presence of steam encourages the Maillard reaction—a chemical process responsible for browning and flavor development. When the crust browns evenly and crisps up, it’s not just visually appealing; it also enhances the flavor, creating that complex, caramelized taste everyone loves. The tradeoff, however, is timing: too much moisture for too long can make the crust soggy, so understanding when and how to introduce steam is key. Ultimately, steam’s role is to balance expansion and crust formation, ensuring a beautiful, flavorful finish that elevates your homemade bread from simple to artisan-quality.

LoafNest inTune Precision Baker : 9 qt (4+5) Multipurpose Baking Dish and Cloche with Built in Oven Thermometer and Water Tray
New Breakthrough for Home Bakers. LoafNest inTune Provides the Ultimate Control on your Bake. Multipurpose, Easy to Use…
As an affiliate, we earn on qualifying purchases.
As an affiliate, we earn on qualifying purchases.
How to Add Steam in Your Kitchen Without Fancy Equipment
Adding steam to your home oven is simpler than you think. Here are 4 practical methods, along with insights into why they work:
- Water Pan Method: Place a metal tray or cast-iron skillet on the bottom rack while preheating. When you slide in your bread, pour hot water into the pan and quickly close the door. This method creates a burst of steam that mimics professional steam-injected ovens, helping the crust develop a deep color and crunch. The tradeoff is that the water can cause a rapid temperature drop if not done carefully, so preheating the pan and pouring water quickly are important techniques to master.
- Spritzing: Use a spray bottle to mist water onto the oven walls or directly onto the dough during the first 10 minutes. Repeating every few minutes maintains surface moisture, prolonging the steam effect. This method allows for more control over moisture levels, but overdoing it can lead to a soggy crust or uneven browning. It’s best used for smaller batches or when you want to fine-tune the crust’s appearance.
- Using a Dutch Oven: Bake your bread inside a preheated Dutch oven with the lid on. The enclosed space traps natural moisture released by the dough, creating a humid environment that promotes oven spring and a crackly crust. This method offers the most consistent results but requires a bit of planning to ensure the Dutch oven is hot enough before baking. The tradeoff is that it limits your ability to add extra steam mid-bake, but it’s ideal for achieving a bakery-quality crust with minimal fuss.
- Ice Cubes or Wet Towels: Toss a few ice cubes into a hot pan or place a wet towel in the oven to generate steam quickly. This approach provides an immediate burst of moisture, useful for quick baking sessions or when other methods aren’t feasible. However, it can be less consistent and may cause temperature fluctuations, so it’s best used as a supplementary technique rather than your primary method.
Each method influences the crust differently, and understanding these nuances helps you tailor your approach to your specific bread type and oven. For example, artisan loaves with high hydration benefit greatly from enclosed environments like Dutch ovens, while simpler techniques like spritzing work well for everyday baking.

GoodCook Nonstick Loaf Pan 8 x 4-Inch Heavy-Duty Steel Bakeware with Easy-Clean Non-Stick Coating, Oven & Dishwasher Safe Pan for Meatloaf Breads Lasagnas Casseroles & More, Set of 2, Gray
SET OF TWO 8 x 4-INCH MEDIUM LOAF PANS: Great for baking meatloaf, sweet or savory breads, thick…
As an affiliate, we earn on qualifying purchases.
As an affiliate, we earn on qualifying purchases.
Which Method Works Best? Comparing Steam Techniques
| Method | Ease of Use | Crust Quality | Best For |
|---|---|---|---|
| Water Pan | Easy | High | Hard Crust & Artisan Loaves |
| Spraying | Moderate | Moderate | Small Batches, Quick Crust |
| Dutch Oven | Easy | Excellent | All Types, Especially Sourdough |
| Ice Cubes/Wet Towels | Moderate | Good | Home Bakes, No Equipment |
Choosing the right method depends on your equipment, the type of bread you’re making, and your desired crust. The Dutch oven method is often favored for its consistency and professional results, as it creates a humid environment that replicates commercial steam-injection ovens. However, water pans and spritzing offer flexibility and ease for everyday baking, allowing you to experiment without significant investment. Understanding these tradeoffs helps you decide which technique aligns best with your baking goals and equipment constraints.

AHJ 6QT Dutch Oven For Bread Baking, Enameled Cast Iron Dutch Oven Pot with Lid, Multi-Functional Bread pan, Sourdough Baking Supplies with Proofing Basket, Cast Iron Bread Oven, Silicone Sling & Gloves.
PROFESSIONAL BREAD BAKING EXPERIENCE: Achieve artisan-quality sourdough and crusty loaves with our 6QT cast iron bread oven and…
As an affiliate, we earn on qualifying purchases.
As an affiliate, we earn on qualifying purchases.
Common Mistakes That Kill Your Bread’s Crust (And How to Avoid Them)
Many bakers sabotage their crusts without realizing it. Here’s what to watch out for, along with the implications of each mistake:
- Adding too much water: Excess moisture can make your crust soft and floppy instead of crispy. Overhydration can also lead to uneven baking, as the excess water cools the oven and prevents proper browning. The tradeoff is that too little moisture may result in a dull crust that lacks shine and crispness. Finding the right balance ensures a crust that’s both attractive and crunchy.
- Not preheating enough: Cold oven walls mean less steam retention and uneven heat distribution, which can cause poor oven spring and pale crusts. Proper preheating ensures that the oven environment is ideal from the start, allowing the steam to work effectively and the crust to develop evenly. The consequence of insufficient preheating is a loaf that looks and tastes underdeveloped, missing that desirable crust.
- Opening the oven door early: Letting steam escape prematurely halts oven spring and can cause the crust to form too early, resulting in a dull, thick crust. Timing is critical—wait until the initial baking phase is complete before venting. The tradeoff is that early venting might be necessary to control moisture levels, but doing so too soon compromises crust quality.
- Using cold water or ingredients: Cold ingredients slow down the Maillard reaction and crust browning, leading to a pale, underdeveloped crust. Warm or hot water accelerates browning and helps the crust form a beautiful color and crunch. The implication is that ingredient temperature directly influences crust quality, so warming your water slightly can make a noticeable difference.
For example, a baker who forgets to preheat thoroughly or uses cold water may end up with a loaf that lacks the desired color and crispness, regardless of steam. Recognizing and avoiding these pitfalls ensures your efforts yield the best possible crust every time.
bread spritzing spray
As an affiliate, we earn on qualifying purchases.
As an affiliate, we earn on qualifying purchases.
The Science Behind Steam and Crust Browning
Steam enhances the Maillard reaction—the chemical process responsible for browning and flavor development in baked goods. Moisture on the surface delays crust formation, giving the bread more time to expand and develop complex flavors. When the surface remains moist, heat penetrates more evenly, promoting uniform browning and a richer crust. This delay allows the bread to reach higher internal temperatures before the crust hardens, resulting in a deeper, more appealing color and crunch. Scientific studies show that steam can increase crust browning by up to 30%, which significantly impacts flavor, aroma, and visual appeal. Essentially, steam acts as a catalyst, creating the ideal conditions for a beautifully browned, flavorful crust—transforming a simple dough into a culinary masterpiece that delights both the eyes and palate.
Your Practical Guide to Perfect Homemade Bread with Steam
Here’s a quick step-by-step for baking bread with steam that emphasizes the importance of each stage:
- Preheat your oven: Get it hot—around 450°F (230°C)—and place your baking vessel or water pan inside to ensure the environment is ready for proper steam generation. A thoroughly preheated oven allows the steam to interact immediately with the dough, promoting oven spring and crust development.
- Prepare your dough: Shape your loaf and let it proof until it’s ready for baking. Proper shaping and proofing ensure even expansion and a better crust.
- Add steam: Once the oven is preheated, slide your dough into the oven. Pour hot water into your water pan or place the lid on your Dutch oven. This step is crucial because it introduces moisture at the right moment, supporting maximum oven spring and crust color.
- Bake with steam for 10-15 minutes: Keep the oven door closed during this phase to trap moisture. This window is when the crust forms and browns, so maintaining high humidity is essential for a shiny, crispy crust.
- Venting: After the initial phase, open the oven or remove the lid to let the crust crisp up further. This step allows excess moisture to escape, preventing a soggy crust and ensuring the crunchiness you want.
Following this sequence maximizes the benefits of steam, giving you a loaf with superior oven spring, shine, and crunch. Each step matters because the timing and environment directly influence the crust’s final appearance and texture.
Remember, Practice Makes Perfect (And a Better Crust)
Mastering the use of steam in baking is a skill that develops over time. Every oven has its quirks, and each dough responds differently to moisture and temperature. Keeping detailed notes on your experiments—such as how long you add steam, the oven temperature, and moisture levels—helps you understand what works best for your specific setup. Over time, you’ll identify subtle adjustments that yield consistent, professional-looking crusts. For example, some bakers might find that a longer initial steaming period produces a darker, crunchier crust, while others may prefer a shorter burst for a softer finish. The key is persistence and observation. Also, always prioritize safety—hot water and steam can cause burns, so handle everything with care and use oven mitts. Remember, every batch is a learning opportunity, and with patience, you’ll perfect your technique and consistently create bakery-quality loaves that impress every time.
Key Takeaways from This Guide
- Steam is essential for achieving shiny, crispy, bakery-quality crusts, as it influences both appearance and flavor development through delayed crust formation and enhanced browning.
- Simple household methods like water pans, spritzing, or Dutch ovens make it accessible, allowing bakers without professional equipment to achieve excellent results.
- Timing matters: introduce steam during the first 10-15 minutes of baking, as this window is critical for oven spring and crust development.
- Over-moistening can backfire: too much moisture or prolonged steaming may result in a soggy crust. Balance moisture carefully based on your bread type and baking environment.
- Experiment and adapt: every oven and dough responds differently—keep notes and refine your technique to find what yields the best crust for your baking style.