
TL;DR
Frosting splits mainly because of temperature mismatch, overmixing, or too much liquid added too fast. Using stabilizers and controlling ingredient temperatures can prevent and fix this common baking hiccup.
Ever wondered why your smooth, creamy frosting suddenly turns grainy or separates into oily chunks? It’s frustrating, especially when you’re just trying to finish that cake. The good news: most frosting split issues come down to simple, fixable mistakes. Understanding what causes frosting to split can transform your baking game, saving you time and wasted ingredients.
In this guide, you’ll learn the key reasons behind frosting splitting, practical tips to prevent it, and how to rescue your frosting if it starts to go south. Whether you’re a weekend baker or a home pastry pro, mastering this skill can make your decorating smoother, prettier, and more reliable.
Always start with ingredients at room temperature to ensure smooth emulsification.
Add liquids slowly, in tiny amounts, while mixing on medium speed.
Avoid overmixing butter-based frostings—less can be more.
Stabilizers like cornstarch or commercial products can prevent splitting, especially in humid conditions.
If frosting splits, small adjustments with warm liquids can often bring it back together.
What Causes Frosting to Split? The Hidden Culprits
The main reason frosting splits is temperature mismatch. When fats like butter or shortening are too cold or too warm, they don’t blend smoothly with sugar and liquids. For example, if you start mixing cold butter straight from the fridge, it can cause your frosting to look greasy or lumpy. Conversely, if your butter is melting in the bowl, it can lead to a runny, separated mess.
Another common culprit? Adding liquids too quickly or in large amounts. Think of pouring milk or cream into your frosting all at once. That sudden influx can cause the fats and liquids to separate, creating that dreaded split. Overmixing can also break the emulsion, especially with butter-based frostings where excessive beating releases too much oil.
Lastly, the type of fat matters. Butter-based frostings are more sensitive because butter has a lower melting point and contains water. Shortening or stabilized cream cheese frostings tend to be more forgiving, especially if you keep ingredients at room temperature.
Understanding these causes is crucial because each factor influences the stability and texture of your frosting. For example, cold butter causes uneven blending, leading to a grainy or greasy appearance, while warm butter can cause separation and oiliness. The way liquids are incorporated affects the emulsion — a stable mixture of fats and water — which is essential for a smooth, creamy finish. Recognizing these nuances helps you troubleshoot effectively, knowing whether to adjust temperature, slow down liquid addition, or modify your mixing technique.

Dr. Oetker Whipped Cream Stabilizer, 0.35 Ounce (Pack of 2)
- Ingredients: Dextrose, modified corn starch, phosphate
- Package Dimensions: 11.43 x 0.508 x 7.62 cm
- Package Weight: 0.023 kg
As an affiliate, we earn on qualifying purchases.
As an affiliate, we earn on qualifying purchases.
How to Prevent Frosting from Splitting: Easy Steps That Work
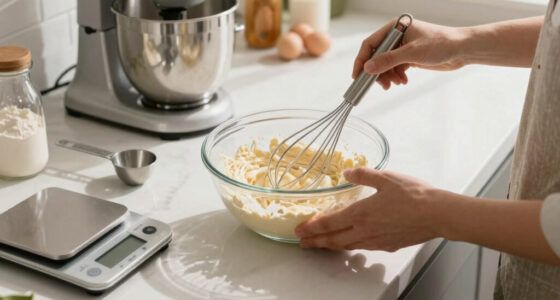
- Start with room temperature ingredients. Cold ingredients can cause uneven mixing and lead to separation. Allow butter, cream cheese, and other fats to sit out until they’re soft but not melting, typically about 30 minutes. This ensures a more uniform emulsion, resulting in a smoother, more stable frosting.
- Add liquids gradually. Pourting all your liquids at once risks overwhelming the emulsion, causing it to break. Instead, sprinkle in small amounts—like a teaspoon of milk or cream—while mixing on low to medium speed. This slow incorporation allows fats and liquids to bond properly, creating a cohesive mixture. The tradeoff here is patience; rushing can lead to split frosting, while slow addition produces a silky, stable texture.
- Use the right tools. A sturdy stand mixer or hand mixer with consistent speed helps maintain control during mixing. Overwhipping or undermixing can both cause issues: overwhipping introduces excess air, making frosting unstable, while undermixing leaves fats and liquids improperly combined. Proper tools facilitate a controlled, thorough mix, which is essential for a durable frosting.
- Control your mixing speed. Start slow to combine ingredients gently, then increase to medium or high once ingredients are incorporated. This prevents vigorous agitation that can break the emulsion. The benefit is a more stable frosting that holds together without splitting. The tradeoff is that rushing can cause separation, especially with sensitive ingredients like butter or cream cheese.
- Incorporate stabilizers if needed. Stabilizers like cornstarch or commercial products can strengthen the emulsion, especially in warm environments or with high-fat frostings. Using them judiciously helps prevent separation as the frosting sits or during decorating. However, overuse can alter texture and flavor, so moderation is key.
Imagine you’re making a vanilla buttercream. By softening your butter to a smooth, spreadable consistency and adding your milk in tiny drips while beating steadily, you’ll notice the frosting stays silky and stable. Patience in ingredient preparation and addition is what makes the difference between a split mess and a flawless finish. This careful approach ensures your frosting remains cohesive, glossy, and easy to work with.

2 in 1 Stainless Steel Whisk & Instant Thermometer 12 inch Probe Combo
- 2-in-1 Design: Measures temperature while blending
- Wide Temperature Range: -22℉ to 623℉ (-30℃ to 350℃)
As an affiliate, we earn on qualifying purchases.
As an affiliate, we earn on qualifying purchases.
Rescuing a Split Frosting — Can You Save It?
Yes, you can often rescue a split frosting. The trick: slow, gentle adjustment. When your frosting starts to look oily or grainy, the key is to re-establish the emulsion without adding too much extra liquid or overmixing. Begin by lowering your mixer speed to prevent further separation. Then, add a small splash of hot water, milk, or a cooled, melted ingredient like white chocolate or cream cheese. These additions help re-emulsify the fats and liquids, bringing your frosting back to a smooth state.
For example, if your buttercream appears greasy and separates, slowly incorporate a teaspoon of hot milk while mixing at low speed. This gentle step can rebind the fats and restore a creamy texture. If the frosting is grainy, a quick whip at medium speed with a tiny amount of warm liquid often dissolves the separation. The key is patience: small, incremental adjustments are more effective than aggressive fixes, which can worsen the split.
However, be cautious: too much liquid or vigorous mixing can cause the frosting to break down further, making rescue impossible. Sometimes, starting fresh is the only option, but often, these small, controlled interventions can save your frosting, saving time and ingredients.
In essence, rescuing split frosting is about understanding the emulsion’s fragile balance and carefully nudging it back into harmony. The tradeoff is patience — rushing the fix can lead to more frustration, but gentle, deliberate adjustments often succeed.

PUCKWAY Angled Icing Spatula, Stainless Steel Offset Spatula, Cake Spatula Set of 2 Black 6, 8 inch Blade
- Set Includes Two Sizes: 6-inch and 8-inch blades for versatility
- Ergonomic Non-Slip Handles: Comfortable, lightweight grip for precise control
- Multi-Purpose Use: Ideal for icing, spreading, and cutting tasks
As an affiliate, we earn on qualifying purchases.
As an affiliate, we earn on qualifying purchases.
Frosting Types and Their Split Risks — What Works Best?
| Frosting Type | Split Risk | Best Practices |
|---|---|---|
| Butter-based | High | Keep at room temp, add liquids slowly, avoid overmixing |
| Shortening-based | Low | More stable; less sensitive to temperature, still add liquids gradually |
| Cream cheese | Moderate | Stabilize with a pinch of cornstarch, keep cool during mixing |
Understanding your frosting’s base helps. Butter frostings are delicious but sensitive to temperature fluctuations because of their water content and lower melting point. Shortening-based frostings are more forgiving because they contain less water and are more stable across temperature changes. Cream cheese frostings strike a balance but require gentle handling and stabilization to prevent splitting. Recognizing these differences helps you choose the right technique and ingredients for your environment, reducing the risk of failure and ensuring a beautiful finish.

LorAnn Butter Vanilla Bakery Emulsion, 4 oz – Intense Butter Vanilla Flavor Extract for Baking, Cookies, Frosting, Ice Cream, Smoothies and Beverage – Gluten Free, Vegan, Sugar Free, Nut Free
- Water-based flavoring: Won't bake out like alcohol extracts
- Easy to use: Add to recipes for bold flavor
- Allergen friendly: Gluten free, nut free, vegan
As an affiliate, we earn on qualifying purchases.
As an affiliate, we earn on qualifying purchases.
Quick Fixes and Long-Term Solutions for Perfect Frosting
Quick fixes include adding a splash of hot liquid or starting over with a fresh batch. To prevent future splits, focus on ingredient temperatures, gradual liquid addition, and gentle mixing. For long-term stability, consider using stabilizers or switching to a more forgiving frosting base like shortening or stabilized cream cheese.
Imagine you’re decorating a summer cake. Keeping ingredients at room temp and adding liquids in small doses can save a lot of headache. Investing in a good mixer and stabilizers makes your frosting more resilient, especially in warm weather.
Frequently Asked Questions
Why does my frosting split even though I followed the recipe?
Most often, it’s due to temperature issues or adding liquids too quickly. Even a slight mismatch can cause separation. Check ingredient temperatures and slow down your liquid additions to prevent splitting.How can I fix split frosting without starting over?
Try lowering your mixer speed and adding a small amount of hot water or milk gradually. Sometimes, a quick whip with a splash of warm liquid can bring your frosting back together. Patience is key.Are some frostings more prone to splitting than others?
Yes, butter-based frostings are more sensitive because of their lower melting point and water content. Shortening-based frostings are more stable, especially in warm weather. Stabilizers can help all types stay smooth.Can I prevent frosting from splitting in humid weather?
Using stabilizers like cornstarch or commercial stabilizers, keeping ingredients at room temperature, and adding liquids slowly can greatly reduce split risks in humid conditions.What’s the best way to store leftover frosting to keep it from splitting?
Store frosting in an airtight container in the fridge. Let it come to room temperature before re-whipping, and add a splash of milk or water if it stiffens or separates during storage.Conclusion
Frosting splitting isn’t a baking disaster — it’s a sign you just need to tweak your technique. Keep your ingredients at the right temperature, add liquids gradually, and don’t rush the process. Master these habits, and your frosting will stay smooth, stable, and picture-perfect every time.
Next time your frosting threatens to split, remember: patience and small adjustments are your best tools. With practice, you’ll turn a common baking hiccup into a simple fix, making your cakes look as good as they taste.