
TL;DR
Dough may not rise due to inactive yeast, incorrect temperature, or poor ingredient quality. Check your yeast’s viability, control environment, and be patient to get fluffy results.
Ever opened your dough, only to find it stubbornly flat? It’s frustrating when your baking doesn’t turn out as planned, especially after waiting patiently. The good news? Most rising issues boil down to simple, fixable problems. In this guide, you’ll learn exactly why your dough might not be rising and what practical steps you can take to get it puffing up beautifully.
Whether you’re a seasoned baker or just starting out, understanding the common pitfalls gives you the power to troubleshoot like a pro. No hype, no fuss—just real solutions for real baking success.
Always test your yeast before mixing it into your dough to avoid surprises.
Maintain a warm, humid environment for optimal rising — 75-85°F works like magic.
Use fresh, properly stored ingredients—especially yeast and flour—to keep your dough lively.
Patience is key; most dough needs 1-2 hours to double in size, but environment matters.
Avoid common mistakes like hot water or rough handling, which can sabotage your rise.
How to Spot If Your Yeast Is Dead Before You Mix It
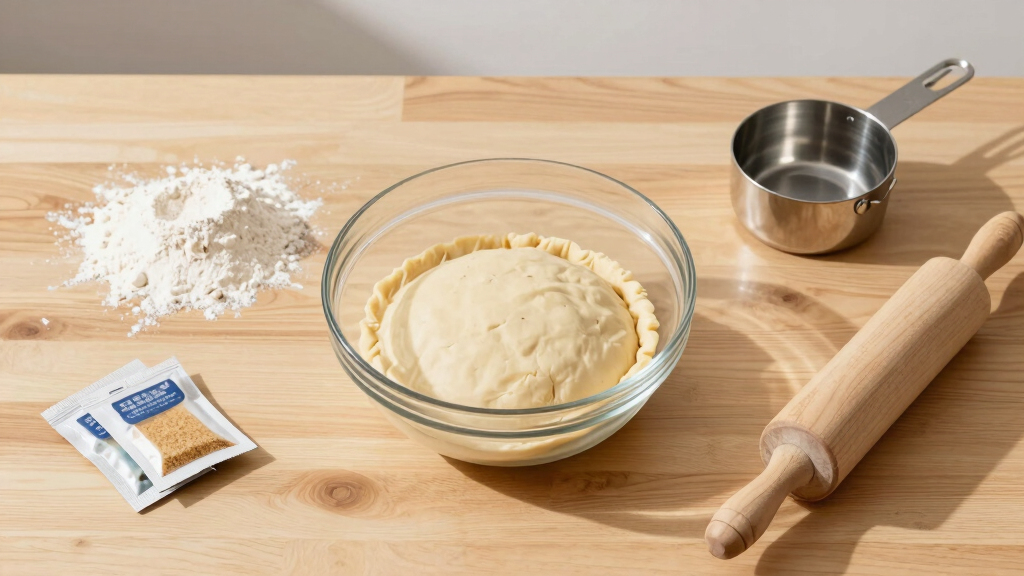
Active yeast is the heartbeat of your dough. If it’s dead, everything else falls flat. To test viability, dissolve a teaspoon of yeast in 1/4 cup warm water (around 100-110°F). Add a pinch of sugar. If it bubbles within 10 minutes, your yeast is alive. No bubbles? It’s time for fresh yeast.
Check expiration dates and storage conditions. Yeast kept in the fridge lasts longer, but once opened, use within 4 months for best results. Old, expired yeast doesn’t produce enough carbon dioxide to lift your dough.
Understanding yeast viability is crucial because using dead yeast results in a flat, dense loaf. It’s a simple step that saves you hours of wasted effort. If your yeast is inactive, no matter how perfect your recipe or environment, your dough won’t rise. Ensuring freshness and viability means your dough has the best chance to develop that airy, light structure you’re aiming for.

SAF-INSTANT YEAST RED LABEL SINGLE 1 lb (16oz) PACKAGE
- Product Type: SAF-INSTANT Yeast Red Label
- Package Size: 1 lb (16 oz)
As an affiliate, we earn on qualifying purchases.
As an affiliate, we earn on qualifying purchases.
Why Temperature Is the Secret to a Perfect Rise
Yeast loves warmth—around 75-85°F. Too cold, and it hibernates, slowing down fermentation; too hot, and it kills the yeast cells altogether. This temperature range is a delicate sweet spot because it allows yeast to produce carbon dioxide efficiently, which creates the bubbles that make your dough rise.
If the environment is too cold, your dough may remain sluggish or fail to rise altogether, resulting in a dense texture. Conversely, if it’s too hot—above 110°F—you risk killing the yeast, which can be a common mistake in warm kitchens or during proofing in hot weather. Creating a stable, warm environment ensures the yeast can work optimally, giving you a light, airy loaf.
Understanding this balance is key because it affects fermentation speed and the final texture. Too cold, and you may need to wait longer; too hot, and you risk losing the rise entirely. Managing temperature carefully allows for predictable, consistent results and helps avoid the disappointment of flat bread.

Sourdough Proofing Basket Gift Set, 9" Round and 10" Oval Banneton Bread Baking Supplies, Sourdough Baskets with Bread Lame, Danish Whish, Bowl Scraper, Sourdough Scraper, and Linen Liner
- Complete Baking Gift Set: Includes baskets, lame, scrapers, and liners
- 9-inch Round & 10-inch Oval: Two sizes for versatile proofing needs
- High-Quality Rattan Material: Smooth, splinter-free, non-stick, durable
As an affiliate, we earn on qualifying purchases.
As an affiliate, we earn on qualifying purchases.
Common Mistakes That Sabotage Your Rising Success
Even seasoned bakers slip up with simple errors. Here’s a quick list of what to avoid, along with why these mistakes matter:
- Using water hotter than 120°F, which kills yeast cells instantly, preventing fermentation altogether. This results in no rise and a dense loaf, wasting your effort.
- Adding salt directly to yeast instead of mixing it into flour. Salt can inhibit yeast activity if it contacts the yeast directly, and improper mixing can cause uneven fermentation, leading to inconsistent rise.
- Using old or improperly stored yeast. As yeast ages, its ability to produce CO2 diminishes, leading to flat baked goods. Proper storage preserves vitality, ensuring reliable leavening.
- Skipping the proofing step altogether. Proofing not only activates yeast but also helps develop gluten structure, which traps gas and gives your bread its texture. Skipping this step can produce dense, flat results.
For example, I once added salt directly into my yeast mixture—result? No rising for hours. It’s a small mistake with a big impact because it halts fermentation early, and the dough can’t develop the necessary air pockets. Recognizing these pitfalls helps you troubleshoot and avoid common failures that can ruin your loaf.

TempPro TempSwift 1 Sec Digital Food Thermometer for Kitchen Cooking
- Fast Readout: 1 second response time
- High Accuracy: +/-0.9°F precision
- Long Probe: 5.3-inch stainless steel probe
As an affiliate, we earn on qualifying purchases.
As an affiliate, we earn on qualifying purchases.
A Step-by-Step Guide to Save Dough That Won’t Rise
- Test your yeast first — if it’s dead, replace it. Dead yeast can’t produce the gas needed for rising, so starting with fresh yeast is essential for successful baking.
- Warm up your environment — create a cozy proofing spot. A consistent warmth promotes steady fermentation, preventing sluggish or uneven rising.
- Give it more time — sometimes cooler spots need an extra 30 minutes. Rushing the process can lead to under-proofed dough that won’t develop proper volume.
- Adjust ingredients — use fresh flour and check your measurements. Old flour can lose its ability to hydrate and form gluten, and inaccurate measurements can inhibit proper fermentation.
- Cover your dough with a damp cloth to trap humidity and warmth. This prevents the surface from drying out, which can hinder expansion and cause a tough crust.
For example, I once left my dough in a drafty corner, and it barely rose. Moving it to a warm, humid spot made all the difference. Patience and proper environment are key to rescuing stubborn dough and achieving that fluffy texture.

Folding Bread Proofing Box with 50-113℉ Temp Control & 48H Timer, Dough Proofer with Metal Rack, Humidor, Ideal for Sourdough, Bread Baking, Pizza, Yogurt, Kombucha, Perfect for Compact Kitchens
- Temperature Range: 50-113°F adjustable temperature control
- Timer Function: Up to 48-hour timer
- Foldable Design: Compact, space-saving foldable structure
As an affiliate, we earn on qualifying purchases.
As an affiliate, we earn on qualifying purchases.
Comparison Table: Fresh Yeast vs. Stored Yeast
| Feature | Fresh Yeast | Stored Yeast |
|---|---|---|
| Potency | High, needs activation | Varies, may lose strength over time |
| Shelf Life | 1-2 weeks in fridge | Up to 6 months if refrigerated |
| Best Use | Immediate baking | Long-term storage, needs proofing |
Choosing the right yeast and storing it properly keeps your dough lively. Outdated yeast is like trying to start a fire with damp wood—hard to ignite.
Understanding the differences in potency, shelf life, and best use helps you make informed choices. Using expired yeast may seem convenient but results in a dense, unrisen loaf. Proper storage preserves yeast’s vitality, ensuring your dough rises reliably every time.
How Long Should You Wait for Your Dough to Rise?
Most dough takes about 1 to 2 hours to double in size at the right temperature. But don’t rush it. Under-proofed dough will be dense; over-proofed can collapse or develop a sour flavor. A good rule of thumb: gently poke the dough with your finger. If the indentation stays, it’s ready. This test helps you determine whether the gluten structure has developed enough to trap gas effectively.
Patience matters because rushing can compromise texture and flavor. Cooler environments may require extra time, and rushing can cause the gluten network to be underdeveloped or overextended. Waiting until the dough passes the finger poke test ensures optimal rise and a light, airy crumb.
What If My Dough Collapses After Rising?
This usually happens when the gluten network weakens after over-proofing or if the dough is handled roughly. Think of it like a balloon deflating after too much stretching—the structure can’t hold the gas anymore. Over-proofed dough loses its elasticity, causing it to collapse because the gluten has been overstretched or broken down.
To prevent this, don’t leave your dough proofing too long—pay attention to signs like a dough that has risen excessively or is very soft. Handle the dough gently after rising, avoiding overmixing or pressing out the air, which can cause deflation. Using the finger poke test helps you catch the perfect moment before collapse occurs, preserving the desired lightness and volume of your bread.
For example, I once let my dough sit overnight in a warm oven, and it collapsed. Next time, I kept a closer eye and stopped proofing early, and the rise was perfect. Recognizing the signs of over-proofing and gentle handling are key to keeping your dough fluffy and stable.
Would Using Baking Soda or Powder Help When Yeast Fails?
Baking soda and baking powder are chemical leaveners that work faster than yeast but produce different textures and flavors. They are useful in quick breads, muffins, or pancakes where a quick rise is needed without fermentation. However, they lack the elasticity and complex flavor development of yeast, which is essential for traditional bread’s airy structure.
In bread baking, relying on chemical leaveners instead of yeast results in a denser crumb and less flavor complexity. If your yeast fails, consider sourdough starters or recipes specifically designed for quick leavening. These alternatives can save your baking session, but they won’t replicate the same lightness and chewiness that yeast provides. For bread with a fluffy, open crumb, yeast remains the preferred leavening agent because of its unique fermentation process that develops flavor and structure over time.
Frequently Asked Questions
Why is my dough not rising even after hours?
If your dough isn’t rising after hours, check if your yeast is active. Also, make sure the environment is warm enough, around 75-85°F. Sometimes, it just needs more time or a better environment to get going.
How can I tell if my yeast is still good?
Mix a teaspoon of yeast with warm water and a pinch of sugar. If it bubbles and foams within 10 minutes, it’s active. No foam? It’s time for fresh yeast to prevent flat dough.
What is the ideal temperature for proofing dough?
The sweet spot is around 75-85°F. Too cold, and yeast slows down; too hot, and it dies. Use your oven with the light on or a warm corner to keep the environment cozy.
Can I revive dead yeast?
Unfortunately, dead yeast can’t be revived. Always test yeast before mixing it into dough. If it’s inactive, replace it with fresh yeast for reliable rising.
Why does my dough collapse after rising?
This usually happens if you over-proof or handle the dough roughly after rising. Wait until the dough passes the finger poke test and handle it gently to keep the air inside.
Conclusion
When your dough refuses to rise, it’s usually a small fix away from success. Check your yeast, control the temperature, and give it time. The moment your dough finally balloons is a simple reward for patience and attention.
Next time, imagine your dough as a tiny, eager balloon waiting to swell—treat it kindly, and you’ll get that perfect fluffy loaf every time.