TL;DR

Get baking supplies delivered free — and shop member deals
- Fast, free delivery on millions of items
- Access to Prime Big Deal Days deals on October 6–7
- Prime Video, Amazon Music and more included
Cakes stick because of inadequate pan prep, improper timing, or damaged pans. The best fix is thorough greasing, flouring, and careful cooling, which makes every cake release smooth and clean.
Nothing is more frustrating than flipping out a cake only to see it cling stubbornly to the pan. Even seasoned bakers face this problem — and it’s often not just bad luck. The secret lies in how you prepare your pan and handle the cake after baking.
If your cakes stick no matter what, you’re probably missing a step or two that can save you time, frustration, and ruined desserts. In this guide, you’ll discover proven techniques to ensure your cakes slide out effortlessly, every single time. Because perfect cakes shouldn’t be a gamble — they should be a guarantee.
Always grease and flour every part of the pan that touches the batter, paying attention to corners and seams.
Using parchment paper on the bottom of round pans adds an extra layer of insurance against sticking.
Let the cake cool in the pan for at least 10-15 minutes before attempting to flip it out.
Gently loosen the edges with a spatula and avoid force—patience prevents tears.
Regularly inspect and replace worn or scratched pans to maintain easy release.
The Fix for Cakes That Stick No Matter What
Cakes stick because of inadequate pan prep, improper timing, or damaged pans. The best fix is thorough greasing, flouring, and careful cooling — which makes every cake release smooth and clean. Perfect cakes shouldn’t be a gamble; they should be a guarantee.
Nothing is more frustrating than flipping out a cake only to see it cling stubbornly to the pan. Even seasoned bakers face this — and it’s often not just bad luck.
KEY INSIGHT · PAN PREP + TIMINGWhy Your Cake Is Sticking — And How to Stop It
The root of sticking lies in a simple breakdown: when parts of the pan aren’t coated properly, batter can latch onto rough or scratched surfaces. This isn’t just about aesthetics — it affects the cake’s structural integrity and appearance when inverted.
Inadequate Greasing
Any missed spot — corners, seams, or a Bundt tube’s crevices — becomes an anchor point where batter bonds directly to the metal.
Rushing the Release
Flipping too soon means the cake is still soft and malleable; waiting until fully cool can make it adhere as it contracts. Timing matters.
Damaged or Wrong Pan
Scratches, residue, worn nonstick coatings, and dark metal that browns too fast all raise sticking risk. “Nonstick” never means “never sticks.”
The Step-by-Step to Prepare Any Pan
Follow these six steps to create a micro-environment where the cake’s surface and the pan’s surface never bond — making removal effortless, every time.
Choose the Right Fat
Softened butter, shortening, or baking spray. Butter adds flavor; shortening is neutral; spray is convenient. A pastry brush reaches every crevice.
Apply a Generous Coat
Cover every surface touching batter — corners, seams, and the center tube in Bundt pans. Any missed spot is an anchor point.
Add a Flour Barrier
Dust with flour, cocoa for chocolate cakes, or sugar for a crisp crust. Tap out the excess thoroughly for a release-friendly micro-layer.
Use Parchment
A parchment circle on the bottom of round pans is foolproof insurance for delicate layers and sticky batters.
Let It Rest
Cool 10–15 minutes in the pan so the structure sets and steam escapes — reducing the moisture and contraction that cause sticking.
Loosen Carefully
Run a thin spatula around the edges, tap or shake gently, then invert onto a rack. Patience prevents tears.
Which Pans Stick Most — And How to Fix That
Each pan has its quirks. Customizing your prep based on material and design prevents sticking and ensures consistent results.
| Pan Type | Sticking Tendency | Best Fixes |
|---|---|---|
| Nonstick Coated | Coatings wear down over time; may still stick | Use a light spray of baking oil plus flour, or parchment for extra safety |
| Dark Metal | Browns cakes quickly, which can cause sticking | Grease thoroughly, reduce oven temp slightly, add a parchment layer |
| Bundt Pans | Crevices trap batter; often stick if not greased well | Brush with softened butter, flour generously, cool before flipping so the structure sets |
| Glass Pans | Often sticky with sticky batters if under-greased | Grease well, dust with flour, avoid overbaking to prevent excess moisture loss |
The Quick Fix When Your Cake Is Already Stuck
If the cake refuses to budge, don’t panic — and never pry forcefully. Gentle, strategic interventions can rescue a seemingly lost cause.
Warm, Damp Towel Trick
Wrap a warm, damp towel around the outside of the pan for a few minutes. The mild warmth slightly expands the pan and softens residual sticking points — especially effective with metal pans.
Gentle Edge Loosening
Run a thin, flexible spatula around the edges, gently prying at stuck spots without gouging the pan. A gentle tap or small shake helps free the edges before inverting.
Patch & Disguise
If part of the cake cracks, patch it with frosting or dust with powdered sugar. Serve as a rustic dessert or transform it into a trifle or cake parfait.
The Dark Pan Chocolate Cake
A chocolate cake stuck in a dark metal pan after cooling. A brief heated cloth plus gentle edge loosening released it with one small tear — cleverly hidden under powdered sugar.
What Moves the Needle on Clean Release
Common Mistakes That Make Cakes Stick Even More
Rushing the Cooling Process
Removing a hot cake before it sets causes tears and sticking — the cake contracts unevenly and stays too soft to hold its shape when inverted.
Trusting Worn Nonstick Coatings
Scratched or residue-coated pans release poorly. Inspect pans regularly and replace them — “nonstick” coatings wear down and are not a guarantee.
Skip-Flouring Chocolate Pans
White flour leaves a pale coating on chocolate cakes. Use cocoa powder instead for a seamless look and equally reliable release.
Forceful Prying
Force tears the cake and damages coated pans. Gentle warmth and a flexible spatula achieve what muscle never will.
Why Your Cake Is Sticking — And How to Stop It in Its Tracks
The root of sticking lies in a simple breakdown: inadequate greasing, poor pan choice, or rushing the release. When parts of the pan aren’t coated properly, batter can latch onto rough or scratched surfaces. This isn’t just about aesthetics; it affects the cake’s structural integrity and appearance. If the pan isn’t prepared correctly, the cake may tear or break when you invert it, ruining the presentation and wasting time. Additionally, rushing the cooling process before attempting to remove the cake can cause it to stick more because the cake contracts unevenly or remains too soft, making it prone to tearing. Proper preparation ensures a smooth, clean release, preserving the cake’s shape and crumb quality. Recognizing these causes highlights the importance of meticulous pan prep and patience, which ultimately save you from disappointment and extra cleanup.
A real-world example? A baker using a shiny, uncoated metal pan forgot to grease the corners of her Bundt pan. When she flipped it out, the cake tore at the deepest crevices. The fix? Carefully brushing softened butter into every nook and dusting with flour — after which the cake released cleanly. This demonstrates how thoroughness in prep directly influences the final outcome, especially in intricate pans where uneven contact can cause sticking issues.
As an affiliate, we earn on qualifying purchases.
The Step-by-Step to Prepare Any Pan So Cakes Never Stick
- Choose the right fat: Softened butter, shortening, or baking spray. Each offers different benefits — butter adds flavor, shortening creates a more neutral nonstick layer, and spray offers convenience. For detailed pans, a pastry brush helps reach every crevice, ensuring even coverage.
- Apply a generous coat: Cover every surface that touches the batter, especially corners, seams, and the center tube in Bundt pans. This comprehensive coverage is crucial because any missed spot can serve as an anchor point for the cake to cling to, especially in pans with complex shapes or textured surfaces.
- Add a flour barrier: Dust the greased surface with flour, cocoa powder for chocolate cakes, or even sugar for a crisp crust. Tap out excess thoroughly. This step creates a micro-layer that helps the cake’s surface release more easily, reducing the risk of tearing or sticking during inversion.
- Use parchment where it helps: A parchment circle on the bottom of a round pan is a foolproof addition, especially for delicate layers or sticky batters. Parchment acts as a non-adhesive barrier, preventing batter from bonding directly to the pan, which is especially useful with sticky or fragile cakes.
- Let it rest: After baking, give the cake 10-15 minutes to cool slightly in the pan. This allows the structure to set and the steam to escape, reducing moisture and contraction that can cause sticking. Rushing this step can lead to tearing or sticking because the cake is still too soft and malleable.
- Loosen carefully: Run a thin spatula or butter knife around the edges, gently prying at any spots where the cake seems stuck. Patience here is key. Gently tapping the pan or giving it a slight shake can also help loosen the edges without damaging the crumb. Then, invert onto a cooling rack or serving plate, ensuring the release is smooth and intact.
Following these steps creates a micro-environment where the cake’s surface and the pan’s surface don’t bond, making removal effortless. This comprehensive approach considers both the chemical and physical interactions at play, giving you a higher success rate and preserving the cake’s appearance and texture.
As an affiliate, we earn on qualifying purchases.
What Kind of Pans Are Most Prone to Sticking — And How to Fix That
| Pan Type | Sticking Tendency | Best Fixes |
|---|---|---|
| Nonstick Coated Pans | Wear down over time, may still stick | Use a light spray of baking oil plus flour or parchment for extra safety |
| Dark Metal Pans | Browns cakes quickly, which can sometimes cause sticking if not careful | Grease thoroughly, reduce oven temp slightly, and consider a parchment layer to prevent direct contact between batter and pan surface |
| Bundt Pans | Crevices trap batter, often stick if not greased well | Brush with softened butter, flour generously, and let the cake cool before flipping to allow the structure to set, reducing tearing and sticking |
| Glass Pans | Often sticky if not greased properly, especially with sticky batters | Grease well, dust with flour, and avoid overbaking to prevent excessive moisture loss that can cause sticking |
Each pan has its quirks. Knowing how to customize your prep makes all the difference — especially with intricate or older pans. Adjusting your approach based on pan material and design helps prevent sticking and ensures consistent results, saving you time and frustration in the long run.
As an affiliate, we earn on qualifying purchases.
The Quick Fix When Your Cake Is Already Stuck
If the cake refuses to budge, don’t panic. Sometimes, a gentle heat can help loosen the bond. Wrap a warm, damp towel around the outside of the pan for a few minutes. The mild warmth causes slight expansion of the pan and can help soften any residual sticking points, making it easier to release the cake without damaging the surface or crumb. This method is especially effective with metal pans, where temperature differences can subtly alter the pan’s surface tension.
Another trick? Carefully run a thin, flexible spatula or butter knife around the edges, gently prying at any spots where the cake seems stuck. Patience is crucial here—rushing can cause tears or cracks. If part of the cake cracks, don’t worry. You can patch it with frosting or serve it as a rustic dessert, transforming an imperfect release into a charming presentation. Sometimes, the effort to loosen a stubborn cake is worth it to preserve the overall appearance and enjoy the dessert.
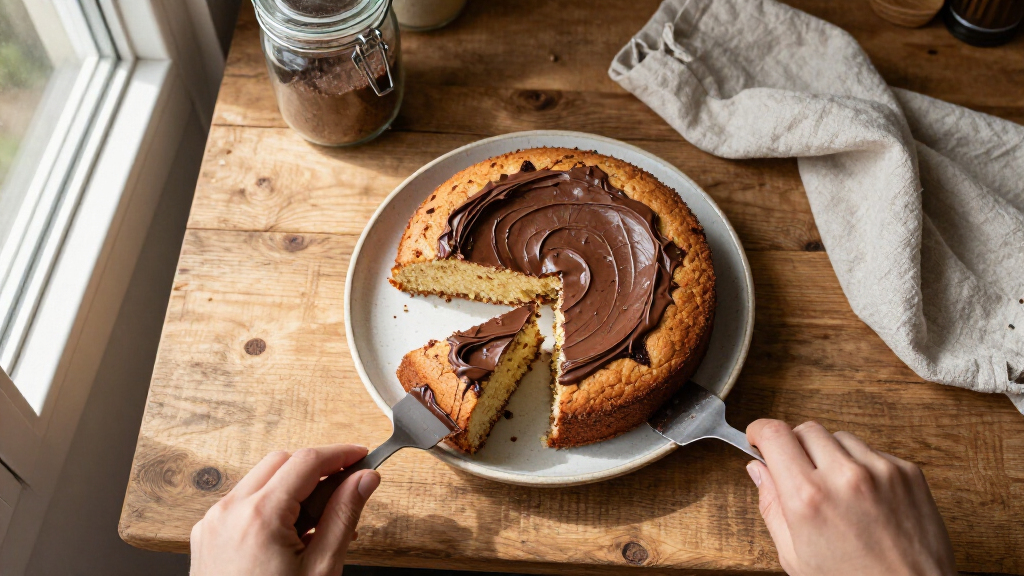
Real-world scenario? A baker’s chocolate cake stuck in a dark metal pan after cooling. She briefly heated a damp cloth, then gently loosened the edges. The cake slid out with only a small tear, which she cleverly disguised with a dusting of powdered sugar. This example shows how gentle, strategic interventions can rescue a seemingly lost cause, turning a sticking mishap into a success story.
As an affiliate, we earn on qualifying purchases.
Common Mistakes That Make Cakes Stick Even More
Rushing the cooling process is a big one. Removing a hot cake from the pan before it’s properly cooled can cause tears or sticking because the cake is still fragile and the moisture hasn’t fully set. Always wait at least 10-15 minutes—longer if the cake is delicate—to allow the structure to firm up and contract slightly, making it easier to remove intact. Skipping this step can lead to crumbling or tearing, which compromises presentation and texture.
Another mistake? Using a pan with scratches, residue, or uneven surfaces. These imperfections can grip the batter, creating points of adhesion that make release difficult. Regularly inspect your pans for scratches or residue, and wash them thoroughly with non-abrasive cleaners. Damaged coatings or rough surfaces increase sticking risk, so replacing worn pans is a wise investment for consistent results. Proper maintenance ensures your pans remain smooth and nonstick, reducing frustration.
Lastly, overbaking can dry out the cake, making it more prone to sticking and breaking during removal. Overly dry cakes tend to shrink and adhere more tightly to the pan’s surface. Use a toothpick or cake tester to check for doneness rather than relying solely on baking time. Adjust your oven temperature or baking time as needed to prevent drying out, ensuring your cake remains moist and easier to release, preserving its appearance and crumb integrity.
Frequently Asked Questions
Should I grease and flour a nonstick pan?
Yes, even nonstick pans can benefit from a light greasing and flouring, especially if they’re older or have scratches. This extra layer helps prevent sticking and makes cake removal smoother.Can I use oil instead of butter for greasing?
Absolutely. A thin coating of oil works well, but for best results, apply evenly with a paper towel or spray, then dust with flour or cocoa powder for added protection.Why did my Bundt cake stick despite greasing?
Bundt pans have many crevices. To prevent sticking, brush softened butter into every nook, dust with flour, and let the cake cool slightly before flipping. Under-greasing or rushed removal often causes sticking.When is the best time to remove a cake from the pan?
Most cakes release best after resting 10-15 minutes, allowing the structure to set. Delicate cakes may need a longer rest, while sturdier ones can often be flipped sooner.Can I rescue a cake that’s already stuck?
Yes. Gently warming the pan with a damp towel can loosen the cake. Carefully run a spatula around the edges, then lift. If it cracks, frosting or serving as a trifle turns mishaps into new treats.Conclusion
The secret isn’t magic — it’s proper prep combined with patience. When you treat your pans right, cakes come out in one piece, every time. Think of it as giving your baked goods the best chance to shine.
Next time you’re faced with a stubborn cake, remember: gentle warmth, careful loosening, and a well-prepared pan are your best allies. With these tricks, you’ll never wrestle a cake free again—just enjoy the sweet, clean moment of perfect release.
Fall Picks
fall essentials
As an affiliate, we earn on qualifying purchases.