TL;DR
The cut-in method involves blending cold fat into flour until it resembles coarse crumbs. Proper technique creates flakiness and tenderness in biscuits and scones, making it a key skill for home bakers aiming for bakery-quality results.
The cut-in method creates flaky layers by embedding small bits of cold fat into the flour.
Proper technique involves quick, confident cutting or blending until the mixture resembles coarse crumbs.
Maintaining cold fat—preferably chilled or frozen—is essential for best results.
Modern tools and vegan fats can make the process faster and more accessible without sacrificing flakiness.
Avoid over-mixing and warm fats to keep your biscuits and scones tender and flaky every time.
What exactly is the cut-in method, and why does it matter?
The cut-in method is a baking technique where you incorporate fat into flour by cutting or blending until it resembles coarse crumbs. This process is crucial because it creates tiny pockets of fat that, during baking, melt and release steam, which pushes apart the gluten strands and forms the flaky layers we associate with high-quality biscuits and scones. Without this step, the dough may lack the necessary structure, resulting in dense or tough baked goods. Understanding this process emphasizes how the distribution and size of fat particles directly influence the final texture—smaller, evenly dispersed fat bits lead to more uniform, tender, and flaky results. The technique’s importance lies in its ability to control the internal layering, which is essential for achieving that delicate, layered crumb that distinguishes bakery-quality pastries from homemade ones.
Think of it as the foundation for tenderness and flakiness. Without proper cutting, your baked goods can turn dense or heavy—like trying to bite into a biscuit made of compressed sawdust. Properly executed, it’s like building tiny steam explosions within your dough, puffing up those layers you crave.
As an affiliate, we earn on qualifying purchases.
Step-by-step: How to master the cut-in technique in your kitchen
- Start with very cold fat—perfectly chilled butter or vegan alternatives. Keeping it cold prevents the fat from melting prematurely, which is vital because melted fat can lead to less distinct layers and a denser texture. Cold fat ensures that during baking, the small fat pockets melt at the right time, creating steam and puffiness. This step is fundamental because the temperature of the fat directly influences the size of the fat particles and their ability to form those crucial layers.
- Measure your flour and other dry ingredients, then add your fat cut into small chunks.
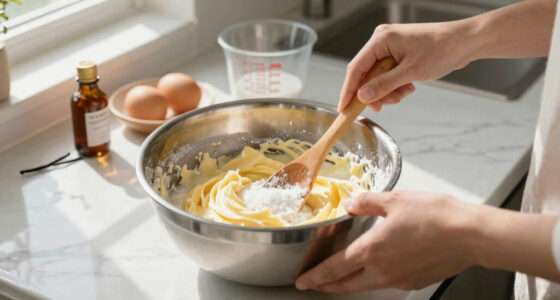
- Use a pastry cutter, two knives, or your fingertips to swiftly cut the fat into the flour. The goal: pea-sized pieces of fat evenly distributed. This size is optimal because larger chunks won’t melt evenly, and smaller bits can overwork the dough, developing gluten and making baked goods tough.
- Stop when the mixture resembles coarse crumbs or small peas, not a uniform paste. This balance ensures enough fat is incorporated to create layers without overmixing, which can develop gluten and compromise flakiness.
- Add your liquid (milk, buttermilk, or plant-based milk) and gently fold to bring everything together, avoiding over-mixing. Overworking the dough can stretch the gluten, leading to tougher textures and loss of flaky layers. The key is gentle handling to preserve the small fat pockets and the delicate structure you’ve built.
This process might take just a few minutes but makes all the difference. For example, grating frozen butter directly into flour can speed things up and keep things cold, reducing the risk of warming the fat and ensuring optimal layering during baking.
As an affiliate, we earn on qualifying purchases.
Why cold fat is the secret to flaky perfection
The magic of cold fat lies in its ability to create steam during baking. When the oven heats up, tiny fat pockets melt and release steam, puffing the dough into flaky layers. Warm fat, on the other hand, blends into the flour, resulting in a denser, tougher texture. Imagine a cold stick of butter—firm, solid, ready to create those delicate layers once baked. This contrast is essential because the solid fat acts as a barrier that, when heated, turns into steam, pushing apart the gluten network and forming those characteristic flaky layers. If the fat is warm or melted, it integrates fully with the flour, leading to a more cohesive, less layered dough. Therefore, controlling the temperature of your fat isn’t just about convenience; it’s a fundamental factor that determines whether your baked goods will be tender, flaky, and light or dense and heavy. The tradeoff is that managing this temperature requires attention and preparation, but the payoff is consistently superior texture and appearance in your baked creations.
Using cold fat is like setting tiny steam bombs inside your dough. If your butter is soft or melted, you lose that crucial contrast needed for flakiness.
As an affiliate, we earn on qualifying purchases.
Frequently Asked Questions
Can I use melted butter for the cut-in method?
Melted butter won’t produce the same flaky layers because it lacks the solid state needed to create steam and layers. Use cold, firm butter for best results.How do I keep my fat cold during baking?
Refrigerate your fats until just before mixing. You can also grate frozen butter directly into the flour or chill your mixing bowls to help maintain a low temperature.Can I adapt the cut-in method for gluten-free baking?
Yes, but it requires extra care. Using a blend of gluten-free flours and adding a little extra fat or binding agents helps mimic the layers and flakiness of traditional dough. The key is to handle the dough gently and keep the fats cold to compensate for the different properties of gluten-free flours, which tend to absorb more moisture and can be more fragile. Adjusting the hydration and incorporating small amounts of binding agents like xanthan gum can also help maintain structure and prevent crumbling, ensuring your gluten-free baked goods still achieve that desirable flaky texture.What is the biggest mistake beginners make with this technique?
Over-mixing or using warm fats. Both lead to dense, tough baked goods. Keep fats cold and mix just enough to combine ingredients. Overworking the dough develops gluten, which negates the layered effect you’re aiming for. Using warm fats causes the fat to fully blend into the flour, resulting in a less flaky, more bread-like texture. The key is to handle the dough gently and keep everything cold to preserve the delicate layers that give biscuits and scones their characteristic flakiness.Are vegan fats as effective as butter?
Vegan fats like coconut oil or vegan butters work well when kept cold. They melt similarly during baking, creating flaky layers comparable to butter. However, their flavor and melting points can differ, so it’s worth experimenting with different brands and types to find the best match for your recipe. Coconut oil, for example, solidifies at cooler temperatures, making it an excellent substitute, but it can impart a coconut flavor. Vegan butters often mimic the fat content and melting behavior of dairy butter, maintaining the layers and flakiness you desire.As an affiliate, we earn on qualifying purchases.