
TL;DR
The stretch-and-fold method is a gentle, effective way to develop gluten in bread dough, especially high-hydration types. It results in better crumb, flavor, and less effort than kneading, making it popular among artisanal bakers and home enthusiasts alike.
The stretch-and-fold method gently develops gluten, especially in high-hydration doughs, leading to better bread structure.
Perform 3-4 folds spaced 30 minutes apart during fermentation; it’s less effort and produces superior results.
This technique is perfect for sourdough and artisan breads, giving an open crumb and better oven spring.
It’s easier and less tiring than traditional kneading, making it ideal for home bakers of all skill levels.
Consistent observation and patience are key to mastering stretch-and-folds for perfect bread.
The Stretch-and-Fold Technique That Replaced Kneading
Develop stronger dough without the arm workout. A few gentle folds during fermentation align gluten, preserve precious gases, and help high-hydration dough become an open, airy artisan loaf.
Gluten develops through alignment, not punishment.
Stretching gently lengthens and aligns gluten strands. Folding layers those strands, redistributes fermentation activity, and creates strength while retaining the gases responsible for lift.
Align
Lifting the dough draws gluten strands in the same direction, gradually creating a coherent network without tearing delicate wet dough.
Layer
Folding the stretched section over itself builds structure in thin layers and redistributes yeast, sugars, temperature, and trapped gases.
Retain
A stronger, more extensible network holds fermentation gases efficiently—supporting better oven spring and a lighter, more open crumb.
Five stages. Minutes of handling.
The dough spends most of its time resting. Observe its elasticity at every fold: it should become smoother, stronger, and more resistant without feeling tight or torn.
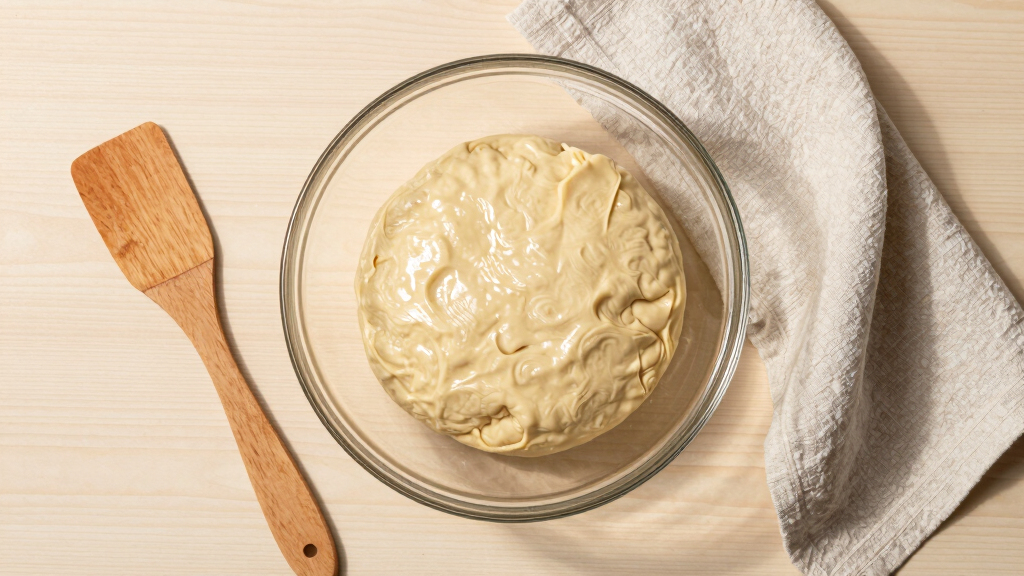
Mix + autolyze
Combine until no dry flour remains. Rest for 20–30 minutes so hydration and enzymes begin the work.
Stretch
With damp hands, lift one edge upward gently. Stop before the dough begins to tear.
Fold
Lay the stretched flap over the center. Rotate the bowl and repeat 3–4 times around it.
Rest + repeat
Cover for 30 minutes. Complete another 2–3 sets while the dough gains strength.
Ferment + bake
After the final fold, let bulk fermentation continue until the dough is airy and nearly doubled.
Stretch-and-fold vs. traditional kneading
Kneading remains useful for firmer, time-sensitive doughs. For sticky sourdough and artisan loaves, gentle folding offers greater control with less mess and physical effort.
| Feature | Stretch-and-fold | Traditional kneading |
|---|---|---|
| Physical effort | ✓Low — brief, gentle handling | ✗Higher — sustained manual work |
| Gluten development | ✓Gradual, layered, extensible | ~Rapid, strong, easier to overwork |
| High hydration | ✓Excellent for sticky dough | ✗Messy and difficult by hand |
| Gas preservation | ✓Gentle handling retains bubbles | ~More degassing during handling |
| Crumb + spring | ✓Open crumb and strong oven spring | ~Often finer, more uniform crumb |
| Time profile | ~Longer elapsed time, little labor | ✓Faster development, active labor |
| Best use | ✓Sourdough, artisan, 70%+ hydration | ✓Sandwich bread and firmer dough |
Choose folding when…
The dough is wet, the fermentation is long, and your goal is extensibility, preserved gas, open crumb, and minimal physical effort.
Choose kneading when…
The dough is comparatively firm, the schedule is short, or a close, even crumb is more important than large artisan-style air pockets.
Where gentle folding pulls ahead
These directional scores visualize the practical strengths described by bakers: easier handling, better gas preservation, and stronger performance as hydration rises.
Method strengths
Relative performance for high-hydration artisan dough.
The hydration threshold
Stretch-and-fold becomes especially valuable as dough grows wetter and conventional kneading becomes awkward.
One gentle action, five connected outcomes
The technique works as a system: each fold affects structure, fermentation, gas retention, expansion, and ultimately the texture of the finished loaf.
Patience is the real tool.
There is no fixed fold count that fits every dough. Use the schedule as a guide, then read the dough: smoother surface, stronger edges, cleaner release, and increasing resistance are the signals that structure is developing.
What Is the Stretch-and-Fold Technique and Why It Works So Well
The stretch-and-fold technique is a gentle way to develop gluten, using a series of stretches and folds during fermentation. Instead of kneading aggressively, you lift and stretch the dough, then fold it over itself. This process aligns gluten strands gradually, strengthening the dough without tearing it apart. The key here is that this method allows gluten to develop in a way that mimics long fermentation, promoting extensibility and strength simultaneously. Why does this matter? Because a well-developed gluten network traps gases more effectively, leading to a lighter loaf with a better rise and open crumb. It’s especially advantageous in high-hydration doughs, which are too sticky and delicate for traditional kneading. The gentle nature of this method reduces the risk of overworking gluten, which can make bread dense and tough. Moreover, by observing how the dough responds to each fold, bakers gain insight into the dough’s hydration level and elasticity, enabling more precise adjustments. This interpretive feedback loop enhances consistency and quality in baking, especially for those seeking artisan results without complex equipment or vigorous effort.
bread dough stretch and fold technique
As an affiliate, we earn on qualifying purchases.
As an affiliate, we earn on qualifying purchases.
How to Perfect the Stretch-and-Fold Process in Your Kitchen
- Mix your ingredients until just combined and let the dough rest for 20-30 minutes to autolyze. This rest period allows enzymes to begin breaking down proteins and starches, making gluten formation more efficient and the dough easier to stretch without tearing. It’s a foundational step that influences the dough’s extensibility and overall texture.
- Perform the first stretch-and-fold: grab the edge of the dough, stretch it gently upwards, then fold it back over the dough. Repeat 3-4 times around the dough circle. Each fold helps to gradually strengthen the gluten network, promoting even structure and gas retention. The gentle stretching aligns gluten strands without overworking them, which is crucial for maintaining dough elasticity and preventing tearing.
- Cover the dough with a damp cloth or plastic and let it rest for 30 minutes. This resting period allows the gluten to relax and the dough to hydrate further, which improves extensibility for the next folds.
- Repeat the stretch-and-fold process 2-3 more times, spaced out by 30-minute intervals. These repeated gentle manipulations build a robust gluten network gradually, ensuring the dough develops strength without becoming overworked. This slow, layered approach yields a dough that can trap gases efficiently and rise with a light, airy crumb.
- After the final fold, let the dough ferment until nearly doubled in size, then shape and bake. This final fermentation period is critical for flavor development and gluten maturation, resulting in bread with optimal texture and taste. The cumulative effect of these folds is a dough that’s cohesive, extensible, and ready to produce artisan-quality bread with minimal effort.
For example, a typical schedule might be: mix at 8 am, first fold at 8:30 am, second at 9 am, third at 9:30 am, and bake around noon. This staged approach encourages even fermentation, better gluten structure, and a more open crumb, demonstrating how timing and gentle handling are key to success.
high hydration bread proofing tools
As an affiliate, we earn on qualifying purchases.
As an affiliate, we earn on qualifying purchases.
Stretch-and-Fold vs. Kneading: Which Wins for Your Bread?
| Feature | Stretch-and-Fold |
|---|---|
| Effort Level | Less physical effort, especially for high-hydration doughs |
| Gluten Development | Gradual, gentle, effective, especially for sticky doughs |
| Crumb Quality | Open, airy, with better oven spring in high-hydration loaves |
| Time Investment | Longer fermentation, but less manual work |
| Best For | High-hydration, sourdough, artisan breads |
Traditional kneading offers rapid gluten development but can be tough on sticky doughs and may overwork gluten strands if done excessively. The stretch-and-fold method, on the other hand, aligns gluten strands more naturally and preserves dough gases, which are vital for the bread’s rise and texture. This gentle approach reduces the risk of over-kneading—a common pitfall that can lead to dense, tough bread—and allows more nuanced control over dough development. While kneading can be quick, it often requires experience to avoid overworking, especially with high-hydration doughs. Conversely, the stretch-and-fold method, through its iterative and gentle nature, offers a more forgiving process that encourages optimal gluten formation without sacrificing dough extensibility. The tradeoff is time; however, many bakers find that the quality of their bread justifies the longer process, especially since it minimizes physical fatigue and mess.

Sourdough Proofing Basket Gift Set, 9" Round and 10" Oval Banneton Bread Baking Supplies, Sourdough Baskets with Bread Lame, Danish Whish, Bowl Scraper, Sourdough Scraper, and Linen Liner
- Complete Baking Gift Set: Includes baskets, lame, scrapers, and liners
- 9-inch Round & 10-inch Oval: Two sizes for versatile proofing needs
- High-Quality Rattan Material: Smooth, splinter-free, non-stick, durable
As an affiliate, we earn on qualifying purchases.
As an affiliate, we earn on qualifying purchases.
Why More Bakers Are Dropping Kneading in Favor of Gentle Folds
The rise of artisan and sourdough baking has popularized the stretch-and-fold as a smarter, more effective way to develop gluten. Bakers report that it produces a more extensible dough, leading to a lighter, more open crumb. Plus, it’s much easier on the arms—no slapstick needed. For instance, a baker experimenting with 75% hydration sourdough found that after just four gentle folds, the dough was strong enough to hold its shape and expand beautifully in the oven, surpassing her previous kneading attempts. This shift isn’t just about effort—it’s about dough quality. The gentle folds allow gluten strands to develop more evenly, reducing the risk of overworking and tearing, which can happen with vigorous kneading. Additionally, the method promotes better gas retention and a more uniform crumb structure. As bakers gain experience, they discover that this technique offers more consistent results, especially for high-hydration and sourdough recipes where traditional kneading can be less effective or even detrimental. This approach aligns with the philosophy of artisan baking: respecting the dough’s natural behavior and working with it gently rather than forcing it through aggressive manipulation.
Online tutorials and baking classes now emphasize stretch-and-folds as the future of bread making, especially for high-hydration recipes. It’s become a core technique for those seeking consistent, professional-quality results without the physical strain or mess of traditional kneading. The implications are significant: more accessible, less physically demanding, and more reliable for bakers aiming for artisanal quality. As this method continues to gain popularity, it’s reshaping how both home bakers and professionals approach bread development, emphasizing patience, observation, and gentle handling over brute force.
As an affiliate, we earn on qualifying purchases.