TL;DR
Crimping a pie edge that looks bakery-made is achievable with consistent technique, proper tools, and chilled dough. Practice simple methods like pinching or using a fork to create uniform, attractive edges that elevate your pie’s look.
Picture this: you pull a freshly baked pie from the oven. The filling is perfect, but what really catches the eye is that beautifully crimped edge—uniform, elegant, bakery-quality. That’s not just luck; it’s a skill anyone can learn with a few simple tricks. And trust me, a well-crimped crust makes your pie look as good as it tastes.
In this guide, you’ll discover proven techniques, handy tools, and practical tips to help you master the art of pie crimping. Whether you’re prepping a fruit tart or a savory quiche, these methods will give your crust that extra polished touch—making every slice a feast for both the eyes and the palate.
Chill your dough thoroughly before crimping to prevent shrinkage and improve workability.
Use simple tools like a fork or your fingers for quick, attractive edges, or invest in decorative cutters for more intricate designs.
Practice on scrap dough to develop muscle memory and achieve consistent, professional-looking results.
Apply an egg wash or sugar before baking for a shiny, bakery-finish crust.
Consistent pressure and even rolling are key to a smooth, uniform pie edge.
How to Crimp a Pie Edge That Looks Bakery-Made
The polished edge is not luck. Cold dough, even thickness, deliberate spacing, and consistent pressure turn an ordinary crust into a clean, elegant frame for fruit pies, savory quiches, and everything between.
Six moves from rolled dough to a professional rim
Treat every stage as part of the crimp. A beautiful pattern cannot rescue dough that is warm, uneven, stretched, or poorly trimmed.
Chill
Refrigerate the dough for at least 30 minutes.
Roll evenly
Aim for about ⅛ inch with no fragile thin spots.
Trim cleanly
Remove ragged excess while preserving a useful overhang.
Fold under
Tuck the overhang beneath itself to build a sturdy rim.
Crimp
Repeat the same pressure, depth, and spacing all around.
Finish
Brush with egg wash or add sugar before baking.
The bakery rule: if the dough becomes soft or sticky while shaping, stop and chill it again. Firm—not frozen—dough is easier to define and less likely to lose its pattern.
Compare popular crimping methods
Choose for the occasion, your confidence, and the dough’s strength. The simplest pattern executed consistently usually looks better than an ornate pattern executed unevenly.
| Method | Ease | Appearance | Best for | Tool needed? |
|---|---|---|---|---|
| Finger pinch | ✓Easy | Simple, rustic flutes | Quick pies and casual baking | ✗No |
| Fork press | ~Moderate | Neat, graphic ridges | Classic bakery-style pies | ✓Fork |
| Decorative cutter | ~Moderate+ | Ornate, intricate pattern | Celebrations and showpieces | ✓Cutter |
Tools that make consistency easier
Special tools are optional, but they can speed up repetition, reduce hand fatigue, and turn rough spacing into a controlled pattern.
Crimping fork
Creates evenly spaced ridges or scallops with less guesswork than freehand shaping.
Best benefit: repetitionDecorative cutter
Presses ornate motifs into sturdy crusts for a more elaborate, occasion-ready finish.
Best benefit: detailSilicone guide
Helps maintain consistent rim thickness and placement as you work around the plate.
Best benefit: uniformityPastry wheel
Trims overhang cleanly and can add a fluted edge without tearing or jagged cuts.
Best benefit: precisionThe bakery-quality priority stack
These scores are a practical visual ranking of technique priorities—not laboratory measurements. Master them from top to bottom.
Impact on a clean, lasting edge
Longer bars indicate greater practical influence on shape, definition, and consistency.
Why each small action shows up in the final pie
A bakery-made appearance is a connected system: preparation affects handling, handling affects definition, and definition affects how the crust survives the oven.
Practice creates the “bakery” look.
Use scrap dough to rehearse one motion at a time. Match the depth of every pinch, keep the spacing steady, and rotate the pie plate instead of twisting your wrist. The goal is not mechanical perfection—it is a confident, repeatable rhythm.
The Secrets to a Flawless, Bakery-Quality Crimp
Achieving a professional-looking crimp isn’t magic; it’s about consistency and technique. The secret? Keep your dough cold, use the right tools, and choose a method that suits your style. For example, a simple pinch with your fingers can look elegant if done evenly, while a scalloped cutter creates a more ornate finish.
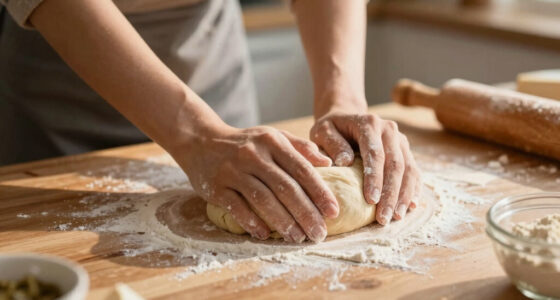
Let’s start with the basics: making sure your dough is evenly rolled and chilled. When dough is cold, it’s less sticky and easier to shape, which is crucial because warm or soft dough can lead to uneven edges or shrinking during baking. As you crimp, maintaining even pressure prevents gaps or uneven ridges, which can compromise both appearance and structural integrity. Think of your pie as a canvas—every fold and pinch should be deliberate, as these small details contribute to the overall professional look and help the crust hold its shape during baking.
Choosing the right technique and understanding why it works helps you troubleshoot issues—like why your crust might shrink or lose its shape—and allows you to adapt your approach for different pie types or dough textures. For instance, more delicate doughs benefit from gentler handling and specific tools, whereas sturdier crusts can handle firmer pinches and more elaborate patterns.
As an affiliate, we earn on qualifying purchases.
Step-by-Step: How to Crimp Like a Bakery Pro
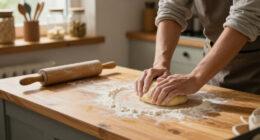
- Chill your dough in the fridge for at least 30 minutes before working. This step is essential because cold dough is less sticky and more responsive to shaping, which helps prevent shrinking and warping during baking.
- Roll the dough evenly to about 1/8 inch thick, avoiding thin spots that can tear or burn easily, and thick areas that can look uneven. Uniform thickness ensures consistent baking and a balanced appearance.
- Trim excess dough to create a clean edge, then fold or pinch to start shaping. Proper trimming prevents overhang and helps with even crimping, reducing the risk of uneven baking or gaps.
- Use your thumb and forefinger to pinch the dough between your fingers, creating a scalloped edge. Repeat around the entire rim, applying even pressure. This creates a decorative, uniform pattern that not only looks appealing but also helps seal the crust effectively.
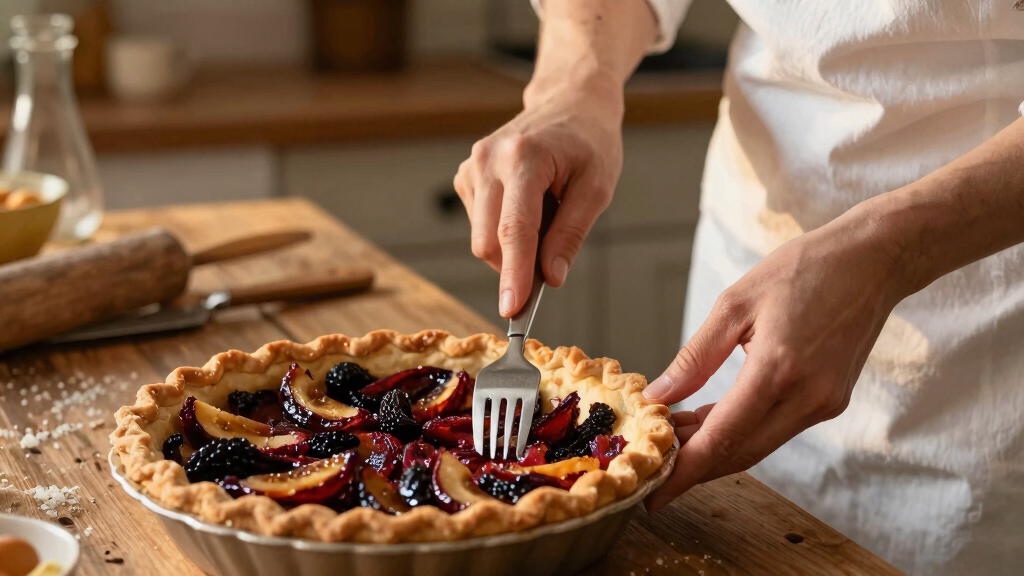
- For a decorative touch, use a crimping fork or scalloped cutter to press into the edge—these tools help create consistent, intricate patterns with less effort, giving a professional finish without much skill required.
- Brush with egg wash or sprinkle sugar for a shiny, bakery-style finish before baking. These finishing touches enhance visual appeal and can influence texture, like a crisp or glossy surface.
Practicing this sequence ensures a crisp, even crimp every time. Think of each step as building a sturdy foundation for your pie’s appearance and structure. Over time, you’ll develop an intuitive sense of pressure and movement, leading to more uniform and attractive edges that elevate your baking to a professional level.
As an affiliate, we earn on qualifying purchases.
Compare Popular Crimping Methods to Find Your Style
| Method | Ease | Appearance | Best For |
|---|---|---|---|
| Pinch with fingers | Easy | Simple, rustic look | Quick pies, casual baking |
| Fork press | Moderate | Scalloped, uniform edge | Bakery-style pies |
| Decorative cutters | Moderate to advanced | Ornate, intricate patterns | Special occasions, show-stopping pies |
Choosing the right method depends on your skill level and the look you want. For a rustic vibe, finger pinches are perfect because they are quick and forgiving, making them ideal for everyday baking or when you’re short on time. Want that classic bakery scallop? Use a fork—it’s a reliable, straightforward tool that creates consistent, attractive edges with minimal effort. For those seeking to impress with elaborate designs, decorative cutters allow for intricate patterns, but they require a steadier hand and a bit more practice.
Understanding the tradeoffs—like ease versus appearance—helps you select a method that aligns with your baking goals and confidence level. Over time, experimenting with different techniques will help you discover your personal style and improve your skills, making each pie a reflection of both your craftsmanship and your aesthetic preferences.
As an affiliate, we earn on qualifying purchases.
Tools that Make Crimping Easier and More Consistent
- Crimping Forks: These are designed to create uniform scalloped edges with minimal effort, reducing hand fatigue and increasing consistency. They help ensure that each scallop is evenly spaced and shaped, which is key for a professional appearance.
- Decorative Cutters: These tools allow you to press intricate patterns into the crust, elevating simple crimping to decorative art. They can save time and achieve more elaborate designs than hand pinching alone.
- Silicone Guides: Flexible rings or strips that fit around the pie rim, helping you maintain a consistent thickness and pressure as you crimp. This consistency translates into a more uniform and polished look.
- Pastry Wheel: A versatile tool that not only trims excess dough cleanly but can also be used to create fluted or decorative edges. Its precision helps avoid uneven or jagged borders.
Using these tools isn’t just about convenience; they fundamentally improve the quality and uniformity of your crimping. For example, a scalloped cutter can turn a rough, uneven edge into a beautifully finished border, giving your pie a professional appearance that rivals bakery products. Investing in the right tools can streamline your process, reduce frustration, and elevate your baking results significantly.
As an affiliate, we earn on qualifying purchases.
Practice, Patience, and Perfecting Your Technique
Crimping isn’t just about tools and tricks—it’s a skill that develops through consistent practice and mindful attention. Each pie you prepare is an opportunity to refine your technique, understand the nuances of dough behavior, and develop your personal style. Start by practicing on scrap dough, experimenting with different pressures, patterns, and speeds. This experimentation helps you discover what works best for your hand and dough type, leading to more confident, precise crimping over time.
As you practice, pay attention to subtle cues—like how dough responds to pressure or how your hand movement affects the pattern. Visualize the end goal: a uniform, attractive edge that enhances your pie’s overall presentation. Remember, even professional bakers spend years honing their skills; patience is key. With each attempt, your muscle memory improves, and your edges become more consistent, giving your pies a polished, bakery-quality finish that reflects your growing expertise.
Frequently Asked Questions
How can I make my pie edges look more professional without special tools?
You can achieve a professional look by pinching the dough with your fingers or using a fork to scallop the edges. Keep your dough chilled, work gently, and practice to develop a steady hand.
What’s the easiest way to get uniform crimping on a beginner level?
The easiest method for beginners is to use a fork. Simply press the tines into the dough around the edge, creating a scalloped pattern that’s both attractive and consistent.
How do I prevent my crust from shrinking or losing shape during baking?
Chill the dough thoroughly before crimping, avoid overworking it, and don’t skip the step of trimming excess dough. Using a pie crust shield can also help maintain shape during baking.
Can I make decorative edges without any special tools?
Absolutely. Pinch with your fingers or use a fork to create textured, decorative edges. These methods are simple, effective, and add charm to your pies.
What’s the best way to improve my crimping skills quickly?
Practice on scrap dough, focus on even pressure, and experiment with different techniques. Watching a few online tutorials can also help you mimic professional-looking edges faster.
Conclusion
Perfecting your pie crimp is a small detail that makes a big difference. With patience and the right technique, your homemade pies will look just as polished as they taste.
Next time you bake, focus on your edge—it’s the finishing touch that turns a good pie into a showstopper. Remember: practice, tools, and a little patience are all you need to make your crusts look bakery-perfect every time.