TL;DR
Beautiful dinner rolls depend on creating a smooth, taut surface tension on the dough before baking. Proper portioning, gentle shaping, and minimal flour help achieve evenly risen, bakery-quality rolls. These simple techniques make all the difference.
Ever wondered why some dinner rolls look like they just stepped out of a bakery—smooth, round, and perfectly risen? The secret isn’t just in the ingredients or oven temperature. It’s in the way you shape the dough. The technique of shaping isn’t merely to make a ball; it’s about creating a taut, smooth ‘skin’ that guides the roll’s rise and final look.
Understanding and mastering this shaping art can transform your home baking. Whether you want soft, pull-apart dinner rolls or glossy, bakery-style buns, focusing on surface tension and gentle handling makes all the difference. Let’s explore the shaping secrets that turn basic dough into stunning dinner rolls.
Create a smooth, taut surface on each dough piece before baking; surface tension guides the rise and appearance.
Portion dough accurately with a scale to ensure even proofing and baking.
Use gentle, quick circular motions to shape rolls, sealing seams on the bottom.
Minimize flour use during shaping to keep surfaces smooth and shiny.
Proof until just right—test with a gentle poke to avoid flat or collapsed rolls.
The Shaping Secrets Behind Beautiful Dinner Rolls
The bakery finish begins before the oven. Accurate portions, gentle handling and a smooth, taut dough skin determine whether rolls rise tall and glossy—or spread, crack and bake unevenly.
Surface tension turns a piece of dough into a roll with direction.
Build the skin that guides the rise
A well-shaped roll behaves like a tiny inflated envelope. Its taut outer layer holds fermentation gases, supports the dough and directs oven spring upward instead of outward.
Smooth, not stretched
Tuck the outer surface underneath until it feels resilient. Stop before the skin tears; a torn surface cannot contain expansion evenly.
Rise goes upward
A taut exterior acts as a framework. The dough expands into a tall dome rather than relaxing into a wide, flat disk.
Gas stays organized
Gentle shaping preserves useful gas pockets while redistributing large bubbles, creating a more even, tender crumb.
The tension sweet spot
Too loose and the roll spreads. Too tight and the surface tears or restricts expansion. Aim for a skin that is visibly smooth, sealed and gently resilient.
Five moves from dough to dome
The best results come from a repeatable rhythm: weigh, pre-round, rest, tighten and proof. Each stage prepares the dough for the next.
Portion
Weigh pieces at 50–70g so every roll proofs and bakes at the same rate.
Pre-round
Gather edges underneath with light pressure to create an initial ball.
Bench rest
Cover and wait 10–20 minutes so tight gluten relaxes without drying.
Final round
Cup, rotate and tuck with quick circles until the top becomes smooth.
Proof
Set seam-side down and wait for a slow spring-back in the poke test.
Master the cupped-hand round
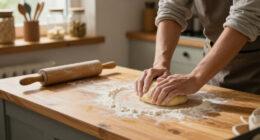
Place the dough on a barely floured surface. Cup one hand over it like a cage, keeping the fingers and heel close to the counter. Move in small, quick circles. Friction rotates the dough and tucks its edges underneath, tightening the top while hiding the seam below.
This short pause relaxes gluten, reduces spring-back and helps prevent tearing during the final round.
Use the counter, not a cloud of flour
The drag between dough and worktop is what builds surface tension. Excess flour removes that grip, dries the skin and prevents seams from sealing.
| Decision | Best practice | Too little control | Too much force or flour |
|---|---|---|---|
| Bench preparation | ✓ Barely floured or clean | ~ Dough may stick badly | ✗ No grip; seams stay open |
| Hand movement | ✓ Small, quick circles | ~ Loose, uneven skin | ✗ Torn surface and lost gas |
| Final surface | ✓ Smooth and resilient | ✗ Flat or wrinkled | ✗ Cracked or overstretched |
| Seam placement | ✓ Sealed underneath | ~ Side split likely | ✗ Roll opens during proof |
| Sticky dough fix | ✓ Cool dough or lightly oil hands | ~ Awkward handling | ✗ Dry, dull exterior |
Read the poke, not the clock
Press gently with one fingertip. The ideal roll springs back slowly and keeps a slight indentation.
What drives a polished result
These relative indicators show where careful technique has the greatest practical effect.
Soft, glossy or crusty
Shaping creates the structure; arrangement and finishing determine the personality of the baked roll.
Pull-apart softness
Place rolls close enough to touch as they expand. They rise taller and develop soft, tender sides.
Individual rounds
Leave space around each roll for a defined circular profile and more crust on every side.
Control the shine
Egg wash deepens color and gloss. Brushing butter on hot rolls creates a soft, supple sheen.
Why Surface Tension Is the Magic Trick for Perfect Rolls
Surface tension is what keeps the dough skin tight and smooth. When you shape a roll correctly, you’re creating a surface that’s like a drum skin—firm, taut, and resilient. This tension directs the dough’s rise upward during baking, resulting in a tall, rounded, and shiny roll.
If the surface isn’t tight enough, your rolls will spread out flat or develop cracks. A torn or uneven surface disrupts the rise, leading to uneven crumbs and a less professional look. The key is to develop a smooth, taut outer layer before baking.
Think of it as preparing a tight envelope for your dough—this envelope contains the dough’s potential, allowing it to rise upward rather than outward. A well-developed surface tension also helps in trapping gases produced during fermentation, which contributes to a better oven spring and a more uniform crumb. While it might seem like a subtle detail, neglecting surface tension can lead to flat, cracked, or misshapen rolls, undermining their visual appeal and texture. Developing this tension requires gentle, deliberate shaping, and understanding its role helps you make better decisions during handling, like how much flour to use or when to stop shaping.
Deepening your understanding of surface tension reveals its importance in achieving consistent, professional-looking rolls. This tension acts as a guiding framework—if it’s too loose, the dough can’t rise properly or will collapse; if too tight, it might tear or prevent expansion. Balancing this tension is crucial, and it’s a fine art of gentle, controlled shaping that influences the final appearance and texture of your baked goods.

T Shape Pastry Roller, Fondant Bakery for Kitchen Pin Pastry Tool Dough Roller Wooden Multifunction Cookie Pizza Rolling Pin Pasta Hand Chapati(1)
- Versatile Kitchen Use: Suitable for cookies, pizza, pie, and more
- Uniform Thickness: Ensures even cooking and consistent crusts
- Small Roller for Edges: Fills dough to edges and smooths sides
As an affiliate, we earn on qualifying purchases.
As an affiliate, we earn on qualifying purchases.
How to Portion Dough for Uniform, Beautiful Rolls
Beautiful dinner rolls start before shaping—by dividing your dough into even portions. Use a digital scale to weigh each piece at around 50–70 grams. This ensures each roll bakes evenly and looks consistent.
For example, if you’re making 12 rolls from a 900-gram dough, divide it into 12 equal parts. Eyeballing often leads to mismatched sizes, which affects how they proof and bake.
Proper portioning isn’t just about aesthetics—it impacts the final texture and rise. Larger pieces may not rise as high or develop the same crust, while smaller ones risk over-proofing and collapsing. Consistent sizing helps ensure a uniform oven spring, leading to evenly shaped and textured rolls. Additionally, accurate portioning reduces waste and makes your process more predictable, especially when baking for a crowd. It’s a foundational step that influences every other aspect of shaping and baking, so investing in a good scale and taking your time here pays off in the final product.
Beyond visual uniformity, precise portioning ensures the internal crumb structure develops evenly. When dough pieces are inconsistent in size, larger portions may remain underproofed, resulting in dense centers, while smaller ones could overproof and collapse. This inconsistency affects not only appearance but also mouthfeel and texture. Accurate portioning acts as a control point—by standardizing size, you create predictable, reliable results, making your baking process more efficient and your rolls more professional in appearance and quality.

FAQQI 12 in Hoagie Roll Baking Pan, 3-Slot Perforated Carbon Steel Tray
- Size and Capacity: 12-inch, 3-slot bread pan for 8-10 inch rolls
- Perforated Design: Promotes airflow for crisp crusts
- Nonstick Interior: Easy release of baked rolls
As an affiliate, we earn on qualifying purchases.
As an affiliate, we earn on qualifying purchases.
Master the Classic Round: The Simple Technique That Works Every Time
The most reliable way to shape a smooth, round roll is the ‘cupped hand’ method. Place a dough piece on a lightly floured (or even unfloured) surface. Cup your hand over it, with fingers and heel touching the counter. Move your hand in small, quick circles.
This motion causes the dough to rotate and tuck under itself, tightening the skin. The seam ends up on the bottom, hidden from view. For stickier dough, use a two-hand ‘claw’ grip to guide and tuck.
Imagine you’re gently tucking in a sleeping baby—gentle but firm, with a steady motion. This technique not only creates a tight, smooth surface but also helps distribute tension evenly across the dough’s surface. Consistency in this motion ensures each roll has a uniform shape and surface tension, which ultimately contributes to a glossy finish and a tall, rounded profile. The key is gentle, deliberate movements that do not overstretch or tear the dough, preserving internal gas pockets and promoting a strong, resilient skin. This method is reliable because it balances firmness with gentleness, allowing you to control the tension without risking damage to the dough’s internal structure, leading to uniform, professional-looking rolls every time.

Letron Food Scale, 33 lb / 0.1 oz High Precision Kitchen Scale for Sourdough Bread, Built-in 7 Units, Timing & Tare Function, Rechargeable Digital Kitchen Scale for Food, Baking, Cooking
- High Precision Measurement: Measures up to 33 lb with 0.1 oz accuracy
- Multiple Units & Backlit Display: Switch between 7 units with clear LCD screen
- Tare & Timer Functions: Reset weight and track cooking time easily
As an affiliate, we earn on qualifying purchases.
As an affiliate, we earn on qualifying purchases.
Why Flour on the Surface Can Kill Your Shape (and How to Avoid It)
Too much flour on your surface or inside the folds prevents the dough from gripping and pulling tight. Flour creates a barrier that stops the surface tension from developing properly, making the rolls look dull and uneven.
Instead, use minimal flour—just enough to prevent sticking. A light dusting on the surface helps, but avoid heavily flouring the dough or the work surface.
For sticky doughs, oil your hands lightly or keep the dough cool, making shaping easier without adding excess flour. This helps the dough develop a natural, resilient surface tension, which leads to a shiny, smooth top after baking. Excess flour can also interfere with the final appearance, causing dull or floury-looking crusts, and can even weaken the surface tension, leading to cracks or uneven rises. Finding the right balance in flour use is essential because too much can hinder the dough’s ability to form a tight, glossy surface, while too little might make handling difficult. Striking this balance ensures your dough can stretch and seal properly, resulting in a polished, bakery-quality finish that’s both attractive and structurally sound.
Over-flouring can also cause a matte, dull appearance after baking, as excess flour absorbs moisture and prevents a shiny crust. It may also lead to cracks or splits if the surface isn’t properly tensioned. Conversely, under-floured or lightly oiled hands help maintain the dough’s natural elasticity, promoting a smooth, resilient surface that bakes up beautifully. Mastering this balance is a key skill—knowing when to use just enough flour to prevent sticking without compromising surface tension makes all the difference in professional-looking rolls.

12 PCS Pottery Glaze Brushes Set with Goat Hair & Hake Brush,Professional Soft Bristle for Ceramic, Pottery, Clay, Acrylic Painting
- Complete 12-Piece Set: Includes various brushes for all ceramic needs
- Natural Goat Hair Bristles: Provides superior glaze absorption and smooth application
- Ergonomic Wooden Handles: Ensures comfortable, non-slip grip during use
As an affiliate, we earn on qualifying purchases.
As an affiliate, we earn on qualifying purchases.
Seam Placement & Pan Arrangement: How to Make Your Rolls Look Like Bakery Art
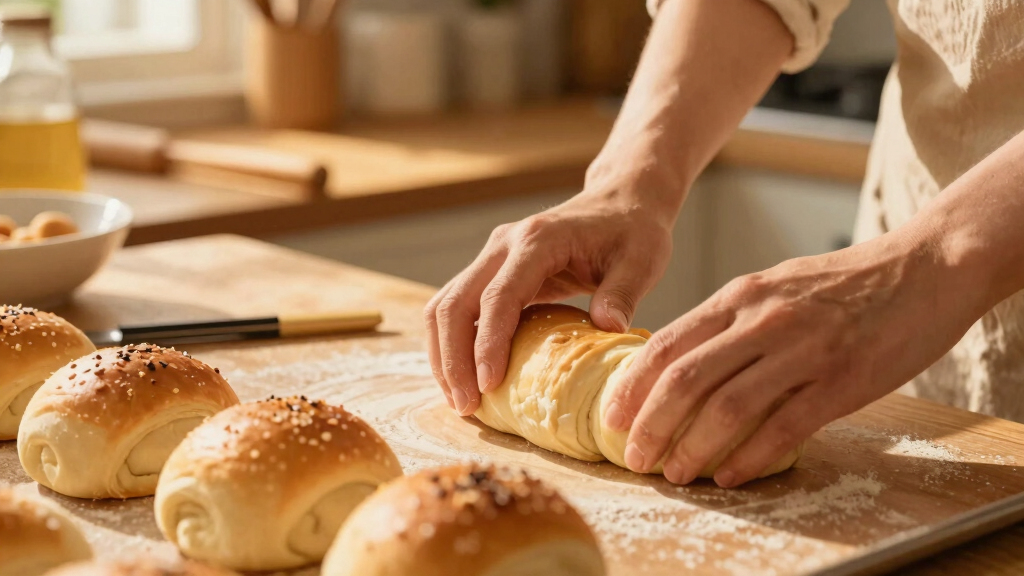
Place the seam-side down on your baking tray. This hidden seam keeps the roll smooth and prevents it from opening during baking. If you want a pull-apart look, arrange the rolls close together so they rise into each other, creating a soft, connected crust.
Spacing matters—spaced-out rolls will rise tall and round, with crusty exteriors. Touching rolls will puff up taller, with soft sides that are perfect for pulling apart.
Think about the final look you want: spaced for crusty individual rolls, close for soft, bakery-style Pull-Aparts. The arrangement influences how the surface tension guides the rise. Proper placement also impacts the overall aesthetic—seams on the bottom keep the top smooth and glossy, while close placement encourages the rolls to rise into each other, forming a unified, attractive shape. Careful positioning helps you achieve the desired texture and appearance, whether for a rustic basket or a neat, uniform tray. When rolls are arranged thoughtfully, the surface tension and proofing work together to produce a polished, professional look that’s both appealing and structurally sound.
Proofing Like a Pro: When and How Your Rolls Are Ready to Bake
Shaped rolls need to proof until they nearly double in size. Test readiness with the gentle poke—if your finger leaves a slight indentation that springs back slowly, they’re ready. Under-proofed rolls might burst or be dense; over-proofed ones can collapse or wrinkle.
Ideal proofing temperature is around 75–80°F (24–27°C). If your kitchen is cooler, let them proof longer or use a proof box. Cold-proofing in the fridge after shaping can also help manage busy schedules and improve handling.
Timing varies, but usually, 45–60 minutes does it. Watching for a soft, pillowy feel—like pressing on a marshmallow—is a good indicator. Proper proofing is crucial because it directly affects the roll’s final volume, texture, and appearance. Under-proofed dough lacks enough gas expansion, resulting in dense, flat rolls. Over-proofed dough, on the other hand, can become weak and collapse during baking. Developing an intuitive sense for when the dough is perfectly proofed takes practice, but it’s essential for consistent, professional results that look as good as they taste.
Tiny Changes That Make Your Rolls Look Bakery-Perfect
Small adjustments elevate your shaping game:
- Use a light touch—avoid squeezing or pressing too hard, which can deflate the dough and disrupt surface tension.
- Keep hands lightly oiled for sticky doughs—this prevents sticking without adding excess flour that could weaken the surface.
- Apply an egg wash or butter after baking for shine and softness; this enhances appearance and flavor.
- Practice the twist and tuck technique for knots or braids—this ensures tight, uniform shapes.
- Use clipped or floured fingers to seal seams tightly, preventing them from opening during baking and maintaining a smooth surface.
Patience and gentle handling are your best tools for achieving bakery-quality results. These small tweaks, along with consistent practice, help you refine your shaping skills, leading to more uniform, attractive rolls. Over time, these deliberate adjustments become second nature, elevating your baking from homemade to professional-quality.
Frequently Asked Questions
Why are my rolls lopsided or uneven after baking?
Uneven or lopsided rolls usually result from inconsistent portioning or insufficient surface tension during shaping. Using a scale and practicing the circular shaping motion help create uniform, smooth rolls.Why did my rolls spread out flat instead of rising tall?
Flat rolls often have a weak surface tension or are over-proofed. Make sure to shape tightly, proof just until they’re soft and pillowy, and avoid over-proofing, which causes the dough to deflate.How do I get a perfectly smooth, round top?
Master the cupped hand rolling technique—small, quick circles gently tuck the dough inward, creating a tight, smooth surface. Sealing seams properly and minimal flour also help achieve a glossy, rounded top.Why did my rolls burst or split open on the side?
Tearing or splitting occurs when the surface isn’t taut enough or seams aren’t sealed properly. Gentle shaping and sealing the seam on the bottom prevent splits, while proper proofing avoids over-stretching the dough.Can I shape rolls the night before and bake in the morning?
Yes, you can shape the rolls and refrigerate them overnight, covered. Proof them slightly longer before baking, or proof directly from the fridge if your schedule requires. This makes holiday baking easier.Conclusion
Shaping dinner rolls isn’t just about forming a ball—it’s about mastering tension, patience, and finesse. When you focus on creating a taut surface and handle your dough gently, bakery-quality results become simple. So next time you make rolls, think about those tiny, deliberate touches—your perfect, glossy, tall roll is just a shape away.
Remember: the secret lies in tension, not force. With practice, your kitchen will become a bakery, one beautifully shaped roll at a time.