TL;DR
Listen free for 30 days with Audible
Thousands of audiobooks and originals — cancel anytime.
Start your free trialAs an affiliate, we earn on qualifying purchases.
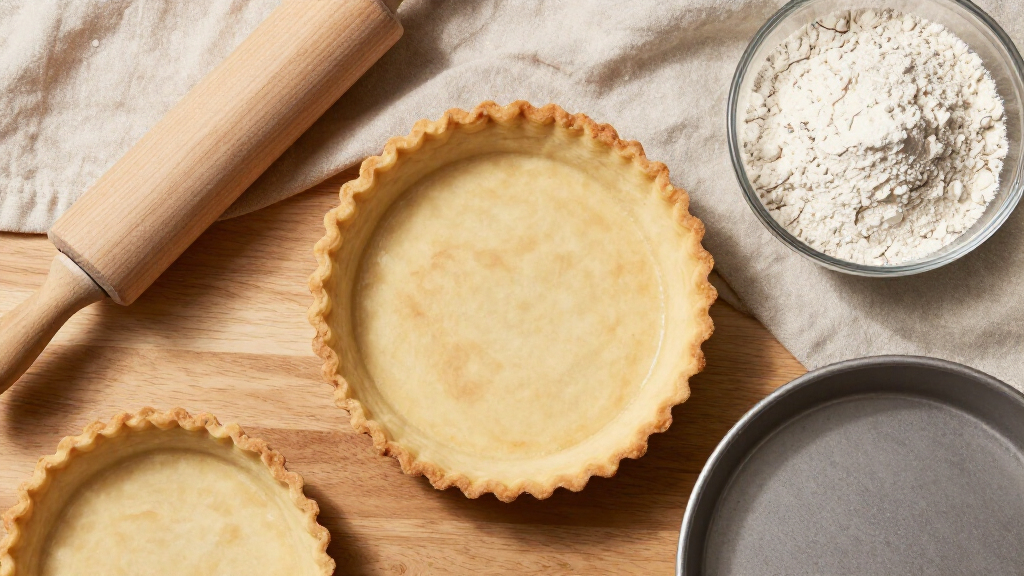
To make a tart shell that holds its shape, focus on proper dough preparation, chilling, blind baking with weights, and temperature control. These steps prevent shrinking and puffing, resulting in a sturdy, attractive crust.
Nothing ruins a beautiful tart faster than a shell that sags, cracks, or puffs up. You want a crust that’s crisp, golden, and perfectly sturdy—ready to hold your vibrant fillings without losing form. Achieving that takes more than just mixing dough; it’s about understanding how each step impacts the final shape.
In this guide, you’ll discover proven techniques for making a tart shell that stays intact through baking and filling. Whether you’re a home baker or just starting out, these tips will help you produce crusts that look as good as they taste—crisp, neat, and irresistibly flaky.
Use a high fat-to-flour ratio (around 50%) to create a sturdy, flaky crust.
Chill your dough for at least 30 minutes to relax gluten and prevent shrinking.
Blind bake with weights at 375°F (190°C) to maintain shape and crispness.
Choose a metal pan with a removable bottom for even heat and easy removal.
Proper rolling, docking, and temperature control are keys to a perfect-shaped tart shell.
Why Your Tart Shell Might Fail and How to Fix It
Many bakers find their tart shells shrink, puff, or crack during baking. The main culprits? Improper dough handling, insufficient chilling, or skipping blind baking. These issues create weak spots or cause the dough to pull away from the sides.
For example, I once made a beautiful tart, only to see the edges curl inward because I skipped chilling the dough. Once you understand the common pitfalls, fixing them becomes straightforward.
Follow these simple rules: keep your ingredients cold, don’t rush the resting phase, and use weights during blind baking. That’s the magic formula for a shell that keeps its shape.
metal tart pan with removable bottom
As an affiliate, we earn on qualifying purchases.
As an affiliate, we earn on qualifying purchases.
Step-by-Step: How to Prepare Your Dough for a Sturdy Tart Shell
- Measure ingredients precisely. Use a kitchen scale for flour, butter, and sugar. For a standard tart, aim for about 50% fat-to-flour ratio for structure.
- Keep everything cold. Cut butter into small cubes, chill your flour, and work quickly to prevent melting.
- Mix gently. Use a pastry cutter or your fingers to combine ingredients just until it looks like coarse crumbs—don’t overmix.
- Form into a disk and chill. Wrap tightly and refrigerate for at least 30 minutes. Resting relaxes gluten and solidifies fats, helping maintain shape during baking.
Imagine pulling out a perfectly chilled dough—firm, pliable, ready to roll. This initial step sets the foundation for a shell that won’t shrink or puff up.
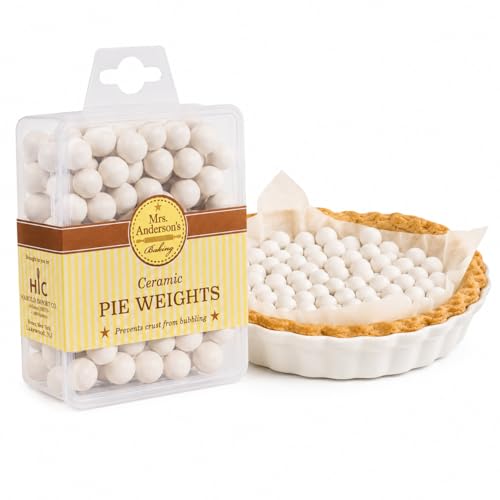
Mrs. Anderson's Baking Ceramic Pie Crust Weights, 135 Count, Natural Stoneware, For Blind Baking Pie Crusts And Tart Shells With Even Baking Results
- Product Name: Mrs. Anderson's Ceramic Pie Weights
- Quantity: 135 reusable weights
- Material: Natural ceramic stoneware
As an affiliate, we earn on qualifying purchases.
As an affiliate, we earn on qualifying purchases.
How to Roll and Dock Your Dough for a Perfect Base
Rolling evenly is key. Lightly flour your surface and roll from the center outward, rotating occasionally. Aim for about 1/8 inch thickness to ensure even baking and structural stability.
Docking means pricking the dough with a fork—about every 1/2 inch—to prevent bubbles and puffing. A flat, even shell is less likely to crack or shrink.
Think of it like stretching a canvas—you want no wrinkles or uneven tension. Proper rolling and docking create a smooth, sturdy surface for a flawless tart.
high fat-to-flour ratio tart dough
As an affiliate, we earn on qualifying purchases.
As an affiliate, we earn on qualifying purchases.
Choosing the Right Tart Pan to Keep Its Shape
The pan you select influences how well your tart holds its shape. Metal pans, especially aluminum, conduct heat evenly and promote crispness. Non-stick pans are convenient but can sometimes cause uneven baking if not used carefully.
Opt for a pan with a removable bottom—this makes removal easier and helps avoid damaging the crust. Remember, a sturdy pan supports the dough during baking and helps prevent warping or sagging.
For example, I prefer a 9-inch aluminum tart pan with a loose bottom. It heats evenly, and I can gently slide out the tart without cracking the sides.
As an affiliate, we earn on qualifying purchases.
The Art of Blind Baking: The Secret to a Shape-Holding Shell
Blind baking means pre-baking your tart shell without filling. It’s the most reliable step to keep the crust from shrinking or puffing up when you add soggy fillings.
Here’s how to do it:
- Line the chilled dough with parchment paper or foil.
- Fill with pie weights, dried beans, or ceramic beads.
- Bake at 375°F (190°C) for 15-20 minutes, then remove weights and bake another 5-10 minutes until golden.
For example, I once forgot to blind bake my fruit tart, and the crust sagged. Now I always blind bake for stability and a crisp texture.
Baking Tips to Keep Your Tart Shell Perfect
Temperature control is critical. Bake at 375°F (190°C)—not too hot, not too cool. Too hot, and the edges burn before the inside firms up. Too cool, and the crust may not crisp properly.
Brush the crust with an egg wash before baking for a shiny, golden finish. This also helps seal the surface, preventing puffiness.
For example, a quick brush with beaten egg before baking turned my pale shell into a beautiful, golden crust that held its shape beautifully.
Comparison Table: Metal vs. Glass vs. Silicone Tart Pans
| Feature | Metal | Glass | Silicone |
|---|---|---|---|
| Heat Conductivity | Excellent | Moderate | Low |
| Ease of Removal | Easy (removable bottom) | Moderate | Very easy |
| Shape Stability | Best | Good | Less stable |
| Durability | High | Moderate | Lower |
Fixing Common Problems: Cracks, Shrinkage, and Puffing
If your tart shell cracks or shrinks during baking, it’s usually because the dough was overworked or not chilled enough. Puffy shells are often due to lack of docking or uneven heat.
To fix small cracks, gently patch with extra dough or fill with a little filling. Prevent shrinkage by chilling the dough thoroughly and docking before baking. For puffing, ensure proper blind baking and use enough weight.
Once I learned to chill my dough longer and dock more thoroughly, my crusts became noticeably more stable.
Frequently Asked Questions
How do I prevent my tart shell from shrinking or puffing up during baking?
Chill the dough thoroughly, dock it well before baking, and always blind bake with weights. These steps keep the crust from shrinking or puffing and ensure it retains its shape.
Can I make a tart shell in advance?
Absolutely. You can prepare and blind bake the shell ahead of time. Store it in an airtight container at room temperature for a day or freeze it for longer storage. Just reheat briefly before filling.
What’s the best pan for a tart shell?
A metal pan with a removable bottom is ideal. It conducts heat evenly, supports the dough during baking, and makes removing the tart easy without damaging the sides.
How do I fix a cracked or shrunken tart shell?
Small cracks can be patched with extra dough or filling. Shrinkage is best prevented by chilling the dough thoroughly and docking. For cracks, a little extra dough or gentle patching works well.
Are gluten-free tart shells as stable as traditional ones?
They can be, if you use the right ingredients. Recipes with almond flour, rice flour, or gluten-free blends plus binding agents like xanthan gum can produce sturdy shells that hold their shape.
Conclusion
Mastering the art of shaping tart shells isn’t magic—it’s about technique, patience, and attention to detail. With the right dough, chilling, and baking steps, you’ll produce shells that look as perfect as they taste.
Next time you bake a tart, remember: a shell that holds its shape is the foundation of a show-stopping dessert. Get those steps right, and your tart will be the star of the table—crisp, neat, and irresistible.
Grilling season Picks
grills
As an affiliate, we earn on qualifying purchases.