
TL;DR
Open a free Amazon Business account
Business pricing, bulk buying and tax-exempt orders.
Create a free accountAs an affiliate, we earn on qualifying purchases.
The secret to perfect molten lava cake lies in balancing baking time, oven heat, and batter temperature. A test cake and careful observation help you nail that flowing center every time.
Imagine cutting into a warm, fudgy lava cake and watching a rich, dark chocolate river flow out. That’s the magic everyone chases but few master. The trick isn’t adding extra liquid or complicated fillings—it’s about controlling the simple details. Getting that molten center right depends on perfect timing, consistent heat, and a bit of practice.
In this guide, you’ll learn how to fine-tune your lava cakes, troubleshoot common pitfalls, and create that dreamy, flowing center every time. Whether you’re aiming for a restaurant-quality dessert or just want a reliable recipe, these tips will make baking lava cakes feel more like a science and less like guesswork.
The Lava Cake Trick: Getting That Molten Center Right
The coveted chocolate river is not created by adding extra liquid. In the classic method, immediate oven heat sets the shell while the center stays soft. Control the chocolate, batter temperature, ramekin and clock—and guesswork becomes repeatable technique.
Six controls before the timer starts
The molten center is the outcome of a controlled heat gradient. Standardize these variables before changing the recipe or reaching for a separate filling.
Choose fluidity
Use a glossy dark or bittersweet bar at 60–70% cacao. Cocoa butter melts smoothly; chip stabilizers may resist flow or create graininess.
Weigh every gram
Small flour and egg variations change how quickly the center sets. Use one kitchen scale and record exact quantities for repeatable batches.
Butter, then cocoa
Coat every corner of each ramekin generously with butter. Dust with cocoa powder to prevent sticking without leaving a pale flour residue.
Preheat completely
Immediate, consistent heat firms the outside before the middle catches up. A cool oven extends baking and can dry the edges.
Match the molds
Use identical ramekins with equal portions on one metal tray. Wider or smaller molds bake faster than deeper, higher-capacity molds.
Know the batter
Refrigerated batter generally needs longer than room-temperature batter. Keep its starting temperature consistent when comparing tests.
Time leads. Visual cues confirm.
Color alone is a poor guide for chocolate batter. Watch for contrast: a structured perimeter surrounding a soft center that still moves.
Relative influence on the outcome
A practical troubleshooting hierarchy—not a fixed recipe formula.
The three-cue test
Look, nudge and verify near the edge.
Firm perimeter
Edges look set, slightly browned and may begin pulling from the ramekin.
Soft surface
The top is no longer liquid, yet it has not become dry or uniformly firm.
Controlled wobble
The middle jiggles like thick pudding while the surrounding shell stays stable.
Failure is useful data
Change one variable at a time. The adjustment column gives the smallest sensible next move, preserving everything already working.
| Observed result | Likely cause | Signal | Next adjustment |
|---|---|---|---|
| No molten center | Baked too long, small ramekin or excessive resting | ✗Center fully set | Reduce baking by 30–60 seconds |
| Complete collapse | Severely underbaked or unmolded immediately | ~Shell cannot hold | Add a little bake time; rest 1–2 minutes |
| Cake sticks | Too little butter or missed ramekin corners | ✗Torn exterior | Butter generously and dust with cocoa |
| Center is thick | Cake cooled too long or chocolate ratio is low | ~Slow, paste-like flow | Serve sooner or test a ganache filling |
| Dry edges | Oven too cool, requiring an extended bake | ✗Hard perimeter | Verify heat with an oven thermometer |
| Uneven batch | Mixed ramekin sizes, crowding or oven hot spots | ~Different centers | Match molds, space evenly and rotate only if needed |
| Firm edge, soft wobble | Heat gradient is correctly established | ✓Target structure | Rest briefly, unmold and serve immediately |
Diagnostic rule / Keep the recipe, ramekin, oven position and batter portion constant while testing time.
Classic underbaked center
TraditionalThe cake’s own batter remains soft in the middle. It delivers the most authentic texture, but the center may contain incompletely cooked egg or flour. Pasteurized eggs and heat-treated flour can reduce food-safety concerns.
Inserted ganache center
PredictableA chilled ganache piece, truffle or frozen chocolate filling melts inside a more fully baked shell. The flow is easier to guarantee, though the result is less like the classic underbaked method.
Calibrate your oven with one cake
A recipe provides a starting point. A test cake accounts for your actual oven, mold, batter temperature and chocolate—variables a printed time cannot see.
Use the planned batter weight, ramekin, tray and oven position.
Start with the recipe’s time and watch for set edges plus a soft middle.
Wait only 1–2 minutes so the shell stabilizes without setting the center.
Observe shell strength, center flow and whether the interior seems unsafe or raw.
Adjust the batch by 30–60 seconds, then record the winning setup.
Serve the moment the test succeeds
Residual heat keeps cooking after the ramekin leaves the oven. Unmold after a short rest and serve immediately; as the cake cools, the molten chocolate gradually thickens. For make-ahead batter, cover prepared ramekins in the refrigerator and expect chilled portions to need slightly more oven time.
Choose the Right Chocolate for a Smooth, Melty Center
The first step to a perfect molten core? High-quality dark or bittersweet chocolate, ideally 60-70% cacao. This range provides enough fat and cocoa solids to melt into a luscious, smooth center without becoming bitter. Cheaper chocolates or chocolate chips often contain stabilizers or additives that can interfere with melting, leading to grainy or uneven textures.
Why does this matter? Because the quality of chocolate directly impacts how it melts and the final texture. Superior chocolate has a higher cocoa butter content, which melts smoothly at lower temperatures, creating that glossy, flowing center. Lower-quality chocolates may contain stabilizers or fillers that resist melting, resulting in a less desirable molten effect or a grainy mouthfeel. Choosing the right chocolate ensures that your lava cake not only looks stunning but also delivers that signature silky, oozing interior.
Pro tip: Use a bar with a deep, glossy sheen—cut into chunks and melted gently. Experiment with different brands to find one that melts evenly and complements your preferred sweetness level.
Note: Avoid using chocolate chips unless they are specifically formulated for melting, as they tend to hold their shape or create a grainy texture due to stabilizers and added ingredients.
As an affiliate, we earn on qualifying purchases.
Measure Precisely—Even Tiny Changes Matter
Baking lava cakes is all about precision. Small differences in ingredients—like a gram of flour or an extra egg—can disrupt the delicate balance needed for that molten center. These minor variations can influence batter consistency, setting points, and ultimately, the flow of the center. For example, adding too much flour might stiffen the batter, preventing the center from melting properly, while too little could cause it to collapse or leak excessively.
Using a kitchen scale ensures you measure accurately, reducing variability between batches. This consistency is crucial because the difference of a few grams can alter how the batter behaves in the oven—affecting whether it remains fluid or sets prematurely.
Why does this matter? Because baking is a precise science; small missteps in measurement can lead to inconsistent results. When ingredients are measured accurately, you control the batter’s texture and baking behavior, making it easier to predict and achieve that perfect flowing center. It’s a tradeoff: meticulous measurement may take extra time but yields much more reliable and repeatable results, especially important when troubleshooting or refining your technique.
Tip: Use the same scale for all ingredients, double-check measurements, and measure at eye level for consistency. This disciplined approach helps you understand how slight adjustments influence the final outcome.
Remember: consistency in measurement translates to consistency in results, which is the foundation of perfect lava cakes.
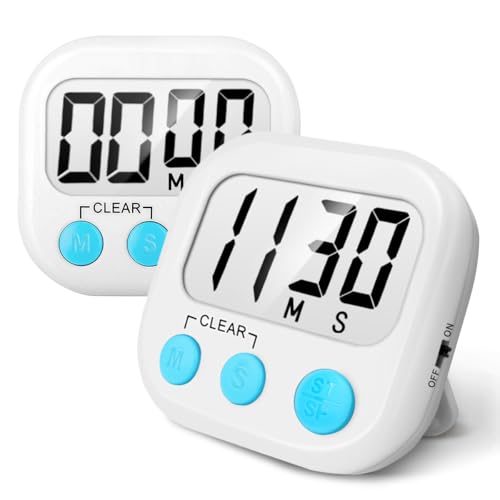
AOUCE Digital Kitchen Timers for Cooking, Timer for Kids 2 Pack White
- Large Digital Display: Easy-to-read big digits
- Loud Audible Alarm: Hear clearly from another room
- Magnetic & Stand Backing: Flexible placement options
As an affiliate, we earn on qualifying purchases.
As an affiliate, we earn on qualifying purchases.
Define the Ideal Baking Point and How to Recognize It
Understanding when your lava cake is perfectly baked is crucial. The goal is to achieve a firm outer shell with a center that remains soft and molten. Typically, this means baking until the edges are set and slightly browned, but the middle still jiggles gently when shaken or nudged. Overbaking causes the center to solidify, losing that signature gooeyness, while underbaking might make the cake too runny or raw.
To recognize the right moment, look for a few key signs: the outer edges should be firm and slightly pulling away from the ramekin, and the surface should appear set but not dry. Gently shake the ramekin—if the center jiggles like a thick pudding and the edges stay firm, it’s ready. Using a toothpick inserted near the edge can also help; it should come out with moist crumbs, not wet batter.
Practice makes perfect. As you bake more, you’ll develop an intuitive sense of timing and visual cues, but initially, relying on these signs helps you fine-tune your process. Remember, every oven is different, so adjustments may be necessary based on your equipment and ingredients.
oven thermometer for precise baking
As an affiliate, we earn on qualifying purchases.
As an affiliate, we earn on qualifying purchases.
Apply the Technique with a Test Cake and Adjust Accordingly
Once you’ve understood the signs of doneness, the best way to perfect your lava cake is through practice with test batches. Bake a small test cake, following your chosen recipe and timing, then carefully evaluate the results. Is the center too runny? Slightly reduce the baking time by 10-15 seconds. Is it too firm? Add a few extra seconds. Keep notes on each attempt, adjusting one variable at a time—be it baking time, temperature, or batter consistency.
This iterative process helps you find the sweet spot where the center is just molten, and the outer shell is perfectly baked. Remember, factors like oven calibration, ramekin size, and ingredient temperature all influence the outcome. Adjustments may seem small, but they make a big difference in achieving that elusive flowing center.
Over time, you’ll develop a sense of how your specific setup behaves, allowing you to produce consistent, perfect lava cakes with minimal trial and error. Patience and careful observation are your best tools here.
As an affiliate, we earn on qualifying purchases.
Frequently Asked Questions
Is the molten center raw?
In a traditional lava cake, the center is deliberately underbaked, so it’s soft and flowy. It may contain partially cooked egg and flour, which is safe if you use pasteurized eggs or a ganache-based filling. The key is achieving a texture that’s slightly undercooked but not raw or unsafe to eat. The tradeoff is that a perfectly molten center balances food safety with the desired gooeyness—using pasteurized eggs or a ganache can help ensure safety while maintaining that luscious flow.
How can I tell when it is done?
The edges should be firm and set, indicating the outer shell has baked through. The center, however, should remain slightly jiggly and soft—like a thick pudding. The surface will no longer look completely liquid, but don’t wait until it’s completely firm all over, as that means it’s overbaked. The key is to look for a contrast: a firm perimeter with a center that still wobbles gently when shaken. This balance ensures that the molten interior remains flowy upon serving, which is the hallmark of a perfect lava cake.
Why did my lava cake turn into an ordinary chocolate cake?
This usually happens if you bake it too long. Even an extra 30 seconds can cause the center to set completely, losing that signature molten texture. The tradeoff is between fully baked and underbaked—aim for a point where the edges are firm but the center remains slightly jiggly. Overbaking results in a solid, uniform cake, whereas underbaking maintains that gooey core. Watching the edges and the center’s wobble during baking helps you fine-tune your timing for future batches.
Can I bake several at once?
Yes, as long as the ramekins are identical and evenly spaced on the baking sheet. However, be cautious about overcrowding, as this can cause uneven heat distribution, leading to inconsistent centers. Also, make sure your oven can maintain a consistent temperature across multiple cakes. Baking in a single layer with ample space ensures even heat circulation, which is essential for uniform molten centers across all your cakes.
Should the batter be cold or at room temperature?
Either is acceptable, but consistency is key. Cold batter will take slightly longer to bake, giving you more control over the timing of the molten center. Room temperature batter bakes more predictably, but can sometimes cause the center to set too quickly if not watched carefully. The tradeoff is that cold batter provides a buffer—if you’re experimenting or adjusting baking time, starting with cold batter can help you fine-tune the process more precisely. Whichever you choose, keep it consistent to achieve reliable results.
Conclusion
Perfecting a molten lava cake is about the little details—timing, temperature, and preparation. The more you practice with a test cake, the more confident you’ll become. Soon, you’ll be serving that luscious, flowing center with every batch.
Remember, patience and precision turn baking into an art. So next time, treat those cakes like a science experiment—and enjoy every gooey, chocolatey bite.
Baby shower & registry season Picks
baby registry must-haves
As an affiliate, we earn on qualifying purchases.