
TL;DR
A great fruit crumble hinges on contrast: tender, juicy fruit beneath a crisp, buttery topping that forms distinct crumbs. Using cold butter, proper mixing, and right baking techniques ensures a crunchy, flavorful topping every time.
Imagine slicing into a warm, bubbling fruit crumble. The rich aroma of caramelized fruit mingles with the crackle of a golden topping—every bite a dance of textures and flavors. Achieving that perfect balance isn’t about following a strict recipe; it’s about understanding the magic behind the topping.
In this guide, you’ll learn how to create a crumble with a topping that’s crispy, buttery, and distinct. Whether you’re baking for comfort or impressing guests, mastering these techniques transforms an ordinary dessert into a memorable treat.
Use cold butter and mix just enough to create large, flaky crumbs for a crisp, textured topping.
Choose the right thickener—cornstarch for shine, flour for rusticity, tapioca for juiciness—to get a perfectly thickened filling.
Bake at 180°C until the topping is deep golden and the filling bubbles, then rest for 15–30 minutes.
Add spices, nuts, and citrus to elevate your crumble’s flavor and texture.
Avoid overmixing topping ingredients and pressing down the crumbs to maintain a crunchy, airy crust.
How to Make a Fruit Crumble With the Perfect Topping
A great fruit crumble hinges on contrast: tender, juicy fruit beneath a crisp, buttery topping that forms distinct crumbs. Cold butter, minimal mixing, and the right bake transform an ordinary dessert into a memorable treat.
The Perfect Topping, Step by Step
Overmixing turns the topping into a dense paste; warm butter makes it greasy. Follow the chain below — every step protects the crumb.
Cold Butter
Rub into dry ingredients until pea-sized pieces form alongside fine crumbs.
Mix Just Enough
Stop when the mix holds when squeezed. A uniform paste bakes dense and greasy.
Vary Crumb Sizes
Fine crumbs cover the fruit; large clusters deliver the crunch.
Add Oats Carefully
Use rolled oats only — quick oats go soft, steel-cut stay too hard.
Chill 15–30 Min
Refrigeration keeps crumbs distinct and slows premature butter melt.
Scatter Loosely
Never press down. Loose scatter lets steam escape for a crisp crust.
Bake to Bubble
Deep amber topping plus bubbling juices means the thickener activated.
Topping Ratios That Never Fail
For a medium dish serving 6–8: 150 g flour, 75–100 g rolled oats, 100–150 g sugar, ¼ tsp salt, 115–140 g cold butter. Adjust within these ranges.
Richer, Larger Clusters
Extra fat binds bigger, crunchier clumps that cling to the fruit.
Drier, Sandier Topping
Flour-forward mixes stay fine-grained; more sugar means deeper browning and crunch.
Choosing the Right Thickener
Too little thickener leaves a soupy base that sogs the topping; too much turns filling gluey. Match the starch to your fruit.
| Thickener | Pros | Cons |
|---|---|---|
| Cornstarch | ✓ Glossy, clear filling with strong thickening power — ideal for sauces that need shine. | ~ Can turn translucent or slimy if overused or cooked improperly. |
| All-Purpose Flour | ✓ Rustic, opaque sauce; forgiving and easy to work with. | ✗ Can look cloudy or dull, reducing visual appeal in excess. |
| Tapioca Starch | ✓ Glossy and stable even with very juicy fruits like berries. | ~ May become chewy if overcooked or used in excess. |
| Arrowroot | ✓ Clear, delicate finish; less likely to turn slimy. | ✗ Breaks down and thins out when overcooked. |
Match the Thickener to the Fruit
Apples & Pears
Dense fruits need little thickener. Slice evenly so pieces soften at the same rate.
Peaches, Plums & Nectarines
Release more juice — add extra starch to keep the filling spoonable, not soupy.
Berries
Need the most thickener, especially frozen. 1–2 tbsp cornstarch per batch of blackberries.
Rhubarb
Substantially more sugar required to balance its sharp acidity.
Cherries
Benefit from almond extract, vanilla, or citrus zest folded into the filling.
Toss Just Before Baking
Sugared fruit left sitting macerates and releases liquid, making the base watery.
Bake to Golden, Rest Before Serving
Browning alone doesn’t prove doneness. Watch for fruit juices bubbling at the edges and center — that’s your signal the thickener has activated.
Catch the Overflow
Place the dish on a lined baking sheet. If the topping browns too fast, tent loosely with foil while the fruit finishes.
Patience Pays Off
Cooling lets the filling thicken so it doesn’t flood the dish when served. Then crack through that golden crust.
What Makes a Crumble Topping Truly Perfect?
The best crumble topping strikes a balance between crumbly and crunchy. It should cling to the fruit, provide texture, and add a buttery richness. Imagine a topping that breaks apart easily with a satisfying crunch—like a cookie but more rustic.
Key to this is choosing the right ingredients and mixing them just enough. Overmixing can turn your topping into a dense paste, losing the desired crumbly texture, while under-mixing keeps the crumbs large and flaky, which is ideal for contrast. Using cold butter is essential; it creates pockets that melt in the oven, forming those irresistible clusters that give the topping its signature crunch. The temperature of the butter influences the final texture—warm butter will blend into the dry ingredients, resulting in a denser, less crispy topping, whereas cold butter helps maintain those large, satisfying crumbs.
For example, a topping made with 150 grams of flour, 100 grams of brown sugar, and 125 grams of cold butter, mixed until crumbly, will produce a textured, flaky crust that contrasts beautifully with the soft fruit beneath. This balance between ingredients and technique is what creates that perfect crunch and ensures the topping stays crispy and distinct during baking and serving.
As an affiliate, we earn on qualifying purchases.
Step-by-Step: How to Make the Perfect Crumble Topping
- Start with cold butter. Cut it into small cubes or rub it into the dry ingredients with your fingertips until the mixture resembles coarse crumbs and pea-sized pieces. This step is crucial because cold butter creates the large, flaky crumbs that stay crispy after baking. Warm butter, on the other hand, can cause the mixture to turn greasy and dense, reducing the desired crunchy texture.
- Mix just enough. Stop when the mixture holds together when squeezed. Overworking the mixture causes the fats to melt and the crumbs to become dense, resulting in a topping that’s less crisp and more doughy. Minimal mixing preserves the integrity of the large crumbs, which are essential for that satisfying crunch.
- Vary the crumb sizes. Keep some larger clumps for a more pronounced crunch, and finer crumbs for even coverage. This variation enhances texture, providing a contrast between the crisp clusters and the delicate base, making each bite more interesting.
- Add oats carefully. Use rolled oats for texture; avoid quick oats if you want a chewier bite, or toast them lightly for extra flavor. Oats also help the topping hold together and provide a nutty flavor that complements the fruit.
- Chill the topping. Refrigerate the mixture for 15–30 minutes. This step helps maintain crumb structure during baking and prevents the butter from melting too quickly, which can cause the topping to become soggy instead of crispy.
- Scatter loosely. Spread the topping evenly without pressing it down. Loose scatter creates steam during baking, which helps keep the topping crisp and prevents it from becoming dense or chewy.
- Bake until golden and bubbling. Usually 35–55 minutes at 180°C. The deep amber color indicates caramelization of sugars, and vigorous bubbling of the filling signals that the juices have thickened and the topping is crisping up properly.
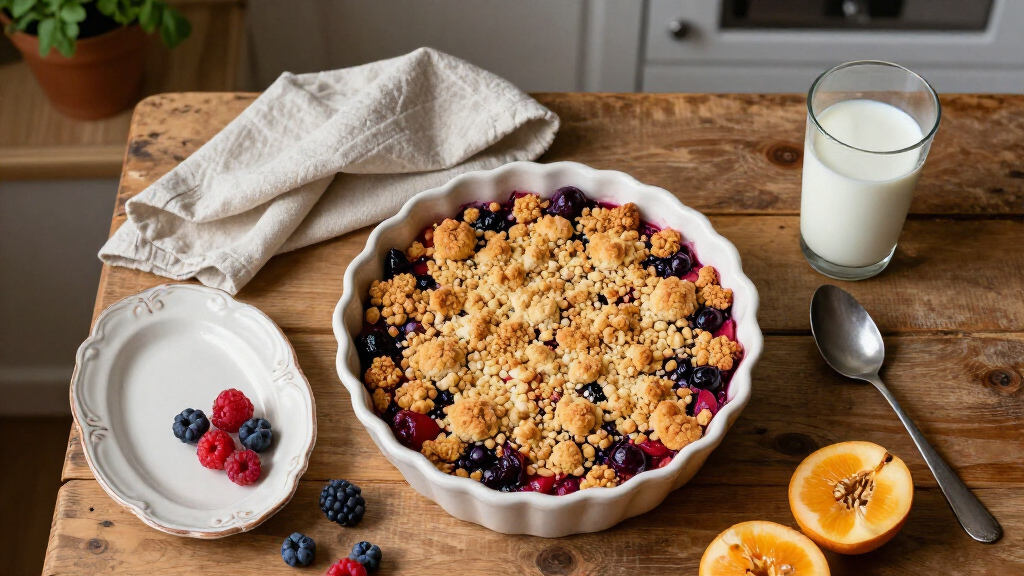
Picture a rustic crumble, its topping golden and crispy, ready to crackle under your fork. Following these detailed steps ensures that texture and flavor align perfectly, giving you a topping that is both crunchy and visually appealing.
As an affiliate, we earn on qualifying purchases.
Choosing the Right Fruit and Thickener for That Juicy, Tender Filling
Fruit choice and thickener are the backbone of a good crumble filling. Juicy fruit like peaches or berries needs a thickener to prevent a soggy bottom. The right thickener not only prevents leakage but also influences the overall texture and appearance of your filling. Using too little thickener can result in a runny, soupy consistency that makes the topping soggy and less appealing, while too much can make the filling gloopy or overly firm. The tradeoff lies in balancing the amount to maintain a luscious, syrupy consistency without compromising the crispness of the topping. Dense fruits like apples or pears require less thickener, but still benefit from a small amount to ensure a tender, cohesive filling. Adjusting the quantity based on fruit ripeness and juiciness is key to achieving the perfect texture.
For instance, if you’re using fresh blackberries, adding 1–2 tablespoons of cornstarch helps absorb excess juices, ensuring the filling thickens into a glossy, stable sauce that clings to the fruit and enhances the visual appeal. For firmer fruits like apples, a tablespoon of flour often suffices, but the goal remains to create a balance—enough to thicken without turning the filling into a gluey mass.
Here’s a quick comparison of common thickeners and their implications:
| Thickener | Pros | Cons |
|---|---|---|
| Cornstarch | Produces a glossy, clear filling with strong thickening power, ideal for fruit sauces that need shine and smoothness. | Can turn translucent or slimy if overused or cooked improperly, which might affect presentation. |
| All-purpose flour | Provides a rustic, opaque sauce that’s easy to work with and forgiving to overuse, giving a hearty appearance. | Can make the filling appear cloudy or dull, potentially reducing visual appeal, especially if used excessively. |
| Tapioca starch | Creates a glossy, stable filling that remains thick even with high juiciness, making it excellent for very juicy fruits. | May develop a chewy texture if overcooked or used in excess, which can detract from the overall mouthfeel. |
| Arrowroot | Gives a clear, delicate finish that’s less likely to become slimy, suitable for light, fresh fruit fillings. | Less forgiving if overcooked; can break down and thin out if not careful, risking a runny result. |
Choosing the appropriate thickener involves understanding your fruit’s water content and the desired visual and textural qualities of the filling. A judicious balance ensures the filling remains luscious and stable without compromising the crispness of the topping, creating a harmonious dessert that delights both the eyes and palate.
As an affiliate, we earn on qualifying purchases.
Baking Tips for That Perfect Golden and Bubbling Finish
To achieve that rich, golden color and the bubbling, aromatic filling, baking temperature and timing are critical. Most crumbles bake well at 180°C (350°F) for 35–55 minutes, but the exact time depends on the fruit moisture and topping thickness. The goal is to develop a deep amber hue on the topping, which indicates caramelization, and to ensure the filling is thick and bubbling—signs that the juices have concentrated and the starches have done their job. Placing your dish on a lined baking sheet is a simple but effective way to catch drips, especially if the filling is particularly juicy, preventing messes in your oven. If the topping starts to brown too quickly, loosely cover the dish with foil to prevent burning while allowing the filling to continue bubbling. The bubbling stage is key—it signifies the thickening process is complete and the flavors are melded.
Allow the crumble to cool for 15–30 minutes before serving. This resting period allows the juices to settle and thicken further, resulting in a smooth, luscious filling that isn’t runny. Cutting into a freshly baked crumble too soon can lead to a watery mess, undermining the texture and overall presentation. Think of this as giving the dessert a moment to set, ensuring each bite is as rich and satisfying as intended.
Imagine a perfectly baked crumble—warm, fragrant, with a crackly topping and juicy fruit oozing from beneath. Following these detailed tips maximizes your chances of achieving that ideal balance of color, texture, and flavor, elevating your baking from good to exceptional.
As an affiliate, we earn on qualifying purchases.
Flavor Boosters and Texture Extras That Make Your Crumble Stand Out
Want to elevate your crumble beyond the basics? Incorporating spices, zest, or nuts adds layers of flavor and complexity that can turn an ordinary dessert into a showstopper. Spices like cinnamon, ginger, and nutmeg are traditional, but experimenting with cardamom or allspice can introduce unexpected warmth. Fresh citrus zest—lemon, lime, or orange—brightens the fruit, creating a lively contrast to the sweet topping. Vanilla or almond extract can add depth and warmth, enhancing the overall aroma. Including chopped nuts such as pecans or walnuts introduces a crunchy texture that complements the soft fruit and crumbly topping. Toasting nuts beforehand intensifies their flavor and helps them stay crisp during baking. For an extra touch of richness, sprinkle a pinch of flaky sea salt after baking; this enhances sweetness and adds a subtle savory note.
Other creative ideas include shredded coconut, a dusting of ground spices, or a drizzle of honey or maple syrup over the top before baking. These small but impactful additions add complexity and sophistication, transforming a simple crumble into a memorable dessert. Think of each element as a layer—spices for warmth, citrus for brightness, nuts for crunch—that together create a harmonious symphony of flavors and textures, ensuring each bite is intriguing and satisfying.
Picture a scoop of warm crumble topped with toasted nuts and a hint of citrus zest—each element working in concert to deliver a multi-dimensional experience. These thoughtful enhancements make your crumble not just a dessert, but a culinary experience.
Avoid Common Mistakes That Ruin Your Crumble
Ever had a soggy, greasy crumble? It’s often because of overmixing the topping ingredients or using warm butter, which causes the fats to melt prematurely and the mixture to become dense and paste-like. The topping should be crumbly, with large flakes that stay crispy after baking. Always start with cold butter and mix minimally—this preserves the integrity of the large crumbs and results in a more satisfying crunch. Another common mistake is under-thickening the fruit. Juicy berries or stone fruits release a lot of liquid during baking; without enough thickener—about 1–2 tablespoons per cup—the filling can become watery, leading to a soggy topping and a less appealing texture overall. Proper thickening traps the juices, creating a luscious, stable sauce that complements the crisp topping. Don’t press the topping down when spreading it; loosely scattering ensures steam can escape during baking, which is crucial for maintaining crispness. Lastly, baking until the topping is golden is important, but ensuring the filling is bubbling signals that the juices have thickened and the dessert is ready. Servings immediately after baking can be disappointing if the filling is still runny; giving it a short rest allows the juices to settle and thicken, resulting in a perfect balance of textures.
Conclusion
Mastering the art of a fruit crumble isn’t just about the ingredients; it’s about understanding how they work together. The key is creating a topping that’s flaky, buttery, and distinct from the juicy fruit beneath.
Next time you bake, remember: cold butter, gentle mixing, and proper baking time turn a simple dessert into something truly special. Your perfect crumble is just a few tweaks away—and the aroma alone makes every effort worth it.