
TL;DR
Kneading dough by hand isn’t about strict timing; it’s about feeling when the dough is smooth, elastic, and passes the windowpane test. Focus on texture and signs of gluten development for perfect results.
Ever wondered if you’re kneading your dough just enough? Or maybe you’re afraid of overdoing it and ending up with tough bread. The truth is, there’s no one-size-fits-all timer for kneading—it’s about feeling the dough’s texture and elasticity. When you understand what to look for, kneading becomes less of a chore and more of a satisfying dance with your ingredients.
In this guide, you’ll learn how to recognize the signs that tell you when to stop kneading by hand. We’ll explore the key indicators, share practical tips, and clarify common doubts—so your bread turns out perfectly every time, with that lovely chewy crumb and crisp crust.
Focus on dough texture and elasticity, not just time, to know when to stop kneading.
The windowpane test is a reliable, tactile sign of gluten development—pass it before stopping.
Environmental factors like humidity and flour type influence kneading time and technique.
Over-kneading by hand is rare but can toughen your bread; watch for signs of excess effort.
Developing a feel through practice is the best way to perfect your kneading skills.
How to Know When to Stop
Kneading is less about obeying a timer and more about reading the dough. Stop when it feels smooth, slightly tacky, elastic, and strong enough to stretch into a thin windowpane without tearing.
Typical hand-kneading minutes, though dough feel matters more than the clock.
Core readiness cues: smoothness, windowpane stretch, and spring-back.
“Your hands are the best timer in the kitchen.”
A thin, translucent stretch signals developed gluten.
Smooth, pliable, and slightly tacky beats dry or sticky.
Over-kneading by hand is uncommon but possible.
Humidity, flour, and hydration change the timeline.
The Three Signs That Say “Stop”
Properly kneaded dough feels firm but not stiff, resilient but not rubbery, and lively under your hands. Combine these cues for a more reliable answer than time alone.
Smooth & Elastic
The dough shifts from rough and sticky to silky and pliable as gluten networks form. It should stretch and fold without tearing immediately.
Windowpane Pass
Pinch off a small piece and stretch it gently. If it becomes thin and translucent before ripping, the gluten is strong enough.
Springs Back
Press the dough lightly with a fingertip. A quick bounce-back means it has enough elasticity to hold shape during proofing and baking.

Pwnllaf 13 Inch Danish Dough Whisk, 304 Stainless Steel Dough Whisk with Long Smooth Wooden Handle – Dutch Whisk Sourdough Bread Tools for Pizza, Pastry & Cake Batter Mixing Easy & Quick
【13 Inch 304 Stainless Steel Danish Dough Whisk】 – Danish whisk unique open-coil dual-loop heart-shaped flow design(stable and…
As an affiliate, we earn on qualifying purchases.
As an affiliate, we earn on qualifying purchases.
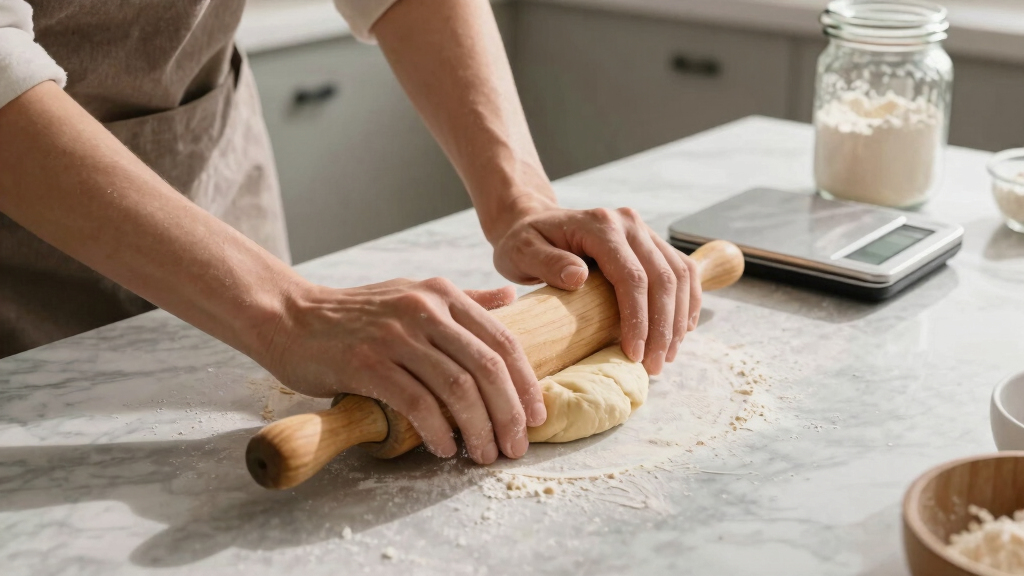
From Shaggy Mass to Bread-Ready Dough
Use a steady push, fold, and turn rhythm. The dough’s response should become more organized with each pass.
Push
Use the heel of your hand to stretch the dough away from you.
Fold
Bring the stretched edge back over itself to layer gluten strands.
Turn
Rotate the dough so pressure is distributed evenly.
Test
Stop once smoothness, windowpane, and spring-back line up.
dough windowpane test kit
As an affiliate, we earn on qualifying purchases.
As an affiliate, we earn on qualifying purchases.
Why the Clock Can Lie
A dough that is ready in eight minutes on a humid summer day may need ten or more in a dry winter kitchen. Let conditions guide your hands.

Regency Wraps Kneading Gloves for Non-Stick Dough Rolling and No-Mess Dough Handling, White, One Size
NO-MESS KNEADING: Handle dough without it sticking to hands and getting under nails. Flour up the gloves, rub…
As an affiliate, we earn on qualifying purchases.
As an affiliate, we earn on qualifying purchases.
Stop, Continue, or Adjust
Use this table as a tactile checklist before you move the dough into its first rise.
| Sign | What You Feel or See | Ready? | Best Move |
|---|---|---|---|
| Smoothness & Elasticity | Dough feels silky, cohesive, and bounces back when pressed. | ✓ | Stop kneading and let it rise. |
| Windowpane Test | A small piece stretches into a thin, translucent sheet without tearing. | ✓ | This is the strongest stop signal. |
| Sticky & Lumpy | Dough clings heavily to hands and looks uneven. | ~ | Knead longer; dust lightly only if needed. |
| Dry & Cracking | Surface splits, resists stretching, or feels stiff. | ✗ | Add water in tiny amounts and rest briefly. |
| Tough & Resistant | Dough becomes hard to shape after prolonged vigorous kneading. | ✗ | Stop; further effort may damage texture. |

WanMoThink 100 Bowl Covers Bread Proofing Large Shower Cap Plastic Wrap for Food Sourdough Bread Baking Supplies Rising Elastic Reusable Sourdough Tools Banneton covers Outdoor Fresh Keeping Bags
Stand-up Packaging – Opening the vacuum packaging, put plastic covers for bowls into stand-up bag, which is convenient…
As an affiliate, we earn on qualifying purchases.
As an affiliate, we earn on qualifying purchases.
Rare by Hand, But Worth Watching
Most home bakers stop too early rather than too late. Still, excessive force can make dough stiff, resistant, and less pleasant to shape.
Hand Signals
The Feel Spectrum
The sweet spot sits where the dough stretches thinly, springs back, and still feels alive rather than tight.
Common Doubts, Clear Answers
The best kneading skill is sensory memory. Small batches, careful observation, and repeated tests build confidence quickly.
How do beginners know when dough is kneaded enough?
Look for a smooth, elastic texture and use the windowpane test. The dough should feel resilient and slightly tacky, not wet or dry.
Can dough be over-kneaded by hand?
It is unlikely with attentive hand kneading, but very vigorous, prolonged kneading can make bread tough and dense.
What if the dough is too sticky?
Knead a little longer first. If it still clings heavily, add flour sparingly so you do not dry out the final loaf.
What if the dough is dry and cracking?
Add small splashes of water and let the dough rest briefly. Resting helps flour hydrate and gluten relax.
What does properly kneaded dough look and feel like?
Properly kneaded dough is smooth, slightly tacky, and elastic. It should feel firm but not stiff, and bounce back when pressed gently. Imagine pressing your finger into a soft rubber ball—that’s the kind of resilience you want.
For example, after about 8 minutes of kneading, your dough should pass the “windowpane test”—stretch a tiny piece into a thin, translucent sheet without tearing. This indicates that gluten strands are well developed, giving the bread structure and chewiness.
Visual cues matter. If your dough looks lumpy or sticky, it might need a bit more kneading or a sprinkle of flour. If it’s dry and cracking, a splash of water can help bring it back to life.
How to tell when your dough is ready — 3 clear signs
- It’s smooth and elastic: When you knead, the dough should transform from rough and sticky to silky and pliable. This change signifies that gluten networks are forming, which are essential for trapping gases and giving bread its rise and structure. Recognizing this elasticity helps you avoid under- or over-kneading, both of which can negatively impact the final loaf.
- It passes the windowpane test: Stretch a small piece into a thin, translucent membrane without tearing. This indicates that gluten strands are sufficiently developed, providing the necessary strength and extensibility for shaping and oven spring. Ripping or tearing suggests the gluten network isn’t fully formed, risking a dense or misshapen loaf.
- It springs back: Gently press the dough with your finger; if it bounces back quickly, it shows that the dough has enough internal elasticity. This resilience reflects proper gluten development, which is crucial for maintaining shape during proofing and baking. If the dough remains indented or resists bouncing back, it may need more kneading to strengthen the gluten network.
Understanding these signs helps you gauge the dough’s readiness more accurately than relying solely on time, which can vary based on ingredients and environment. Developing this sensory awareness ensures consistent, high-quality bread with the desired texture and structure.
Remember, each sign provides insight into the dough’s internal development. Combining them gives you a comprehensive understanding, helping you make informed decisions during kneading.
Why over-kneading is rare but can ruin your bread
Over-kneading by hand is less common than many think. Usually, if you keep kneading past the point of proper gluten development, the dough becomes tough and difficult to shape. It’s like over-rolling pastry—excessive handling squeezes out the delicate layers.
For example, if you knead a batch of bread for 20 minutes straight, you might notice the dough feels stiff and resists shaping. The crumb could turn dense, losing that airy structure you aimed for.
The good news? Paying attention to how the dough feels prevents overdoing it. Once it’s smooth, elastic, and passes the windowpane test, you can stop. Over-kneading can also lead to a hardened crust and a bread with a chewy, tough crumb, diminishing the overall eating experience. Recognizing the signs early ensures you don’t compromise the bread’s quality for the sake of thorough kneading, which is rarely necessary with proper technique.
It’s important to understand that over-kneading isn’t just about time; it’s about the dough’s response. Pushing the dough beyond its optimal point can cause the gluten strands to break down, leading to a loss of elasticity and a denser crumb. This is why sensory cues are more reliable than time alone—your hands can tell you when enough has been done, and further effort might do more harm than good.
How environmental factors influence kneading and when to stop
Humidity, temperature, and flour hydration levels all impact how long you should knead. In a humid kitchen, dough may develop gluten faster and need less kneading. In dry conditions, it might take longer.
For example, in summer, a dough might reach the right elasticity in 8 minutes, while in winter, it might need 10. Whole grain flours absorb more water and can require gentle kneading over a slightly longer period.
Recent baking advice emphasizes focusing on dough feel rather than clock-watching. Adjust your kneading based on how the dough responds, not just the time elapsed. If the environment is particularly dry or humid, be prepared to adapt your kneading time accordingly, always prioritizing the dough’s appearance and texture over a fixed duration.
Understanding the influence of environmental factors is crucial because these variables directly affect gluten formation and dough behavior. For instance, in high humidity, excess water can make the dough sticky and require less kneading, while dry air can hinder gluten development, necessitating longer or more gentle kneading. Recognizing these factors allows bakers to make informed adjustments, leading to consistent results regardless of external conditions.
Quick comparison: When to stop kneading by hand
| Sign | Description | When to stop |
|---|---|---|
| Smoothness & Elasticity | The dough feels silky and bounces back when pressed. | When it’s smooth and elastic, typically after 8-10 minutes. |
| Windowpane Test | Stretch a tiny piece into a thin, translucent sheet without tearing. | When it passes without ripping. |
| Spring Back | Dough quickly recovers shape after pressing. | When it immediately springs back. |
Use these cues as your guides rather than sticking strictly to a timer. Your dough will tell you when it’s ready.
Your best kneading buddy: Developing a feel for your dough
Practice makes perfect. The more you knead, the better you’ll get at sensing when your dough is ready. Trust your hands—notice how it feels, how it responds, and how it looks.
For example, start with small batches and focus on the texture. Over time, you’ll recognize that perfect moment when the dough is smooth, elastic, and passes the windowpane test without second-guessing.
Think of kneading as a conversation with your ingredients—your hands tell you what they need.
Frequently Asked Questions
How do I know when my dough is kneaded enough if I’m a beginner?
Look for a smooth, elastic texture and perform the windowpane test. When you can stretch a small piece into a thin, translucent sheet without tearing, it’s ready. Focus on how it feels—resilient and slightly tacky—more than on time.
Can I over-knead dough by hand?
While rare, over-kneading can happen if you knead excessively or with too much force. It makes the dough tough and dense. Pay attention to signs like a stiff feel or inability to pass the windowpane test, and stop once those appear.
How long should I knead by hand for most recipes?
Typically, 8-10 minutes is enough for most bread doughs. But instead of focusing solely on time, watch for signs like smoothness, elasticity, and the windowpane test. Adjust as needed based on your dough’s response.
What if my dough is sticky or too dry?
Adjust hydration gradually. Add small amounts of water if it’s too dry, or sprinkle a little flour if it’s sticky. Knead gently after each addition and check again until the dough feels just right.
Is hand kneading better than using a mixer?
Many bakers prefer hand kneading for the tactile feedback and control it offers. It helps you develop a feel for your dough, leading to better results. However, a stand mixer with a dough hook can save time, especially for large batches.
Conclusion
Mastering when to stop kneading by hand is all about tuning into your dough’s signals. It’s a mix of science and intuition—your hands, eyes, and nose all play a part. With patience and practice, you’ll instinctively know the perfect moment to pause, ensuring every loaf has that irresistible chew and structure.
Next time you knead, listen closely. Your bread will thank you with a crust that’s crisp, a crumb that’s airy, and a flavor that delights your senses. Happy baking!