
TL;DR
Blind baking involves pre-baking your pie crust before adding moist fillings. Using pie weights, docking, and precise timing creates a crisp, strong crust that won’t turn soggy. This simple step makes all the difference in baking perfect pies.
Nothing ruins the pleasure of a homemade pie faster than a soggy bottom. It’s like biting into a crust that’s lost its crunch, dampening the rich flavors of fruit, custard, or cream. Yet, with one simple trick—blind baking—you can keep your crust crisp and sturdy, no matter what filling you choose.
In this guide, you’ll learn the exact steps, tools, and tips to master blind baking. Think of it as the secret handshake for every confident home baker aiming for that perfect, crackly crust every time.
Always chill your dough before rolling to keep the crust flaky and prevent shrinkage.
Use pie weights or alternatives to keep the crust flat and prevent puffing during baking.
Dock the crust with a fork to release steam and avoid bubbles or puffiness.
Bake until the crust is golden and crisp—don’t pull it out too soon.
Cooling the crust completely before filling is key to avoiding sogginess.
The Blind Baking Trick That Ends Soggy Pie Bottoms for Good
Blind baking means pre-baking the crust before moist fillings arrive. With a chilled shell, fork docking, pie weights, and precise timing, the base sets crisp and sturdy instead of turning damp under fruit, custard, or cream.
15-20 min
Most crusts need this first weighted bake at 375°F to 425°F before the weights come out.
30 min
Chilling keeps fat solid, improves flake, and helps the crust hold its shape.
Weights stop puffing and shrinkage before they start.
A flat, golden shell creates the moisture barrier that soggy-bottom pies are missing.
Even rolling prevents pale patches and burnt edges.
Hot enough to set the shell and brown the surface.
After weights are removed, crisp the exposed base.
Custard, cream, and juicy fruit fillings need protection.
Color matters: pale crust is usually underbaked crust.
Sogginess is a moisture problem with a timing problem.
Juicy fillings release water while the crust is still trying to set. Blind baking flips the order: first the crust dries, browns, and strengthens; then the filling goes in.
Wet filling hits raw dough
Fruit juices, custard, and cream soak into an unset base, turning layers limp before they can crisp.
Weights hold the shell flat
Parchment plus weights keep the crust from ballooning, shrinking, or slumping down the dish.
A dry barrier forms first
Golden pastry resists moisture, supports clean slices, and keeps that crackly bite under the filling.
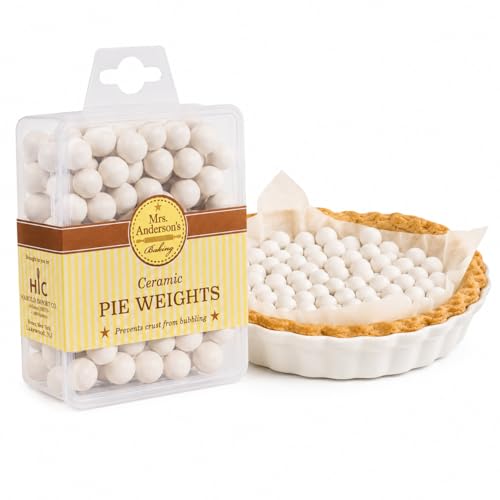
Mrs. Anderson's Baking Ceramic Pie Crust Weights, 135 Count, Natural Stoneware, For Blind Baking Pie Crusts And Tart Shells With Even Baking Results
Mrs. Anderson's Baking Ceramic Pie Crust Weights: reusable blind baking pie crust tool for empty pie and tart…
As an affiliate, we earn on qualifying purchases.
As an affiliate, we earn on qualifying purchases.
The six-move blind bake sequence.
Patience is the trick. Each step controls one failure mode: shrinkage, puffing, bubbling, pale dough, or trapped steam.
Chill
Rest dough at least 30 minutes so fat stays cold and structure firms up.
Roll
Keep the dough near 1/8 inch thick for even baking across the base.
Dock
Prick bottom and sides with a fork so steam can escape cleanly.
Weight
Line with parchment or foil, then fill with pie weights, beans, or rice.
Bake
Set the shell at 375°F to 425°F until the edge starts to color.
Finish
Remove weights and bake briefly until the base is dry, crisp, and golden.

Ginfonr 2 Pack Pastry Cutting Wheel, Pastry Wheel Decorator Pie Crust Pastry Wheel and Cutter for Cutting Pastry, Rolled Pastry Pie Crimper, Baking & Cooking Tool for Apple Pie Crust or Ravioli Pasta
[Sufficient quantity]: You will get 2 pastry wheel decorators. The abundant quantity provides you with more choices. You…
As an affiliate, we earn on qualifying purchases.
As an affiliate, we earn on qualifying purchases.
What makes the crust crisp?
The best results come from combining structure, steam control, and enough final browning. Skip one, and the soggy-bottom risk climbs fast.
Crispness contribution
Relative impact of each blind baking habit on a sturdy pie base.
Timing spectrum
Pulling the shell too early leaves moisture pathways open; too long can toughen the crust.

EVEDMOT Pizza Dough Docker Roller Stainless Steel, Pin Puncher Dough Hole Maker, Docking Tool for Pizza Pie Cookie Pastry Bread
Premium Material: Our dough docker roller with a solid plastic handle. Pins are made of Food Grade stainless…
As an affiliate, we earn on qualifying purchases.
As an affiliate, we earn on qualifying purchases.
Pie weights and the best substitutes.
Any weight is better than none, but heat distribution and reliability change the quality of the final shell.
| Method | Flatness | Heat Control | Pros | Tradeoff | Verdict |
|---|---|---|---|---|---|
| Metal or ceramic pie weights | ✓ | Most even | Reusable, clean handling, consistent pressure, professional results. | Higher initial cost, but useful for frequent bakers. | Best choice |
| Dried beans or rice | ~ | Moderate | Cheap, easy to find, effective for casual baking. | Can scorch, may heat unevenly, usually becomes baking-only after use. | Good backup |
| Frozen pie weights | ✓ | Even | Reusable and helpful when you want controlled heat transfer. | Requires planning, storage space, and extra prep. | Precise option |
| No weights | ✗ | Uncontrolled | Fastest setup and no special supplies needed. | Puffing, bubbling, and shrinking become much more likely. | Avoid |

Burry 3 Inch Sweet Dessert Pie Shells, Pre-Baked Tart Crusts for Mini Pies & Tarts, Individual Ready-to-Fill Pastry Shells, 72 Count Bulk for Foodservice
Effortless Dessert Creation: Pre-baked 3-inch individual pie shells are ready to fill with your favorite sweet or savory…
As an affiliate, we earn on qualifying purchases.
As an affiliate, we earn on qualifying purchases.
When the crust still turns soft.
Blind baking fixes the big problem, but cooling, barriers, and bake color decide whether the crust stays crisp after filling.
Never fill a steamy shell.
A hot crust can trap condensation under the filling. Cool it completely so the crisp layers stay dry and firm.
- 1 Bake until the bottom looks dry, not merely set.
- 2 Remove weights and give the base a short finishing bake.
- 3 Cool fully before adding fruit, custard, cream, or curd.
- 4 Add a thin chocolate, breadcrumb, or cookie-crumb barrier for very wet fillings.
- 5 Store pre-baked shells airtight so humidity cannot soften the crust.
From raw dough to crackly slice.
The technique is simple because the chain is logical: control fat, control steam, control moisture, then let the filling shine.
Cold dough
Less shrinkage, better flake, sturdier edges.
Docked shell
Steam escapes before bubbles lift the base.
Weighted bake
The crust stays flat while the structure sets.
Golden finish
Dry, browned pastry forms the moisture shield.
Clean filling
Custard, cream, or fruit sits on a crisp base.
Why Soggy Pie Bottoms Happen — And How Blind Baking Fixes It
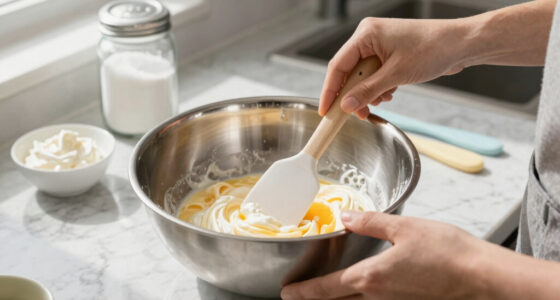
Soggy bottoms are usually caused by excess moisture seeping into the crust or an underbaked shell. When your filling releases water—like juicy berries or custard—the crust struggles to stay crisp. Blind baking creates a barrier, sealing the crust and setting it firm before the filling arrives. This barrier prevents moisture from penetrating the crust, which is especially crucial for fillings with high water content. Without it, the crust becomes a sponge, losing its crunch and turning limp.
Imagine baking a cookie—if you add chocolate chips too early, they melt and make the dough soggy. Similarly, blind baking lets the crust set up, forming a dry, sturdy base that fights off moisture. This step is a strategic investment; it may take extra time upfront, but it guarantees a better texture and presentation in the final pie. Skipping this step often results in disappointment, especially with juicy or custard-filled pies where moisture is unavoidable. The tradeoff is a bit more effort during preparation, but the payoff is a reliably crisp crust that holds up under any filling.
Step-by-Step: How to Blind Bake a Perfect Pie Crust
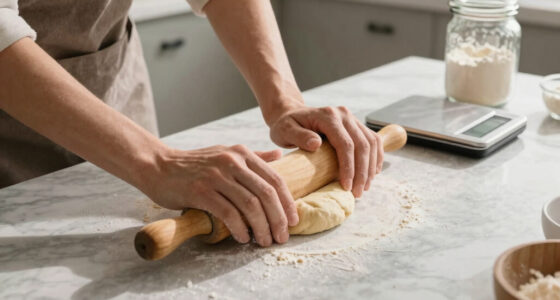
- Chill the dough: Rest your dough in the fridge for at least 30 minutes. Cold fat equals flaky, sturdy crusts. This step ensures the fat remains solid during baking, which helps prevent shrinking and promotes an even, flaky texture. Skipping chilling can result in a greasy, shrunken crust that doesn’t hold its shape.
- Roll out evenly: Keep your dough about 1/8 inch thick, and transfer it to your pie dish gently. An even thickness ensures uniform baking, preventing some parts from overbaking while others remain underdone. Uneven thickness can lead to soggy spots or burnt edges, especially if the crust is thicker in certain areas.
- Dock the crust: Use a fork to prick the bottom and sides. This prevents puffing or bubbling during baking by allowing steam to escape. Proper docking avoids the formation of air pockets that can cause uneven baking and compromise the crust’s structure.
- Line with parchment or foil: Cover the crust with a sheet, then fill with pie weights, dried beans, or rice. This creates gentle pressure, keeping the crust flat and preventing it from shrinking or puffing up. The choice of weight impacts the baking quality; ceramic or metal weights distribute heat more evenly and are reusable, while beans or rice are more accessible but may burn if baked too long.
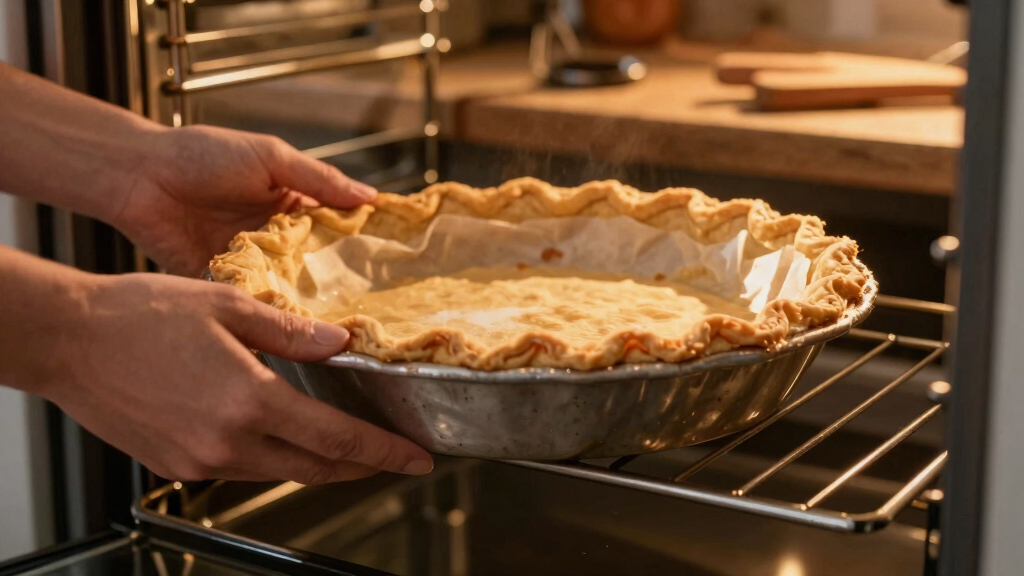
- Bake at the right temp: Usually 375°F to 425°F for 15-20 minutes, until golden. The temperature controls how quickly the crust sets and browns. Too low, and it may stay pale and soft; too high, and it might burn or become tough. Adjust based on your oven and crust thickness.
- Remove weights and finish baking: Lift out the parchment/foil, and bake 5 more minutes if needed to deepen color and crispness. This final step ensures the crust is fully baked and has a firm, crisp texture. Removing the weights allows the crust to expand slightly and develop a golden, flaky surface. Patience here pays off, as rushing this step can leave the crust underdone or unevenly crisp.
Remember: patience with each step pays off—your crust’s future sogginess depends on it.
Tools and Materials That Make Blind Baking Easier
- Pie weights: Metal, ceramic beads, dried beans, or rice. Each keeps the crust flat and prevents shrinking. Metal and ceramic weights conduct heat more evenly, reducing the risk of hot spots that can cause uneven baking. Beans and rice are more accessible but are single-use and may burn if baked too long, so they require careful timing. Investing in quality weights can save frustration and improve results.
- Parchment paper or aluminum foil: Lines the crust, protecting it from direct heat and making weight removal easier. Proper lining prevents sticking and ensures the weights can be lifted out cleanly, avoiding damage to the crust. Aluminum foil can be crinkled to fit irregular shapes, while parchment provides a smoother surface.
- Fork: For docking—pricking the crust to release steam and stop puffing. Docking is essential for preventing bubbles that can cause uneven baking or holes that weaken the crust. It’s a simple step with a big impact on the final texture.
Using the right tools ensures even baking and saves you from a soggy disaster. The choice of weights and lining material can influence how uniformly your crust bakes, affecting both appearance and texture. Think of these tools as your secret weapons for achieving a professional-quality crust with minimal fuss.
Comparing Common Alternatives to Pie Weights
| Method | Pros | Cons |
|---|---|---|
| Pie weights (ceramic or metal) | Provide consistent heat, reusable, and easy to handle, leading to more uniform baking and less risk of burning or uneven crusts. | Initial cost can be higher, but they pay off over time with repeated use. |
| Dried beans or rice | Very affordable and readily available, making them a popular choice for casual bakers. | Single-use, may burn if baked too long, and can be less reliable for very precise crusts due to uneven heat conduction. |
| Frozen pie weights | Reusable and often more evenly distribute heat compared to loose beans or rice. | Require pre-heating and may need special storage, adding some prep time. |
Choosing the right weight depends on your baking style and budget, but ceramic or metal weights tend to give the most even results, especially for delicate or high-precision pies. Weighing the tradeoffs helps you select tools that align with your baking goals and frequency, ensuring your crusts come out crisp and perfect every time.
Troubleshooting: When Your Crust Still Turns Soggy
If your crust remains soggy despite blind baking, don’t panic. First, make sure it’s fully baked and cooled before filling. Sometimes, underbaking or placing a hot crust directly in the fridge causes moisture to condense, leading to sogginess. Ensuring the crust is thoroughly baked and cooled prevents trapped steam, which can soften the crust later.
Adding a thin layer of chocolate, breadcrumbs, or crushed cookies on the crust before filling can also act as a moisture barrier, absorbing excess water and preventing it from seeping into the crust. For extra crispness, bake the crust a bit longer, watching carefully to avoid burning—this extra step can help seal the surface, making it less permeable to moisture. Remember, a fully cooled, crispy crust is your best defense against sogginess, but sometimes, you may need to experiment with these additional layers or baking times to perfect your method.
Can You Make Blind Baking Faster Without Sacrificing Quality?
Yes, you can streamline blind baking without losing quality. Use preheated ceramic weights or a silicone baking mat to distribute heat evenly, reducing baking time and ensuring consistent results. Start checking the crust for a golden color around 15 minutes—once it reaches this stage, it’s a good indicator that it’s close to done. Using a hot oven and pre-chilled dough accelerates the process, but rushing can risk underbaking or uneven coloration. To speed things up without sacrificing quality, keep a close eye on the crust, and remove it from the oven as soon as it turns a deep golden hue and feels firm. This proactive approach saves time and ensures a crisp, well-baked crust every time, even when you’re pressed for time.
Pre-chilling your dough and maintaining a high oven temperature help expedite baking, but patience remains key. Rushing the process may lead to a crust that’s either underbaked or overly browned, so balance speed with vigilance for best results.
Frequently Asked Questions
How do I prevent my crust from shrinking during blind baking?
Chill your dough thoroughly before rolling and avoid stretching it too much when fitting into the pan. Using pie weights and docking also helps keep the shape intact during baking. Properly chilled dough maintains its structure and resists shrinking under heat, which is crucial for a professional-looking, evenly baked crust.
Can I blind bake without pie weights?
Yes, dried beans, rice, or ceramic weights can replace commercial pie weights. Just be sure to preheat or use them carefully to avoid uneven baking or burning. These alternatives can be just as effective, provided you follow proper preparation and baking techniques to prevent the crust from puffing or shrinking.
How do I know when the crust is fully baked?
Look for a deep golden color and a firm, crisp texture. The crust should no longer feel soft or doughy when lightly touched, and it should easily lift from the pan without sticking. Achieving this level of doneness ensures your crust is ready to support moist fillings without becoming soggy.
Can I blind bake a crust in advance?
Absolutely. Bake the crust fully, cool it completely, then store in an airtight container. Reheat briefly before filling for best results. Making the crust ahead of time can save time on the day of baking, but proper cooling and storage are key to maintaining crispness.
What’s the one mistake that ruins a blind bake?
Not using enough weights or skipping docking can lead to puffed, uneven, or soggy crusts. Follow all steps carefully for a perfect result. Ensuring proper preparation, including adequate weights and docking, prevents common pitfalls and guarantees a reliably crisp crust every time.
Conclusion
The secret to avoiding soggy pie bottoms lies in the simple, reliable step of blind baking. Done correctly, it transforms a soggy, limp crust into a crisp, golden shell that holds up under any filling.
Next time you bake a pie, remember: patience, proper tools, and a few smart techniques turn a good pie into a great one. Your crust will thank you—and so will everyone who gets to bite into that perfect slice.