
TL;DR
Open a free Amazon Business account
Business pricing, bulk buying and tax-exempt orders.
Create a free accountAs an affiliate, we earn on qualifying purchases.
A beautifully set tiramisu depends on managing moisture, creating a stable mascarpone filling, and chilling long enough. Proper technique ensures clean layers and perfect slices every time.
Nothing beats the sight of a perfectly layered tiramisu—smooth, clean slices revealing distinct layers of creamy mascarpone and dipped ladyfingers. Yet, achieving that level of precision often feels tricky. The secret isn’t just in the recipe but in the technique. If your tiramisu often turns out watery, uneven, or falls apart when sliced, this guide will show you how to fix that. You’ll learn how to control moisture, build a stable filling, and give your dessert enough chill time for that beautiful, sliceable finish.
By mastering these simple steps, you’ll transform your tiramisu into a showstopper—whether for a special dinner or just a cozy weekend treat. It’s all about understanding what makes the layers hold and how to give the dessert time to set. Let’s get into the practical, no-fuss tips that guarantee a beautifully set tiramisu every time.
Control the moisture by cooling coffee and dipping biscuits briefly.
Build a stable mascarpone filling with whipped cream and gentle folding.
Chill the assembled tiramisu for at least 6 hours, preferably overnight.
Slice with a hot, sharp knife, wiping between cuts for clean layers.
Avoid over-soaking ladyfingers or rushing the chilling process for best results.
How to Make Tiramisu That Sets Beautifully
A sliceable tiramisu is built through moisture control, a stable mascarpone cream, and patient chilling. Master those three variables and every portion can stay soft and creamy while revealing crisp, elegant layers.
Three controls make the layers hold
Tiramisu should set through technique—not excessive gelatin or solid freezing. Keep each component cool, controlled, and structurally sound.
Keep stray liquid out
Use cold, full-fat mascarpone, drain visible liquid, and cool the coffee completely. Warm espresso and watery flavorings soften the entire structure.
Build air into the cream
Whip heavy cream to medium or firm peaks in a separate bowl. Gently fold it into loosened mascarpone to create a light, elastic filling.
Dip—do not soak
Crisp savoiardi need only a swift dip in cool coffee. A slightly dry center is useful: the biscuit continues absorbing moisture while it chills.
Balance cream, biscuits, and coffee
Practical ranges for a 20 × 20-centimeter or 8 × 8-inch dish. Texture matters more than using every last milliliter of coffee.
A dependable build
Use these ranges as structural guardrails, then stop dipping when the biscuits feel moist but intact.
Find the moisture sweet spot
The correct dip softens the surface while preserving enough dry structure to support the cream.
The rule: about one second per side in a shallow dish of cooled, strong coffee. Layer immediately.
Small choices, dramatically different slices
The “best” column protects both texture and presentation. Amber choices can work, but demand closer control.
| Decision point | Best technique | Risky technique | Likely result |
|---|---|---|---|
| Mascarpone temperature | ✓Cold and full-fat | ✗Warm or watery | Firm cream vs. loose filling |
| Combining the filling | ✓Fold gently | ✗Beat aggressively | Smooth structure vs. graininess |
| Coffee preparation | ✓Strong and fully cooled | ✗Warm or steaming | Controlled absorption vs. sogginess |
| Ladyfinger dipping | ✓One second per side | ✗Leave submerged | Defined layers vs. collapse |
| Chilling time | ✓Overnight | ~Under 6 hours | Clean cuts vs. sliding layers |
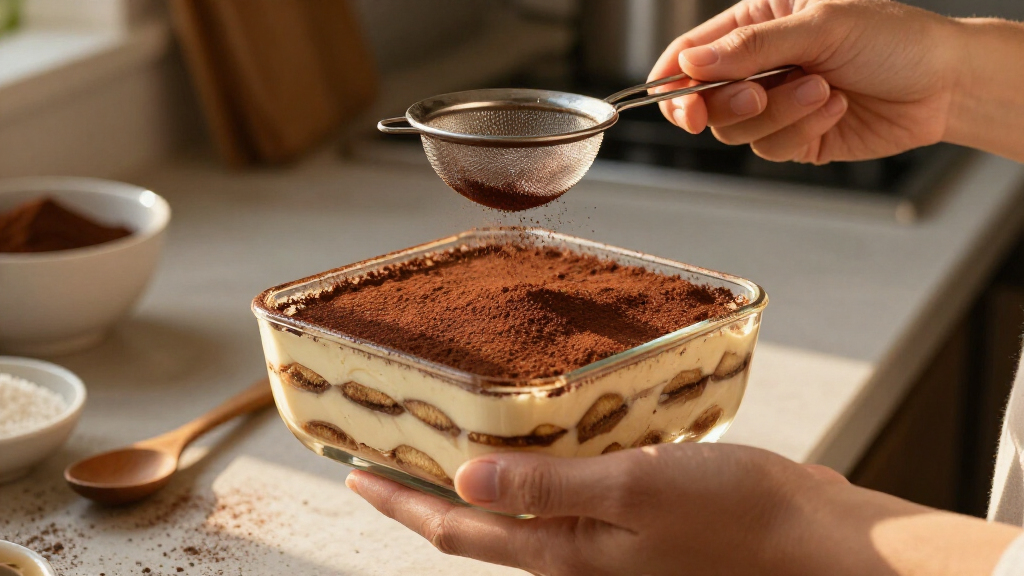
| Cocoa finish | ✓Dust before serving | ~Dust far in advance | Fresh surface vs. damp cocoa |
From cold ingredients to a clean slice
Each stage protects the next. A single moisture or temperature mistake can travel through the entire dessert.
Cool & drain
Cold mascarpone, cold cream, room-temperature coffee.
Whip & fold
Trap air in the cream, then preserve it with gentle folding.
Dip & layer
Swiftly moisten crisp biscuits and build even layers.
Cover & chill
Rest for 8–12 hours so moisture redistributes evenly.
Cut & lift
Use a hot, clean knife and a thin, wide spatula.
Read the symptom, fix the cause
Most setting problems trace back to heat, excess liquid, overmixing, or insufficient resting time.
Runny filling
Likely cause: underwhipped cream, warm mascarpone, or liquid added directly to the filling.
Grainy or curdled cream
Likely cause: overmixing or combining ingredients at very different temperatures.
Liquid at the bottom
Likely cause: over-soaked ladyfingers, warm coffee, or undrained mascarpone.
Layers slide apart
Likely cause: loose cream, uneven layers, or slicing before the dessert has fully chilled.
Slice like a pastry chef
A stable tiramisu still needs clean cutting technique. Work quickly and keep the filling cold.
Chill thoroughly in a straight-sided, tightly covered dish.
Warm a long, sharp knife under hot water, then dry it.
Cut straight down without sawing through the cream.
Wipe the blade and rewarm it between every portion.
Lift with a wide spatula and serve before the filling warms.
Cool coffee + briefly dipped savoiardi + gently folded cream + an overnight chill.
Keep excess liquid out of the filling for a firm, slice-ready tiramisu
Start by choosing cold, full-fat mascarpone and draining any visible liquid from the container. This simple step prevents your filling from becoming runny or grainy. When mixing, stir only until just combined—avoid overworking it, which heats the mascarpone and softens the structure. Always let hot coffee cool completely before dipping the ladyfingers. Warm liquid softens the biscuits excessively and adds unwanted moisture, making the whole dessert unstable.
For example, I once added steaming hot espresso directly to my ladyfingers. The result? A soggy mess that refused to hold its shape. Now, I let the coffee sit until room temperature, and my slices come out clean and firm. Controlling liquid is the first step toward perfect layers.
Why does excess moisture matter so much? Because moisture acts as the primary destabilizer in tiramisu. Too much liquid weakens the mascarpone’s structure, causing it to collapse or become watery, especially after refrigeration. Conversely, too little moisture can leave the dessert dry and crumbly. The key is balancing the moisture content—enough to soften the biscuits but not so much that the layers lose their integrity. Achieving this balance is crucial for a dessert that slices cleanly and maintains its form over time.
As an affiliate, we earn on qualifying purchases.
Create a stable mascarpone cream with whipped cream and gentle folding
The key to a firm, sliceable tiramisu is a stable mascarpone mixture. Whipping heavy cream to medium or stiff peaks before folding it into the mascarpone creates a light but sturdy filling. When combining, loosen the mascarpone slightly first, then fold in the whipped cream gently—no beating. This method adds structure without sacrificing creaminess. The whipped cream acts as a structural binder, trapping air and providing elasticity that supports the layers during slicing and refrigeration.
For instance, I whip 300 ml of heavy cream to soft peaks, then fold it into 400 grams of mascarpone. The result? A smooth, firm filling that slices cleanly and holds its shape overnight. Using whipped cream instead of eggs or gelatin reduces the risk of curdling or graininess and makes the process more forgiving. The tradeoff is that if the whipped cream isn’t properly stabilized or overfolded, the mixture can deflate or become runny. So, gentle folding and proper whipping are essential for optimal stability.
Why does this matter? Because a well-structured mascarpone filling prevents the layers from collapsing or sliding apart when sliced. It ensures that the dessert maintains its elegant appearance and texture, especially after chilling for hours or overnight. The stability achieved through whipped cream and gentle folding is the backbone of a professional-looking tiramisu that slices effortlessly.
As an affiliate, we earn on qualifying purchases.
Dip ladyfingers just briefly—avoid soggy, collapsing layers
The biggest mistake in making tiramisu is over-soaking ladyfingers. A quick dip—about one second per side—in cool, strong coffee is enough. Think of the biscuit as a sponge that needs just enough moisture to soften without turning to mush. The goal: biscuits that are moist but still hold their shape when layered.
For example, I used a shallow dish with cooled espresso, dipped each ladyfinger swiftly, and layered immediately. The result: firm biscuits that absorb just enough liquid. If you saturate them too long, they’ll continue soaking during refrigeration and cause a watery mess. Over-soaking can lead to layers that slide apart or become overly soft, which compromises the aesthetic and texture of the final dessert. Proper dipping ensures that the biscuits provide the right balance of softness and structure, making slicing easier and cleaner.
Why is this important? Because the moisture level in each biscuit directly influences how well the layers hold. Too much liquid causes the biscuits to disintegrate, leading to messy slices and a watery tiramisu. Too little, and the dessert might feel dry and less cohesive. Finding that perfect quick dip optimizes the texture and appearance, especially after chilling.
As an affiliate, we earn on qualifying purchases.
Use the right proportions to balance moisture and firmness
Getting the proportions right is crucial. Too little filling and the layers feel weak; too much liquid and they collapse. For a typical 20×20 cm dish, aim for about 450–500 grams of mascarpone, 240–360 ml of heavy cream (if used), and roughly 24–30 ladyfingers. The coffee should be strong but not overwhelming—about 240–360 ml, cooled.
Imagine stacking two layers of dipped biscuits and a thick layer of mascarpone cream on top. Each layer should be even and not drenched. The balance of ingredients prevents the dessert from becoming soggy or dry, leading to clean, attractive slices. Adjusting these proportions based on your ingredients and preferences allows you to fine-tune the moisture content, ensuring stability without sacrificing flavor or texture. Proper ratios are the foundation for consistent results and beautiful presentation.
Why does this matter? Because improper proportions can lead to a fragile, uneven dessert that doesn’t hold its shape when sliced. Conversely, the right balance ensures the layers are firm yet tender, making slicing a satisfying experience and presentation visually appealing.
chilling dessert storage containers
As an affiliate, we earn on qualifying purchases.
As an affiliate, we earn on qualifying purchases.
Chill long enough for the perfect slice every time
Patience is your best friend. Chill the assembled tiramisu for at least 6 hours—overnight is even better. During this time, the mascarpone firms up, and moisture redistributes evenly. A long chill ensures the layers hold when sliced, giving you those perfect, clean lines.
For example, I once left my tiramisu overnight, and the next day, it sliced like a dream—no crumbling or collapsing. Cover it tightly to prevent drying or absorbing other fridge odors. The longer the tiramisu rests, the more the flavors meld and the structure solidifies. This extended chilling allows the mascarpone to set fully, which is critical for clean slicing. If you cut too early, the layers might be unstable and prone to breaking or sliding apart, ruining the presentation and texture. For best results, plan ahead and give your tiramisu ample time to rest.
Why is this necessary? Because the setting process involves moisture redistribution and protein stabilization within the mascarpone. Without sufficient chilling, the dessert remains too soft and unstable, making slicing a messy affair. Proper chilling transforms a soft, amorphous mixture into a firm, sliceable masterpiece.
Achieve clean slices with the right technique
Use a long, sharp knife, and wipe it clean between cuts. For extra precision, dip the knife in hot water and wipe dry before each slice. Start from the edge and cut down smoothly—no sawing. Lift each piece with a wide spatula for a neat presentation.
Imagine slicing a perfectly chilled cake—each cut should be confident, with no jagged edges. Serving individual glasses is also a neat trick, as it sidesteps slicing altogether, though it changes the visual appearance.
Proper slicing technique is essential because it directly affects the presentation and the experience of eating the dessert. A dull or dirty knife causes jagged, uneven slices that look unprofessional and can damage the delicate layers. Wiping the knife ensures a clean cut through the mascarpone and ladyfingers, preventing smudging or tearing. Using a warm knife reduces adhesion and helps produce smooth, precise slices, highlighting the layered beauty of the tiramisu. This attention to detail elevates the dessert from homemade to restaurant quality, making each serving a visual delight.
Common pitfalls—what to avoid for a perfect tiramisu
If your tiramisu isn’t setting well, the cause is often moisture or stability issues. Too much liquid makes it runny. Overmixing mascarpone causes graininess. Oversaturating ladyfingers leads to a soggy bottom. And slicing too soon can cause layers to slide apart. Recognizing these pitfalls helps you troubleshoot quickly.
For example, I once sliced my tiramisu after only 2 hours—result? A gooey mess. Now, I wait at least 8 hours, and the layers stay intact. Patience pays off. Understanding these common mistakes allows you to adjust your process—whether it’s letting the dessert chill longer, controlling the dipping process, or handling the mascarpone gently. Avoiding these pitfalls ensures a dessert that maintains its structure, looks appealing, and slices beautifully every time.
Why does this matter? Because rushing or neglecting these details often results in a disappointing presentation. Recognizing and correcting these issues early means you’ll consistently produce a professional-looking, delicious tiramisu that impresses every time.
Gelatin? Sometimes helpful, mostly unnecessary
Gelatin isn’t usually needed for a good tiramisu. Properly whipped cream, restrained dipping, and long chilling create enough stability. Gelatin can make the dessert rubbery or overly firm if used excessively. Its primary purpose is to provide extra firmness or height in molded presentations or in warm environments where the dessert might soften quickly. But in traditional, layered tiramisu, these techniques—stability through proper whipping, moisture control, and patience—are usually sufficient.
In tall molded versions or in situations where the environment is warm, a small amount of gelatin can help maintain the structure. However, overuse can compromise the soft, delicate texture that defines a good tiramisu. It’s a tradeoff: using gelatin can add stability but at the risk of altering the classic creamy mouthfeel. Most home cooks find that mastering the basic techniques eliminates the need for gelatin, keeping the dessert authentic and tender.
Why is this important? Because relying on gelatin can sometimes mask technique flaws and lead to a less authentic texture. Focus on technique first—stabilize with whipped cream, control moisture, and chill thoroughly. Gelatin should be a last resort, not a default solution, as it can interfere with the dessert’s delicate balance.
Traditional vs. modern methods—what really works
Classic tiramisu relies on mascarpone, eggs, sugar, coffee, and ladyfingers. Modern tweaks include using whipped cream, pasteurized eggs, or egg-free options. Some recipes incorporate flavor variations like matcha or fruit but require careful moisture management.
For example, I’ve made a vegan tiramisu using coconut cream and soaked sponge cake. It’s different but still delicious. The key is understanding how each ingredient affects moisture and stability, no matter the style. Modern methods often emphasize convenience or dietary restrictions but should still prioritize moisture control and layering techniques to ensure the dessert holds its shape and looks appealing. Whether traditional or contemporary, the principles of balancing moisture, stabilizing the filling, and proper chilling remain essential to a successful tiramisu.
Food safety basics—keep your tiramisu fresh and safe
Refrigeration is a must because it contains mascarpone and eggs. Use pasteurized eggs, or cook the yolks with sugar over gentle heat until thickened. Chill the dessert promptly and keep it covered. Consume within 2–3 days for best freshness and safety.
For example, I make my tiramisu a day ahead, then store it tightly covered. It stays moist and safe to eat, with no worries about bacteria. Always follow food safety guidelines to enjoy your dessert worry-free. Proper handling and storage prevent bacterial growth and ensure the creamy layers remain fresh and safe to consume over the recommended period.
Frequently Asked Questions
Can tiramisu be made without raw eggs?
Absolutely. Use pasteurized eggs, or cook the yolks with sugar over gentle heat until thickened. Egg-free mascarpone and whipped cream also work well, giving you a safe, stable dessert without raw eggs.
Why did my mascarpone cream become runny?
This often happens if mascarpone is overmixed, warm, or if too much liquid was added. Keep mascarpone cold, fold gently, and refrigerate briefly if it starts to loosen. Proper handling keeps your cream firm and sliceable.
How long should ladyfingers be dipped?
Dip each side for about one second in cooled, strong coffee. The goal is to soften the biscuits without soaking them into a soggy mess. Quick, controlled dips help maintain structure during chilling and slicing.
Can I use regular coffee instead of espresso?
Yes. Brew it stronger than usual so its flavor remains bold after soaking. Strong coffee ensures your tiramisu has the rich, authentic taste without watering down the layers.
Must the coffee be cold?
Definitely. Warm coffee softens the biscuits too much and can destabilize the cream. Use cooled or chilled coffee for best control and structure.
Conclusion
Remember, the secret to a beautifully set tiramisu isn’t just in the ingredients but in patience and technique. Master those brief dips, stabilize your cream, and give it enough time to rest. The result? A dessert that slices like a jewel—smooth, firm, and picture-perfect every time.
Next time you serve tiramisu, think of it as a layered sculpture—delicate yet sturdy, soft yet structured. With just a little care, you’ll turn simple ingredients into a show-stopping centerpiece. Your guests will ask for seconds—and maybe even thirds.
Baby shower & registry season Picks
baby registry must-haves
As an affiliate, we earn on qualifying purchases.