
TL;DR
Proper greasing and lining of your pans is key to easy release. Using the right fats, parchment, and layering techniques prevents sticking and keeps your baked goods looking professional.
Ever had a gorgeous cake tear when you try to lift it out of the pan? Or a batch of cookies that stubbornly cling, forcing you to peel them apart? That frustration ends the moment you master the art of properly greasing and lining your pans. It’s a small step, but it makes a huge difference in your baking success.
In this guide, you’ll learn exactly how to prepare your baking pans—step-by-step—to ensure your goodies slide out smoothly, every single time. No more broken cakes, no more ruined cookies. Just perfect results, with minimal effort and maximum satisfaction.
Always apply a thin, even layer of fat—no thick globs—using butter, oil, or spray.
Line pans with parchment or silicone mats for effortless release, especially for delicate baked goods.
Dust greased surfaces with flour, cocoa powder, or sugar to add an extra non-stick barrier and help baked goods release cleanly.
Choose reusable silicone mats for eco-friendly, long-term savings and consistent performance.
Cooling baked goods slightly before removing helps prevent tearing and sticking, as heat causes contraction and easier release.
The Simple Science Behind Preventing Sticking
Greasing and lining are your secret weapons against sticking. When you apply fat to the pan’s surface, you create a barrier that prevents the batter from bonding with the metal or silicone. This barrier reduces the surface tension that causes baked goods to stick, especially as they cool and contract. Adding a layer of parchment or silicone mat seals this effect, which is particularly important for sticky or delicate items that are prone to tearing or breaking if they adhere too strongly.
Think of it like a non-stick handshake—each element plays a role. The fat coats every nook and cranny, preventing direct contact between the batter and the pan, while the parchment or silicone provides an extra slick surface for easy release. This combination minimizes the mechanical stress on your baked goods during removal, which is crucial for maintaining perfect shapes and textures. Properly understanding this science helps you choose the right materials and techniques to optimize your baking results, especially for intricate or fragile recipes.

Luckyiren 2-Pack Silicone Baking Mats – Non-Stick Reusable BPA-Free Oven Liners, 100% Food-Grade Silicone, Fit Half Sheet Pans (16.54" x 11.62") for Cookies, Pastry & More
Perfect Fit for Half Sheet Pans: Sized at 16.54" x 11.62", these reusable silicone baking mats fit all…
As an affiliate, we earn on qualifying purchases.
As an affiliate, we earn on qualifying purchases.
How to Choose the Right Greasing Agent for Your Baked Goods
- Butter or margarine: Rich in flavor, ideal for cakes and quick breads. The fats in butter create a flavorful crust, but they can melt unevenly if not applied properly. Using softened or melted butter ensures even coverage, which helps form a uniform barrier. The tradeoff is that butter can brown quickly, so balancing the amount used prevents excess browning or greasiness.
- Vegetable or canola oil: Neutral taste, great for cookies and muffins. Oils provide a smooth, thin layer that penetrates into tiny crevices, ensuring a non-stick surface even for intricate pans. They are less likely to burn during high-temperature baking, but over-application can lead to greasy baked goods. Using a paper towel or brush helps control the amount, avoiding excess that can compromise texture.
- Shortening: Creates a sturdy, reliable barrier, especially for layered cakes. Because shortening contains less water and more fat, it resists melting at higher temperatures, maintaining its coating longer. However, it can sometimes result in a slightly less flavorful crust. The key is to use just enough to coat the surface evenly, balancing durability with flavor.
- Cooking spray: Convenient and quick, especially with added flour or cocoa powder. The aerosol spray distributes a fine, even layer of fat, reducing uneven spots. However, some sprays contain propellants or additives that might affect flavor or leave residues. Light, even application ensures a non-stick surface without excess greasing, which could otherwise cause baked goods to become greasy or overly browned.
- Clarified butter: High smoke point, suitable for high-temperature baking like biscuits or scones. Removing the milk solids reduces the risk of burning and creates a pure fat layer. This method retains the flavor of butter while providing a more stable barrier, especially in recipes that require higher heat. The tradeoff is that it’s more labor-intensive to prepare but offers superior non-stick performance in specific applications.
For instance, when baking a rich chocolate cake, a brush of butter followed by a dusting of cocoa powder creates a non-stick surface that also enhances flavor and appearance, especially if the cake is delicate or prone to sticking. Choosing the right fat and application method directly impacts how easily your baked goods release and how they look when sliced.
Remember, over-greasing can make baked goods greasy or cause excessive browning. Less is often more—apply a thin, even layer to strike the perfect balance between non-stick effectiveness and optimal texture.

GUANCI 2 Pack Silicone Baking Mats, 11.6" x 16.5" Each, 0.7mm Thick, Food Grade Non-Stick Reusable Baking Mats & Baking Sheet Liners for Cookies, Macarons, Bread, Pizza & Pastry
Food-Grade Silicone Baking Mat: Made from high-quality food-grade silicone, this silicone baking mat (baking silicone mat / silicone…
As an affiliate, we earn on qualifying purchases.
As an affiliate, we earn on qualifying purchases.
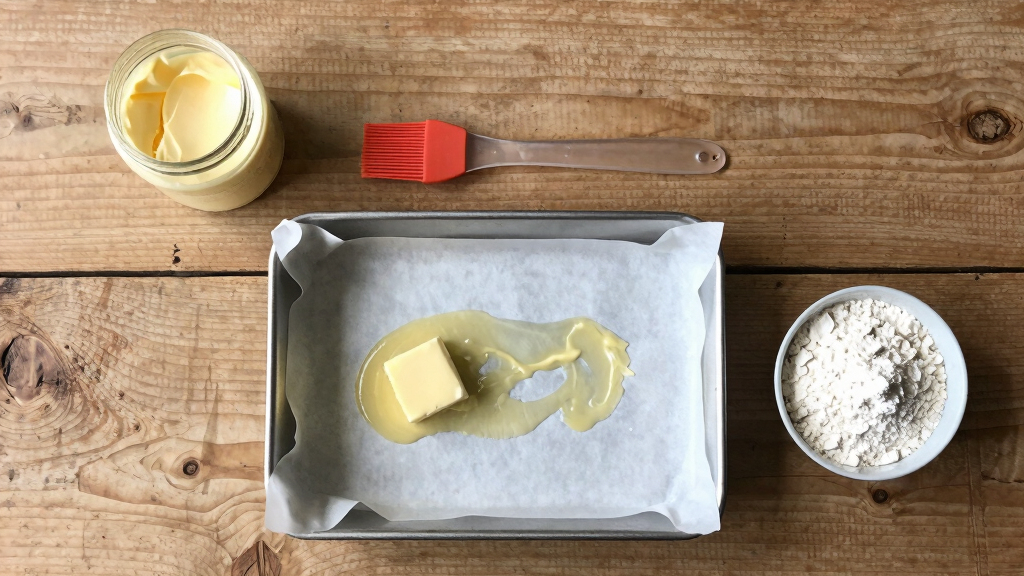
Defining the Step-by-Step Process for Proper Pan Preparation
Properly preparing your pan involves a sequence of simple steps that ensure maximum non-stick performance. First, select the appropriate greasing agent based on your recipe and pan type. Next, apply a thin, even layer of fat using a brush, paper towel, or spray, making sure to cover all corners and edges. After greasing, dust the surface lightly with flour, cocoa powder, or sugar, tapping out the excess. This additional layer acts as a buffer, preventing batter from bonding directly to the pan and facilitating easy release.
For intricate or delicate recipes, consider lining the bottom with parchment paper or silicone mats before greasing. This extra step provides an extra barrier, especially useful for sticky or fragile baked goods. Finally, allow the pan to sit for a minute or two before pouring in your batter, giving the coating a chance to settle and adhere evenly. Following this sequence ensures your baked goods will come out cleanly, maintaining their shape and appearance.
Applying these steps consistently will improve your results and reduce frustration, especially when baking complex or high-stakes recipes. Remember, the key is in the details: even coating, proper layering, and patience during preparation make all the difference.

PAM Baking Non-Stick Cooking Spray, 5 oz.
What You Get: One 5 oz. can of PAM Baking Non-Stick Spray
As an affiliate, we earn on qualifying purchases.
As an affiliate, we earn on qualifying purchases.
Frequently Asked Questions
What is the best way to grease a pan for cakes?
Use softened butter or oil, spread evenly with a brush or paper towel, then dust with flour or cocoa powder. This creates a barrier that helps your cake release smoothly without sticking. Proper application ensures the entire surface is coated evenly, preventing weak spots where sticking could occur, especially around edges or corners. This thorough coverage is crucial for delicate cakes that can tear or break during removal.
Can I use wax paper instead of parchment paper?
Wax paper isn’t heat-resistant and can melt or catch fire in the oven, posing safety risks and compromising your baked goods. It’s designed for cold uses like wrapping or lining, not baking. For oven use, always opt for parchment paper or silicone baking mats, which are specifically manufactured to withstand high temperatures without degrading or releasing harmful fumes. Choosing the correct lining material ensures safety and optimal non-stick performance.
How do I prevent cookies from sticking to the baking sheet?
Line your sheet with parchment or silicone mats, which create a non-stick surface that prevents cookies from adhering and tearing during removal. Lightly spraying or brushing with oil can help, but the key is to use a reliable non-stick surface to avoid uneven sticking. Allow cookies to cool briefly before transferring them — this cooling period helps the cookies contract slightly, making them easier to lift without breaking. Proper lining and cooling techniques preserve the cookies’ shape and appearance.
Is it necessary to flour the pan after greasing?
For cakes and quick breads, dusting with flour or cocoa powder after greasing creates an additional non-stick barrier, especially for recipes with delicate textures or high sugar content that tend to stick more. This extra step ensures the batter doesn’t bond with the pan, facilitating easy release. For cookies or bars baked in lined pans, this step is often unnecessary because parchment or silicone mats alone provide sufficient non-stick properties. The choice depends on your recipe and pan type, but understanding when to flour helps optimize release and presentation.
Are silicone mats better than parchment paper?
Silicone mats are reusable, eco-friendly, and highly durable, making them ideal for frequent baking and reducing waste over time. Parchment paper is disposable and more convenient for occasional use or when you need quick cleanup. Both materials are effective at preventing sticking when used properly—silicone mats provide a consistent non-stick surface that can withstand high heat, while parchment is versatile and easy to cut to size. Your choice depends on your baking frequency, environmental considerations, and specific needs for each recipe.

Reynolds Kitchens Unbleached Parchment Paper Roll, Non Stick Parchment Paper for Cooking and Baking, Oven Safe up to 425 Degrees, Chlorine-Free, 45 Feet x 12 Inches, 45 Total Sq. Ft.
Package Includes: One (1) Reynolds Kitchens Unbleached Parchment Paper Roll measuring 45 feet long by 12 inches wide…
As an affiliate, we earn on qualifying purchases.
As an affiliate, we earn on qualifying purchases.
Conclusion
Getting your pans perfectly prepared isn’t just about avoiding mess; it’s about elevating your entire baking game. When you master these simple techniques, your treats will come out looking flawless—every time.
So next time you bake, picture that smooth release, that perfect slice, and the pride in knowing you nailed it. Your kitchen’s secret weapon? Properly greased and lined pans.