
TL;DR
The two-stage mixing method divides dough preparation into two phases, boosting gluten development and ingredient integration. It results in better texture, flavor, and consistency—perfect for artisanal bread and pastries. Even home bakers can master this for professional-quality results.
Dividing dough mixing into two stages enhances gluten development and improves dough elasticity.
A 20-30 minute autolyse in the first stage allows natural gluten formation and hydration, leading to better rise and texture.
Adding fats, sugars, or mix-ins after gluten begins forming ensures even distribution without weakening the dough.
Avoid rushing the first stage or overmixing during the second; both can compromise your final bake.
This technique is especially valuable for high-hydration, enriched, or delicate doughs like sourdough and croissants.
Why the Two-Stage Mixing Method Makes Your Dough Stronger
Imagine your dough as a web of tiny strands. The two-stage method helps build a stronger, more elastic web by giving gluten the time it needs to develop. During the first stage, you hydrate the flour and let gluten strands form naturally—this is called autolyse. When you add the remaining ingredients in the second stage, those gluten strands are already in place, ready to stretch and trap gas.
This process creates a dough that’s easier to handle, rises higher, and has a finer crumb. For example, if you’ve ever struggled with a dense loaf, this method can help fix that by ensuring your gluten network is fully developed before adding fats or sugars that might weaken it. The deeper implication is that proper gluten development during early stages allows for better gas retention during proofing and baking, leading to a lighter, airier crumb. However, this approach also requires patience; rushing the first stage can result in underdeveloped gluten, which compromises structure and volume. The tradeoff is that while it takes more time upfront, the final product benefits from enhanced strength and resilience, making the extra effort worthwhile for artisan-quality results.

Stainless Steel Spiral Dough Hook Replacement for KitchenAid 4.5QT & 5QT Bowl Tilt-Head Stand Mixers, Rust-resistant & Easy Clean, Efficient Kneading for Bread, Pizza, Pasta, Cookies
Note: Compatible with almost all KitchenAid 4.5-quart and 5-quart tilt-head stand mixers. You can find your model on…
As an affiliate, we earn on qualifying purchases.
As an affiliate, we earn on qualifying purchases.
Step-by-Step: How to Master the Two-Stage Mixing Technique
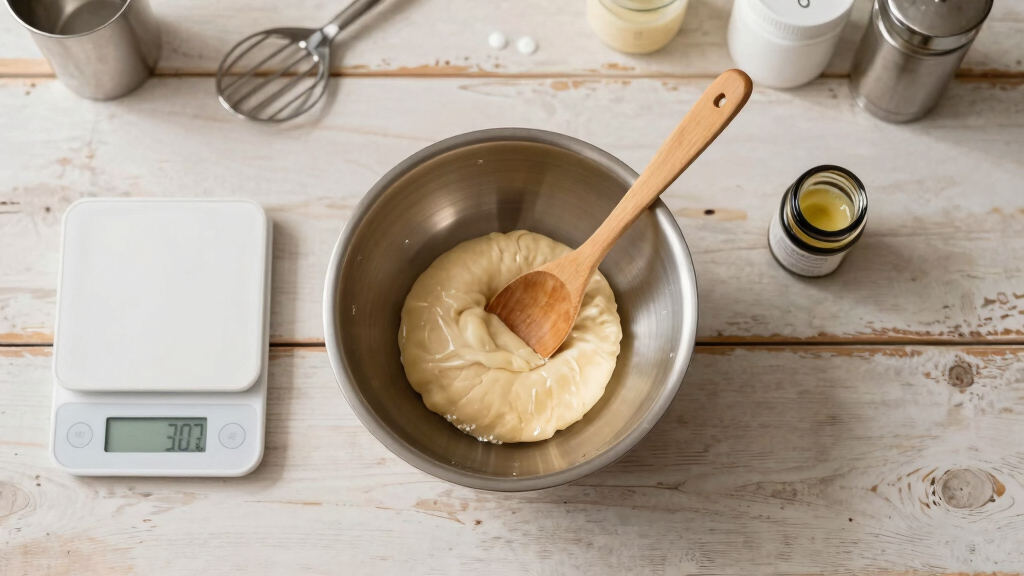
- Combine flour and water: Mix until just combined, no dry flour remains. Let it rest for 20-30 minutes—a process called autolyse. This rest period is crucial because it allows gluten strands to begin forming naturally and the flour to fully hydrate, which improves dough extensibility and gas retention. Skipping or shortening this step can lead to weaker gluten networks that struggle to trap gases effectively, resulting in denser bread. The balance here is timing; too short, and you miss out on these benefits; too long, and the dough may become overly slack or begin to ferment prematurely.
- First rest period: During this time, gluten forms naturally, and the flour fully hydrates. You’ll notice the dough becomes more cohesive and slightly elastic. This is the window where gluten structure starts to develop without mechanical intervention, setting a foundation for strength that will support better fermentation and shaping later.
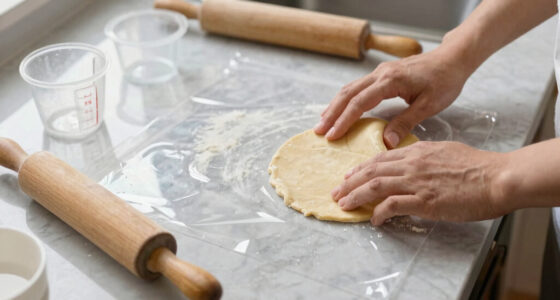
- Add remaining ingredients: Incorporate salt, fats, sugars, or mix-ins. Mix thoroughly until evenly distributed. Adding these after the initial gluten formation prevents weakening the network with overmixing and ensures even ingredient distribution, which impacts both flavor and texture. This staged addition allows for better control over dough consistency and minimizes the risk of overworking the gluten, which can lead to tough bread.
- Second mixing stage: Knead or mix until the dough is smooth and elastic, usually 5-10 minutes with a stand mixer or by hand. This step refines the gluten network, aligning it for optimal strength and extensibility. Proper kneading here is essential; under-kneading will leave the dough weak, while over-kneading can make it overly tight and difficult to shape. The key is to develop a dough that’s resilient yet pliable, capable of trapping gases and rising to a desirable volume.
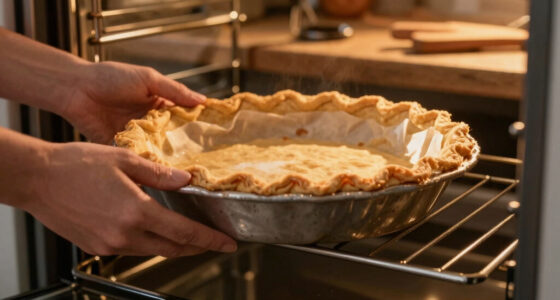
- Fermentation and shaping: Proceed with bulk fermentation, shaping, and final proofing as usual. The improved gluten structure from the staged process results in better gas retention, leading to a more open crumb and increased oven spring. The tradeoff is that this method may require slightly more planning, but the payoff is a more consistent, bakery-quality loaf.
This simple sequence boosts gluten strength and ensures even ingredient distribution, resulting in a superior bake every time. The deeper understanding here is that each stage builds upon the previous, creating a synergistic effect that enhances final dough performance and baked product quality.

Sourdough Proofing Basket Gift Set, 9" Round and 10" Oval Banneton Bread Baking Supplies, Sourdough Baskets with Bread Lame, Danish Whish, Bowl Scraper, Sourdough Scraper, and Linen Liner
What You Get: 1 9-inch round banneton bread proofing basket , 1 10-inch oval proofing basket, 2 liners,…
As an affiliate, we earn on qualifying purchases.
As an affiliate, we earn on qualifying purchases.
Compare Traditional Single-Stage vs. Two-Stage Mixing
| Feature | Single-Stage Mixing | Two-Stage Mixing |
|---|---|---|
| Gluten Development | Develops during mixing and fermentation | Begins during first stage, stronger network formed |
| Ingredient Incorporation | All ingredients added together | Fats, sugars, and mix-ins added after gluten forms |
| Handling Ease | Can be sticky or tough if overmixed | More elastic, easier to shape |
| Resulting Texture | Variable, sometimes dense or uneven | Finer crumb, better rise |
Choosing the right method depends on your goals. For rustic loaves, single-stage might be enough. But if you want bakery-quality bread with a light, airy crumb, the two-stage approach delivers a noticeable difference. The deeper implication is that tailoring your process to your desired outcome can significantly influence the final product’s texture, appearance, and flavor. While single-stage mixing offers simplicity and speed, the two-stage method provides a more controlled development of gluten and ingredient integration, which is particularly advantageous for delicate or high-hydration doughs where structure is critical. The tradeoff here is between convenience and quality—understanding this allows bakers to make informed choices based on their priorities.

7PCS Dough Scraper Set, Plastic Bench Scraper, Multipurpose Bowl Scraper for Kitchen, Baking, Cake, Bread, Pizza, Pastry
【7-Color Variety】:A set of 7 colorful scrapers offers ample quantity and style options, meeting daily baking needs for…
As an affiliate, we earn on qualifying purchases.
As an affiliate, we earn on qualifying purchases.
Common Mistakes That Ruin Your Two-Stage Dough
Even seasoned bakers can slip up. The biggest mistake? Rushing the first stage. Skipping or shortening the autolyse means less gluten development, leading to dense loaves. This shortcut might seem time-saving, but it compromises the dough’s ability to trap gases effectively, resulting in a less airy crumb and reduced oven spring. Another pitfall is overmixing in the second stage, which can break down gluten strands and weaken the structure. Overmixing can also lead to excessive dough elasticity or toughness, making shaping difficult and affecting final texture. Temperature matters, too. Using water that’s too hot can kill yeast or make gluten too tough, while cold water slows fermentation. Maintaining moderate temperatures—around 75-80°F (24-27°C)—ensures optimal gluten development and yeast activity. For example, a baker trying to speed up the process by skipping the rest period might end up with a loaf that’s flat and gummy inside, highlighting how these mistakes directly impact the final quality. Being mindful of timing, temperature, and mixing intensity is essential to avoid these pitfalls and achieve the best results.
Northriver Casting 9×5 Inch Cast Iron Loaf Pan with Lid | Bread Baking Pan | Even Heat Distribution for Homemade Bread, Cake, and Meatloaf | 2 Piece Set
【BASIC CAST IRON BREAD PANS】: Northriver Casting bread loaf pan set is fully made of high grade cast…
As an affiliate, we earn on qualifying purchases.
As an affiliate, we earn on qualifying purchases.
How This Method Fits Into Your Overall Baking Routine
Integrating the two-stage method into your routine is straightforward. It works well with both stand mixers and hand kneading. The key is timing: plan for a 20-30 minute autolyse before adding remaining ingredients. To streamline your process, consider preparing ingredients in advance or setting timers to remind you when to incorporate the second batch. This small step can significantly improve dough extensibility and final texture. If you bake regularly, establishing a routine—such as mixing in the morning and baking later—helps ensure consistency. It also encourages patience, which is crucial for this technique’s success. For instance, if you’re baking bread on a Sunday morning, mix your flour and water first thing, then go about your day. When you’re ready, add the remaining ingredients and bake—your dough will have developed a more robust gluten network, making shaping easier and the crumb lighter. The deeper benefit is that this method fosters greater control over dough behavior, leading to more predictable, professional-style results with less guesswork.
The Best Recipes to Try Using the Two-Stage Mix
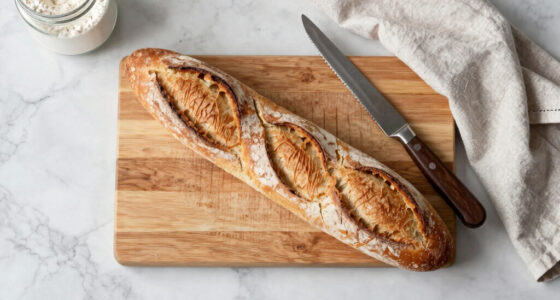
This method shines in recipes where gluten strength and ingredient precision matter. Think sourdough bread, enriched brioche, or flaky croissants. Any recipe with high hydration or delicate ingredients benefits from this approach. For example, a batch of classic French baguettes benefits from the initial hydration and gluten formation, resulting in a crust that’s crisp and crumb with a fine, open structure. Enriched doughs—like brioche—also gain from this staged process, as it evenly distributes butter and eggs without overworking the dough. The staged approach allows for better control over hydration levels, ensuring the dough remains supple yet strong enough to hold its shape during proofing and baking. Experimenting with your favorite recipes using this technique can reveal subtle improvements in dough resilience, oven spring, and crumb structure, elevating your home baking to a professional level.