
TL;DR
Browning butter without burning it requires low to medium heat, continuous stirring, and quick recognition of color and aroma cues. Using the right pan and monitoring temperature can make this simple process foolproof, enhancing your dishes with rich, toasted flavor.
Always use medium to medium-low heat to prevent burning.
Constant stirring and visual cues are your best tools for perfect browning.
A light-colored or stainless steel pan helps you see the color change clearly.
Remove the butter from heat the moment it reaches a golden amber hue and nutty aroma.
Using a thermometer can help maintain precise temperature control.
How to Brown Butter Without Burning It
Low, controlled heat transforms ordinary butter into a deeply nutty ingredient. The winning formula is simple: use a light pan, keep the milk solids moving, and remove the butter the instant it reaches golden amber.
Slow melt. Constant motion. Fast finish.
Browning is the toasting of butter’s milk solids. Moderate heat gives those particles time to color evenly before they cross from fragrant to bitter.
Melt gently
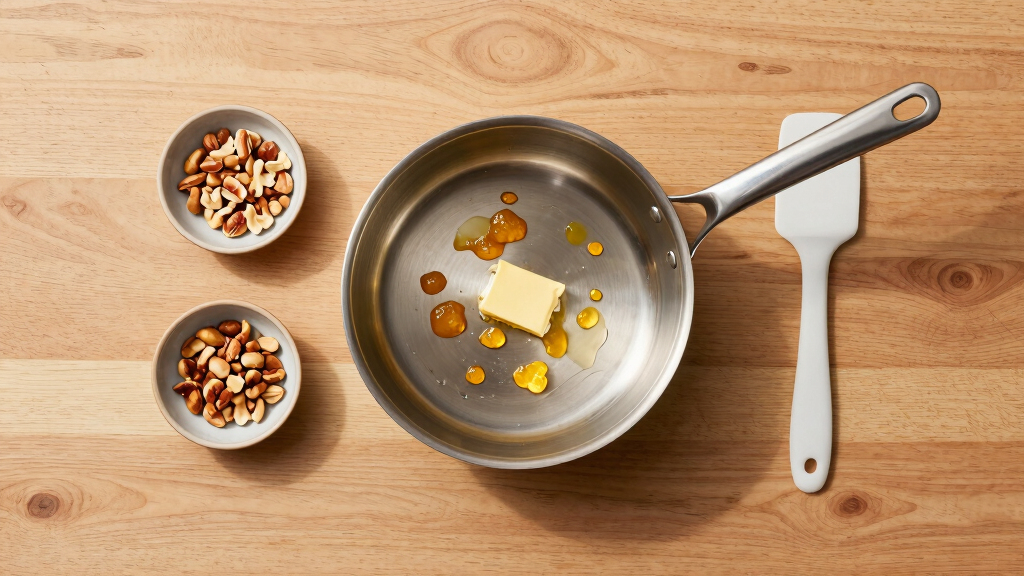
Place butter in a light-colored stainless steel pan over medium to medium-low heat. Let it melt evenly without rushing.
Stir continuously
Move a spoon or spatula across the base in steady strokes. This redistributes the milk solids and prevents scorching hot spots.
Remove and transfer
At deep golden amber with a strong nutty aroma, take the pan off the burner and pour everything into a cool container.
Read the butter with three senses
Foam can hide the bottom of the pan, so color alone is not enough. Watch the milk solids, listen to the bubbling, and notice when the aroma changes.
The color window
Your target sits between yellow melted butter and dark, bitter solids.
The cue checklist
Why butter burns so quickly
Butter is roughly 80% fat, 16% water, and 4% milk solids. Those milk solids create the prized toasted flavor—but at excessive heat they blacken, producing bitter flavor and dark residue.
Stay inside the control zone
A digital thermometer can reduce guesswork. Aim for approximately 300–325°F (149–163°C), using the visual and aroma cues as the final test.
The burn threshold
Near this point, exposed milk solids can rapidly smoke and blacken. High heat, inattention, or leaving the butter in the hot pan makes overshooting far more likely.
Your pan changes what you can see
Visual feedback is the easiest safeguard, especially for beginners. A pale cooking surface reveals subtle changes that dark pans conceal.
| Pan type | Visual clarity | Heat behavior | Best feature | Watch out for |
|---|---|---|---|---|
| Light stainless steel | Responsive and easy to control | Immediate view of color and milk solids | Handle carefully to avoid warping or scratches | |
| Dark non-stick | Often gentle and convenient | Minimal sticking and quick cleanup | Dark surface masks the amber transition | |
| Cast iron | Excellent retention; slower response | Stable, even cooking once heated | Carryover heat and limited visual cues |
Modern tools, smarter control
The classic stovetop method needs no special gear, but temperature tools and controlled alternatives can improve repeatability.
Digital thermometer
Track the butter directly and lower the heat if it climbs too quickly toward the burn zone.
Infrared sensor
Scan pan temperature to identify overheating, while remembering that surface and butter readings may differ.
Oven or sous-vide
More even environments reduce hot spots, although they are slower and less intuitive than the stovetop.
From solid butter to toasted flavor
Each stage sets up the next. The last transition is short, so preparation matters: have the cool receiving bowl ready before you begin.
If the butter smells scorched, looks nearly black, or leaves blackened particles, discard it. Slight bitterness will carry into sauces and baked goods. Hot fat can cause serious burns, so use dry utensils and keep water away from the pan.
How to Spot Perfectly Browned Butter in Real Time
Knowing when your butter reaches that perfect golden hue is everything. It’s a visual and olfactory dance. As the milk solids toast, the butter shifts from pale yellow to a warm, honey-golden color. You’ll smell a rich, nutty aroma—like toasted almonds or hazelnuts—filling your kitchen. The butter will foam briefly, then settle down, and tiny dark specks might appear at the bottom of the pan. That’s your cue to act fast.
Use a light-colored or stainless steel pan. Dark pans hide the color change and can mislead you into overcooking. Keep your stove at medium to medium-low. Stir constantly—silky, rhythmic strokes ensure even heat distribution. This prevents hot spots that can quickly turn burnt. Once the color deepens to a rich amber and the aroma intensifies, remove the pan immediately. If you wait too long, the milk solids can burn, turning bitter and blackening the butter. Recognizing these cues is crucial because even a few seconds’ delay can result in a bitter, burnt flavor that ruins your dish and wastes your effort.
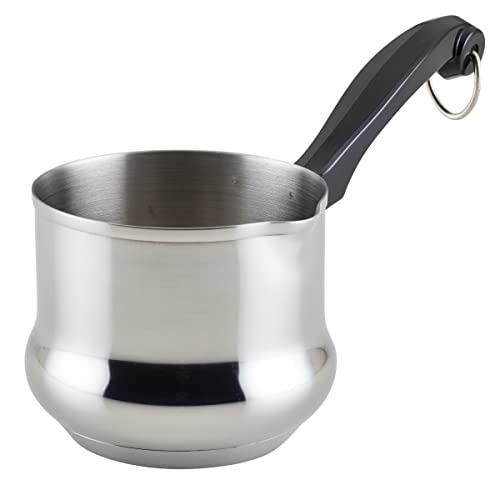
Farberware Classic Series Stainless Steel Butter Warmer, Melting Pot, Milk Warmer Pot
- Material: Stainless steel with aluminum core
- Design: Mirror finish for classic look
- Pouring Spout: Convenient for sauces and butter
As an affiliate, we earn on qualifying purchases.
As an affiliate, we earn on qualifying purchases.
3 Simple Steps to Brown Butter Without Burning It
- Melt butter slowly: Place your butter in a light-colored pan over medium or medium-low heat. Let it melt gently, watching the liquid turn clear and creamy. This initial stage is crucial because rushing it can cause uneven melting, leading to hot spots that burn the milk solids.
- Stir constantly: Use a spoon or spatula to keep the milk solids moving evenly throughout the butter. Think of it as stirring a delicate sauce—constant movement prevents sticking and uneven browning. This step is vital because stationary butter can develop hot spots, increasing the risk of burning. Pay close attention to the color and smell; the transition from pale yellow to golden is your cue.
- Remove at the right moment: When the butter turns a deep golden amber and emits a nutty aroma, take it off the heat immediately. Transfer it to a cool container to halt the cooking process. Waiting too long risks the milk solids turning black and bitter, which can happen within seconds once the perfect color is reached. This is similar to roasting nuts—timing is everything, and removing at the right moment ensures maximum flavor without bitterness.
This step-by-step approach, coupled with attentive observation, ensures you achieve that toasted, nutty flavor without crossing into burnt territory. Patience and vigilance are your best allies in this process, much like tending a delicate flame or watching a soufflé rise—small cues make all the difference.

0.5 Sec Instant Read Meat Thermometer Digital for Cooking, Red
- Fast Reading Speed: 0.5 seconds for quick results
- High Precision: ±0.5℉ accuracy with professional sensor
- Long Probe & Lock: 4-inch probe with temperature lock feature
As an affiliate, we earn on qualifying purchases.
As an affiliate, we earn on qualifying purchases.
Comparison: Using Different Pans for Browning Butter
| Pan Type | Pros | Cons |
|---|---|---|
| Light-colored stainless steel | Easy to see color change, good heat control, allows for quick visual assessment of browning progress, which is essential for timing and preventing burning. | Slightly more delicate, needs careful handling to avoid warping or scratching. |
| Dark non-stick | Less sticking, easy to clean, and convenient for quick cleanup. | Harder to see browning progress, which can lead to overcooking or burning if not vigilant. The dark surface can mask subtle color changes, making it harder to judge the perfect moment to remove the butter. |
| Cast iron | Excellent heat retention and even cooking, providing a stable temperature environment that can help prevent hot spots. | Heavy, takes longer to heat up, and the dark surface offers limited visual cues, increasing the need for temperature monitoring rather than visual cues alone. It’s more forgiving but requires experience to use effectively. |
Choosing the right pan impacts not just ease but also the quality of your browned butter. For example, a light-colored stainless steel pan provides immediate visual feedback, which is invaluable for beginners or those seeking precision. Cast iron offers steady heat, making it more forgiving for prolonged heating, but the lack of visual cues demands reliance on temperature monitoring. Non-stick pans are convenient but can obscure subtle color changes, increasing the risk of overcooking. Consider your comfort with visual cues and control when selecting your pan, as this choice directly influences the success of your browning process.

CAROTE Nonstick Frying Pan, 8 Inch Classic Granite Skillet
- Eco-friendly Material: Non-stick granite, PFOA free
- Easy to Clean: Wipes clean with paper towel or water
- Universal Compatibility: Works on all stove types, including induction
As an affiliate, we earn on qualifying purchases.
As an affiliate, we earn on qualifying purchases.
Why Butter Burns and How to Prevent It
Butter burns because its milk solids reach their smoke point—around 350°F (177°C)—and then start to blacken and burn. Think of it like caramelizing sugar: once the temperature exceeds a certain point, the sugars break down and turn bitter or black. When you crank up the heat or walk away, those milk solids can quickly overreach their safe temperature, leading to a burnt, acrid smell and bitter taste. This is why patience and moderate heat are essential—rushing the process or leaving it unattended is like leaving sugar on high heat without stirring, risking burnt, unusable butter.
For example, if you turn your burner to high expecting quick results, you might see the butter brown too fast and then suddenly blacken, much like a pancake that’s been flipped too late. Using a digital thermometer to monitor temperature—keeping it between 300–325°F (149–163°C)—acts as a safeguard, much like a cooking thermometer helps prevent overcooked meats. If you notice the butter smelling scorched or turning dark too quickly, immediately lower the heat. Recognizing these signs early is crucial because once the milk solids burn, the flavor is compromised, and the butter becomes unusable for recipes that require a clean, nutty flavor.

DD-life 3 Pcs Silicone Chocolate Melting Pot, Butter Sauce Milk Microwave Baking Pouring Tool
- High-quality silicone material: Made of durable, high-quality silicone
- Set of 3 colorful pots: Includes three differently colored silicone pots
- Wide temperature range: -40°C to 230°C temperature resistance
As an affiliate, we earn on qualifying purchases.
As an affiliate, we earn on qualifying purchases.
Latest Tech and Tricks for Perfect Browning
Modern tools have revolutionized how we brown butter. Digital thermometers and infrared sensors provide precise temperature readings, allowing you to maintain a consistent, optimal heat—much like having a chef’s intuition in your hand. For example, using an infrared sensor to scan your pan’s surface can tell you whether the temperature is ideal, helping you avoid the guesswork that often leads to burnt butter. Some chefs are experimenting with oven-browning or sous-vide methods, which offer more even, controlled heat environments—think of these as the slow-cooker approach to browning, reducing the risk of hot spots.
Infusing flavors like garlic or herbs during browning is trending, but it requires even more attention since these additions can burn quickly if not monitored carefully. Clarifying butter beforehand—removing water and milk solids—can also make the process more predictable and reduce the risk of burning, especially for those new to this technique. However, some chefs prefer unclarified butter for its richer flavor, accepting the increased need for vigilance. These innovations and techniques help cooks achieve consistent results, making browning butter both easier and more reliable.
What You Need to Know About Butter Composition & Burning
Butter is approximately 80% fat, with the remaining 20% made up of water and milk solids. The milk solids—proteins and sugars—are what toast and develop that characteristic nutty aroma during browning. But these solids are also the first to burn once exposed to high heat, turning bitter and black. Think of it like roasting coffee beans: the sugars and proteins toast to bring out flavor, but over-roasting quickly turns them bitter. This dual nature means that controlling temperature is vital; too hot or too long, and your butter turns from perfectly toasted to charred and inedible.
Timing is critical—properly browned butter reaches its peak flavor in just 3 to 5 minutes at the right temperature. Beyond this window, the milk solids start to burn rapidly, much like sugar caramelizing beyond its ideal point. Understanding this chemical reaction helps you appreciate why even small adjustments in heat or timing can make a big difference in flavor and texture. Recognizing these nuances allows you to produce consistently delicious browned butter, enhancing your dishes without risking bitterness or waste.
Top 5 Questions About Browning Butter—Answered
- How do I prevent my butter from burning? Use moderate heat, stir continuously, and watch for color and aroma changes. Think of it as tending a delicate flame—small adjustments keep it just right, preventing bitter, burnt flavors.
- Can I brown butter in a non-stick pan? Yes, but a light-colored pan helps you see the browning process better. This is crucial because visual cues guide your timing and prevent overcooking, much like watching a cake rise through a clear glass.
- How long does it take to brown butter? Usually 3–5 minutes, depending on heat and pan type. This window is critical; staying attentive ensures you catch the perfect moment before burning.
- What if my butter smells burnt? Discard it. Burning creates bitter flavors and can be harmful, much like burnt toast—no amount of toasting can fix the flavor once it’s gone too far.
- Is browned butter safe to eat if slightly burnt? It’s better to avoid eating burnt butter—it can taste bitter and cause stomach upset. The tradeoff is clear: better to start fresh than risk an unpleasant taste or digestive discomfort.
Frequently Asked Questions
Can I brown butter in a microwave?
While technically possible, browning butter in a microwave is tricky. Microwaves heat unevenly, increasing the risk of hot spots that can burn the milk solids quickly. It’s best to stick with stovetop methods for control and even heating.
How do I store browned butter safely?
Cool the browned butter to room temperature, then transfer it to a sealed container. Store in the refrigerator for up to a week or freeze for longer. Reheat gently to preserve flavor without overcooking.
Is browned butter healthier than regular butter?
Browning butter doesn’t significantly change its nutritional profile, but it enhances flavor without added ingredients. Just be mindful of portion sizes, as butter remains calorie-dense and high in saturated fat.