TL;DR
Perfect lemon bars depend on the right egg-to-liquid ratio, accurate measurements, gentle baking, and thorough cooling. The filling continues to firm as it cools, so patience is key for clean, creamy slices.
Ever cut into a lemon bar and wonder why some slices are smooth and others are a gooey mess? The secret isn’t just in the ingredients, but in timing, technique, and patience. Achieving that perfect set—firm but tender—comes down to understanding how the filling behaves during and after baking.
If you’ve ever had bars that slid apart or cracked when sliced, you’re not alone. Many bakers struggle with the delicate balance needed. This guide will walk you through the key principles and practical tips to turn out lemon bars that slice cleanly and hold their shape beautifully.
Remove lemon bars when the center has a slight wobble for perfect firmness.
Use a thermometer to verify the filling reaches 170–175°F during baking.
Prebake the crust until lightly golden to prevent sogginess and support the filling.
Cool completely at room temperature before refrigerating for clean slices.
Accurate measurements and gentle baking are key to achieving a smooth, sliceable lemon bar.
The Secret to Perfectly Set Lemon Bars
Clean, creamy slices come from balancing egg structure, liquid, heat, and time. Remove the bars when the center still moves gently as one unit, then let cooling finish the set.
Six variables control the set
Lemon filling behaves like a delicate custard. A small change in depth, liquid, temperature, or cooling time can shift it from silky to runny—or from tender to rubbery.
Balance eggs and liquid
Egg proteins build the custard network. Extra lemon juice without enough egg or starch can create loose, weeping bars.
Measure by weight
A scale keeps flour, sugar, and liquid consistent. Small volume-measurement errors can noticeably change the final texture.
Prebake the crust
A lightly golden shortbread base resists sogginess and supports the filling when the slab is lifted and sliced.
Use a warm crust
Pouring the filling onto a freshly baked, warm crust encourages the layers to bond and reduces separation.
Bake gently
Steady heat sets the eggs smoothly. Excessive heat can scramble proteins, crack the surface, and create a grainy bite.
Let cooling finish the job
The filling firms as heat dissipates and the custard network stabilizes. Warm bars are not ready for judgment or slicing.
From loose filling to clean slices
Follow the sequence. Each stage prepares the structure for the next, and skipping the cooling stages can undo otherwise accurate baking.
Prebake
Line the pan with parchment and bake the crust until lightly golden.
Mix precisely
Weigh ingredients, rub zest into sugar, and whisk without excessive aeration.
Pour warm
Add the strained filling while the crust remains warm for stronger adhesion.
Bake to a wobble
Look for set edges, a matte surface, and one gentle movement in the center.
Cool, then chill
Reach room temperature before refrigerating. Slice only when thoroughly cold.
Read the filling—not just the clock
Time is only a guide because pan material, filling depth, oven calibration, and recipe composition all affect the bake.
The setting window
Thermometer placement and recipe composition can shift the exact reading. Pair temperature with visual cues: set edges, a matte surface, and a center that moves as one unit.
Three movement signals
Your pan changes the heat
Pan material affects browning, edge cooking, and carryover heat. Changing pan size also changes filling depth and baking time.
| Pan type | Heat behavior | Likely effect | Best adjustment | Predictability |
|---|---|---|---|---|
| Light metal | Conducts heat efficiently and evenly | Balanced crust browning and controlled edges | Follow the recipe, then verify the center | ✓Most reliable |
| Dark metal | Absorbs heat quickly | Crust and edges can brown before the center sets | Watch early and consider slightly gentler heat | ~Needs attention |
| Glass | Heats moderately and retains heat longer | Edges continue cooking after oven removal | Remove at the first correct wobble | ~More carryover |
| Ceramic | Can heat slowly and unevenly | Center and edges may set at different rates | Use temperature and movement cues together | ~Recipe dependent |
Best baseline · A parchment-lined, light-colored metal pan
What builds the custard
Every ingredient changes structure, tenderness, moisture, or aroma. Reliable substitutions must preserve those functions—not merely replace volume.
The structural backbone
Proteins coagulate during baking and form the network that allows each bar to hold its shape.
Tenderness regulator
Balances acidity and raises the temperature at which egg proteins set, helping prevent a harsh, firm custard.
Flavor plus liquid
Fresh lemon juice provides acidity and brightness, but excess volume can overwhelm the filling’s structure.
Aroma without dilution
Concentrated citrus oils intensify lemon character without adding significant liquid to the custard.
Structural insurance
Flour or starch binds moisture, supports the egg network, and makes the chilled slab easier to slice.
Flavor and tenderness
Butter enriches the shortbread base and may add richness to the filling in recipes designed for it.
Why lemon bars fail to set
Diagnose the symptom before changing the recipe. Most problems trace back to measurement, heat, pan geometry, or cutting too soon.
Liquid center
Likely causes include underbaking, a cool-running oven, too much lemon juice, or too few eggs.
Fix · Verify oven heat and bake until the center no longer sloshesMoisture on the surface
An imbalanced egg-to-liquid ratio or an untested substitution may leave water insufficiently bound.
Fix · Return to weighed ingredients and the tested recipe ratioWeak bottom crust
The base may have been underbaked, or the filling may have rested too long on a cool, soft crust.
Fix · Prebake until lightly golden and fill while warmDry surface
High heat or waiting for complete rigidity can over-coagulate the eggs and contract the filling.
Fix · Remove at a gentle wobble and avoid excessive oven heatRagged slices
Warm custard smears and pulls. Even correctly baked bars need time for the structure to stabilize.
Fix · Chill thoroughly and wipe the knife after every cutOverdone edges
A dark or heat-retentive pan can cook the perimeter faster than the center, especially with deep filling.
Fix · Match the specified pan size and monitor carryover heatThe clean-slice sequence
The final cut is the visible result of four connected controls. A weakness at any point can compromise the entire slab.
Measure
Balanced eggs, liquid, sugar, and starch.
Bake
Steady temperature and a warm, prebaked crust.
Observe
Matte surface, set edges, and one gentle wobble.
Cool
Room temperature first, then at least two hours chilled.
Why Your Lemon Bars Might Be Too Runny — And How to Fix It
The most common reason lemon bars don’t set properly is underbaking. The filling may look firm at the edges, but if the center still jiggles or sloshes, it’s not ready. Think of it like a custard—if it’s still liquid, it needs more time in the oven. This is crucial because the filling’s texture depends on reaching the right internal temperature, much like a delicate custard or flan.
Using a reliable temperature is crucial. The filling should reach about 170–175°F. Many ovens run cooler, so an oven thermometer can save you from underbaking. Also, avoid pouring hot filling onto a cold crust—wait until it’s lightly golden and cooled just enough to prevent separation. If you pour hot filling onto a cold crust, the sudden temperature change can cause the filling to separate or become rubbery.
Before slicing, check the texture: a slight wobble in the middle indicates it’s just right. Trust your eyes and touch, not just the clock. Remember, the filling continues to firm as it cools, so pulling it out too early guarantees a runny mess. For example, if you remove the bars immediately after baking, the residual heat will keep the filling liquid, resulting in slices that are difficult to serve neatly.
digital kitchen thermometer for baking
As an affiliate, we earn on qualifying purchases.
As an affiliate, we earn on qualifying purchases.
Step-by-Step: How to Bake Lemon Bars So They Set Perfectly
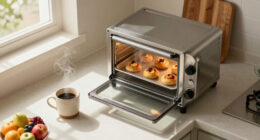
- Prebake the crust. Bake until it’s lightly golden, about 15 minutes at 350°F. This creates a sturdy base that prevents sogginess. A well-baked crust acts as a stable foundation, much like a sturdy building’s footing—if it’s underbaked, the weight of the filling can cause sogginess or collapse.
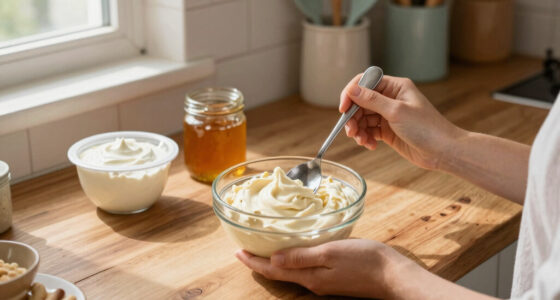
- Mix your filling accurately. Use a kitchen scale for eggs, sugar, and flour. Combine lemon juice, zest, eggs, sugar, and starch until smooth. Precise measurement matters because too much liquid or too little thickener can tilt the balance, leading to a filling that is either too runny or too firm.
- Pour onto a warm crust. This helps the filling adhere and reduces separation. Imagine pouring honey onto toast—if the toast is too cold, the honey hardens quickly and doesn’t spread evenly. Similarly, a warm crust allows the filling to settle smoothly, promoting uniform setting.
- Bake gently. Keep the oven at a steady 350°F or lower if advised. Watch for a matte surface and a slight wobble in the center. Lower temperatures and gentle baking reduce the risk of cracks and over-baking, which can make the filling rubbery or dry.
- Check doneness. The edges should be set, and the center should jiggle slightly but not slosh. Think of it like a jiggly pudding—if it wobbles too much, it’s underdone; if it’s too firm, it’s overbaked. The goal is a delicate balance, ensuring the filling is just set enough to hold shape but still tender.
- Cool completely before refrigerating. Let the bars reach room temperature, then chill for at least two hours. Cooling allows the filling to continue setting, much like a custard, which improves sliceability and texture. For example, rushing to cut the bars while warm can cause the filling to crack or crumble.
non-stick tart pan with removable bottom
As an affiliate, we earn on qualifying purchases.
As an affiliate, we earn on qualifying purchases.
Compare Common Pans and How They Affect Your Lemon Bars
| Pan Type | Heat Conductivity | Effect on Baking |
|---|---|---|
| Light-colored metal | High | Predictable baking, crust browns evenly |
| Dark metal | Very high | Crust browns quickly, watch carefully |
| Glass | Moderate | Retains heat longer, edges may overbake |

TILUCK Stainless Steel Measuring Cups & Spoons Set, Cups and Spoons
- Includes Multiple Sizes: Various cups and spoons for all needs
- Premium Food-Grade Steel: Rust-resistant, non-toxic stainless steel construction
- Easy to Clean: Dishwasher safe, stackable design
As an affiliate, we earn on qualifying purchases.
As an affiliate, we earn on qualifying purchases.
How to Know When Your Lemon Bars Are Perfectly Done
Look for a matte or slightly dull surface with edges that are firm but not cracked. The center should wobble gently like a Jell-O shot—no sloshing or liquid pools. Think of it as checking a custard—if it jiggles slightly but holds its shape, it’s ready.
If you have a digital thermometer, aim for about 170–175°F in the center. Remember, carryover heat continues after removing from the oven, so a slight jiggle is good. This is similar to how a cheesecake continues to firm up after baking, which is why monitoring temperature is more reliable than just visual cues.
Don’t rely solely on color or time. The real test is the feel and appearance. Removing bars too early results in a runny, unstable filling, while overbaking leads to cracks and dryness. Think of it like baking a soufflé—timing and gentle handling are key to achieving that perfect rise and delicate texture.
refrigerator with precise temperature control
As an affiliate, we earn on qualifying purchases.
As an affiliate, we earn on qualifying purchases.
What Each Ingredient Does to Help Your Bars Set Properly
Eggs are the backbone—coagulating during baking to give structure. Sugar not only sweetens but raises the egg proteins’ setting temperature, giving you tenderness. Lemon juice adds flavor and acidity but also adds liquid, so balance is key. For instance, too much lemon can make the filling overly loose, while too little diminishes flavor.
Adding flour or starch acts as a stabilizer, preventing runniness, especially if you tweak ingredients. Think of it as adding scaffolding to a building—without it, the structure can collapse or become unstable. The zest intensifies lemon aroma without thinning the filling. Remember, fresh lemon juice and zest produce the brightest, most balanced flavor.
Refinements That Make Your Lemon Bars Stand Out
Precision matters. Weigh ingredients for consistency, especially flour and sugar. Use an instant-read thermometer to check custard temperature. Straining the filling removes chalazae and zest lumps, ensuring a silky texture. For example, a smooth filling avoids lumps that can cause uneven setting or a grainy mouthfeel.
Rubbing lemon zest into sugar releases oils that boost aroma—think of it like blooming spices in cooking. Chill the bars thoroughly—preferably overnight—to help the filling firm up. For flavor variation, switch to Meyer lemons, but reduce sugar cautiously because they’re sweeter. This extra step of chilling allows the proteins and starches to fully hydrate and set, resulting in cleaner slices.
Finally, wipe your knife after each cut to get sharp, bakery-style edges. For gluten-free options, test well-blended nut flours or gluten-free blends instead of untested substitutions. These refinements ensure a professional appearance and a perfect texture every time.
Frequently Asked Questions
Why are my lemon bars runny?
If your lemon bars are too liquid, they probably needed more baking time or had too much lemon juice. Inaccurate measurements or using a pan that conducts heat unevenly can also cause runniness. Baking until the filling just slightly jiggles ensures a firm, sliceable result.
Will lemon bars firm up as they cool?
Yes. The filling continues to set as it cools, especially after refrigeration. Keep in mind, removing the bars from the oven when they are just slightly underdone yields the best texture—firm yet tender, not rubbery or runny.
Should lemon bars jiggle when done?
Absolutely. A gentle, unified wobble in the center means they’re just right. If they ripple or slosh, they need more time. Overbaking causes cracks and dryness, so aim for that perfect jiggle, then let them cool completely.
Do lemon bars need refrigeration?
Yes. Because the filling contains eggs and moisture, store them covered in the refrigerator after cooling. Proper chilling helps the filling firm up and makes slicing easier, plus it keeps them fresh longer.
How long should I chill before slicing?
A minimum of two hours is best, but overnight is ideal. This allows the filling to fully set, resulting in clean, bakery-style slices. Warming slightly at room temperature before serving enhances flavor and texture.
Conclusion
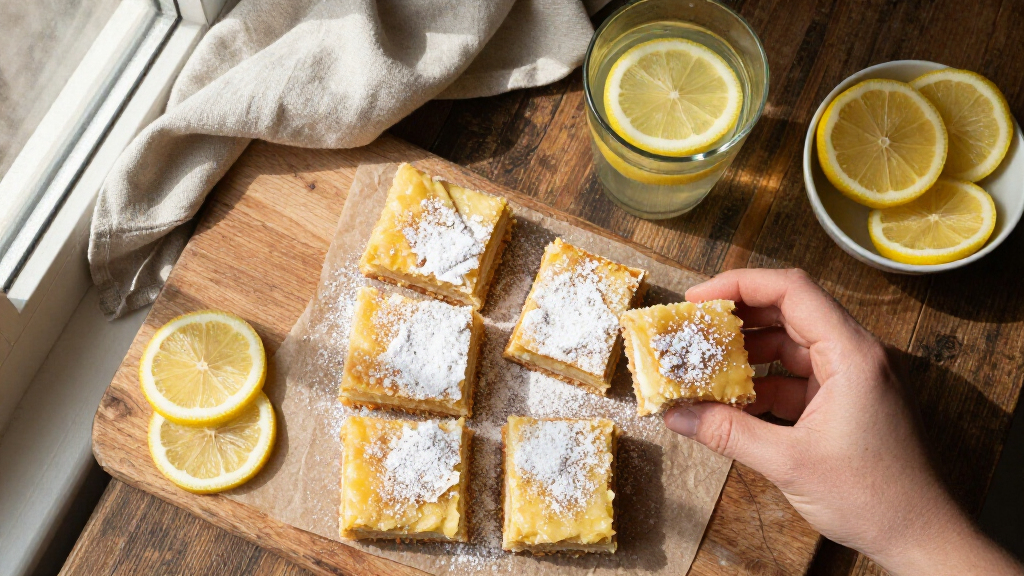
Perfect lemon bars aren’t just about the ingredients; they’re about timing, technique, and patience. Recognize that the filling continues to firm as it cools, and don’t rush the process.
Next time you bake, focus on that slight wobble and cool thoroughly. Your slices will thank you with their clean, silky appearance—and that bright, tangy flavor that makes every bite worth the wait.