
TL;DR
The key to effortless Bundt cake release is a careful combination of proper pan coating and a precise cooling window. When stuck, a hot, damp towel can often rescue the cake without damage. Follow these steps, and sticking will become a thing of the past.
If you’ve ever wrestled with a stubborn, stuck Bundt cake, you know the frustration. You carefully prep the pan, bake your masterpiece, then—disaster. The cake clings like it’s glued in place. It feels like a secret handshake gone wrong.
But what if the fix isn’t just about the pan? What if there’s a simple trick that makes every Bundt release smooth, every time? You’re about to learn that magic. It’s a straightforward combo of coating technique and timing that transforms how you bake and serve.
Proper pan coating—using shortening with flour or a flour-based spray—is your best defense against sticking.
Wait roughly 10 minutes after baking before inverting to give the cake time to set but remain warm enough to release easily.
A hot, damp towel can rescue a stubborn cake, softening sticky spots with gentle steam, without damaging the crust.
Avoid common mistakes like underbaking, missing coating spots, or using worn pans to prevent sticking issues.
Modern baking sprays and homemade release pastes can improve success, especially with detailed, intricate pans.
The reliable release method
The Bundt Cake Release Trick That Saves Every Bake
A flawless release depends on two things working together: a thin, complete barrier across every detail of the pan and a confident inversion while the cake is still slightly warm.
Long enough for the crumb to set, but early enough to prevent sugars and fats from gripping the pan.
Use shortening with flour, cake-release paste, or a baking spray formulated with flour.
A hot, damp towel can soften stubborn contact points without aggressive prying.
More detail means more contact
Bundt pans expose batter to far more metal than an ordinary cake pan. Every ridge, narrow corner, and decorative recess becomes a potential anchor point—especially when sugar caramelizes against an uncoated patch.
Deep grooves
Intricate channels are easy to miss with a quick spray or brush.
Center tube
This high-contact surface must be coated as carefully as the outer wall.
Sugary batter
Caramelized sugar can bond tightly to exposed metal during baking.
Sticky additions
Jam, fruit, streusel, and chocolate chips raise the sticking risk.
Worn coating
Scratches and peeling surfaces create irregular grip points.
Coat. Bake. Wait. Invert.
The technique succeeds as a connected system. Thorough preparation prevents bonding, complete baking gives the crumb strength, and correct timing releases the cake before the pan cools around it.
Reach every detail
Apply a thin barrier to every ridge, corner, center tube, and decorative recess.
Set the structure
Bake fully. An underbaked, moist center may tear even when the pan is prepared well.
Wait about 10 minutes
Let the crumb firm while the cake remains warm enough to separate cleanly.
Flip with confidence
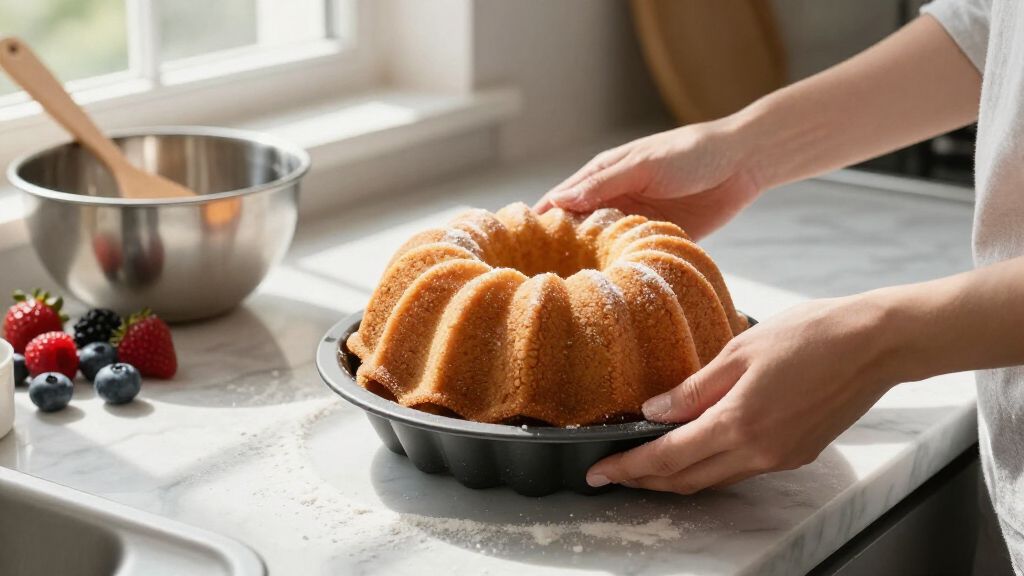
Loosen only the upper edge, cover with a rack, and invert in one controlled motion.
Invert immediately and the delicate crumb may collapse. Wait until completely cool and caramelized areas can tighten against the pan. The center of the scale is the practical sweet spot.
Treat this as a target rather than an inflexible stopwatch reading. Very dense cakes may need a small adjustment, but the cake should remain distinctly warm.
Build a thin, complete barrier
The ideal coating is even and nearly invisible. Heavy deposits can create gummy patches, soften sharp decorative details, or collect at the bottom of the pan.
Baking spray with flour
Spray shortly before filling. Rotate the pan and work from several angles so the center tube and deepest details receive coverage.
Best for speed and consistencyShortening + flour
Brush on softened shortening, dust with flour, then tap out every loose pocket. Use cocoa powder for a chocolate cake.
Best for controlled coverageCake-release paste
Mix equal parts flour, neutral oil, and shortening. Brush on a thin layer and inspect for streaks before adding batter.
Best for complex decorative pans| Preparation method | Dry barrier | Detailed coverage | Primary caution | Verdict |
|---|---|---|---|---|
| Flour-based baking spray | Included | Strong from several angles | Follow the pan maker’s care advice | Recommended |
| Shortening and flour | Added separately | Excellent with a pastry brush | Tap out excess flour | Recommended |
| Homemade release paste | Built into paste | Excellent and brushable | Keep the coating thin | Recommended |
| Butter alone | None | Uneven in fine grooves | Water and milk solids can promote sticking | Avoid alone |
| Ordinary cooking spray | None | Fast but less dependable | May leave gummy or bare areas | Less reliable |
Use warmth, moisture, and patience—not force.
Leave the pan inverted
Keep the rack in place and avoid repeated flipping, pulling, or twisting.
Drape with a hot, damp towel
The trapped heat and gentle steam soften sticky caramelized contact points.
Tap and shake gently
Use light taps against the sides or a small controlled shake to encourage release.
Small mistakes create stubborn cakes
When release fails, the cause is usually traceable to an incomplete barrier, weak cake structure, poor timing, or a damaged pan—not bad luck.
Missing the center tube
Inspect the tube, narrow corners, and deepest grooves before adding batter.
Using butter alone
Its water and milk solids make it less reliable in intricate metal pans.
Flipping immediately
The crumb may still be too fragile to support the cake’s full weight.
Cooling completely
Sugars and fats can firm against the pan and resist a clean release.
Underbaking
A wet, unset interior can tear even when the surface coating is excellent.
Using a damaged pan
Scratches and worn nonstick areas turn formerly reliable surfaces into grip points.
A well-coated, slightly warm cake is ready to release.
Prepare the pan shortly before filling, keep the barrier thin and complete, bake until the structure is set, cool for about 10 minutes, and invert decisively. If resistance remains, let gentle steam do the work.
Why Your Bundt Cake Sticks and How to Fix It
Bundt pans are notorious for sticking because of their intricate shapes, deep grooves, and narrow corners. They create more surface contact than regular pans, which increases the chances of sticking. Sugary batters and fillings like jam or streusel only make things worse, caramelizing against the metal.
To fix this, you need a smart prep. Using a generous layer of shortening or a flour-based spray ensures every ridge and detail gets coated. Think of it as laying a slick barrier that prevents the batter from bonding to the pan. When done right, your cake will slide out like butter.
As an affiliate, we earn on qualifying purchases.
The Perfect Pan Coating: Step-by-Step Guide
Getting the coating right is your secret weapon. Here’s a quick step-by-step to master it:
- Spray or brush a thin layer of softened shortening into every nook and cranny. Use a pastry brush for corners and detailed crevices.
- Dust with flour or cocoa powder (for chocolate cakes). Tap out excess. This dry layer helps prevent gumming or sticking.
- If you prefer, mix equal parts flour, neutral oil, and shortening into a paste. Coat the pan evenly — it’s especially good for highly detailed designs.
- For quick prep, use a flour-based baking spray, which combines fat and a dry barrier in one.
- Fill the pan no more than ¾ full. Overfilling leads to uneven baking and sticking.
Remember, a thin, even coat is best. Heavy layers can cause gummy patches or obscure the design. The goal: just enough to create a slippery surface that lets the cake slide out.
As an affiliate, we earn on qualifying purchases.
Timing Is Everything: When to Flip Your Cake
The magic number is about 10 minutes. After baking, let the cake sit in the pan for roughly ten minutes. This window is critical. The cake needs time to firm up, so it doesn’t crumble when you flip it, but it’s still warm enough to release easily.
Imagine you’re giving the cake just enough time to set—like letting a jello salad cool but not harden completely. During this period, the sugars and fats haven’t bonded too tightly. When you invert, the cake should glide out without resistance.
Picture this: you gently loosen the edges with a silicone spatula or a soft brush. Place a cooling rack over the pan, then flip confidently. If the cake resists, don’t panic. Proceed to the rescue trick.
As an affiliate, we earn on qualifying purchases.
The Rescue Trick for a Stubborn Cake
If your cake refuses to release, don’t force it. Instead, try this simple rescue: place the upside-down pan on a rack and drape a hot, damp kitchen towel over it for 5-10 minutes. The heat and steam soften the sticky spots, often loosening the cake enough to drop free.
It’s like giving the cake a gentle steam bath. After this, tap the sides lightly or give the pan a gentle shake. Usually, the cake will slide out with minimal effort. Just remember—don’t overdo the steam, or the crust might soften too much.
This trick is a lifesaver for those tricky, overly sticky cakes. But it’s better to get the coating right from the start!
As an affiliate, we earn on qualifying purchases.
Common Mistakes That Make Your Bundt Stick Like Glue
Many bakers unknowingly sabotage their release with small, easy-to-avoid errors. For example, using only butter in an intricate pan can cause sticking because butter contains water, which can make the surface gummy. Missing spots during coating, especially in the center tube or detailed areas, creates sticky patches.
Other common mistakes include waiting too long to invert, underbaking (which keeps the cake too moist and sticky), or using worn pans with scratched or peeling coatings. These slip-ups turn a perfect bake into a sticky nightmare.
By focusing on thorough, even coating and timing your flip around the 10-minute mark, you set yourself up for success. Remember: patience and attention to detail are your best friends here.
Modern Tips for Even Better Bundt Cake Releases
Today’s bakers favor flour-based sprays and homemade cake-release pastes over traditional butter and flour. These options create a more reliable barrier, especially for detailed or heavily coated pans. Also, check your pan’s care instructions; some manufacturers advise against aerosol sprays due to residue buildup, which can reduce nonstick performance over time.
Silicone pans are easier to release but may produce less browning. Heavy metal cast aluminum pans, with their sharp details, still lead the pack for consistent, even crusts and intricate designs.
Pro tip: never skip a thorough coating, especially in deep grooves or narrow corners. A little extra effort here prevents sticking and makes your cake look professional every time.
Frequently Asked Questions
How long should a Bundt cake cool before it is flipped?
About 10 minutes after baking is ideal. This allows the cake to firm up enough to hold its shape but remain warm enough to release easily. Waiting longer risks sticking, especially if the cake cools completely.
Should I use butter, shortening, or cooking spray?
Shortening plus flour or a flour-based spray provides the most reliable release, especially for intricate pans. Butter alone can cause sticking because of its water content, and regular sprays without flour may leave gummy patches.
Do I need to flour a nonstick Bundt pan?
Yes, unless your pan is coated with a special release spray containing flour or the recipe specifically says otherwise. Nonstick doesn’t mean no stick—especially in detailed designs.
Can I prepare the pan hours in advance?
It’s best to coat the pan shortly before filling. Over time, excess oil or spray can collect at the bottom, and the coating may become uneven, increasing sticking risk.
What should I do if the cake does not release on the first flip?
Leave it inverted, cover with a hot, damp towel for 5-10 minutes, then gently tap or shake. Avoid prying or forcing with a knife, which can damage both the cake and the pan.
Conclusion
The secret to a flawless Bundt cake release isn’t magic. It’s a careful blend of thorough pan preparation and patience—waiting the right 10 minutes before flipping. Incorporate these simple steps, and your cakes will slide out every time, looking as beautiful as they taste.
Next time you bake, remember: a well-coated, slightly warm cake is a happy cake. Treat your pan with respect, and your baked creations will reward you with perfect, unstuck slices—every single time.