
TL;DR
A perfect pavlova has a dry, crisp shell and a soft, marshmallow-like core. Achieve it by controlling baking temperature, using fine sugar, and cooling gradually. This guide covers the step-by-step process, common pitfalls, and topping tips.
Imagine biting into a pavlova—crisp on the outside, like a delicate shell, yet soft and gooey inside, full of marshmallow warmth. It’s a dessert that plays with textures in your mouth, making every spoonful a contrast of crunch and chew. But getting that perfect balance isn’t just about mixing ingredients; it’s about mastering timing, temperature, and technique.
If you’ve ever struggled with cracks, soggy shells, or a center that’s more gooey than soft, you’re not alone. This guide breaks down exactly how to make a pavlova with a crisp shell and tender core. No fluff, no hype—just practical, reliable tips to turn you into a pavlova pro.
Use superfine sugar and add it gradually for a glossy, stable meringue.
Bake at low temperatures for a long time—about 75–100 minutes—until the shell feels dry and firm.
Cool the pavlova slowly in the oven with the door ajar to prevent cracks and collapse.
Add toppings just before serving to keep the shell crisp and fresh.
Troubleshoot common issues by adjusting baking time, temperature, and handling moisture carefully.
How to Make a Pavlova With a Crisp Shell and Soft Center
A perfect pavlova is a study in contrast: a dry, delicate shell gives way to a tender, marshmallow-like core. The result depends on three controls—fine sugar, gentle heat and an unhurried cool-down.
Six moves to the ideal texture
Visual and tactile cues matter more than the clock. Keep every tool grease-free, dissolve the sugar completely and protect the baked shell from abrupt temperature changes.
Start impeccably clean
Use a dry glass or metal bowl. Separate room-temperature whites carefully; even a trace of yolk or grease can weaken the foam.
Whip to soft peaks
Begin on medium speed, then increase. Stop when the whites hold a gentle peak before introducing any sugar.
Add fine sugar slowly
Spoon in caster sugar a little at a time. Continue until the meringue is glossy, stiff and smooth when rubbed between two fingers.
Fold in acid and starch
Gently fold in one teaspoon each of cornstarch and vinegar or lemon juice. Mix only until evenly combined.
Build a thick round
Form high, even sides and a shallow center well on parchment. Bake gently until the shell feels dry and releases cleanly.
Cool without rushing
Switch off the oven and leave the pavlova inside with the door closed or slightly ajar until completely cool.
The reliable base formula
Sugar strengthens the air-bubble network, acid supports the egg-white proteins and cornstarch manages moisture so the center remains tender.
One large pavlova
Relative impact on the final texture
From foam to two textures
The exterior is exposed to dry oven air and loses moisture first. The thicker center retains enough moisture to stay soft while the surface develops its crisp shell.
Read the symptom, adjust the variable
Small cracks are normal. Sticky shells, syrup, heavy browning and dramatic collapse point to specific problems with moisture, sugar, heat or cooling.
| Problem | Most likely cause | Best correction | Signal |
|---|---|---|---|
| Soft or sticky shell | Humidity, underbaking or early decoration | Bake until dry, cool fully and top immediately before serving | ~Moisture |
| Syrup leaking | Undissolved sugar, overwhipping or underbaking | Add fine sugar gradually and perform the finger-rub test | ×Unstable |
| Surface beads | Sugar crystals remain or oven temperature is too high | Use superfine sugar and reduce the heat | ~Heat |
| Excessive browning | Oven running hotter than its setting | Lower the temperature and verify it with an oven thermometer | ×Too hot |
| Major collapse | Rapid cooling, underbaking or an overly deep center | Shape evenly and leave it in the switched-off oven | ~Thermal shock |
| Mixture spreads | Underwhipped whites, early sugar or overmixing | Reach soft peaks first and fold stabilizers gently | ✓Fixable |
Finish late. Serve immediately.
Whipped cream and fruit release moisture. Keep the baked shell airtight at room temperature, then decorate shortly before the first slice.
Keep the layer light
Use softly whipped cream and spoon it into the center well without pressing down on the shell.
Choose bright acidity
Berries, passion fruit and kiwi balance the sweetness. Drain especially juicy fruit before adding it.
Top at the last minute
An undecorated shell can be stored for a day in an airtight container. Once topped, crispness fades quickly.
The perfect bite starts with a dry shell, yields to a soft center and ends with fresh fruit—not a soggy base.
Pavlova FAQ
A few final checks help distinguish a properly tender center from an underbaked one—and normal character from true structural failure.
How do I know it is baked?
The outside should feel dry, sound hollow when tapped and peel from the paper. The center should be soft, not wet or sticky.
Can I prepare it a day early?
Yes. Cool the shell completely and store it airtight at room temperature. Add cream and fruit only before serving.
Why did the shell crack?
Fine cracks are natural as the meringue expands and contracts. Major collapse suggests rapid cooling or insufficient baking.
Start with Clean, Well-Prepared Egg Whites for Perfect Volume
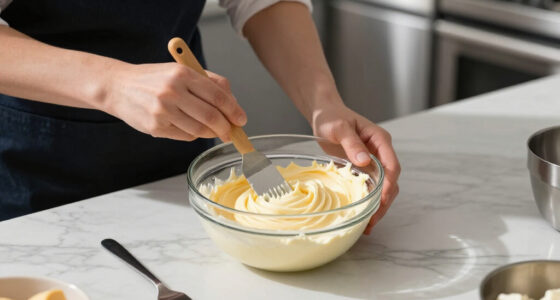
The foundation of a good pavlova is whipped egg whites. Using a clean, grease-free bowl is a must. Even a tiny bit of oil or yolk can prevent the whites from whipping up to the airy, stiff peaks you need. Glass or metal bowls are best—plastic can trap residues that weaken the foam.
Room-temperature eggs whip more easily and to a greater volume. So, take your eggs out of the fridge at least 30 minutes before starting. When separating, make sure no yolk sneaks in; yolk weakens the foam and can cause collapse.
For example, if you’re making a large pavlova, start with 4 large egg whites. Whip them on medium speed until soft peaks form, then increase to high. They should hold a gentle peak—like a soft mountain—before you add sugar.
As an affiliate, we earn on qualifying purchases.
Add Sugar Gradually for a Glossy, Stable Meringue
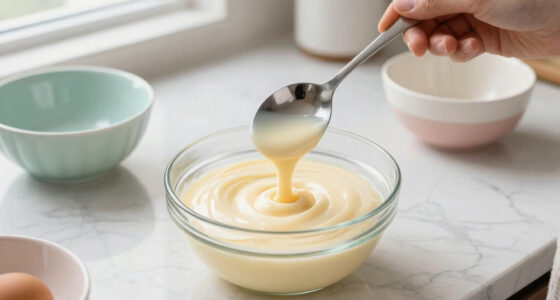
Adding sugar slowly is key to a smooth, glossy pavlova. Once your egg whites reach soft peaks, start spooning in superfine sugar—caster sugar works best—one teaspoon at a time. Wait until each addition dissolves completely before adding more.
Rub a tiny bit of the mixture between your fingers; it should feel smooth, not gritty. This process ensures the sugar dissolves fully, creating a shiny, stiff, and stable meringue that can hold its shape during baking.
Imagine trying to build a snowman—if the snow isn’t compacted properly, it crumbles. The same applies here. Properly incorporated sugar creates a resilient shell that won’t crack or bleed moisture.
As an affiliate, we earn on qualifying purchases.
Incorporate Stabilizers for the Perfect Texture
Adding a small amount of acid and starch stabilizes the meringue and shapes the interior. Vinegar or lemon juice helps proteins in the egg whites set properly, preventing collapse. Cornstarch, about a teaspoon, absorbs excess moisture and keeps the inside marshmallow-soft.
Gently fold in the cornstarch and acid with a spatula after whipping. Don’t overmix—just enough to combine. This step is what gives the pavlova that iconic contrast: a dry, crisp shell with a gooey, tender center.
Understanding why these stabilizers matter helps you troubleshoot. Acid stabilizes the proteins, making the foam more elastic and less prone to collapsing under the weight of toppings or during cooling. Cornstarch prevents excess moisture from seeping out, which could otherwise turn the interior gummy or soggy. Balancing these ingredients is crucial: too much can make the shell overly dry, too little may cause collapse or a soggy interior.
As an affiliate, we earn on qualifying purchases.
Shape and Bake for a Shell That’s Crispy and Not Overbaked
Shape your meringue into a thick, even circle with a slight depression in the center. Use parchment paper on a baking sheet. Spoon the meringue onto the paper, forming a high, rounded edge and a shallow well in the middle.
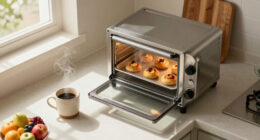
Bake at a low temperature—around 110–130°C (230–265°F)—for 75–100 minutes. The goal: a dry, firm shell that peels away easily from the paper, while the inside remains soft.
Check after 75 minutes: the exterior should feel dry and sound hollow if tapped. The center should still be marshmallow soft, not wet or sticky. If it’s browning too much, lower the oven temp or extend baking time.
Why is this important? Baking at a low temperature for an extended period ensures moisture gradually escapes, allowing the shell to dry out thoroughly without overcooking the interior. Overbaking can lead to a shell that’s too hard and brittle, while underbaking might leave it soggy. Striking this balance is key to achieving the desired contrast in texture.
As an affiliate, we earn on qualifying purchases.
Cool Slowly to Prevent Cracks and Collapse
Cooling is just as crucial as baking. Turn off the oven once the pavlova looks dry and lightly golden. Leave the door slightly ajar or prop it open with a wooden spoon. This slow cooling prevents sudden temperature changes, which cause cracks or collapse.
Let it cool completely in the oven. This can take an hour or more. Rushing this step often results in a cracked, shattery shell or a collapsed center, especially in humid conditions.
Imagine letting a hot cake cool too quickly—you get cracks. Treat the pavlova the same way, and it’ll reward you with that perfect contrast.
Troubleshooting Common Pavlova Problems
Here’s a quick run-down of typical pitfalls and how to fix them:
- Soft or sticky shell: Bake longer until dry; cool slowly; add toppings just before serving.
- Syrup leaking: Ensure sugar is fully dissolved; don’t overwhip or underbake.
- Cracks or major collapse: Cool gradually, don’t open the oven prematurely, and bake at a gentle temperature.
- Hollow interior: Avoid overwhipping or too hot an oven. Use a thermometer if needed.
Understanding these issues helps you make informed adjustments. For example, a shell that remains soft or sticky often indicates insufficient baking time or temperature. Cracks or collapse are signs of rapid cooling or overhandling. Recognizing these signs allows you to refine your technique, leading to more consistent results and a better understanding of how each variable influences the final texture.
Toppings and Serving Tips for the Best Presentation
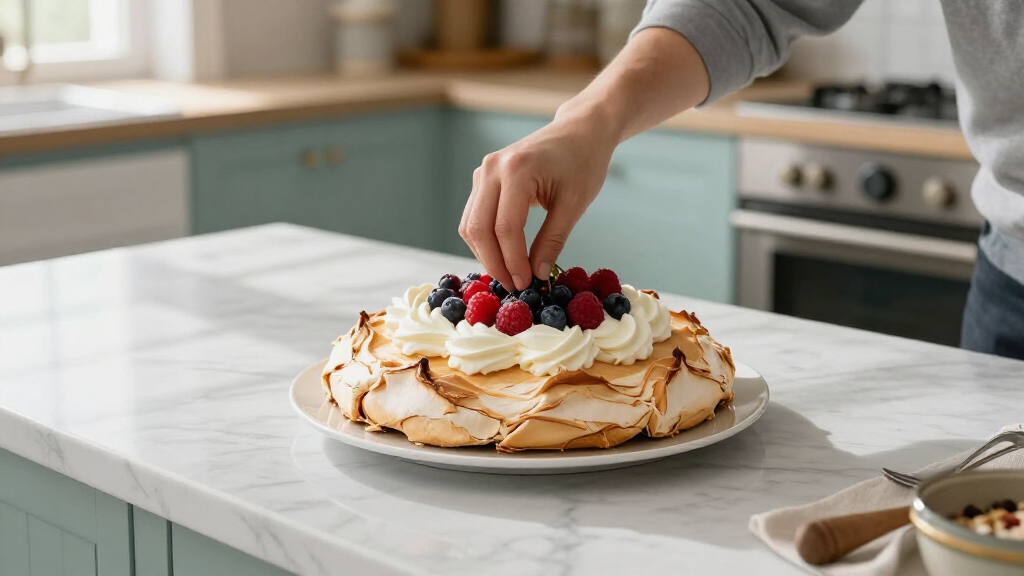
Decorate your pavlova just before serving to keep that crisp shell. Top with whipped cream, fresh berries, passion fruit, or sliced kiwis. Keep toppings light and moisture-rich fruits separate until the last minute to prevent sogginess.
For a stunning effect, pile the whipped cream high and scatter colorful fruit on top. The contrast of bright berries against the white meringue makes every bite visually appealing.
Remember: the more moisture you add, the faster the shell softens. Serve immediately for the ideal crunch.
Frequently Asked Questions
How do I know when my pavlova is done baking?
The outside should feel dry and sound hollow when tapped. The shell should easily peel away from the paper, and the center should be soft and marshmallow-like—not wet or sticky.
Can I make a pavlova ahead of time?
Yes, the shell can be made a day in advance. Store it in an airtight container at room temperature. Just add whipped cream and fruit right before serving to keep it crisp.
Why does my pavlova crack or collapse?
Cracks happen naturally due to expansion and contraction, but major collapse often results from rapid cooling or underbaking. Cool slowly in the oven and bake at a gentle temperature to prevent this.
How can I prevent my pavlova from being chewy or soggy?
Make sure the shell is fully dry during baking, cool it slowly, and add toppings just before serving. Humidity and moisture are the main culprits for softness.
Conclusion
Remember, the secret to a pavlova with a crisp shell and soft center isn’t just in the ingredients—it’s in the process. Patience with baking and cooling makes all the difference. With these tips, you’ll create a stunning dessert that balances texture and flavor in every bite.
So next time you whip up a pavlova, think of it as a little science experiment—controlled, precise, and always rewarding. Now, go impress your friends with your perfectly balanced pavlova!