
TL;DR

Get baking supplies delivered free — and shop member deals
- Fast, free delivery on millions of items
- Access to Prime Big Deal Days deals on October 6–7
- Prime Video, Amazon Music and more included
The stand mixer bread method simplifies bread-making for busy people. It automates kneading, saves time, and delivers consistent, bakery-quality loaves—perfect for anyone short on time but craving fresh bread.
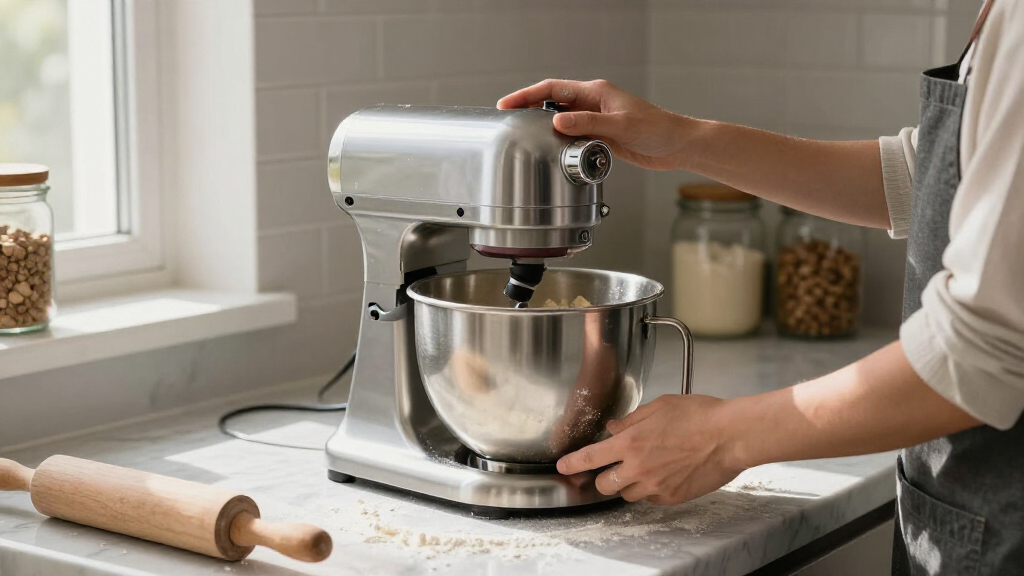
If you’ve ever felt overwhelmed by the thought of kneading bread dough for what seems like forever, you’re not alone. The stand mixer bread method transforms this daunting task into a quick, hands-free step, letting you enjoy fresh bread without sacrificing your busy day.
Imagine mixing your ingredients, pressing a button, and then doing other things while the dough gets its strength. It’s about making bread-making practical and approachable—even for beginners or those juggling multiple priorities.
A stand mixer with a dough hook can cut kneading time by over 75%, making bread more accessible for busy schedules.
Passive fermentation, like overnight fridge proofing, boosts flavor and simplifies timing.
Use a heavy-duty mixer and keep ingredients at room temp for best results.
Monitoring kneading time carefully prevents overworking the dough and guarantees a better crumb.
Creating a crispy crust is as simple as preheating, using steam, and baking in a Dutch oven.
The Stand Mixer Bread Method for Busy Bakers
Let the dough hook do the hard work. A short, controlled knead builds reliable gluten while passive fermentation fits bread-making around work, family, and everything else in the day.
minutes on low speed
minutes on medium
or refrigerate overnight
Fahrenheit target range
approximately doubled in size
Mix. Knead. Walk away.
The active work is concentrated at the beginning and end. Between those moments, the mixer and fermentation do the transformation for you.
Combine
Add flour, water, yeast, salt, and any recipe-specific ingredients.
Low · 2–3 minKnead
Increase to medium. Watch for smooth, elastic dough that clears the bowl.
Medium · 8–12 minRise
Cover and let the dough ferment until approximately doubled.
1–4 hr or overnightShape
Gently form the loaf, then proof until visibly expanded and airy.
Hands-on · briefBake
Use strong heat, steam, and a Dutch oven or stone for a crisp crust.
Oven · 450°F+Elastic and slightly tacky—not sticky
Stop kneading when the dough looks smooth, stretches without tearing immediately, and clings lightly to a fingertip. Do not keep adding flour simply to make the bowl spotless.
Fermentation sweet spot
A dough temperature near 75–80°F supports steady, predictable fermentation.
Why the mixer earns its counter space
It occupies the practical middle ground: faster than long no-knead fermentation, easier on the body than hand-kneading, and dependable enough for repeatable weekday loaves.
| Feature | Stand mixer | Hand-kneaded | No-knead |
|---|---|---|---|
| Physical effort | ✓ Minimal | ✗ High | ✓ Minimal |
| Kneading phase | 8–12 minutes | Continuous manual work | Usually replaced by time |
| Consistency | ✓ Highly reliable | ~ Skill-dependent | ~ Recipe-dependent |
| Gluten development | Even and controlled | Variable by technique | Slow fermentation-led |
| Fast schedule | ✓ Strong fit | ~ Possible | ✗ Usually slower |
| Flavor potential | ✓ High with cold rise | ✓ High | ✓ High |
Even gluten
The dough hook repeats the same motion, supporting a uniform structure, stronger rise, and more predictable crumb.
Less strain
Minimal manual kneading makes fresh bread more approachable for beginners and bakers with limited strength or joint issues.
One core method
Adapt the sequence for white, whole-wheat, sourdough, seeded, herbed, vegan, or recipe-specific gluten-free loaves.
Let the fridge take the night shift
Cold fermentation develops deeper flavor and improves extensibility while giving you control over the baking schedule. Mix tonight; shape and bake when tomorrow allows.
Fast and practical
Allow the dough to rise at room temperature until nearly doubled, then shape, proof, and bake.
Flexible and flavorful
Refrigerate the covered dough for slow enzyme activity, richer flavor, and a schedule that works while you sleep.
The bakery-crust formula
Professional-looking crust comes from managing heat and moisture during the opening stage of baking—not from adding more flour to the dough.
Stop at the right moment
The clock is a guide; texture is the decision-maker. Flour type, hydration, mixer power, and room temperature can all shift the exact timing.
Rough and fragile
Dough tears quickly, lacks elasticity, and may bake into a dense, flat loaf with weak structure.
Smooth and stretchy
Dough is elastic, slightly tacky, and strong enough to stretch thinly without immediately ripping.
Hot and overly tight
Dough becomes stiff or difficult to shape and may produce a tough, overly chewy result.
The loaf is dry and dense
Measure carefully and add extra flour gradually. The ideal dough may feel tacky; it should not resemble a dry, rigid ball.
The loaf barely rises
Give fermentation enough time. Use a warm, draft-free location and look for expansion rather than relying only on the timer.
The mixer strains or walks
Use a sturdy model with a dough hook and at least 300 watts. Reduce the batch size if the motor sounds labored.
The exterior stays soft
Preheat thoroughly, introduce steam, and use a hot Dutch oven or stone for stronger browning and crispness.
Quick answers for busy bakers
Can any stand mixer knead bread?
Choose a sturdy mixer with a proper dough hook. A motor rated at 300 watts or more is a practical starting point for regular bread dough.
How long should the mixer knead?
Most recipes need 8–12 minutes on medium speed after a 2–3 minute low-speed mix. Stop when the dough is smooth and elastic.
Does the same method work?
Gluten-free dough behaves differently and often needs gentler or shorter mixing. Use a recipe specifically developed for gluten-free bread.
Can the dough be saved for later?
Yes. Shape and freeze it on a tray, transfer it to a bag, then thaw overnight in the refrigerator before proofing and baking.
Every stage sets up the next
How a stand mixer makes bread simple and consistent
Using a stand mixer with a dough hook automates the kneading process, ensuring even gluten development. This means your bread will have a better rise, a chewy crust, and an airy crumb—without the muscle work.
For example, a typical 8-minute knead at medium speed creates a dough with the right elasticity, avoiding common issues like under-kneading or over-kneading. It’s like having a reliable hand that never tires.
In real life, I’ve seen busy parents toss ingredients into their stand mixer before heading out the door. When they return, a perfectly kneaded dough awaits, ready for shaping and baking—saving hours of manual effort.
As an affiliate, we earn on qualifying purchases.
The most time-saving way to use your stand mixer for bread
- Mix your ingredients on low speed for 2-3 minutes until combined.
- Increase to medium speed and knead for 8-12 minutes. The dough should be elastic and slightly tacky but not sticky.
- Let it rise passively, either at room temp for 1-2 hours or overnight in the fridge for flavor development.
- Shape, proof, and bake as usual.
This simple sequence turns a multi-hour process into a streamlined routine. Plus, the dough’s gluten structure is more uniform, thanks to the consistent kneading of the mixer.
As an affiliate, we earn on qualifying purchases.
How stand mixers compare to hand-kneading and no-knead methods
| Feature | Stand Mixer Bread |
|---|---|
| Effort | Minimal—just mixing and shaping |
| Time | 8-12 min kneading, 1-4 hours rising |
| Consistency | Highly reliable, even gluten development |
| Flavor Development | Same as traditional, can be enhanced with longer fermentation |
Compared to hand-kneading, the stand mixer reduces physical effort and produces more uniform results. It’s especially helpful for those with joint issues or limited strength. Unlike no-knead recipes, which require longer fermentation, the mixer method speeds up the process without sacrificing quality.
bread making accessories for stand mixer
As an affiliate, we earn on qualifying purchases.
As an affiliate, we earn on qualifying purchases.
Tips to get perfect bread with your stand mixer every time
- Use a heavy-duty mixer with at least 300 watts of power for consistent kneading.
- Keep ingredients at room temperature for better gluten formation.
- Don’t over-flour—aim for dough that’s elastic and slightly tacky.
- Monitor kneading time carefully; most recipes need 8-12 minutes.
- Allow ample rising time—dough almost doubles in size for best texture.
- Preheat your oven and use steam or a Dutch oven to create that bakery-quality crust.
As an affiliate, we earn on qualifying purchases.
Why passive rising makes your bread better and easier
Passive or long fermentation, like overnight rising in the fridge, enhances flavor and texture because it allows enzymes to develop complex flavors and improves dough extensibility. This slow fermentation breaks down starches and proteins, resulting in a richer flavor profile and a more digestible loaf. It also reduces the risk of over-proofing, which can cause the dough to collapse or develop a coarse crumb. This method aligns with busy schedules because you can prepare the dough well in advance, freeing up your day for other tasks while still producing bakery-quality bread.
For example, I once prepared dough in the evening and let it rise in the fridge overnight. The next morning, I baked a loaf that had a complex, nutty flavor and a chewy crust—easier than rushing through a quick rise.
Common pitfalls and how to avoid them
Over-kneading can make bread tough because it develops too much gluten, leading to a dense or chewy texture. Following the recommended 8-12 minutes helps balance gluten development without overdoing it, ensuring the dough is elastic and easy to shape. Using the mixer’s dough hook, you can observe the change in dough texture—when it becomes smooth and slightly tacky, it’s a sign to stop. Under-kneading results in poor gluten structure, causing bread to be dense and flat, while over-kneading can make the dough overly tough and difficult to rise properly.
Too much flour can dry out the dough, preventing proper gluten formation and leading to a dense loaf. To prevent this, measure ingredients carefully and add flour gradually if needed, rather than dumping large amounts at once. Patience during rising is equally vital—dough that is allowed to double in size develops a better crumb and flavor, making the effort worthwhile for a superior loaf.
How to get that bakery crust at home
Crust quality depends on steam, oven heat, and baking vessel. Preheat your oven to at least 450°F and use a Dutch oven or baking stone for even heat transfer. These tools help mimic professional bakery environments by trapping heat and moisture. Before baking, brushing the dough with water or oil encourages browning and creates a shiny crust, which adds flavor and visual appeal. Incorporating steam during the initial baking phase—by placing a pan of water in the oven or spritzing the dough—results in a crisp, shiny crust that rivals bakery loaves. This step enhances the Maillard reaction, intensifying the crust’s flavor and texture, making your homemade bread look and taste professional.
Frequently Asked Questions
Can I use any stand mixer for bread making?
Not all stand mixers are created equal. Look for models with at least 300 watts of power and a sturdy dough hook. Heavy-duty brands like KitchenAid or similar are recommended for consistent, reliable kneading.
How long should I knead bread dough in a stand mixer?
Typically, 8-12 minutes on medium speed is ideal. Over-kneading can toughen the bread, so follow recipe instructions and check the dough’s elasticity—it should be smooth and slightly tacky.
Can I make gluten-free bread using this method?
Yes, but gluten-free dough behaves differently. It usually requires different ingredients and may need gentler mixing or less kneading. Experiment with recipes designed for gluten-free baking.
How do I prevent my bread from being dense or flat?
Ensure proper fermentation—dough should double in size. Also, avoid over-flouring and give the dough enough rising time. Using warm, draft-free spots helps dough develop better.
Is it okay to freeze the dough for later baking?
Absolutely. Shape the dough, freeze it on a baking sheet, then transfer to a bag. Thaw in the fridge overnight before baking for fresh, homemade bread anytime.
Conclusion
Mastering the stand mixer bread method turns bread baking from a time-consuming chore into a practical, rewarding routine. It’s about making fresh, wholesome bread part of your busy life without sacrificing quality or flavor.
Next time you feel overwhelmed by kneading or long fermentation, remember—your mixer is your best ally. Let it do the heavy lifting, while you enjoy the smell of fresh bread filling your home.
Fall Picks
fall essentials
As an affiliate, we earn on qualifying purchases.