TL;DR
Achieving even cake layers relies on precise batter division, using the right tools, and baking techniques. Weighing batter, using cake strips, and trimming after baking make all the difference.
Nothing ruins a beautifully decorated cake faster than uneven layers. You’ve seen it—one side taller, the other a bit flat. It’s frustrating, especially when you want that clean, professional look. The good news? With just a few straightforward techniques, you can make every layer perfectly even, every single time.
In this guide, I’ll walk you through the practical steps, the best tools, and the little tricks that turn uneven baking into a thing of the past. Whether you’re a home baker or more experienced, these tips will help you get that flawless, level layer every time.
Always weigh your batter for each layer to ensure uniform volume.
Use cake strips and chill the batter to prevent doming and promote even baking.
Trim and level your cakes after chilling to achieve perfectly flat layers.
Invest in essential tools like a digital scale, cake leveler, and turntable for consistency.
Combine measurement, baking, and finishing techniques for the most professional results.
How Precise Batter Measurement Turns the Tide
The secret to even cake layers starts with how you measure your batter. Using a digital kitchen scale to weigh each portion ensures every layer is the same volume. This precision is crucial because even slight variations in batter amount can lead to noticeable differences in height after baking. When your layers are uneven, it can throw off the entire aesthetic and structural balance of your cake, making decorating more difficult and less polished.
Imagine filling two pans: one with 250 grams of batter and another with 255 grams. That small discrepancy might seem negligible, but once baked, it can cause one layer to be slightly taller or more domed. Over time, these inconsistencies compound, leading to a cake that looks uneven and unprofessional. By weighing your batter, you are effectively eliminating this source of error, ensuring each layer has the same starting point. This consistency not only results in a visually appealing cake but also simplifies subsequent steps like stacking and decorating.
Pro tip: Before pouring into pans, weigh your batter in a large bowl, then divide into portions. This method guarantees each layer gets the same amount of batter, making your layers uniform and reducing the need for trimming later. The tradeoff here is a slight increase in prep time and the need for a digital scale, but the payoff is a perfectly level, professional-looking cake.

Etekcity Food Kitchen Scale, Digital Grams and Ounces for Weight Loss, Baking, Cooking, Keto and Meal Prep, LCD Display, Medium, 304 Stainless Steel
𝗘𝗳𝗳𝗼𝗿𝘁𝗹𝗲𝘀𝘀 𝗪𝗲𝗶𝗴𝗵𝗶𝗻𝗴: Supports 5 units (oz/lb:oz/fl'oz/g/mL), tare function, and includes 2 AAA batteries for hassle-free operation
As an affiliate, we earn on qualifying purchases.
As an affiliate, we earn on qualifying purchases.
Why Using Cake Strips and Chilling Is a Game-Changer
Cake doming occurs when the batter rises unevenly during baking, often resulting in a rounded, uneven top. This phenomenon isn’t just a cosmetic issue; it can affect the structural integrity of your cake, making it more difficult to stack and decorate. Using baking strips—fabric or silicone bands soaked in water and wrapped around pans—addresses this by creating a more uniform heat distribution around the batter. This insulation slows the rate of heat transfer to the edges, allowing the center to bake more evenly and preventing the formation of domes.
When I baked a carrot cake with strips, the dome disappeared entirely, and the top baked flat. This meant I could skip trimming and focus on decorating. The benefit of this technique is not only aesthetic but also time-saving, as trimming a domed cake can be messy and may compromise the structure if not done carefully. Moreover, the even rise ensures that your layers align perfectly, which is essential for a polished appearance.
Chilling the batter for 15-30 minutes before baking further enhances this process by allowing the gluten to relax and the moisture to redistribute. This stabilization reduces batter spreading during baking, leading to a more controlled rise and a flatter top. Combining these techniques—using cake strips and chilling—gives you a reliable way to produce consistently flat, even layers. The tradeoff is a slightly longer prep time, but the consistency and quality of your final cake make it well worth the effort.
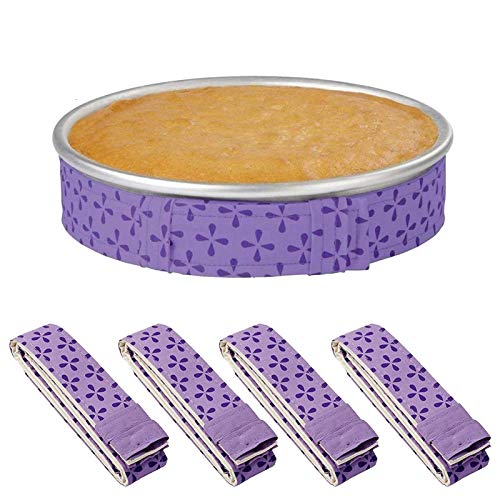
Mity rain 4-Piece Cake Pan Dampen Strips, Super Absorbent Thick Cotton Strips for Baking, Cake Leveler and Baking Supplies
Cotton and polyester (Super absorbent thick cotton and Pearl Finished Fabrics insulation), easy to use, Make sure to…
As an affiliate, we earn on qualifying purchases.
As an affiliate, we earn on qualifying purchases.
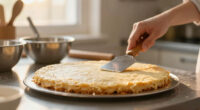
Mastering the Art of Leveling and Trimming
Even if your layers come out slightly domed, it’s essential to level them properly before stacking. A domed top can cause the cake to lean or crack, compromising both appearance and structure. Using a serrated knife or a dedicated cake leveler allows you to remove the rounded top evenly, creating a flat surface for stacking. Chilling the cake beforehand makes this process easier, as cold cake firms up, reducing crumbs and making the cut cleaner.
For example, I once baked a vanilla sponge with a perfect dome. After chilling it for 30 minutes, I used a serrated knife to trim the top, revealing a smooth, level surface. This step is crucial because it ensures that each layer sits evenly, preventing tilting or uneven filling. Proper leveling also makes decorating easier and results in a more professional appearance.
Gently rotate your cake on a turntable while trimming to maintain a straight, even cut. Always start with a small amount and check for levelness frequently—it’s easier to remove more than to fix an over-trimmed layer. Remember, the goal is to create a stable, flat surface that will support your decorations and fillings perfectly. Skipping this step might seem minor, but it can significantly impact the final look and structural integrity of your cake.
Leveling is the final step that transforms a good cake into a professional masterpiece, ensuring every layer is even, stable, and ready for decoration.

RFAQK 90PCs Cake Decorating Kit for Beginners, Baking Supplies Includes Cake Turntable, Cake Leveler, 24 Icing Piping Tips, 56 Piping Bags, 2 Couplers, Spatulas, Scrapers, Video Course and Booklet
Beginner-Friendly Value: Getting ready to decorate as a beginner, but not sure what tools you need, RFAQK offers…
As an affiliate, we earn on qualifying purchases.
As an affiliate, we earn on qualifying purchases.
Tools That Make Achieving Perfect Layers Effortless
Having the right tools takes the guesswork out of even layers and makes the process more precise and less stressful. Here’s what I recommend:
- Digital kitchen scale: For precise batter measurement, reducing inconsistencies.
- Cake leveler or serrated knife: To trim domed tops evenly and accurately.
- Cake strips: To prevent doming during baking by promoting uniform heat distribution around the pans.
- Turntable: To rotate your cake smoothly while trimming and decorating, ensuring straight, even cuts.
- Measuring cups and spoons: For dry ingredients and initial batter portions, maintaining consistency in your recipe.
Investing in these tools streamlines your baking process, reduces errors, and consistently produces professional-looking cakes. Over time, they become invaluable for any serious baker aiming for perfection. While there is an upfront cost, the improved results and confidence they bring are well worth it. Remember, precision tools are the foundation of consistent, even layers that elevate your baking game.

YAMHOHO Adjustable Cake LevCake Cutter Slicer Leveler, 9 Different Height Premium Food Grade Stainless Steel Double Wires Cake Cutter/Slicer/Adjustable Cake Leveler for Leveling and Molding (black)
READY, SET, BAKE: This Wilton adjustable cake leveler is the quick and easy way to create even cake…
As an affiliate, we earn on qualifying purchases.
As an affiliate, we earn on qualifying purchases.
Compare Common Techniques for Perfectly Even Layers
| Technique | How It Works | Best For |
|---|---|---|
| Weighing Batter | Using a scale to measure exact batter weight for each layer, ensuring uniform volume and height, which directly impacts the cake’s overall appearance and structural stability. | Ensuring perfect volume and height, especially important for multi-layer cakes where consistency is key. |
| Using Cake Strips | Insulating pans with soaked fabric or silicone bands to slow heat transfer and promote even rising, preventing domes and ensuring flat tops. | Flat, even tops that require minimal trimming, resulting in a cleaner, more professional finish. |
| Chilling Batter | Allowing the batter to rest in the refrigerator before baking stabilizes the mixture, reduces spreading, and encourages even rising, leading to flatter, more uniform layers. | Reducing spreading and doming, especially with delicate or airy batters that tend to rise unevenly. |
| Level and Trim | Post-baking, trimming domed or uneven tops with a serrated knife or leveler creates a flat, stable surface for stacking and decorating. | Achieving flat, professional layers that are easier to decorate and less prone to structural issues. |
Each method addresses a different stage of the baking process—measurement, baking, or finishing. When combined thoughtfully, these techniques maximize your chances of producing perfectly even, stable layers. Understanding the tradeoffs—such as extra prep time versus superior results—helps you choose the best approach for your specific cake and skill level. Mastering these techniques ensures your cakes not only look stunning but also hold together beautifully through decorating and serving.
Frequently Asked Questions
How do I prevent my cake from doming in the middle?
Use cake strips around your pans and avoid overmixing batter. Cake strips insulate the sides, promoting even heat distribution. Baking at a slightly lower temperature can also help prevent rapid rising that causes domes. Additionally, ensuring your oven is properly calibrated and avoiding opening the oven door during the first part of baking can promote more even heat, further reducing the risk of domes.
What’s the easiest way to level a domed cake?
Chill the cake first to firm it up, then use a serrated knife or a cake leveler to carefully trim off the dome. Rotating the cake as you cut helps maintain an even, straight line. For best results, work slowly and check for levelness frequently, removing only as much as needed to create a flat surface. This approach ensures your layers stack evenly and look professional.
Can I use different pans for each layer?
It’s best to use the same size and type of pans for consistency, as different pans can cause uneven baking and height discrepancies. If you must use different pans, measure their capacity and adjust your baking time accordingly. However, for the most predictable and uniform results, sticking to one set of pans is recommended, especially for layered cakes where visual symmetry matters.
How do I make sure my layers are the same height?
Precise measurement of batter weight combined with consistent baking conditions—same oven rack, temperature, and baking time—helps ensure uniform height. After baking, leveling all layers by trimming off any domed or uneven tops guarantees they sit flat and even when stacked. Using a ruler or a cake leveler for trimming helps maintain accuracy and consistency across layers.
Are there particular recipes better suited for even layers?
Yes, recipes with stable, less airy batters like pound cake, butter cake, or dense sponge tend to produce more uniform layers because they rise more evenly. Light, airy batters—such as chiffon or angel food—are more prone to doming and require extra care, like using cake strips and careful mixing, to achieve even layers. Choosing recipes with a reliable rise and structure simplifies the process of creating even, professional-looking layers.
Conclusion
The secret to even cake layers boils down to precision, patience, and the right tools. When you measure carefully, bake with insulators like cake strips, and trim with a steady hand, your cakes will look as flawless as they taste.
Next time you bake, think of it as a simple formula: accurate measurement + gentle baking + careful trimming. That’s what makes every layer perfectly even—every single time.