TL;DR

Get baking supplies delivered free — and shop member deals
- Fast, free delivery on millions of items
- Access to Prime Big Deal Days deals on October 6–7
- Prime Video, Amazon Music and more included
Holes in bread aren’t always a sign of failure — but large, uneven tunnels often stem from improper shaping, fermentation issues, or handling mistakes. Changing one variable at a time can help you get a more uniform crumb and a better-looking loaf.
Nothing ruins the appearance of a rustic loaf faster than those giant, uneven holes. You pull the bread from the oven, expecting a beautiful, open crumb, only to find one or two oversized tunnels stretching across the slice. Frustrating, right? But here’s the truth: these tunnels often aren’t just a fluke. They’re clues—clues that point to what’s happening during shaping, fermentation, or handling.
In this guide, you’ll learn exactly why those huge holes appear in the wrong places and how to fix them. Whether you bake sourdough or yeasted bread, understanding the root causes can help you create a crumb that’s more even—beautifully open, but not riddled with tunnels. Better bread starts with small, intentional tweaks. Ready to troubleshoot?
Shaping with proper tension and gentle handling prevents large air pockets from forming tunnels.
Timing fermentation based on visual cues and dough feel is more reliable than sticking to strict proofing times.
Strengthening gluten through proper kneading and folding helps evenly distribute gas and reduces big holes.
Pop or smooth out large surface bubbles during shaping to prevent them from expanding into tunnels during baking.
Match your crumb style to your bread’s purpose—some large holes add rustic charm, others are a sign to troubleshoot.
Bread troubleshooting / Crumb guide
Why Your Bread Has Huge Holes in the Wrong Places
Oversized tunnels are clues about how dough was shaped, fermented, strengthened, or handled. A few small adjustments can help you keep an airy crumb without losing an even slice.
Often work together
Adjust one variable
Use cues over the clock
Open, even, fit for use
01 / Diagnose the loaf
Where tunnels begin
Big holes may appear in sourdough or yeasted bread. Look at the whole process: trapped pockets, uneven gas production, and weak spots can combine to create a few dramatic tunnels.
01 / Shape
Loose folds
Loose shaping can trap large air pockets. Consistent tension helps redistribute gas and guides a more even oven spring.
02 / Ferment
Too early or too late
Underproofed dough may expand sharply; overproofed dough can lose strength and hold gas unevenly.
03 / Strength
Weak gluten network
Mixing, kneading, folds, and flour characteristics affect how well dough retains and distributes gas.
04 / Handle
Bubble imbalance
Leave a conspicuous surface bubble and it may grow. Handle too roughly and you can deflate the loaf unevenly.
05 / Oven
Score or weak seam
Oven spring can make an existing weak spot more visible. Scoring controls where the loaf opens; it rarely causes the crumb problem by itself.
06 / Style
Not every hole is a flaw
Rustic bread can be deliberately open. Troubleshoot when tunnels disrupt slicing, toppings, or the style you want.
02 / Fermentation signals
Read the dough, not just the timer
Temperature, recipe, flour, hydration, and starter or yeast activity all change proofing speed. Use the clock as a record, then judge the dough by its rise, feel, and response.
Underproofed tendency
Dough may look dense with little rise; retained pockets can expand abruptly in the oven.
Overproofed tendency
Dough may look overly puffed and slack; weakened structure can struggle to contain gas evenly.
Poke test: A gentle press should leave a slight indentation that springs back slowly. A single test is only one clue; read it alongside dough rise and strength.
03 / A practical next bake
Make a small, useful adjustment
Keep the crumb airy while reducing the oversized pockets. A short, repeatable routine makes it easier to identify whether shaping, proofing, or strength is behind the tunnels.
Check strength
Build gluten with suitable mixing, kneading, or stretch-and-folds until dough feels more elastic.
Judge proof
Note dough temperature and watch its rise and feel; don’t rely on a fixed time alone.
Shape evenly
Fold gently, seal seams, and create a smooth, taut surface without crushing the crumb.
Pop big bubbles
Lightly press conspicuous surface bubbles, then tighten the dough with a gentle shaping pass.
04 / Keep the feedback loop
Track what changed
If tunnels persist, log a few bakes so you can connect the crumb to the process. Change one variable at a time and compare the slices.
Record
Dough temperature
Temperature helps explain why fermentation moved faster or slower than expected.
Compare
Proofing time + cues
Write down time, rise, poke response, and whether the dough felt strong or slack.
Evaluate
Slice and intended use
Note where holes appeared and whether they affected the loaf’s slicing or toppings.
Scoring is a clue, not usually the cause. It guides expansion at the surface; check proofing, shaping, and dough strength for the underlying crumb pattern.
Quick answers
Common bread questions
Why does sourdough get one or two huge holes?
Common contributors include trapped pockets during shaping, fermentation that is too early or late, and insufficient dough strength.
Should I pop large bubbles?
Gently press conspicuous surface bubbles during shaping. Avoid rough handling that deflates the whole loaf.
Does scoring create tunnels?
Scoring affects where the loaf opens and may reveal an existing weak spot, but usually does not create the uneven interior.
Does high hydration cause uneven crumb?
Hydration changes dough handling and structure, but a tunnel alone does not identify hydration as the cause. Check the whole process.
Why Shaping Might Be Causing Those Big Holes
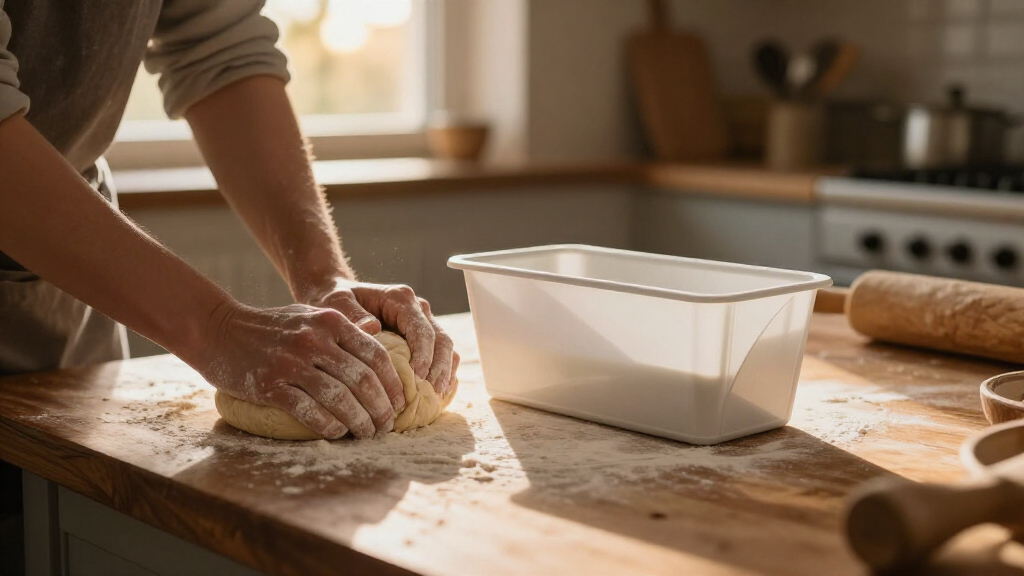
The way you shape your dough can make or break the crumb’s uniformity. If you fold or roll loosely, large air pockets can get trapped, turning into tunnels during baking. Think of shaping as the final step to evenly distribute the gas that’s built up during fermentation.
Why does this matter? Because uneven shaping can lead to uneven tension in the dough, which influences how the gas bubbles are retained. If the surface tension isn’t consistent, some areas will expand more than others during oven spring, creating large tunnels. Proper shaping ensures the gluten is evenly stretched and sealed, acting like a mold that guides the oven spring and gas retention evenly throughout the loaf.
For example, if you gently fold dough into a tight round and give it a firm but gentle tension, you help the gluten network tighten around those air bubbles. This prevents large pockets from forming or expanding into tunnels. A good test is to feel the surface tension—you want a smooth, taut surface before the final proof.
Here’s a quick checklist for better shaping:
- Use enough tension to create a smooth, tight surface.
- Fold and stretch gently to avoid trapping large bubbles.
- Ensure seams are sealed well to prevent escape points that lead to uneven crumb.
One tip: after shaping, gently press out any large surface bubbles with your fingertips. It’s a small step that can prevent large tunnels from developing in the oven.
As an affiliate, we earn on qualifying purchases.
How Fermentation Timing Creates Those Oversized Tunnels
Fermentation controls how much gas the dough can hold. Underproofed dough still has large pockets of gas, which expand rapidly in the oven, creating big tunnels. Overproofed dough, on the other hand, weakens the gluten structure, making it unable to hold gas evenly, resulting in uneven holes.
Why does this matter? Because the timing of fermentation directly affects the internal structure of your bread. If the dough is underproofed, the large gas pockets haven’t had enough time to settle and distribute evenly, so they explode during oven spring, forming tunnels. Conversely, overproofed dough has a weakened gluten network that can’t contain the gas, leading to irregular holes. Proper proofing optimizes the internal tension, allowing for a balanced expansion that results in a uniform crumb.
Imagine a dough that’s underproofed: it looks a little dense, with minimal rise. If you bake it then, large bubbles won’t have enough time to settle. Instead, they explode into big tunnels. Conversely, overproofed dough may look overly puffed, with a slack, weak gluten network.
The key is to gauge proofing by visual cues, not just time. Dough should pass the ‘poke test’—a gentle press leaves a slight indentation that slowly springs back. If it collapses or stays indented, it’s either under- or overproofed.
To troubleshoot, record proofing times and dough temperatures. Adjust proofing based on how your dough looks and feels, rather than sticking strictly to recipes or timers. This mindful approach helps you develop a feel for the ideal fermentation stage, which directly influences the crumb’s evenness and overall loaf structure.
As an affiliate, we earn on qualifying purchases.
Strengthening Your Dough for a More Even Crumb
The gluten network is the backbone that holds gas bubbles evenly in your bread. Weak gluten results in uneven expansion and those dreaded tunnels. If your dough isn’t strong enough, large bubbles can form and expand unchecked, creating oversized holes.
Why does this matter? Because a strong gluten structure ensures that gas is evenly distributed and retained during fermentation and baking. Without it, certain areas become weak points where large bubbles can form and rupture prematurely, leading to tunnels. Developing gluten strength through proper kneading and folding techniques creates a resilient matrix that can hold gas more uniformly, resulting in a more consistent crumb.
Think about kneading, folding, and the type of flour you use. A high-protein flour, like bread flour, develops more gluten. Proper kneading or stretch-and-fold techniques build strength gradually, making the dough more resilient during baking.
For example, during a series of stretch-and-folds, you’ll notice the dough becoming more elastic and less sticky. When you gently press it, it should spring back slightly, indicating good gluten development.
Tip: if your dough feels slack or tears easily, it needs more gluten development. Incorporate a few additional folds or extend kneading time. This improves gas retention, leading to a crumb with smaller, evenly distributed holes, and reduces the likelihood of large tunnels caused by weak gluten points.
As an affiliate, we earn on qualifying purchases.
Handling and Popping Bubbles Without Ruining Your Crumb
Handling your dough carefully during shaping is crucial. Large surface bubbles can turn into tunnels if not managed. Some bakers gently pop big bubbles with their fingertips during shaping. But rough handling can deflate the entire loaf, making the crumb dense and uneven.
Why does this matter? Because large bubbles that are not managed can expand uncontrollably during oven spring, leading to tunnels that ruin the appearance and texture of your bread. Gently popping or smoothing large bubbles during shaping releases excess gas and helps the dough expand more evenly. However, aggressive handling can damage the gluten structure, causing the dough to lose its elasticity and creating weak spots that form tunnels later. The goal is to release excess gas gently while maintaining the overall integrity of the dough’s structure, ensuring a balanced oven spring and a more uniform crumb.
One practical tip: during shaping, lightly press out large surface bubbles with your fingertips, then tighten the dough to create tension. This balances releasing excess gas with maintaining an open, airy structure.
Remember, handling is a delicate dance. Too rough, and you risk uneven tunnels; too gentle, and the large bubbles might still expand unchecked. Developing a feel for this process takes practice, but the result is a more controlled oven spring and a crumb with fewer large tunnels.
As an affiliate, we earn on qualifying purchases.
Scoring and Oven Spring: Friend or Foe for Holes?
Scoring influences where a loaf opens during baking but usually doesn’t create large tunnels on its own. Instead, scoring can accentuate existing weaknesses or large bubbles, making tunnels more noticeable.
Why does this matter? Because scoring is a tool to direct the expansion of the loaf. If the dough has weak spots or large bubbles, scoring over those areas can cause an exaggerated opening or tunnel formation. Proper scoring technique involves understanding your dough’s internal structure—if it’s well-developed and proofed correctly, scoring will enhance the crust and oven spring without creating unintended tunnels. Conversely, if the dough is underdeveloped or overproofed, scoring may reveal underlying weaknesses, resulting in large tunnels or irregular openings. The key is to score with intention, aiming to control the loaf’s expansion, not just cut for aesthetics.
One tip: observe how your dough responds to scoring. If large tunnels appear along the score line, it may signal that the dough was underdeveloped or overproofed before baking, which affects how the bread expands and where tunnels form.
In essence, scoring is a tool to guide oven spring and should be used in conjunction with proper dough development. When your dough is strong and proofed correctly, scoring helps create a beautiful crust without unintended tunnels. If tunnels appear, consider adjusting your proofing or dough handling techniques instead of relying solely on scoring.
Is a Few Large Holes in Your Bread Actually a Good Thing?
Not all large holes are bad. In many rustic or sourdough breads, an open crumb with some big tunnels adds character and flavor. The problem is when those holes interfere with toppings or slicing.
Why does this matter? Because the aesthetic and functionality of your bread depend on its purpose. Large, irregular holes are part of the charm in artisanal loaves, where they indicate well-developed fermentation and good oven spring. However, if you’re aiming for a uniform, sliceable loaf—like sandwich bread—these large tunnels can compromise the structure, making slicing uneven or toppings unstable. Recognizing when large holes are desirable versus when they signal a need for troubleshooting helps you tailor your process accordingly. It’s about balancing rustic charm with the bread’s intended use, understanding that some large tunnels are a natural part of certain styles, but problematic in others.
Adjusting hydration, fermentation, and handling can help control the size and distribution of large holes, ensuring they complement your bread’s style rather than detract from it. Ultimately, it’s about matching your technique to your bread’s purpose and style, so your loaf meets your expectations.
Step-by-Step Troubleshooting: Fix One Variable at a Time
The easiest way to improve your bread’s crumb is to change just one thing at a time. This prevents confusion and helps you identify what really makes a difference.
Why is this important? Because bread baking involves many interconnected factors—shaping, fermentation, handling, and ingredient quality—and changing multiple variables simultaneously can obscure which adjustment actually improved or worsened the crumb. By isolating each variable, you gain clearer insight into what influences the formation of tunnels and holes. For example, if you change both proofing time and shaping technique together, you won’t know which one had the desired effect. Instead, focus on tweaking one aspect, observe the results, and then proceed to the next. This systematic approach ensures steady progress and a deeper understanding of your dough’s behavior, leading to more consistent, well-structured bread over time.
Start with these steps:
- Check dough temperature—aim for about 75-78°F (24-26°C).
- Assess fermentation—does the dough pass the poke test? If not, adjust proofing times.
- Examine shaping technique—ensure tension and surface smoothness.
- Record your results—note proofing times, dough temperature, handling style.
- Repeat, tweaking one variable at a time, until the crumb improves.
This methodical approach will help you pinpoint whether the problem stems from underproofing, weak gluten, or rough handling, and will give you the confidence to make targeted improvements in your baking process.
Conclusion
The biggest mistake you can make is ignoring the clues your bread gives you. Those giant tunnels? They’re not just random. They’re signs that your dough needs a little more attention during shaping, fermentation, or handling. Small adjustments—like tightening your shaping or timing proofing more carefully—can turn those uneven tunnels into a beautifully even crumb.
Remember, baking bread is a dance of patience and observation. Your ideal crumb isn’t just about the recipe—it’s about how well you read and respond to what your dough is telling you. Keep experimenting, and soon those holes will be just part of the rustic charm, not the chaos.
Fall Picks
fall essentials
As an affiliate, we earn on qualifying purchases.