
TL;DR
The toothpick test is quick but not always reliable. Using a food thermometer, visual cues, and timing offers more precise and safe ways to ensure your food is perfectly cooked every time.
The toothpick test is quick but not always reliable, especially for dense or layered baked goods.
A digital food thermometer provides the most accurate and safe way to check doneness, especially for meats.
Combine visual cues, texture, timing, and temperature readings for the best results.
Let cooked meats rest after reaching target temperature for even juices and final doneness.
Oven calibration and understanding your specific equipment improve baking accuracy.
Kitchen Science / Doneness Checks
The Toothpick Test and Better Ways to Know When It’s Done
The clean-pull toothpick test is quick, familiar, and useful for some bakes. But it can miss dense centers, sticky pockets, uneven oven heat, and food safety targets. Better doneness comes from combining temperature, visual cues, texture, timing, and rest.
Key Insight
A digital food thermometer gives the most accurate read on doneness because it measures the food’s internal state, not just the surface or a single crumb path.
Safe internal temperature for chicken and turkey.
A practical internal cue for many finished loaves.
Cakes and muffins give the toothpick test its best chance.
Loaves, layered bakes, and sticky fillings can fool it.
Minutes help meats redistribute juices and finish evenly.
Internal temperature reduces guesswork and safety risk.
Why The Old Test Slips
A Toothpick Checks One Tiny Tunnel
A clean toothpick can mean “done,” but it can also mean the pick missed the wet center, slid past melted chocolate, or sampled a drier pocket. Use it as a quick signal, not the final verdict.
It samples a narrow path
The pick only reports on the crumbs it touches. A loaf can look perfect on top while its center still needs heat.
Sticky mix-ins confuse the read
Chocolate chips, fruit, custards, and layered fillings can cling to the pick even when the crumb is set.
It cannot prove meat is safe
Color, juices, and poking are not reliable safety measurements. Meat needs a verified internal temperature.
Reliability Rises When Cues Stack
The strongest doneness check uses several signals at once: thermometer first for safety and precision, then texture, color, and recipe timing for finish and quality.
Temperature Beats Guesswork
The Thermometer Is the Objective Check
Insert an instant-read probe into the thickest part, away from bone, pan, or air pockets. For baked goods, aim for the center. The number tells you what a toothpick cannot: whether the interior has reached the target zone.
Use for poultry safety and reduced undercooking risk.
A helpful doneness zone for many loaves and rolls.
Lets heat and juices settle before slicing meat.
Measure the thickest or most protected part of the food.
| Method | Speed | Accuracy | Safety | Best Use |
|---|---|---|---|---|
| Toothpick test | ✓ Fast | ~ Variable | ✗ Not for meat | Light cakes, muffins, quick checks |
| Instant-read thermometer | ✓ Fast | ✓ High | ✓ Strong | Meats, bread, dense baked goods |
| Visual cues | ✓ Immediate | ~ Needs practice | ✗ Not enough alone | Crust color, browning, presentation |
| Texture checks | ✓ Fast | ~ Food dependent | ~ Supplemental | Cake spring, bread hollow tap, firmness |
| Timer only | ✓ Easy | ✗ Oven dependent | ✗ Incomplete | Starting point, not the finish line |
Traceability Chain
A Better Doneness Workflow
Treat the recipe time as a checkpoint, then layer in observation, measurement, and rest. The goal is not more fuss; it is fewer surprises.
Start With Time
Use the recipe range, then begin checking early in the final stretch.
Read The Surface
Look for browning, set edges, crust development, and even rise.
Check Texture
Cakes should spring back; bread crust can sound hollow when tapped.
Confirm Center
Use a thermometer in the thickest point for safety and precision.
Rest And Finish
Let meats rest so juices redistribute and final doneness stabilizes.
Reader Questions
Quick Answers For Real Kitchens
The practical rule: no single cue is perfect for every food. Choose the check that matches the risk, density, and purpose of the dish.
Is the toothpick test reliable for all baked goods?
No. It works best for light, airy cakes and muffins. Dense breads, layered cakes, and sticky bakes need temperature or additional cues.
What is safest for meat?
A digital thermometer is the most reliable way to confirm internal temperature and reduce the risk of undercooked poultry, pork, or seafood.
Can visual cues replace a thermometer?
Visual cues help with quality, browning, and texture, but they should support temperature checks rather than replace them for safety.
What else improves accuracy?
Calibrate your oven, know its hot spots, check early near the end of cooking, and rest meats before slicing.
Bottom Line
Keep the Toothpick, Add Better Evidence
The toothpick test still has a place, but the best cooks use it as one clue among several. Temperature protects safety, visual cues protect finish, texture protects structure, and timing keeps the process organized.
Use The Toothpick When
- The bake is light, airy, and simple.
- You need a quick crumb check near the end.
- You also confirm with spring, color, and structure.
Use Temperature When
- The food is meat, poultry, seafood, or dense bread.
- Food safety or exact texture matters.
- The surface looks done but the center may be lagging.
Why the Toothpick Test Can Fool You Every Time
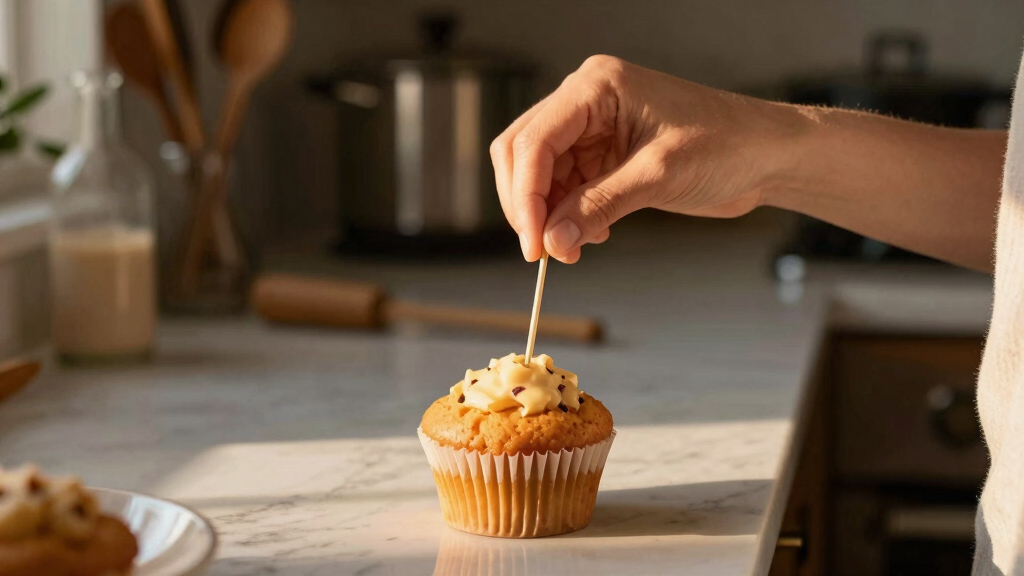
The toothpick test is a classic for a reason: quick, easy, and inexpensive. You insert a toothpick into the center of your cake or muffin, and if it comes out clean, you’re done. Sounds simple, right? But here’s the catch: it’s not always reliable. Dense or layered baked goods can hide moist spots or sticky ingredients that cling to the toothpick, giving a false sense of doneness.
Imagine pulling out a toothpick from a chocolate chip muffin. It’s clean, but the inside is still gooey and underdone. Or a bread loaf that looks perfect on top but remains raw in the middle. The toothpick only checks surface or very accessible areas—not the entire interior. That’s why relying solely on this method can leave you with unevenly baked treats or even food safety risks, especially with meats. The core issue is that the toothpick’s indication depends heavily on the type of food and its density. For example, a light sponge cake might give a quick, reliable result, while a dense loaf or layered dessert can deceive you into thinking it’s done when it’s not. This can lead to the tradeoff between underbaking—risking raw, unsafe food—and overbaking, which dries out your baked goods. Understanding these limitations helps you recognize when to supplement or replace the toothpick test with more accurate methods.
digital food thermometer for meats
As an affiliate, we earn on qualifying purchases.
As an affiliate, we earn on qualifying purchases.
Why a Food Thermometer Is Your Best Friend in the Kitchen
A digital instant-read thermometer takes the guesswork out of doneness. Push it into the thickest part of your meat or the center of your baked good. When the display hits the safe internal temperature—say, 165°F (74°C) for chicken or 190°F (88°C) for bread—the food is perfectly cooked. No more waiting for a toothpick to come out clean, which can be unreliable for dense or layered items. The significance of this is that internal temperature is a direct measure of the food’s thermal state—an objective, quantifiable indicator that correlates directly with safety and doneness. For instance, cooking poultry to 165°F destroys harmful bacteria, making it safe to eat. For baked goods, reaching the right internal temperature ensures the center is cooked through, preventing sogginess or raw dough. The tradeoff is that thermometers require an initial investment and proper technique: inserting the probe correctly and avoiding contact with bone or pan surfaces. However, the benefits—accuracy, safety, and consistency—far outweigh these minor inconveniences. Modern thermometers also save time, providing instant readings that streamline the cooking process and reduce guesswork, especially crucial when preparing multiple dishes or complex recipes.

Chef Craft Cake Tester
- Bakes Tester for Doneness: Checks if baked goods are ready
- Durable Stainless Steel Wire: 6-inch long, sturdy testing wire
- Soft Grip Handle: Comfortable, easy to hold
As an affiliate, we earn on qualifying purchases.
As an affiliate, we earn on qualifying purchases.
How to Use Visual and Textural Cues Alongside Thermometers
Don’t toss the toothpick just yet. Visual cues and texture checks are still useful. For example, a cake should feel springy and bounce back when pressed lightly on top. Baked bread turns a deep golden-brown, and its crust sounds hollow when tapped. These signs, combined with a thermometer reading, give you confidence that your dish is done. The reason combining these cues matters is that each provides a different layer of confirmation. Visual cues tell you about surface doneness and crust development, which impacts flavor and presentation. Texture cues—like a cake’s bounce or bread’s hollow sound—indicate internal structure and moisture balance. When paired with a thermometer reading, which confirms internal temperature, you get a comprehensive picture of doneness. Relying solely on one method can lead to mistakes: a golden crust might hide undercooked centers, while a thermometer reading without visual confirmation could miss surface overbaking or underbaking in layered items. The tradeoff is that mastering these combined cues requires experience, but over time, they become intuitive, allowing you to cook more confidently and consistently.
As an affiliate, we earn on qualifying purchases.
Timing and Technique Tips for Perfect Doneness Every Time
Follow recipe times as a starting point, but always be prepared to adjust. Ovens vary, and ingredients differ. Use a timer, but don’t rely on it alone. Check early, often, especially in the last 10 minutes of baking. The importance of this approach is that no two ovens are exactly alike, and ingredient variations can alter cooking times. Rigidly sticking to a timer might result in undercooked or overbaked outcomes. Using a thermometer during these last stages provides a precise benchmark, ensuring your food hits the target temperature before you remove it. For meats, consider resting time—let it sit for at least 5-10 minutes after cooking. Resting allows juices to redistribute, making your meat more tender and ensuring the temperature stabilizes, which is critical for accuracy. The tradeoff is that timing alone doesn’t account for these variables, so integrating visual cues, tactile feedback, and temperature checks creates a more reliable, foolproof process. This holistic approach minimizes guesswork, leading to consistently perfect results and reducing waste or safety risks.

Efeng Large Dial Oven Thermometer for Gas & Electric Oven,Grill Cooking Safety Leave-in- NSF accurately Easy-to-Read Clearly Large Number Shows temperatures for Meat,Grilling or Cake Cooking Oven
- Temperature Range: 150℉ to 600℉
- Versatile Usage: Suitable for ovens, grills, smokers
- Display Type: Large, easy-to-read dial
As an affiliate, we earn on qualifying purchases.
As an affiliate, we earn on qualifying purchases.