TL;DR
Open a free Amazon Business account
Business pricing, bulk buying and tax-exempt orders.
Create a free accountAs an affiliate, we earn on qualifying purchases.
A successful genoise stays light because it depends mainly on whipped whole eggs. Key steps include warming eggs, thorough whipping, gentle folding, and precise baking. Follow these tips for a tender, airy sponge every time.
Imagine cutting into a genoise sponge. The crumb is whisper-soft, with a fine, almost velvety texture. It’s airy, yet surprisingly resilient — a true testament to good technique. But the secret isn’t just fancy ingredients or luck. It’s about mastering the delicate balance of whipping, folding, and baking. And yes, that means understanding how to keep all that precious air trapped inside.
If you’ve ever baked a genoise that turned out dense, flat, or rubbery, you know how frustrating it can be. This guide will walk you through the precise steps to keep your sponge light and fluffy. From warming your eggs to gentle folding, every detail counts. Ready to elevate your baking game? Let’s get started.
Warming eggs to about 40–45°C before whipping increases their capacity to trap air, yielding a lighter sponge.
Whip eggs and sugar thoroughly to the ribbon stage; this stability is the backbone of a fluffy genoise.
Fold gently and in stages to keep as much air as possible in the batter, avoiding deflation.
Avoid hot butter or adding it directly; always temper to protect the delicate foam structure.
Bake immediately after folding and don’t open the oven early — patience results in a perfect rise.
How to Make a Genoise Sponge That Stays Light
A whisper-soft genoise is built on air, not chemical leavening. Warm the eggs, whip a stable ribbon, fold with purpose, temper the butter, and bake before that precious foam has time to fade.
Warm enough to reduce viscosity and dissolve sugar—never hot enough to damage the foam.
Pale, thick eggs at ribbon stage form the structural backbone of the sponge.
Every move after whipping should preserve the bubbles that will lift the cake.
The six rules of lift
Genoise has little margin for error because its rise comes chiefly from whipped whole eggs. The objective is simple: build a fine, stable foam and lose as little of it as possible.
Warm gently
Bring eggs and sugar to 40–45°C over a water bath. Warm eggs whip more readily and hold greater volume.
Reach ribbon stage
Whip until pale, thick, and roughly tripled. A ribbon should remain visible briefly before melting back.
Sift, then fold
Add low-protein flour in two or three batches using broad, efficient strokes from bottom to top.
Temper the butter
Blend cooled, fluid butter with a little batter first. Only then fold the lightened mixture into the bowl.
Bake immediately
Prepare the pan and oven first. Once flour is folded in, the batter begins steadily surrendering volume.
Do not overbake
Remove when golden, springy, and just pulling from the sides. Low-fat sponge dries surprisingly quickly.
From whole eggs to stable foam
Prepare every component before whipping. The sequence should feel continuous, deliberate, and fast.
Prepare
Line the pan, preheat the oven, sift flour, and cool melted butter.
Warm
Whisk eggs and sugar over gently simmering water to 40–45°C.
Whip
Beat high until tripled, then briefly use low speed to refine large bubbles.
Fold
Add sifted flour in stages, rotating the bowl with each broad stroke.
Bake
Temper in the butter, fill the pan promptly, and place it straight in the oven.
The ribbon test
Lift the whisk. Thick batter should fall in a ribbon and sit on the surface for a few seconds before slowly disappearing.
Stop at stable—not grainy
Under-whipped foam lacks lift. Over-whipped foam becomes coarse and fragile. Aim for a glossy, fine-bubbled structure.
Fold without flattening
Folding is a tradeoff between completeness and speed. Vigorous stirring destroys bubbles, but timid folding can leave dense flour pockets.
Cut, sweep, turn
Use a broad spatula. Cut down through the centre, sweep along the bottom, lift the batter over itself, and rotate the bowl. Stop as soon as no dry streaks remain.
Lighten the fat first
Directly pouring melted butter into the foam encourages it to sink. Tempering distributes the fat gradually and avoids a sudden temperature shock.
Read the finished sponge
The cake’s shape and crumb reveal when the foam was lost. Match the symptom to the most likely point of failure.
| Symptom | Likely cause | Best correction | Diagnosis |
|---|---|---|---|
| Never rises well | Eggs under-whipped or foam deflated during folding | Reach a strong ribbon and fold in fewer, broader strokes | ✗ Foam loss |
| Rises, then sinks | Underbaked centre, coarse bubbles, or oven opened early | Bake until resilient and keep the door shut while structure sets | ~ Structure |
| Dense buttery layer | Butter too hot, too cold, or added directly | Keep butter fluid but cool and temper it with batter | ✗ Fat shock |
| Flour pockets | Folding too timid or bowl bottom not reached | Sift well and sweep the spatula fully beneath the foam | ~ Incomplete |
| Fine, airy, resilient crumb | Stable foam, efficient folding, prompt baking | Repeat the same temperature, timing, and visual cues | ✓ Ideal |
Bake the rise in place
Heat expands the trapped air while egg and flour proteins set around it. Consistent oven temperature turns a temporary foam into a resilient crumb.
The oven must be ready first
Transfer batter promptly to a prepared shallow pan. Bake until lightly golden, springy to the touch, and beginning to pull away from the pan’s sides.
common range
Prepare the pan
No pause should interrupt the journey from finished batter to oven.
Keep the door shut
A sudden temperature drop can collapse a centre that has not set.
Look for spring
The surface should rebound gently and the edges should just release.
Cool in stages
Rest for about 10 minutes, then move to a rack and wrap once fully cool.
The lightness chain
Each decision protects the next. Lose control at one link and the final crumb becomes progressively denser.
Why Your Eggs Are the Key to a Light Genoise
The secret to a fluffy genoise is all in the eggs. Whole eggs, whipped to a ribbon-like foam, trap tiny air bubbles that expand in the oven. The more stable and voluminous the foam, the lighter your sponge. Warming eggs gently to about 40–45°C before whipping helps dissolve sugar and reduces viscosity, making the eggs whip to greater volume.
For example, using room-temperature eggs instead of cold ones can add about 20% more volume. That extra lift makes all the difference when you fold in the flour. Think of your eggs as the tiny balloons that give your genoise its structure — treat them with care, and they’ll lift your cake to new heights.
Understanding why warming eggs improves their whipping capacity is crucial. When eggs are slightly warmed, their proteins unfold more easily, which allows more air to be incorporated during whipping. This results in a more stable foam that can hold the gas bubbles longer, leading to a lighter, more resilient sponge. Conversely, cold eggs tend to be more viscous, trapping less air and making the foam less stable, which can cause deflation during baking.

Hamilton Beach 6-Speed Electric Hand Mixer With QuickBurst and Bowl Rest
- Storage Case: Snap-on case for beaters and whisk
- Multiple Speed Settings: 6 speeds plus QuickBurst button
- Complete Accessory Set: Includes beaters and whisk, dishwasher safe
As an affiliate, we earn on qualifying purchases.
As an affiliate, we earn on qualifying purchases.
How to Whip Eggs and Sugar Perfectly Every Time
- Place whole eggs and sugar in a heatproof bowl over gently simmering water. Whisk constantly until the mixture feels warm (about 40–45°C) and the sugar dissolves completely. This step ensures the proteins in the eggs begin to denature, which is essential for creating a stable foam that can trap more air.
- Remove from heat and whip at high speed. Continue until the mixture becomes pale, thick, and roughly tripled in volume. Look for the ‘ribbon stage’ — when the batter falls from the whisk in thick ribbons that slowly sink back in. Achieving this stage indicates the eggs have been whipped enough to incorporate a maximum amount of air, which is vital for a light sponge.
- Briefly reduce the speed to refine the bubbles, but don’t overmix. Over-whipping can cause the foam to become grainy and unstable, leading to collapse during baking. Practice and patience are key; watching for the ribbon stage is your best cue to stop.
Imagine beating the eggs like a cloud forming — light, voluminous, and steady. This step is critical; under-whipping results in a flat sponge, while over-whipping can deflate the foam. Practice makes perfect, but watching for the ribbon stage is your best cue. The stability of this foam is what will determine the final texture of your genoise, so taking your time and paying attention to the signs of proper whipping will pay off in the final product.

Tovolo Silicone Spatula Wooden Handle for Cooking Baking Mixing, Heat Resistant Food Safe BPA Free Flexible Silicone Baking Spatula with Wood Handles Kitchen Utensils Nonstick Safe, Blue Slate
- Flexible Nylon Core: Balances strength and flexibility
- Ergonomic Wooden Handle: Comfortable for extended use
- High-Temperature Silicone: Withstands up to 600°F
As an affiliate, we earn on qualifying purchases.
As an affiliate, we earn on qualifying purchases.
Gentle Folding: Keep the Air in Your Batter
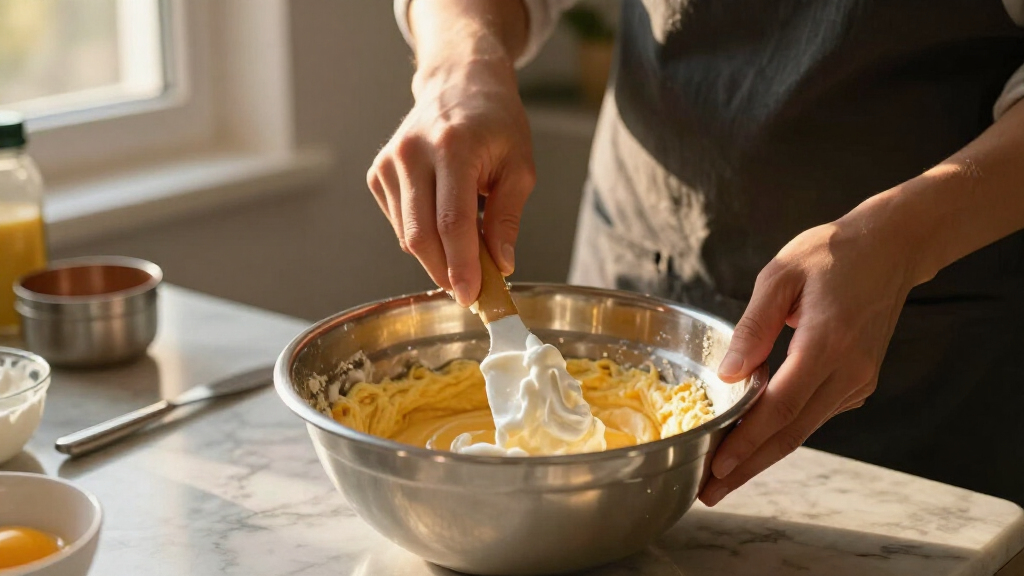
Folding is the most delicate part of making a genoise. It’s like gently coaxing a balloon into a cake pan without popping it. Use a broad spatula or large silicone scraper, and fold in the sifted flour in 2–3 additions.
Each addition should be folded in with broad, sweeping strokes, reaching the bottom and sides of the bowl. Turn the bowl as you go to ensure even incorporation. When the flour is just combined, fold in a small amount of cooled, melted butter — but do it gently to prevent deflating the foam. The goal is to integrate the ingredients without knocking out the air that gives the sponge its lightness.
Proper folding technique is essential because vigorous stirring or overmixing can deflate up to 90% of the air in the batter. This loss of air results in a denser, less tender sponge. The tradeoff is that if you are too gentle or slow, you might not fully incorporate the flour, leading to uneven texture or dense pockets. Striking a balance with quick, broad strokes preserves the maximum amount of air while ensuring uniformity. This careful handling is what ultimately determines the sponge’s delicate crumb and fluffy rise.

Alpha Grillers Instant Read Meat Thermometer Digital, Cooking, Food, Grill
- Instant Read Response: 2-second temperature readings
- Versatile Use: Suitable for grilling, baking, and more
- Easy-to-Read Display: Bright backlight for visibility in dark
As an affiliate, we earn on qualifying purchases.
As an affiliate, we earn on qualifying purchases.
Why Adding Hot Butter Can Sink Your Sponge
Adding melted butter directly to the whipped eggs can cause collapse because the hot fat melts the foam’s tiny air bubbles. To avoid this, temper the butter first.
Here’s how: Take a small spoonful of batter and mix it into the cooled, melted butter. Once combined, fold this mixture back into the main batter. This gentle temperature adjustment keeps the foam stable because it prevents sudden temperature shocks that can cause the delicate air bubbles to burst. If you add hot butter directly, the rapid temperature change causes the proteins in the foam to contract and the air bubbles to deflate, resulting in a dense, heavy sponge.
Imagine pouring hot syrup into a delicate meringue — it deflates instantly. Tempering butter is just like that, protecting your sponge’s lightness. This step ensures that the fat integrates smoothly without compromising the integrity of the foam, maintaining the airy structure that is essential for a perfect genoise.
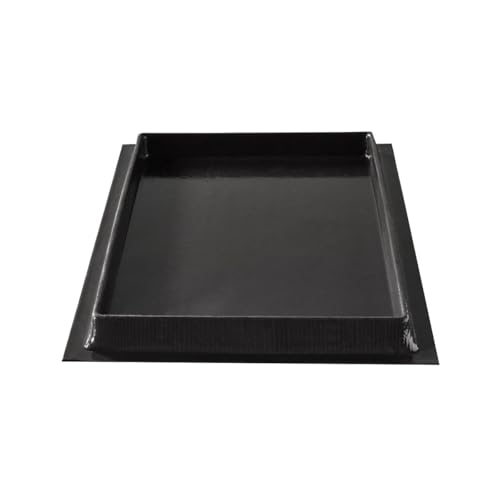
Flexipan by Silpat Sponge Cake Baking Pan – The Original Non-Stick Mold Handcrafted in France Since 1965 – Trusted by World-Class Chefs – Certified Food Safe Flexipan Technology (Swiss Roll)
- Made in France Since 1965: Trusted by professional chefs and home bakers
- Non-Stick Baking Mold: Effortless release without butter or oil
- Patented Flexipan Technology: Ensures even heat distribution and browning
As an affiliate, we earn on qualifying purchases.
As an affiliate, we earn on qualifying purchases.
Bake It Right: How to Get a Perfectly Light Genoise
Preheat your oven to around 175–180°C, and have your pan ready before you fold in the flour. Transfer the batter quickly to avoid losing air, and bake immediately. Proper preheating ensures the oven provides a consistent environment for the delicate rise of the genoise. Baking in a preheated oven prevents the batter from collapsing or deflating due to temperature fluctuations.
Don’t open the oven door early. A sudden drop in temperature can cause the cake to sink or collapse, especially if the structure hasn’t set. Bake until the sponge is golden, springy to the touch, and begins to pull away from the sides of the pan. This indicates the structure has stabilized and the moisture has evaporated enough for a tender crumb.
For best results, bake in a shallow pan for even heat distribution. A typical 20cm round takes about 25–30 minutes. When done, let it cool in the pan for 10 minutes, then transfer to a wire rack. Cooling in the pan initially allows the structure to set gradually, reducing the risk of collapse, and finishing in the wire rack ensures an even, crack-free surface.
Troubleshooting: Why Your Genoise Could Be Dense or Flat
If your genoise turns out dense or flat, check these common culprits:
- Eggs weren’t whipped enough or didn’t reach ribbon stage. Insufficient whipping means less air trapped, resulting in a denser crumb.
- Foam got deflated during folding or before baking. Any loss of air during handling compromises the sponge’s lift and lightness.
- Hot butter was added directly without tempering. The sudden temperature change can cause the foam to collapse, deflating the structure.
- The batter sat too long before baking, allowing the air bubbles to escape or the foam to deflate. Freshly prepared batter ensures maximum volume.
- Oven wasn’t preheated or was too cool. A sudden heat shock or insufficient heat prevents proper setting of the structure, leading to sinking or dense texture.
- Overmixing the flour or overfilling the pan can also affect the rise. Gentle, staged folding preserves the air, and proper pan size ensures even baking.
For example, a cake that sank in the middle often points to underbaking or a sudden temperature drop. Paying close attention to these details and understanding their implications allows you to troubleshoot effectively and consistently produce a light, airy genoise.
Choosing Ingredients That Keep Your Sponge Light
Picking the right ingredients makes a big difference. Use cake flour or a mix of cake flour and cornstarch for a fine, tender crumb. Keep sugar at a level that stabilizes the foam without making the batter too heavy. The type and quality of ingredients influence not just the flavor but also the structure; for example, using too much fat or heavy flours can weigh down the sponge, making it less airy.
Keeping butter melted and cooled minimizes excess water content, which can make the crumb dense. Consider using clarified butter to reduce moisture — too much water in the batter can interfere with the egg foam’s stability. Flavorings like vanilla or citrus zest add aroma without adding weight, and their small amount doesn’t compromise the lightness. Remember: less fat generally means lighter texture, so some recipes omit butter entirely or use minimal amounts.
For example, swapping part of the flour with cornstarch softens the crumb and improves tenderness, especially in gluten-sensitive recipes. This substitution reduces protein content, resulting in a finer, more delicate crumb that supports a lighter structure.
Keeping Your Genoise Moist and Fluffy After Baking
Genoise can dry out quickly, especially if overbaked. To keep it moist, brush it lightly with simple syrup — just enough to moisten the crumb without sogginess. The syrup adds a thin layer of moisture that rehydrates the sponge, preventing it from becoming dry or crumbly. Wrap layers airtight while cooling to lock in moisture, which also prevents the surface from drying out prematurely.
Refrigerate only if necessary, since cold can accelerate staling by causing the starch molecules to recrystallize. When ready to serve, bring the cake to room temperature; this restores softness and enhances flavor, making the crumb tender and airy. For example, a thin layer of syrup can make a dry sponge feel fresh and tender, perfect for layered cakes or roulades. Proper storage and finishing techniques preserve the delicate structure and ensure your genoise remains light and moist until serving.
Modern Tips for Consistent, Light Genoise Every Time
Use digital thermometers to monitor egg temperature, ensuring consistent results. Weigh ingredients precisely to avoid variations that can affect texture and rise. Small adjustments like lightening the oven temperature slightly or using cake strips can promote even baking and prevent doming or sinking. Finishing the whipping process with a brief low-speed mix helps produce smaller, more uniform bubbles, which contribute to a finer crumb and better rise.
Some bakers add a tiny pinch of baking powder for extra lift, especially in humid conditions where the stability of whipped eggs can be compromised. However, this should be used sparingly, as it can alter the traditional texture of genoise. Remember, every tweak should be tested and adjusted based on your specific oven and ingredients, emphasizing consistency and reliability in your results.
Embracing modern techniques and tools enhances your control over the process, leading to more predictable, light, and fluffy genoise every time.
Frequently Asked Questions
How do I tell when the eggs have reached ribbon stage?
Lift the whisk and let the batter fall back onto the surface. It should form a thick ribbon that holds its shape for a few seconds before slowly sinking — a clear sign of proper whipping.
How long should I whip the eggs?
Usually between 6–12 minutes with a stand mixer, depending on egg temperature and volume. Look for the ribbon stage and volume increase rather than relying solely on time.
Can I whip eggs without warming them?
Yes, but room-temperature eggs whip easier and more reliably. Slight warming to 40°C helps dissolve sugar and creates a more stable foam, especially in colder environments.
Why did my genoise collapse after baking?
Common causes include underbaking, deflation during folding, or opening the oven too early. Ensuring proper baking time and temperature helps set the structure.
Can I add baking powder to make it more reliable?
Traditional genoise relies on whipped eggs for lift, but a tiny pinch of baking powder can help in home baking, especially in humid conditions. Use sparingly to avoid altering the classic texture.
Conclusion
A light genoise hinges on a simple but precise process: whip, fold, bake — with care. Treat your eggs like the star of the show, and they’ll lift your sponge to a cloud-like perfection. Remember, every small step counts toward that delicate, airy crumb.
Next time you bake a genoise, visualize those tiny bubbles dancing inside the batter. Handle them gently, and you’ll create a cake that’s not just beautiful but truly light and memorable.
Baby shower & registry season Picks
baby registry must-haves
As an affiliate, we earn on qualifying purchases.