
TL;DR

Get baking supplies delivered free — and shop member deals
- Fast, free delivery on millions of items
- Access to Prime Big Deal Days deals on October 6–7
- Prime Video, Amazon Music and more included
To make soft sandwich bread that stays fresh, focus on choosing the right ingredients, kneading properly, baking at the right temperature, and storing wisely. These steps keep your bread tender and delicious for days without artificial preservatives.
Imagine biting into a slice of bread that’s soft, tender, and still fresh three days later. That’s not just luck — it’s science and technique working together. If you’ve ever had bread turn dry or stale faster than you’d like, you’re not alone. The good news? With a few simple tweaks, you can bake bread that stays irresistibly soft and fresh longer.
In this guide, you’ll learn the secrets behind making bread that’s both fluffy and resilient. From selecting ingredients to perfecting your baking method and storage tips, I’ll walk you through every step. Whether you’re a beginner or want to elevate your home baking, these insights will help you craft loaves that everyone will ask for again.
Use milk, fats, and a touch of sweetener to boost moisture and softness.
Knead until elastic, proof thoroughly, and bake at 350°F–375°F for fluffy, tender bread.
Cool bread completely on a wire rack before storing to preserve the crumb.
Store in breathable containers like a paper bag or bread box, or freeze slices for longer freshness.
Adding ingredients like potato flakes or yogurt can significantly improve moisture retention.
How to Make Soft Sandwich Bread That Stays Fresh
Tender bread that still tastes fresh three days later is not luck. It comes from moisture-holding ingredients, well-developed gluten, controlled heat, complete cooling, and storage matched to when you plan to eat it.
Softness begins before the mixer starts.
Each ingredient has a structural job: flour builds the frame, fat keeps it tender, and milk plus sweetener help the crumb hold water as the loaf ages.
Bread flour
Higher protein supports a resilient gluten network, trapping fermentation gases without sacrificing the fine, even crumb a sandwich loaf needs.
Butter or oil
Fat coats gluten strands and limits tightening. The result is a softer bite and a crumb that resists becoming dry and brittle.
Milk + honey
Milk adds water and richness, while a little honey or sugar attracts moisture and supports browning, flavor, and longer-lasting softness.
A practical starting formula
Relative moisture support
Knead for elasticity. Proof for lightness.
A balanced gluten network traps gas and distributes moisture. Too little development creates a dense loaf; too much tension or fermentation makes the crumb tough or fragile.
Mix
Combine until no dry flour remains and the dough is evenly hydrated.
Knead
Work until smooth, supple, and elastic—not stiff, torn, or greasy.
Proof
Let the dough become visibly puffy and approximately double in size.
Test
A gentle press should spring back slowly while leaving a slight mark.
Use dough behavior—not only the clock—as your guide. Temperature, yeast activity, and flour absorption can all change proofing time.
Target: visibly doubledModerate heat protects the tender center.
Bake evenly at 350–375°F (180–190°C). A little steam early in the bake delays crust setting, encourages oven spring, and helps create a flexible exterior.
The ideal zone balances complete baking with moisture preservation. Excess heat can set a thick crust before the loaf fully expands.
The cooling rule that saves the crumb
- Move the loaf to a wire rack so steam cannot pool underneath.
- Wait at least one hour before slicing; residual heat is still setting the interior.
- Cutting early releases trapped moisture and can leave the crumb gummy, then dry.
- Store only after the loaf is fully cool to reduce condensation and mold risk.
Match the container to the timeline.
No single method wins every category. Balance airflow, humidity, crust texture, and the number of days before the loaf will be eaten.
| Method | Best for | What works | Tradeoff | Verdict |
|---|---|---|---|---|
| Paper bag | Short room-temperature storage | Breathes well and prevents moisture buildup. | Can dry quickly in arid rooms. | ~Good for crust |
| Bread box | Daily use over 2–3 days | Balances humidity with gentle airflow. | Performance varies with room climate. | ✓Best everyday |
| Plastic wrap | Maximum softness | Locks moisture into the crumb. | May create a soggy crust or trap humidity. | ~Use briefly |
| Refrigeration | Slowing microbial growth | Can extend mold-free storage toward a week. | Accelerates starch staling and toughening. | ✗Avoid for texture |
| Freezing | Weeks of storage | Preserves quality when slices are sealed well. | Requires thawing; poor wrapping causes freezer burn. | ✓Best long-term |
Pro move / Slice before freezing, then toast individual slices directly from frozen.
Small additions, longer tenderness.
These ingredients hold water, soften the crumb, or slow the changes in starch that make bread feel stale.
Potato flakes
Add about two tablespoons. The starch absorbs and retains water inside the crumb, slowing firmness over time.
+15–20%Yogurt
Contributes moisture, gentle tang, and lactic acid while supporting a tender, resilient interior.
Softer crumbPlant milk + oil
A dairy-free combination can still deliver excellent softness when hydration and fat remain balanced.
Dairy-freeThe freshness chain
Choose the Right Ingredients for Soft, Long-Lasting Bread
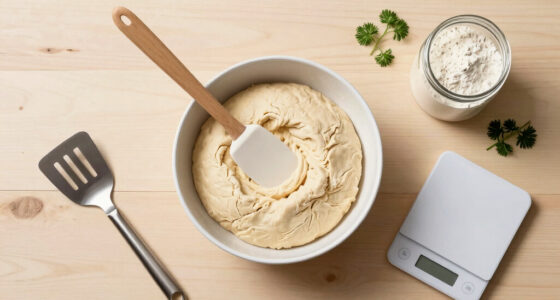
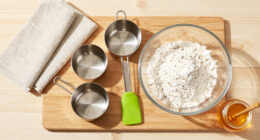
Your bread’s softness and freshness start with what you put in the dough. Using bread flour, which is higher in gluten, provides the necessary structure that traps gases and gives the bread its chewy yet tender crumb. Adding fats like butter or oil tenderizes the gluten network, resulting in a softer texture that resists drying out and staling. Milk or plant-based milk introduces moisture and richness, which help keep the crumb moist over time. A touch of honey or sugar not only enhances flavor but also acts as a humectant — a substance that attracts and retains moisture, which is crucial for extending freshness.
For example, a basic recipe might include 3 cups of bread flour, 1 cup of milk, 2 tablespoons of butter, and 1 tablespoon of honey. These ingredients work together to create a tender, moist crumb that resists drying out. The choice of ingredients significantly impacts how long your bread remains soft. Using milk instead of water, for instance, increases the moisture content, which slows down the staling process. Similarly, fats coat the gluten strands, preventing them from tightening and becoming crumbly as the bread ages. The tradeoff is that these ingredients can slightly alter the flavor or texture, so balancing them according to your preference is key.
As an affiliate, we earn on qualifying purchases.
Master the Art of Kneading and Proofing
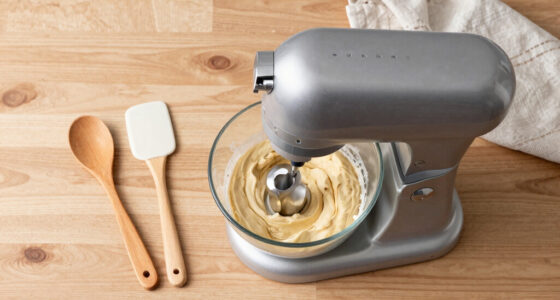
Proper kneading develops a robust gluten network, which is essential for trapping gases produced during fermentation. This network provides the structure needed for the bread to rise well while maintaining a tender crumb. Over-kneading can cause the gluten to become too tight, resulting in a dense, tough loaf, whereas under-kneading leads to weak structure and a crumb that can be crumbly or flat. Achieving the right balance ensures the dough is elastic and smooth, which translates into a soft, airy texture that retains moisture longer.
Proofing, or the fermentation stage, is equally critical. Allowing the dough to rise until it approximately doubles in size creates enough internal gas pockets to produce a light, fluffy crumb. Proper proofing also allows the gluten to fully develop, which enhances the dough’s ability to trap moisture. Under-proofed bread tends to be dense and can dry out quickly because the internal structure isn’t fully developed. Over-proofed bread may collapse or become overly airy, leading to a fragile crumb that dries faster. For optimal softness and freshness, proof until the dough is visibly puffy and springs back gently when pressed. This balance ensures the bread’s internal moisture is well-distributed, extending its tender quality over several days.
bread storage container breathable
As an affiliate, we earn on qualifying purchases.
As an affiliate, we earn on qualifying purchases.
Bake at the Right Temperature for Softness and Even Crust
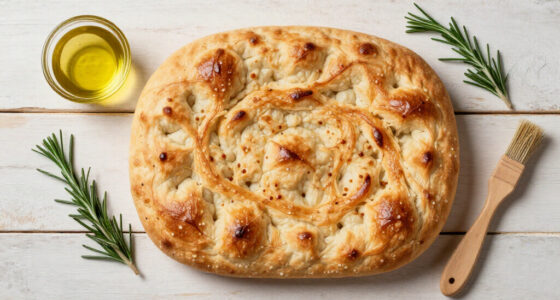
Baking at 350°F to 375°F (180°C to 190°C) ensures your bread cooks evenly without excessive drying or burning. Using steam during the initial phase of baking — for example, by placing a pan of water in the oven — creates a moist environment that keeps the crust soft and promotes oven spring, which is the rapid rise of dough in the oven. This steam helps gelatinize the starches on the surface, forming a tender crust that doesn’t crack prematurely and allows the bread to expand fully. A consistent, moderate temperature prevents the crust from forming too quickly or becoming too thick, which can lead to a tougher exterior and faster staling. The goal is to produce a uniformly cooked loaf with a soft interior and a gentle, flexible crust that retains moisture longer. This careful temperature control directly impacts how long your bread stays tender and how well it resists staling.
Tradeoffs include the need for extra equipment or steps, like adding steam, but the payoff is a loaf with a delicate balance of crust and crumb that stays soft for days.
As an affiliate, we earn on qualifying purchases.
Cool and Store Your Bread the Right Way
Cooling your bread on a wire rack prevents moisture from pooling on the bottom, which can lead to a soggy crust and a gummy crumb. Allowing the bread to cool completely — at least 1 hour — is crucial because residual heat continues to steam the interior, and slicing too early releases this moisture, causing the bread to dry out faster. Proper cooling ensures the internal structure stabilizes, locking in the moisture that keeps the crumb tender.
For storage, wrapping the bread loosely in a clean cloth or placing it in a bread box creates a microenvironment that balances humidity and airflow. This prevents the crust from becoming too hard or too soft, both of which can accelerate staling. If you want to extend freshness beyond 2-3 days, slicing and freezing the bread is effective. When freezing, slice the loaf first; this allows you to thaw only what you need without exposing the entire loaf to freezer burn or moisture loss. Toasting slices from frozen restores a fresh, warm texture, making the bread feel almost new. The key is understanding that proper cooling and storage methods maintain the bread’s internal moisture and texture, significantly extending its shelf life.
As an affiliate, we earn on qualifying purchases.
Compare Common Storage Methods to Keep Bread Fresh Longer
| Method | Pros | Cons |
|---|---|---|
| Paper Bag | Breathes well, prevents moisture buildup, keeps crust tender | Not airtight, may dry out faster, especially in dry environments |
| Plastic Wrap | Locks in moisture, keeps bread soft for a longer period | Traps excess humidity, which can lead to a soggy crust or mold if stored too long |
| Refrigeration | Extends shelf life to about a week by slowing microbial growth | Accelerates staling due to moisture loss, making bread tough and dry faster |
| Freezing | Preserves freshness for weeks, maintains quality when properly sealed | Requires thawing or toasting; improper packaging can cause freezer burn or moisture loss, affecting texture |
Add Natural Ingredients to Boost Softness and Freshness
Incorporating ingredients like potato flakes, yogurt, or additional milk can significantly enhance moisture retention, making bread softer and more resistant to staling. Potato flakes, for example, contain starches that absorb and hold onto water, creating a moist environment within the crumb that slows down the crystallization of starch molecules responsible for staling. Adding 2 tablespoons of potato flakes can boost moisture retention by approximately 15-20%, which translates into a noticeably longer period of softness. Yogurt introduces lactic acid, which not only improves flavor but also strengthens the gluten network, helping the bread stay moist and tender longer. Similarly, extra milk or milk powder enriches the dough, increasing internal moisture. Using these natural add-ins involves tradeoffs — they may slightly alter the flavor profile or texture but offer a significant benefit in extending freshness and improving mouthfeel. Experimenting with these ingredients allows you to customize your loaf for optimal softness and longevity.
Additionally, small amounts of vinegar or ascorbic acid can act as preservatives, strengthening gluten and helping the bread retain moisture by reducing staling. These options provide natural ways to enhance shelf life without relying on artificial preservatives.
Frequently Asked Questions
How do I keep my bread soft for several days?
Store it in a breathable container like a bread box or loosely in a cloth. Avoid refrigeration, which can dry it out. Freezing slices and toasting as needed can also extend freshness without sacrificing softness.Can I make soft bread without using butter or milk?
Yes. Vegetable oil or plant-based milk work well as substitutes. They help keep the crumb tender and moist, just like dairy-based ingredients.Why did my bread turn out dense or tough?
Possible causes include under-kneading, over-proofing, or baking at too high or too low a temperature. Ensuring proper kneading and proofing, along with correct oven settings, makes a big difference.How can I make my bread more flavorful?
Add ingredients like honey, malt syrup, or herbs. Using a preferment or sourdough starter also deepens flavor while maintaining softness.What are the best storage methods to keep bread fresh?
Room temperature in a paper bag or bread box works well for 2-3 days. For longer, slice and freeze, then toast slices directly from the freezer for a fresh taste.Conclusion
Making bread that stays soft and fresh longer isn’t magic — it’s about choosing the right ingredients, mastering the baking process, and storing wisely. A simple tweak, like adding a splash of milk or using a proper cooling rack, can transform your loaf from dry to delightfully tender. With these practical tips, your homemade sandwiches will stay soft and delicious for days.
Next time you bake, think of your loaf as a little gift — tender, moist, and waiting to brighten your day. Because good bread isn’t just a snack; it’s a daily comfort you can craft yourself.
Fall Picks
fall essentials
As an affiliate, we earn on qualifying purchases.