TL;DR
Caramelizing sugar doesn’t have to be nerve-wracking. Focus on even heat, patience, and clear steps. With practice, you’ll create luscious caramel without the stress or burnt bits.
Ever watched sugar turn from sweet granules to rich, amber perfection and felt a wave of panic? You’re not alone. Caramelizing sugar often feels like walking a tightrope—one wrong move and it’s burnt or lumpy. But here’s the truth: with a few simple techniques, you can master this skill and impress yourself with glossy, flavorful caramel every time.
In this guide, you’ll learn the practical steps to caramelize sugar smoothly, avoid common pitfalls, and handle the process with confidence. No more frantic stirring or burnt batches—just calm, control, and delicious results.
Use a heavy-bottomed pan for even heat distribution.
Control heat carefully — medium-low is your friend.
Stir gently and only when necessary to prevent crystallization.
Watch the color closely—remove from heat at the perfect amber shade.
Practice patience; rushing leads to burnt or uneven caramel.
What Exactly Is Caramelization and Why It Matters
Caramelization is the process of heating sugar until it melts and transforms into a golden, fragrant syrup. This isn’t just a simple melting; it’s a complex chemical transformation where sugar molecules break down and recombine, creating deeper flavors and richer colors. Understanding this process matters because it helps you predict and control the outcome—whether you want a light amber for delicate desserts or a darker, more robust caramel for richer treats.
Knowing the temperature range—around 320°F to 350°F—is crucial because it marks the sweet spot where sugar develops optimal flavor without burning. Going above this range causes rapid caramelization that quickly turns bitter or burnt, while staying below it may result in underdeveloped flavor and a sticky, uneven texture. Recognizing the signs of each stage allows you to make real-time adjustments, giving you control over the final product and reducing waste or frustration.
heavy-bottomed saucepan for caramelizing sugar
As an affiliate, we earn on qualifying purchases.
As an affiliate, we earn on qualifying purchases.
The Simple Steps for Stress-Free Caramelizing
Here’s a straightforward process to caramelize sugar without panic:
- Choose the right pan: Use a heavy-bottomed saucepan for even heat distribution, which minimizes hot spots—an essential factor because uneven heat can cause parts of the sugar to burn while others remain unmelted.
- Measure accurately: Use a reliable scale or measuring cup. Around 1 cup of sugar is a good starting point because it’s manageable and reduces the risk of uneven heating, especially for beginners.
- Apply even heat: Set your stove to medium-low. Too high? It’ll cause rapid melting and burning. Too low? It prolongs the process and can lead to crystallization. Consistent, moderate heat allows the sugar to melt evenly and develop flavor gradually.
- Start slow: Add sugar evenly across the pan and stir gently with a heatproof spatula or wooden spoon. Gentle stirring helps dissolve the sugar uniformly and prevents crystallization, which can ruin the texture and appearance.
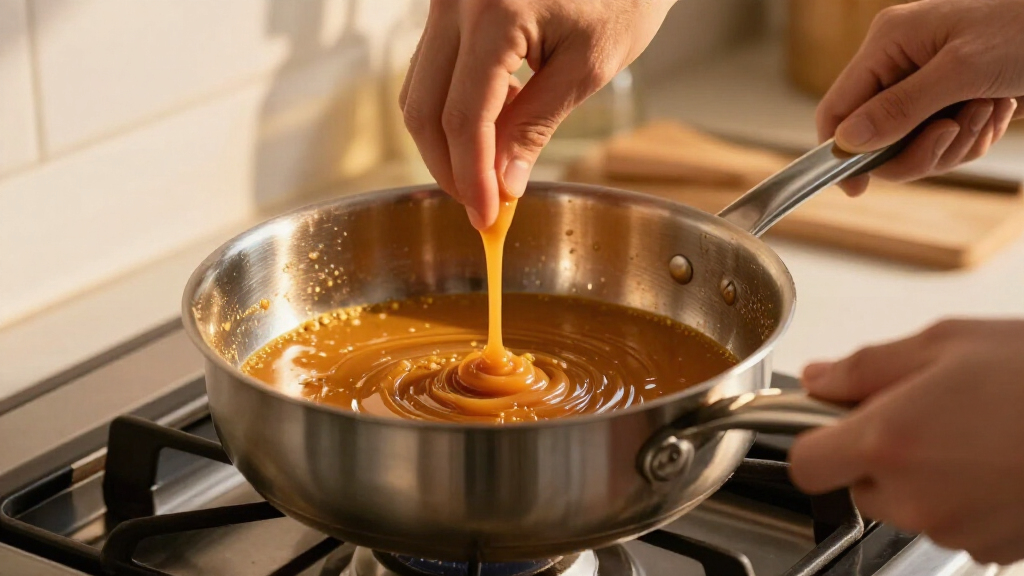
- Watch the color: As the sugar melts, it will go from clear to light amber, then deep gold. This process can take 5-10 minutes depending on the heat and amount. Remove from heat promptly at the right shade because residual heat will continue to darken the caramel, risking bitterness.
- Handle carefully: Pour or use immediately in your recipe. Hot caramel can cause severe burns, so focus and use protective gear if needed. Proper handling ensures safety and preserves the quality of your caramel.
Practicing this process multiple times will train your eye to recognize the perfect color and texture, giving you confidence and mastery over caramelization.

Etekcity Food Kitchen Scale, Digital Grams and Ounces, 11lb
- Multiple Measurement Units: Supports oz, lb, fl oz, g, mL
- Tare Function Included: Zero out weight for accurate measurements
- Hassle-Free Operation: Includes 2 AAA batteries
As an affiliate, we earn on qualifying purchases.
As an affiliate, we earn on qualifying purchases.
Why Your Pan Choice Can Make or Break Your Caramel
The type of pan influences how evenly heat is distributed, which directly impacts the success of your caramel. A heavy-bottomed pan, such as stainless steel or cast iron, acts as a heat reservoir, spreading warmth uniformly and preventing hot spots that can cause localized burning or crystallization.
Imagine trying to cook sugar in a thin, cheap pan—hot spots can cause uneven melting, leading to burnt patches or clumps that ruin the smooth texture of your caramel. Conversely, a thick, heavy pan ensures consistent heat, allowing you to control the process better and achieve a glossy, even finish.
For best results, Aromas Healthy Bake recommends a pan with a heavy base, especially if you’re new to caramelizing. This choice minimizes the risk of uneven heating, which is often the root cause of many common caramel mishaps. Investing in quality cookware can make the process less stressful and more predictable, especially when mastering the technique.
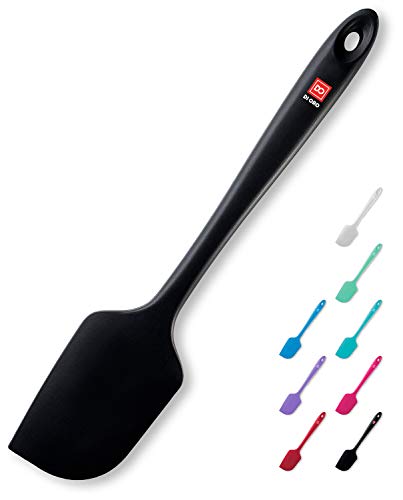
DI ORO Silicone Spatula – 600°F Heat-Resistant Rubber Kitchen Spatula for Baking, Scraping, & Mixing – BPA Free Nonstick Cookware Safe Flexible Utensil for Cooking – Seamless & Dishwasher Safe (Black)
- Awarded Best All-Around Spatula: Recognized by Cook's Illustrated for excellence
- Seamless One-Piece Design: No seams or cracks for easy cleaning
- Heat-Resistant up to 600°F: Safe for high-temperature cooking and baking
As an affiliate, we earn on qualifying purchases.
As an affiliate, we earn on qualifying purchases.
Common Mistakes and How to Avoid Them
Many people panic because they see sugar scorch or crystallize, but understanding why these happen helps you avoid them. Here’s what to watch out for and how to prevent these issues:
- Stirring too much: Excessive stirring can cause crystallization, leading to grainy caramel. Stir gently and only when necessary—initially to dissolve sugar, then minimally during melting. Gentle stirring encourages uniform melting without triggering crystal formation.
- Heating too quickly: High heat causes rapid caramelization and burning, resulting in bitter flavors and dark patches. Keeping the heat at medium-low allows sugars to melt slowly and evenly, giving you more control over the color and flavor development.
- Adding moisture: Don’t add water or liquids unless the recipe specifically calls for it. Water accelerates crystallization and can cause the sugar to seize up, making it difficult to achieve a smooth caramel. If moisture is necessary, add it gradually and carefully, and understand that it may prolong the caramelization process.
- Not watching the color: Caramel develops quickly once it reaches the amber stage. If you’re not attentive, you risk over-darkening or burning. Keep a close eye, and remove from heat immediately when the desired hue appears. This attentiveness ensures a balanced flavor and a glossy appearance.
A vivid example: one novice tried to rush caramel on high heat, expecting quick results. Instead, it scorched within seconds, producing a bitter smell and unusable syrup. This illustrates why patience and controlled heat are crucial—rushing compromises flavor, appearance, and safety. Slow, deliberate steps yield the best, most reliable caramel.

Digital Candy Thermometer with Pot Clip, 10" Long Stainless Steel Probe, Instant Read Kitchen Thermometer for Cooking, Baking, and Candy Making
- Pot Clip for Safe Handling: Securely attaches to pots for safety
- Clear LCD Temperature Display: Easy-to-read digital screen
- Waterproof and Easy to Clean: IP65 rated, safe under running water
As an affiliate, we earn on qualifying purchases.
As an affiliate, we earn on qualifying purchases.
Frequently Asked Questions
How do I prevent my sugar from crystallizing?
Avoid stirring once the sugar begins to melt, as agitation encourages crystal formation. Use a clean, damp brush to wash down any sugar crystals clinging to the sides of the pan, which can serve as nucleation points for crystallization. Additionally, maintaining a steady, moderate heat helps prevent sudden temperature drops or spikes that trigger crystallization. If crystals do form, adding a small amount of water and gently warming can dissolve them, but the key is to keep the process smooth and steady from the start.
Can I make caramel in a microwave?
Yes, but it’s a technique that requires attention. Use a microwave-safe dish, heat in short bursts—about 20-30 seconds—and stir carefully between intervals to promote even melting. Monitoring closely prevents overheating, which can cause boiling over or burning. This method is suitable for small batches or quick projects, but for larger or more controlled caramelization, stovetop methods offer better consistency and control.
What’s the best way to store leftover caramel?
Pour cooled caramel into an airtight container and store at room temperature for up to a week. For longer storage, refrigerate it—just be aware that refrigeration can cause the caramel to become firm. To restore its silky texture, gently reheat it in a microwave or over low heat on the stove. Proper storage prevents crystallization and spoilage, and reheating ensures your caramel remains smooth and ready for your next recipe.
Conclusion
Caramelizing sugar without panic boils down to patience, control, and understanding your equipment. It’s a simple skill that, once mastered, turns an everyday ingredient into a rich, golden treasure.
Next time you reach for the sugar, remember: calm hands and attentive eyes are all you need. Soon, caramel will become your favorite stress-free baking moment—sweet, fragrant, and perfectly glossy.