TL;DR
Achieving a bakery-style pie edge is all about choosing the right tools, practicing consistent pressure, and paying attention to dough temperature. Even beginners can create professional-looking crimps with the right approach.
Ever notice how bakery pies have that perfect, uniform edge that makes your mouth water before you even cut into it? That polished finish isn’t magic — it’s technique. Whether you’re baking for friends or just want to elevate your homemade pies, mastering the art of crimping transforms a simple crust into a professional-looking masterpiece.
In this guide, you’ll learn how to achieve those clean, beautiful edges that look like they came straight from a bakery. No fancy equipment needed—just your hands, a few tools, and some practice. Let’s turn your pie from homemade to showstopper.
Use chilled dough for better control and cleaner crimps.
Practice with simple tools like a fork or fingers before investing in specialized equipment.
Maintain even pressure and consistency to achieve a uniform, professional look.
Experiment with decorative patterns to make your pies stand out.
Don’t be discouraged by imperfections—many can be fixed with gentle reshaping or trimming.
Why Your Pie Edge Matters and How to Make It Look Pro
The crust edge is the finishing touch that makes or breaks your pie’s look. A well-crimped edge isn’t just about aesthetics; it plays a crucial role in the overall presentation and functionality of your pie. A neat, uniform crust shows attention to detail and elevates the entire dessert, making it more inviting and professional-looking. Beyond appearance, a properly crimped edge helps seal the filling inside, preventing leaks during baking, which can compromise the pie’s structure and texture. When your crust is evenly sealed, you also ensure consistent baking and a better eating experience.
Imagine biting into a pie with uneven, sloppy edges versus one with a tidy, fluted border. The difference isn’t just visual—it reflects the baker’s care and skill. Achieving that bakery-quality finish involves understanding the importance of consistent pressure, selecting the right tools, and developing a steady hand. These details might seem small, but they significantly impact the final presentation and how your pie is perceived. So, investing time in perfecting your crimping technique is well worth the effort, especially when you want your homemade pies to look as impressive as those from a professional bakery.

Fusiontec Pastry Wheel Cutter – Pasta Cutter Wheel – Ravioli Crimper Cutter Wheel for Home and Kitchen Use, 1.3inch
- Unique Fluted Design: Creates clear pasta and ravioli patterns
- Durable Materials: Solid wood handle and food-grade aluminum frame
- Perfect Size: 1.3-inch diameter wheel, 5.3 inches long
As an affiliate, we earn on qualifying purchases.
As an affiliate, we earn on qualifying purchases.
Tools That Make Crimping Easier and More Precise
Getting a bakery-quality edge isn’t about fancy gadgets—it’s about choosing the right tools to help you shape and control your crust. The proper tools can make a significant difference in achieving uniform, attractive crimps, especially for those still developing their technique. For instance, a scalloped crimping wheel not only helps create consistent patterns but also reduces fatigue in your hands, allowing for more uniform results even over multiple pies. Using a fork might be a quick fix for a rustic look, but it can also introduce inconsistencies if not handled carefully. Decorative cutters, like scalloped or fluted varieties, give a polished appearance but also help maintain even pressure along the edge, which is crucial for a professional look. Fingers and thumbs, the most traditional tools, offer maximum control and a handmade charm but require more skill to keep results uniform.
Choosing the right tool depends on your desired aesthetic, the type of pie, and your comfort level. For example, a scalloped crimping wheel is excellent for creating consistent, decorative edges with minimal effort, which is especially helpful if you’re short on time or working on multiple pies. Meanwhile, finger crimping allows for a more rustic, personal touch that can be just as appealing when done with care. Practicing with different tools helps you discover what feels most natural and yields the best results, ultimately helping you develop a signature style. Remember, the goal isn’t just neatness but also efficiency—using the right tools streamlines your process and helps you produce bakery-quality results more consistently.

Talisman Designs Pastry Wheel Pie Crust Decorator | Pie Crust Wheel | Pie Crust Decorating Tools | Easy to Use Pastry Wheel | Pie Decorating Tools & Gadgets | Pie Crust Embosser
- Pastry Wheel Decorator: Creates professional-looking pie crusts
- Bakery-Style Pie Creation: Produces flawless, decorative crusts easily
- Suitable for Single or Double Crusts: Versatile for various crust thicknesses
As an affiliate, we earn on qualifying purchases.
As an affiliate, we earn on qualifying purchases.
Step-by-Step: How to Crimp Like a Bakery Pro
- Chill your dough: Keep it cold—around 40°F (4°C)—for better handling. Cold dough is firmer, less sticky, and easier to manipulate, which results in cleaner, more uniform crimps. Warm dough tends to become sticky and can distort easily, leading to uneven edges. Proper temperature control is a simple but crucial step that directly impacts your ability to create neat, consistent patterns.
- Trim excess dough: Leave about 1/2 inch beyond the rim for crimping. Trimming excess dough evenly ensures your edges are uniform and manageable, reducing the risk of uneven crimps or dough bunching up during the process. This step also makes it easier to maintain a consistent pressure as you work around the pie.
- Choose your tool: Use a fork, crimping wheel, or fingers based on your pattern. Each tool offers different control and aesthetic options, so select one that aligns with your pattern and comfort level. Experimenting with different tools helps you find your signature style and improves your technique over time.
- Start at one point: Press or roll to create your pattern, working around the edge. Consistent starting points and working methodically help keep your pattern even. Establishing a rhythm minimizes mistakes and promotes uniformity.
- Maintain even pressure: Keep your hand steady to ensure uniform crimps. Applying consistent pressure prevents variations in size and depth, which can make the edge look uneven. Developing a gentle, controlled touch through practice ensures your crimps are neat and professional-looking.
- Check your work: Step back and see if your pattern looks even. Adjust if needed. Regularly inspecting your progress allows you to catch and correct irregularities early, ensuring a polished final appearance.
Imagine working smoothly, your fingers gliding along the crust, each crimp perfectly aligned. With practice, this becomes second nature—and your pie edges will rival those from a bakery window. Developing a steady rhythm and paying attention to details like pressure and consistency are the keys to professional-looking crimps that impress every time.

Pastry Wheel Cutter, Stainless Steel Fluted Pasta Crimping Wheel Dough Crimper Pie Crust Cutter Lattice Roller Ravioli Maker Tool for Pizza Noodle Cracker
- Versatile Dough Cutting Tool: Suitable for various dough types
- Durable Stainless Steel Material: Reliable, hard, and deformation-resistant
- Ergonomic Size and Handle: Easy to grip and operate
As an affiliate, we earn on qualifying purchases.
As an affiliate, we earn on qualifying purchases.
Decorative Crimping Patterns That Wow
If you want to add a special touch, try these patterns:
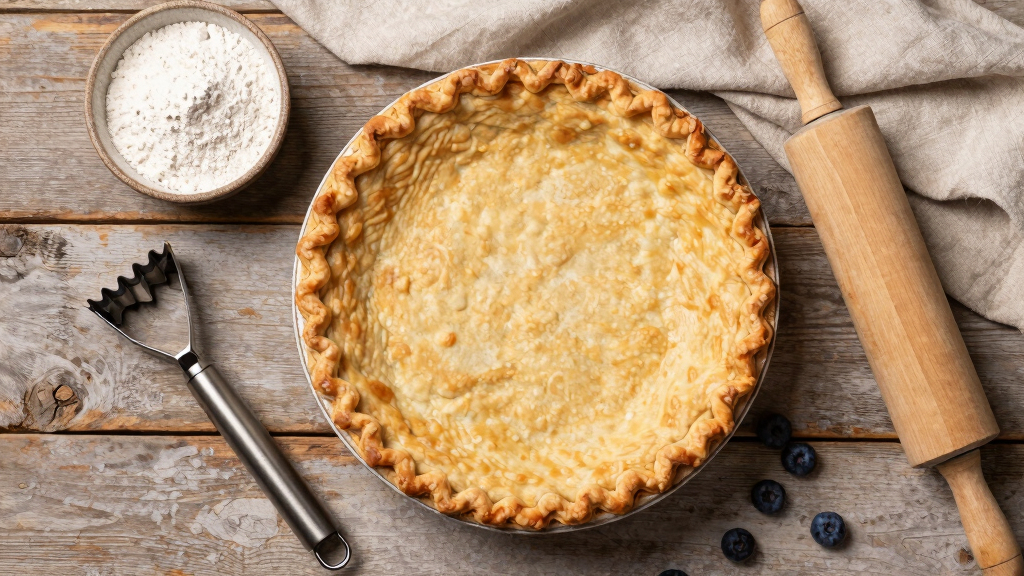
- Fluted: Classic scalloped edge created with fingers or a scalloped cutter. This pattern adds a gentle, rhythmic wave that frames the pie beautifully, making it look more intricate and refined. The repetitive motion of pinching or pressing creates a consistent, eye-catching border that elevates even simple pies. This pattern not only enhances visual appeal but also showcases your skill in creating uniform, decorative edges that add sophistication to your baked goods.
- Braided: Roll three thin strips of dough and braid them along the edge. This technique mimics a woven ribbon, offering a handcrafted, artisanal look. Braiding requires more effort and patience but results in a textured, decorative border that stands out. Besides aesthetic appeal, a braided crust can provide added durability, helping the crust hold up better during baking and serving, especially for fruit pies with juicy fillings.
- Lattice-inspired: Use a crimping wheel to create a textured, woven look that resembles latticework. This pattern is ideal for showcasing the filling of fruit pies while adding a rustic charm. It involves creating a series of parallel crimps that intersect, giving the appearance of a woven basket. This technique combines visual interest with practicality, as it can help prevent filling from spilling out and provides a professional finish that elevates the overall presentation.
- Double crimps: Combine a simple pinch with a decorative pattern for layered effect. This approach adds depth to your crust, making it look more elaborate without requiring advanced skills. Double crimps can be used to highlight certain sections or create a unique border that reflects your personal style. They also reinforce the crust, making it sturdier, which is especially useful for heavier fillings or elaborate designs.
Picture a deep cherry pie with a fluted edge and a braided border—those extra details make it look truly bakery-finished. Practicing different patterns on scraps or small pies before trying on your main crust helps build confidence and ensures your final product looks polished and intentional. Decorative patterns not only enhance visual appeal but also allow you to express creativity and craftsmanship in your baking, making each pie a true work of art.
Talisman Designs Pastry Wheel Pie Crust Decorator | Pie Crust Wheel | Pie Crust Decorating Tools | Easy to Use Pastry Wheel | Pie Decorating Tools & Gadgets | Pie Crust Embosser
- Pastry Wheel Decorator: Creates professional-looking pie crusts
- Bakery-Style Pie Creation: Produces flawless, decorative crusts easily
- Suitable for Single or Double Crusts: Versatile for various crust thicknesses
As an affiliate, we earn on qualifying purchases.
As an affiliate, we earn on qualifying purchases.
Tips for Perfect, Even Crimps Every Time
Consistency is key. Here’s how to keep your crimps uniform and tidy:
- Handle dough gently: Don’t stretch or overwork it, which can cause uneven edges and distort your pattern. Gentle handling preserves the dough’s structure, ensuring your crimps stay even and neat. Overworking can also cause shrinkage during baking, leading to a less polished appearance.
- Use chilled dough: It’s firmer and easier to shape, reducing the risk of stretching or tearing during crimping. Chilled dough holds its shape better in the oven, resulting in a cleaner, more professional appearance and preventing the crust from shrinking away from the filling.
- Apply steady pressure: Keep your hand relaxed to avoid squishing or uneven crimps. Developing a light, controlled touch through practice helps produce consistent patterns that look uniform and refined. Uneven pressure can lead to variations in crimp depth and size, diminishing the overall visual harmony of the crust.
- Practice on scraps: Develop your technique without risking your main crust. Working on small pieces allows you to experiment with pressure, tools, and patterns, leading to more confident and precise crimping on your actual pie. This practice helps you understand how much pressure to apply and how to manipulate the dough for the best results.
- Trim excess dough evenly: A clean, uniform edge makes crimping smoother and more attractive. Even trimming ensures each section of the crust is the same width, which helps maintain consistent pressure and patterning during crimping. It also simplifies the process, reducing the chance of irregularities and making your finished pie look more professional.
Remember, even experienced bakers spend time refining their technique. Regular practice helps you develop a feel for the right pressure and motion, making your crimps more consistent and professional-looking over time. Patience and repetition are your best tools for perfecting this skill, and each attempt brings you closer to a flawless, bakery-quality crust.
Fixing Messy or Uneven Edges Without Starting Over
Messy crimps happen, and they’re part of the learning process. The key is knowing how to fix them quickly and effectively to maintain a polished look. The implications of uneven edges can range from minor aesthetic issues to structural weaknesses, especially if the crust tears or becomes misshapen during handling or baking. Addressing these imperfections promptly helps preserve the overall appearance and integrity of your pie. With a few simple techniques, you can salvage an imperfect edge and still achieve a bakery-quality appearance, saving you time and frustration.
- Use a small knife or scissors: Carefully trim any uneven or jagged edges. This step creates a cleaner base, making your subsequent re-crimping or reshaping easier and more precise. Trimming also prevents small tears from expanding during baking, which could compromise the crust’s appearance and durability.
- Gently reshape: Use your fingers to smooth out irregularities or flatten bumps. Light pressure helps mold the dough back into a more even shape without damaging the crust’s integrity. This technique is especially useful for minor imperfections and can be combined with trimming for best results.
- Re-crimp in sections: Instead of redoing the entire edge, focus on problem areas. Re-apply your pattern or pressure only where needed, which saves time and preserves the overall look of your pie. This targeted approach allows for corrections without disrupting the entire crust’s design.
- Practice patience: Sometimes, small imperfections add rustic charm, especially if you’re going for a homemade look. Accept minor flaws and use them as opportunities to learn. Over time, these small adjustments and forgiving techniques help you develop a more confident, refined crimping style that looks intentional and professional.
Imagine realizing your edge is a bit wonky—no worries! With a little touch-up, you can make your pie look just as polished as one from a bakery display. These quick fixes allow you to maintain a professional appearance without starting from scratch and encourage continued practice, ultimately leading to better results over time.
Frequently Asked Questions
Can I achieve bakery-quality crimps with just my fingers?
Absolutely. Pinching and folding with your fingers can create beautiful, textured crimps. For a more uniform look, a crimping wheel or scalloped cutter can help, but fingers work perfectly for a rustic, charming finish.How do I prevent my crust from shrinking or losing shape during crimping?
Keep your dough cold—around 40°F (4°C)—and handle it gently. Avoid overworking the dough, and don’t stretch it when crimping. Chilled dough holds shape better and gives a cleaner, more professional edge.What if my edges look uneven after baking?
Sometimes, uneven edges are due to inconsistent pressure or uneven dough. You can fix minor issues by trimming or reshaping while still warm or carefully re-crimping once cooled. Practice makes perfect!Are decorative patterns worth the extra effort?
Yes. Decorative crimps like fluted or braided edges add a polished, bakery look that impresses guests and elevates your presentation. Plus, experimenting with patterns makes baking more fun.Conclusion
Mastering the art of crimping turns a simple pie into a visual delight. The secret lies in steady hands, the right tools, and a little patience. With each pie, you’ll get closer to that bakery-perfect edge everyone admires.
Imagine slicing into a pie with a beautifully finished crust—you’ll feel proud knowing your effort paid off. So next time you bake, focus on those edges. It’s the small details that make your homemade pies truly special.