
TL;DR
Many baking failures—dense cakes, flat bread, or crumbly cookies—stem from avoidable mistakes. This guide reveals the top 10 errors and clear ways to stop making them, so your baked goods turn out perfect more often.
Stop overmixing—mix just until ingredients combine for tender results.
Use a digital scale to measure ingredients precisely, not just volume cups.
Always check and calibrate your oven with a thermometer for even baking.
Chill dough and proof yeast properly to prevent flat or dense baked goods.
Adjust for altitude and humidity to keep your baking consistent regardless of environment.
Why Overmixing Batter Is a Hidden Killer of Fluffy Bakes
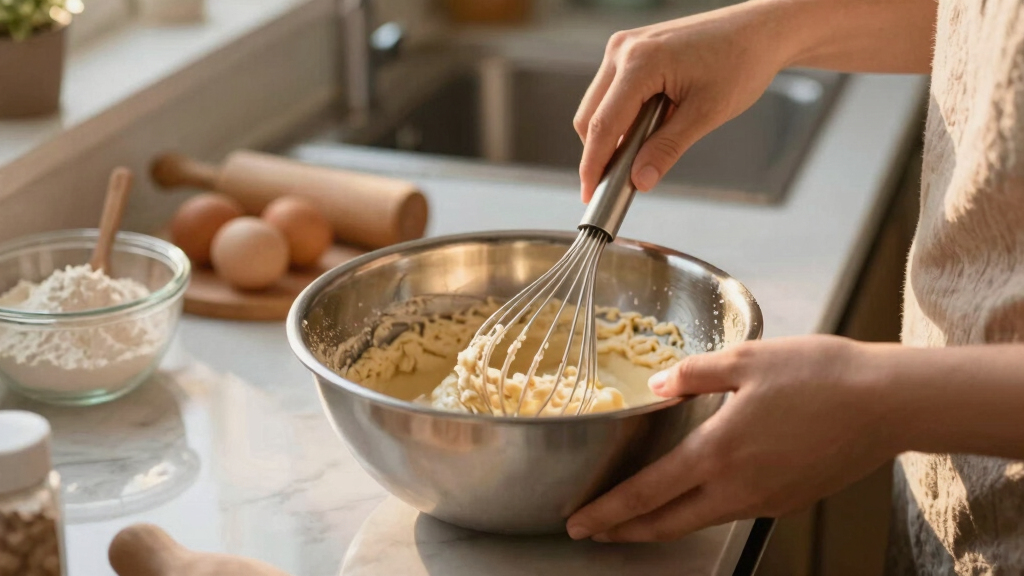
Overmixing is one of the biggest culprits behind dense, rubbery baked goods. When you stir your batter too long, especially after adding flour, you activate gluten. Gluten is a protein that gives dough elasticity, which is desirable in bread but problematic in delicate baked goods like cakes and muffins. Excessive gluten development causes the crumb to become tough and chewy, sacrificing the lightness you’re aiming for.
This matters because it directly impacts texture. Overmixed batter can lead to baked items that are heavy, dense, and less tender—traits that most home bakers want to avoid. The tradeoff is that mixing is necessary to combine ingredients, but knowing the optimal point—just until ingredients are incorporated—is crucial. Using gentle folding techniques and stopping as soon as you see no streaks of flour preserves the delicate crumb and ensures a tender, airy result.

Etekcity Food Kitchen Scale, Digital Grams and Ounces, 11lb
- Multiple Measurement Units: Supports oz, lb, fl oz, g, mL
- Tare Function Included: Zero out weight for accurate measurements
- Hassle-Free Operation: Includes 2 AAA batteries
As an affiliate, we earn on qualifying purchases.
As an affiliate, we earn on qualifying purchases.
How Incorrect Measurements Ruin Your Baking — And How to Measure Like a Pro
Inaccurate measurements are a silent but powerful saboteur in baking. When you rely solely on volume cups instead of a digital scale, you risk introducing variability—sometimes by 10-20%. For example, scooping flour with a cup can pack it differently each time, leading to inconsistent results. Too much flour can make bread dense and dry, while too little can cause cookies to spread excessively.
Measuring by weight using a digital scale provides precision, which is essential because baking is a science. The tradeoff is that it requires an initial investment and a bit of adjustment in your routine, but the payoff is consistency. Weighing ingredients in grams for dry goods and in milliliters for liquids allows you to replicate successful recipes exactly. Level off flour with a straight edge to avoid packing, and tare your scale before each ingredient for accuracy. This meticulous approach minimizes surprises and helps you understand how each ingredient affects the final product.

Rubbermaid Commercial Products Stainless Steel Monitoring Thermometer, Safe for Inside Oven/Grill/Smoker, 60-580°F Range, Easy to Read Food Thermometer For Food Resturant/Home Cooking
- Food Safety Monitoring: Displays true oven temperature instantly
- Wide Temperature Range: Reads from 60°F to 580°F
- Versatile Kitchen Use: Suitable for home and professional kitchens
As an affiliate, we earn on qualifying purchases.
As an affiliate, we earn on qualifying purchases.
The Truth About Oven Temperatures and Why Yours Might Be Off
Oven calibration is often overlooked, yet it’s critical for predictable results. Many ovens are off by 10-20°F from the set temperature, which can cause baked goods to underbake, overbake, or develop uneven textures. For example, a loaf baked at 350°F might actually be at 330°F or 370°F, leading to poor rise or overly dark crusts.
This matters because precise temperature control ensures proper leavening, browning, and cooking times. The tradeoff of ignoring calibration is inconsistent results that frustrate even experienced bakers. Using an inexpensive oven thermometer in the center of your oven allows you to verify the actual temperature. If the reading differs from the setting, you can adjust your oven’s calibration or simply use the thermometer as your guide. Ensuring your oven heats evenly and accurately is the foundation for successful baking—without it, other adjustments may not be enough to compensate for uneven heat distribution or temperature fluctuations.

Deedro Mixing Bowls with Airtight Lids, Stainless Steel Mixing Bowls Set
- Versatile Mixing Bowl Set: Includes 5 sizes with lids for various tasks
- Secure Airtight Lids: Seals in liquids and odors effectively
- Non-Slip Silicone Base: Provides stability and reduces noise
As an affiliate, we earn on qualifying purchases.
As an affiliate, we earn on qualifying purchases.
Why Your Cookies Spread Too Much — And How to Keep Them Thick and Chewy
Cookie spreading occurs when the fats are too warm or when the dough lacks structure. Soft or melted butter causes the cookies to spread thin, while insufficient flour or not chilling the dough beforehand reduces its ability to hold shape during baking. Ingredients and temperature interplay here—warm dough and high oven heat can cause rapid melting and spreading, resulting in flat cookies with less chew and more crisp edges.
To prevent this, measure ingredients precisely—using the correct amount of flour helps build structure. Chilling the dough for at least 30 minutes solidifies the fats and allows gluten to relax, which helps cookies hold their shape. Using room temperature but firm butter ensures consistent spread. Baking at the right temperature—around 350°F—provides enough heat to set the shape quickly, preventing excessive spreading and creating that desirable chewy texture with a crisp edge. The tradeoff is taking extra time to chill and measure carefully, but the payoff is cookies that are thick, chewy, and visually appealing.

TILUCK Stainless Steel Measuring Cups & Spoons Set, Cups and Spoons
- Includes Multiple Sizes: Various cups and spoons for all needs
- Premium Food-Grade Steel: Rust-resistant, non-toxic stainless steel construction
- Easy to Clean: Dishwasher safe, stackable design
As an affiliate, we earn on qualifying purchases.
As an affiliate, we earn on qualifying purchases.
How to Avoid Flat, Dense Cakes Every Time
Flat cakes are often the result of issues with leavening agents or insufficient aeration. Using expired baking powder or baking soda means the chemical reaction needed to produce carbon dioxide—responsible for lift—doesn’t happen effectively. Additionally, batter that isn’t aerated enough, such as by underbeating eggs or not folding in enough air, leads to poor rise.
This matters because a well-leavened cake has a light, fluffy crumb, which is a hallmark of good baking. The tradeoff of neglecting proper leavening is a dense, heavy cake that fails to meet expectations. Always check expiration dates on your leavening agents, beat eggs and butter thoroughly to incorporate air, and gently fold in dry ingredients to preserve the air bubbles. Baking at the correct temperature—around 350°F—also ensures the leavening agents activate properly and the cake rises evenly. Proper technique in these areas makes the difference between a flat pancake and a towering, tender cake.
The Mistake That Turns Your Bread Into Brick — And How to Prevent It
Using old or inactive yeast results in little to no fermentation, causing dense, flat loaves that resemble bricks. Yeast needs to be alive and active to produce the gases that make dough rise. If you prove in a drafty or cold environment, fermentation slows or stops altogether, affecting the bread’s texture and volume.
This matters because proper fermentation develops gluten structure and creates an airy crumb. The tradeoff of using dead yeast or improper proofing is a dense, heavy loaf that lacks the lightness and chewiness you want. Always proof yeast in warm water (105-110°F) with a pinch of sugar until frothy—this confirms activity. Use fresh yeast and give your dough enough time to double in size, which indicates proper fermentation. Skipping these steps results in bread that’s dense and flat, not light and fluffy. Proper yeast activation and fermentation are the keys to baking bread that rises beautifully and has a satisfying texture.
Troublesome Batter: Too Runny or Too Thick? Here’s How to Fix It
Achieving the right batter consistency is vital because it directly impacts the structure and rise of baked goods. A batter that’s too runny will spread excessively, resulting in flat, dense, or overly crumbly baked items. Conversely, a batter that’s too thick can hinder proper rising, leading to dense or unevenly cooked treats. The key is understanding how the ingredients interact—fat, liquids, and flour must balance to create the ideal texture.
Adjust with small, deliberate additions: sprinkle in a little more flour if it’s too runny, or add a splash of milk or water if it’s too stiff. This incremental approach allows you to match the consistency to your recipe’s needs without overcorrecting. The goal is a smooth, spoonable batter that holds its shape but isn’t stiff—this ensures even baking and proper rise. Recognizing the importance of this balance helps prevent common issues like flat muffins or dense cakes, making your baked goods turn out just right every time.
Choosing the Right Tools for Perfect Baking Every Time
Using the right equipment isn’t just about convenience; it’s about precision and consistency. Non-stick pans, silicone mats, and accurate thermometers help you avoid common pitfalls like uneven browning, sticking, or overbaking. For example, dark metal pans conduct heat more quickly, risking burnt edges, while glass pans slow browning, requiring adjustments in baking time.
This matters because the right tools enable you to control the baking process more accurately. The tradeoff of using inferior or inappropriate tools is inconsistent results that can be frustrating and hard to troubleshoot. Investing in a good set of baking essentials—like a digital scale, quality measuring cups, and a reliable oven thermometer—empowers you to bake with confidence. These tools help you replicate successes, troubleshoot issues, and ultimately elevate your baking to a professional level.
How Altitude and Humidity Throw Off Your Baking — And What To Do About It
High altitude and humidity significantly impact baking because they alter how ingredients behave and how leavening works. At higher elevations, the reduced air pressure causes baked goods to rise too quickly and then collapse, resulting in dense or misshapen products. Humidity can cause ingredients like flour and sugar to absorb moisture differently, affecting measurements and moisture content in recipes.
This matters because baking is highly sensitive to environmental conditions. The tradeoff of ignoring these factors is inconsistent results, often requiring multiple tries to get it right. To adapt, increase the amount of flour slightly to provide more structure, and decrease sugar or leavening agents to prevent over-rising and collapsing. For humidity, store ingredients in airtight containers and consider reducing liquids slightly. Understanding these adjustments allows you to produce reliable, consistent baked goods regardless of environmental challenges.
Latest Tools and Techniques That Will Improve Your Baking Game
Modern tools and techniques are transforming home baking by increasing precision and expanding creative possibilities. Smart ovens with Wi-Fi connectivity can alert you when your baked goods reach the perfect temperature, reducing guesswork and preventing overbaking. Digital timers, temperature probes, and high-quality silicone molds help you achieve consistent results and explore new recipes with confidence.
This matters because staying current with tools and techniques can significantly elevate your baking skills. The tradeoff is that some of these innovations require initial investment and a learning curve, but the benefits—more consistent, professional-quality results—are well worth it. Trying out new tools like fermentation starters for sourdough or specialized flours can open new culinary horizons. Keeping up with trends and investing in quality equipment will help you bake smarter, not just harder, making every project more enjoyable and successful.
Frequently Asked Questions
How can I tell if my oven is calibrated correctly?
Place an oven thermometer in the center of your oven and set it to your desired temperature. If the reading differs by more than 10°F, adjust your oven’s calibration or use the thermometer as your guide to bake more accurately.
Chill your cookie dough for at least 30 minutes, use room temperature but firm butter, and bake at the correct temperature. These steps help cookies hold their shape and develop the perfect chewy or crispy edges.
Why does my cake turn out dense even though I followed the recipe?
This often happens when the leavening agents are old or when batter isn’t aerated enough. Check your baking powder’s freshness, beat your eggs well, and avoid overmixing to keep your cake light and fluffy.
How do altitude and humidity affect my baking, and what are quick fixes?
At high altitude, baked goods tend to rise too quickly and collapse. Increase flour slightly and reduce leavening. In humid weather, store ingredients airtight and consider slightly reducing liquids to keep your recipes on point.
Are there any new tools I should try to improve my baking?
Yes! Smart ovens, digital thermometers, and high-quality silicone molds can make your baking more precise and fun. These tools help you monitor temperatures and achieve consistent results, even if you’re just starting out.