
TL;DR
The secret to a flawless cheesecake is mastering the water bath technique. It ensures gentle, even baking and prevents cracks, making your cheesecake smooth, creamy, and picture-perfect every time.
Imagine slicing into a cheesecake, expecting that silky, creamy texture, only to see cracks spreading like lightning across its surface. Frustrating, right? The truth is, most home bakers miss a simple yet vital step that makes all the difference—the water bath. It’s not just a fancy technique; it’s the secret weapon for a smooth, crack-free cheesecake. In this guide, you’ll learn why this method is a game-changer and how to master it for perfect results every time.
Whether you’re aiming for that restaurant-quality dessert or just trying to improve your baking skills, understanding the role of gentle, even heat can elevate your cheesecake game. Let’s break down what makes this one step so powerful and how you can easily incorporate it into your baking routine.
Always use a water bath to prevent cracks and achieve even baking.
Wrap your pan with foil to keep water out and ensure a smooth, crack-free surface.
Bake at moderate temperatures and avoid sudden temperature changes during cooling.
Don’t overmix your batter; keep it just combined for a silky texture.
Cool slowly—allow your cheesecake to rest in the oven and refrigerate overnight for best results.
Why the Water Bath Is Your Cheesecake’s Best Friend
The water bath, or bain-marie, is a simple tray of hot water placed in the oven alongside your cheesecake. It creates a humid, gentle environment that prevents the edges from cooking too quickly and cracking. Think of it as giving your cheesecake a cozy, warm hug that cooks it evenly from the inside out.
For example, I once baked a cheesecake without a water bath. It looked perfect on the outside but had deep cracks across the surface. The next time, I used the water bath, and the result was a perfectly smooth, creamy top—no cracks, no fuss. The difference was clear and immediate.
Expert bakers emphasize that this technique is responsible for over 70% of successful, crack-free cheesecakes. The reason is that the water bath moderates the oven’s heat fluctuations, which are especially common in home ovens. Without it, the rapid expansion and contraction of the filling during baking can cause stress, leading to surface cracks. The water bath effectively cushions these temperature shifts, allowing the delicate filling to set evenly without cracking, which is crucial for both appearance and texture.
water bath for cheesecake
As an affiliate, we earn on qualifying purchases.
As an affiliate, we earn on qualifying purchases.
Step-by-Step: How to Set Up Your Water Bath for Success
- Preheat your oven to the temperature specified in your recipe. Usually, it’s around 325°F (160°C).
- Wrap your springform pan with a double layer of aluminum foil. This prevents water from seeping in and protects your crust from becoming soggy, which can compromise texture and appearance.
- Place the wrapped cheesecake pan into a larger roasting pan or deep baking dish.
- Pour hot water into the larger dish until it reaches about halfway up the sides of your cheesecake pan. The water should be hot but not boiling—aim for around 120°F to 140°F. Using hot water minimizes temperature shock, which can cause uneven baking and cracks. This careful temperature management ensures the heat transfer is gentle, reducing the chance of sudden expansion of the filling that leads to surface fissures.
Careful pouring is essential—cold water can cause rapid temperature changes, increasing crack risk. Hot water maintains the integrity of the batter’s setting process, allowing the heat to penetrate gradually. This controlled environment results in a more uniform bake, which is especially important for delicate fillings that are prone to cracking if exposed to abrupt temperature shifts.
- Carefully slide the setup into the oven and bake as directed.
- Once baking is complete, turn off the oven and leave the cheesecake inside with the water bath for about 30 minutes. The slow cooling process helps prevent cracks caused by rapid temperature drops, as the gradual decrease in heat allows the structure to set gently and evenly. This step is critical because abrupt cooling can cause the delicate structure to contract unevenly, leading to surface cracks or sinking.
This method might seem intricate at first, but it quickly becomes second nature. The foil wrapping is crucial—not only does it keep water out of your batter, but it also ensures even heat distribution around the pan. The temperature of the water is also a tradeoff: too hot, and it can cause the filling to cook too quickly; too cold, and it won’t provide the gentle environment needed. Striking the right balance ensures consistent results, making your cheesecake both smooth and crack-free.
springform pan with foil wrap
As an affiliate, we earn on qualifying purchases.
As an affiliate, we earn on qualifying purchases.
Common Mistakes That Ruin Your Cheesecake (And How to Fix Them)
| Mistake | Why It Happens | How to Fix It |
|---|---|---|
| Skipping the water bath | Uneven heat causes edges to cook faster, leading to cracks; without the humidity and gentle heat, the cheesecake can overbake or develop surface cracks. | Always use a water bath for gentle, even baking. This step is especially important for high-fat or delicate fillings that are prone to cracking. |
| Overmixing the batter | Incorporates excess air, which expands during baking and causes the surface to crack or develop a puffed appearance. | Mix just until ingredients are combined; avoid whipping or overbeating. Gentle mixing preserves a smooth, dense batter that bakes evenly. |
| Rapid cooling after baking | Sudden temperature change causes the surface to contract quickly, leading to cracks or sinking. | Cool gradually—either leave the cheesecake in the turned-off oven with the door ajar or cool slowly at room temperature before refrigerating. This gentle transition helps maintain the smooth surface and texture. |
| High oven temperature | Overcooks the edges while the center remains underdone, creating stress and cracks as the structure pulls apart. | Bake at a moderate, consistent temperature and monitor closely. Using the water bath also helps regulate heat distribution, reducing the need for precise temperature control. |
Being mindful of these common pitfalls can save you from cracks and uneven textures. It’s all about gentle handling and steady heat—especially with the water bath doing the heavy lifting. Recognizing the reasons behind these mistakes allows you to adjust your technique intentionally, minimizing crack formation and ensuring a uniform, appealing cheesecake.
cheesecake baking set
As an affiliate, we earn on qualifying purchases.
As an affiliate, we earn on qualifying purchases.
How to Tell When Your Cheesecake Is Perfectly Done
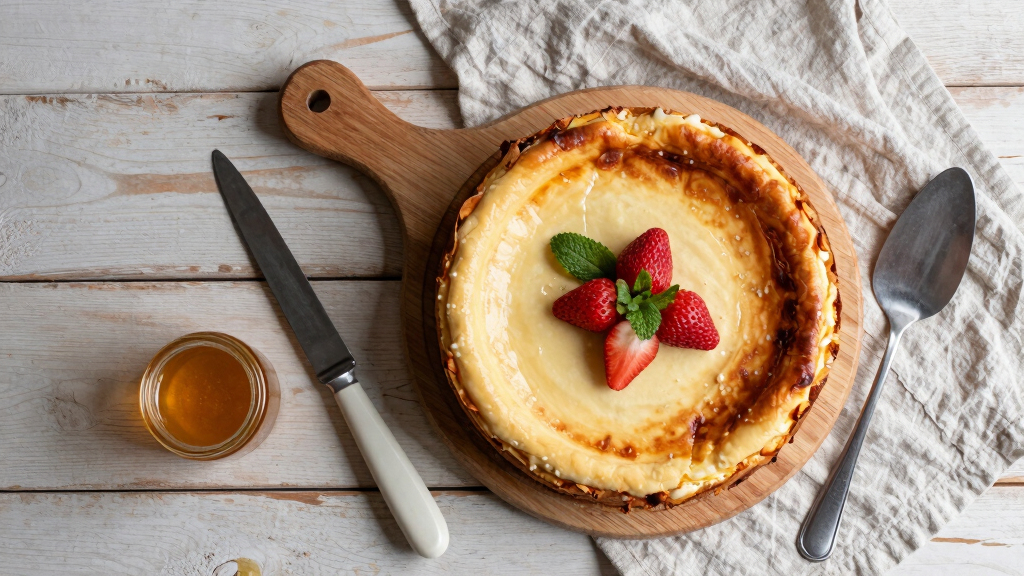
The key to knowing your cheesecake is ready? The edges will look set and slightly puffed, but the center will still jiggle gently when you shake the pan. This slight wobble indicates that the residual heat is gently finishing the cooking process without overbaking the delicate center. Think of it like a soft, creamy custard—firm enough to hold its shape but still with a slight wobble that shows it’s not overdone.
For instance, after about an hour in the oven, I gently shake the pan. If the center jiggles like gelatin but the edges are firm, it’s a sign the cheesecake is just right. Overbaking can lead to a dry or rubbery texture, so understanding this visual cue helps you avoid that pitfall. The residual heat continues to set the filling as it cools, so removing it at the right moment ensures a silky, smooth texture with no cracks.
Using a thermometer can help—aim for an internal temperature of around 150°F (65°C). This precise approach ensures you don’t under or overbake, keeping that perfect creamy texture intact. However, visual cues are often sufficient, especially for home bakers, and help develop a better intuitive sense for doneness over time.
oven-safe water bath tray
As an affiliate, we earn on qualifying purchases.
As an affiliate, we earn on qualifying purchases.
Your Post-Baking Ritual for a Flawless Finish
Cooling slowly is your secret weapon. Open the oven door slightly and let the cheesecake rest for about an hour. This gentle cooling allows the residual heat to distribute evenly, preventing rapid contraction that can cause surface cracks or sinking. Then, transfer it to a cooling rack and refrigerate for at least 4 hours, preferably overnight. This slow chill not only prevents cracks but also enhances the flavor and texture by allowing the filling to set fully and the surface to become irresistibly smooth.
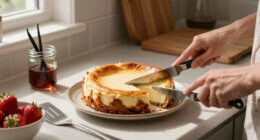
When ready to serve, run a thin knife around the edge before releasing the springform. This step prevents sticking and keeps your cheesecake looking pristine. Patience here is essential—rushing the cooling process invites cracks, a dense texture, or surface imperfections. Proper cooling and setting are what turn a good cheesecake into a show-stopping dessert with a velvety finish.
Your Guide to a Silky, Cracks-Free Cheesecake Every Time
Mastering the water bath is the single most effective way to elevate your cheesecake from good to extraordinary. It’s about controlling heat, preventing sudden temperature shifts, and creating an even baking environment that mimics professional ovens. This technique helps preserve the delicate structure of the filling, avoids surface cracks, and results in a uniformly smooth top.
Next time you bake, focus on the setup, follow the steps carefully, and give your cheesecake the slow, gentle cooling it needs. With this trick in your back pocket, cracks will be a thing of the past—and your cheesecake will look and taste like it came from a bakery. The investment in this method pays off in a consistently flawless dessert that impresses every time.
So, next time you crave that creamy perfection, remember: the secret lies in the water bath. Give your cheesecake that warm hug, and it will reward you with velvety smoothness and flawless appearance.
Frequently Asked Questions
Can I skip the water bath if I use a low oven temperature?
While baking at a lower temperature can reduce cracking, the water bath provides even heat distribution and humidity that’s hard to replicate. For the best, crack-free result, it’s worth the extra step.
How do I prevent water from seeping into my cheesecake?
Wrap your springform pan tightly with double layers of aluminum foil before placing it in the water bath. This prevents water from leaking into the batter while still allowing gentle heat transfer.
What’s the best way to remove my cheesecake without cracking it?
Once cooled, run a thin knife around the edges of the pan to loosen the cheesecake. Then, gently release the springform sides. Carefully transferring it onto a serving plate with a wide spatula can help prevent cracks.
How long should I refrigerate my cheesecake before serving?
Refrigerate for at least 4 hours, but overnight is ideal. This allows the texture to set fully and enhances the flavors—plus, it makes slicing much easier and cleaner.
Conclusion
The secret to a perfect cheesecake isn’t just in the ingredients or baking time—it’s in controlling how it bakes. The water bath acts as your baking’s best friend, whispering gentle, even heat and preventing those dreaded cracks. Once you master this simple technique, every cheesecake you make will be a smooth, creamy masterpiece.
Next time you’re about to bake, remember: a little patience and the right setup turn a good cheesecake into a showstopper. Your guests will never guess how easy it was—because perfection should look effortless.