
TL;DR
Autolyse is a resting phase where flour and water hydrate together, naturally developing gluten and flavor. It reduces kneading, improves dough handling, and results in a more open, tender crumb. A simple step with big benefits—try it in your next loaf.
Autolyse is a simple resting period that hydrates flour, promotes gluten development, and boosts flavor.
Timing varies from 20 minutes to overnight, depending on flour type and desired results.
Skipping autolyse can lead to denser bread and more kneading, but it’s possible with some tradeoffs.
A visible, elastic, and mildly sweet-smelling dough indicates successful autolyse.
Incorporating autolyse reduces overall effort and makes shaping easier, especially for high-hydration and whole grain doughs.
What exactly is autolyse — and why should you care?
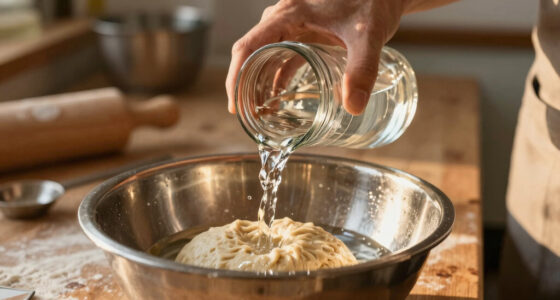
Autolyse is simply a resting period where you mix your flour and water, then leave them to hydrate and start gluten formation. It usually lasts between 20 minutes to an hour, depending on your recipe. This process kickstarts gluten development naturally, without kneading.
Think of autolyse as giving your flour and water a chance to get acquainted. During this time, enzymes activate and break down starches, releasing sugars that boost flavor. This enzymatic activity is crucial because it naturally improves the dough’s extensibility and flavor profile. When gluten begins forming early, it creates a more cohesive dough that’s easier to handle, reducing the effort needed during kneading. The tradeoff is that longer autolyse times can sometimes weaken dough structure if not managed carefully, so understanding your recipe and environment helps optimize the process for best results.
For example, if you’re making a rustic sourdough, autolyse can make the dough feel more like elastic fabric—less resistant and more forgiving. It’s a simple step that yields big gains in bread quality, especially for those new to bread baking who might struggle with sticky or tough doughs.
As an affiliate, we earn on qualifying purchases.
How autolyse boosts flavor, texture, and handling in your bread
Autolyse isn’t just about gluten; it’s a flavor booster too. The enzymatic activity that occurs during this resting period enhances sweetness and depth, which are key to a more complex, well-rounded flavor. The sugars released during autolyse feed the yeast and bacteria during fermentation, resulting in a richer taste and better aroma. The longer the autolyse, the more pronounced these flavor benefits can be, but overdoing it may lead to excessive enzyme activity that weakens gluten structure if not balanced properly.
It also improves dough extensibility—meaning it becomes more elastic and less prone to tearing during shaping. This makes the process less frustrating, especially for high-hydration doughs or delicate shapes like baguettes. The dough’s increased pliability allows for smoother stretching, which helps achieve a more uniform crumb and better oven spring. The tradeoff is that overly extended autolyse can sometimes make dough too slack, risking a flatter loaf if not handled correctly, so timing and observation are key.
Here’s what autolyse does for you:
- Develops gluten early, making kneading quicker and easier—saving time and effort
- Enhances flavor complexity naturally—adding richness and depth without extra ingredients
- Creates a softer, more pliable dough—less sticky and more manageable
- Results in a more open, airy crumb—improving texture and appearance

Superbaking Sourdough Banneton Bread Proofing Basket, 9" Round, Set of 2
- Bake Two Loaves Simultaneously: Includes two 9-inch round proofing baskets
- Splinter-Free, Smooth Finish: Made of premium Indonesian Rattan with polished surface
- Includes BakeSide App Access: AI baking assistant for guidance and scheduling
As an affiliate, we earn on qualifying purchases.
As an affiliate, we earn on qualifying purchases.
How long should you let autolyse go? The perfect timing for your bread
The ideal autolyse time depends on your recipe and flour type. Typically, 30 to 45 minutes works well for most bread doughs, striking a balance between sufficient gluten development and enzyme activity. Extending autolyse beyond this window can deepen flavor and further hydrate the flour, especially with whole grains, but it also risks weakening the dough’s structure if left too long without additional ingredients like salt or yeast.
For example, a basic artisan bread with high hydration benefits from a 1-hour autolyse, which allows enough gluten formation without compromising strength. Whole grain flours, which absorb more water and contain more enzymes, often need longer—up to 2 hours—to fully hydrate and develop flavor. The tradeoff is that longer autolyse times may require adjustments in subsequent steps, like slightly reduced fermentation times, to maintain optimal dough strength and loaf volume.
Here’s a quick guide to timing:
- Standard loaf (white flour): 30-45 minutes — optimal for most home bakers
- Whole wheat or rye: 1-2 hours — allows for full hydration and flavor development
- Overnight autolyse (for deep flavor): 8-12 hours, kept in fridge — enhances complexity but requires careful timing and refrigeration to prevent over-fermentation
As an affiliate, we earn on qualifying purchases.
Can you skip autolyse? What happens if you do?
Can you skip autolyse? Yes, but it’s a tradeoff. Skipping means you mix all ingredients together at once, which can slow gluten development and make the dough tougher to handle. Without this resting period, gluten networks form more slowly during kneading, requiring more effort and time to reach the same strength. The dough may also be stickier and harder to shape, leading to a denser crumb and less developed flavor because enzymatic activity that enhances sweetness and aroma is limited.
For example, if you’re in a hurry or new to baking, you can omit autolyse, but expect a slightly tighter crumb and less aroma. The tradeoff is increased kneading effort and potentially less open crumb structure. While it’s possible to produce good bread without autolyse, understanding these consequences helps manage expectations and adjust techniques accordingly. Skipping it might save time initially but can result in more work during shaping and baking, as well as a less nuanced flavor profile.
As an affiliate, we earn on qualifying purchases.
Quick comparison: Autolyse vs. No Autolyse — what’s the difference?
| Feature | With Autolyse |
|---|---|
| Gluten development | Starts early, creating a stronger, more extensible dough that’s easier to shape |
| Flavor | More complex, richer, with enhanced sweetness and aroma due to enzymatic activity |
| Handling | Softer, less sticky dough that’s easier to work with, reducing frustration |
| Crumb | Open, airy, with larger holes and a tender texture |
| Kneading time | Less overall, as gluten starts forming early during autolyse |
Simple steps to include autolyse in your baking routine
- Mix flour and water until just combined—no salt or yeast yet.
- Cover the bowl with a damp towel or plastic wrap.
- Let it rest for the desired time (30-60 minutes or more), allowing the enzymes to activate and gluten to start forming. This pause helps develop a more cohesive dough, reducing effort later.
- Add salt, yeast, and continue with your recipe as usual.
- Shape, proof, and bake your improved loaf!
For example, after mixing your whole wheat flour and water, cover the bowl and go for a walk. When you return, your dough will feel softer and more elastic, ready for the next steps. This extra time allows the flour to fully hydrate and the gluten to begin forming, which means less kneading and a better final texture.
Signs autolyse has worked — and what to look for
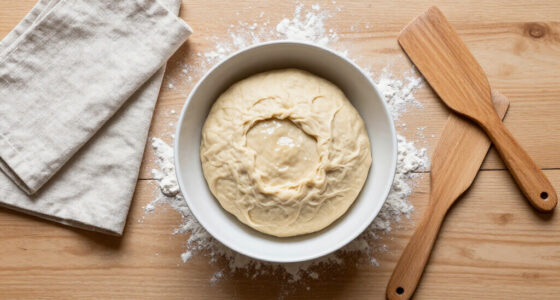
Is your autolyse done? The dough should look visibly hydrated, soft, and slightly glossy. It will smell mildly sweet and be easier to stretch without tearing. These signs indicate enzymatic activity has occurred, breaking down starches into sugars and beginning gluten development, which collectively improve dough extensibility and flavor.
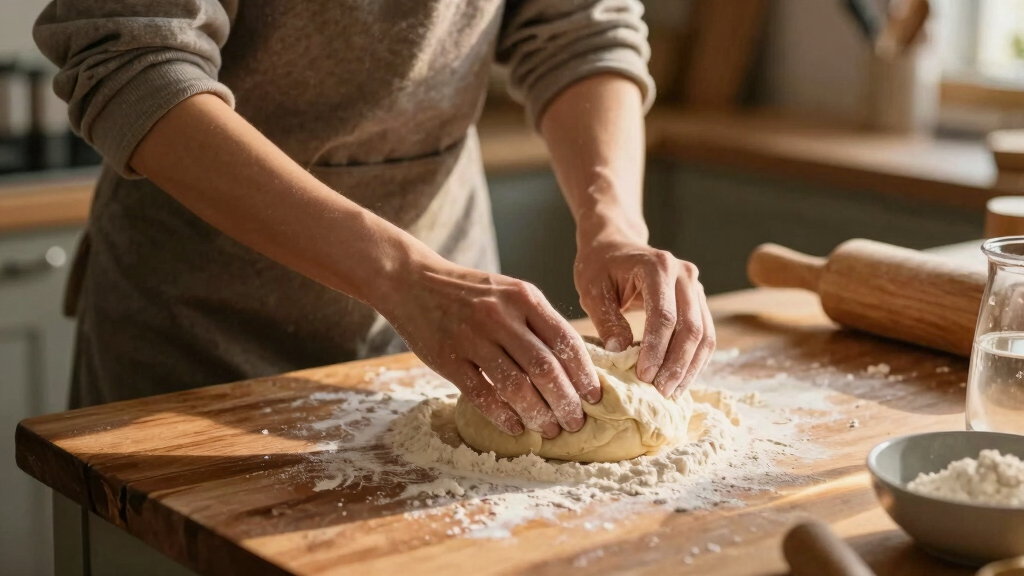
You might notice it feels more elastic and less sticky. When you poke it, the surface springs back gently—like a firm but yielding rubber ball. This elasticity reflects a well-developed gluten network, and the slight glossiness shows proper hydration. If it feels overly stiff or crumbly, it might need more water or a longer rest; if it’s too sticky and slack, it’s ready for the next step. Recognizing these signs helps ensure you maximize the benefits of autolyse without overdoing it.
Autolyse isn’t just for pros — it’s perfect for home bakers too
Beginners often worry about kneading or handling sticky dough. Autolyse makes life easier by naturally developing gluten early, which means less effort and frustration during shaping. This process simplifies the handling of high-hydration or whole grain doughs, which can be more challenging for newcomers. It acts as a gentle pre-work, reducing the need for aggressive kneading and helping bakers achieve better structure with less effort.
For example, a new baker making sourdough can see the difference in how manageable the dough feels after autolyse. It’s a beginner-friendly step that boosts confidence and results, enabling even novice bakers to produce loaves with good oven spring and open crumb. Incorporating autolyse into your routine demystifies bread making, making it accessible and rewarding for everyone.
Even with simple recipes, a short autolyse can elevate your bread from good to great, with less fuss and more flavor, helping you develop skills and confidence along the way.