
TL;DR
This guide walks you through building a sourdough starter from zero, emphasizing daily steps, common pitfalls, and practical tips. It’s a straightforward plan to get you baking naturally leavened bread at home.
A healthy sourdough starter takes about 5-7 days to develop, with bubbles, rise, and a tangy smell as signs of readiness.
Consistency in feeding—either daily or weekly—keeps your starter active and flavorful.
Use a simple ratio: 50g flour + 50g water for feeds, adjusting depending on your storage method.
Troubleshooting common issues involves adjusting temperature, cleaning, and patience.
Your starter’s health directly impacts your bread’s flavor, texture, and shelf life—treat it like a living friend.
What exactly is a sourdough starter, and why does it matter?
A sourdough starter is a living mixture of flour and water, teeming with wild yeast and bacteria. It’s the magic behind flavor and leavening in traditional bread. Unlike commercial yeasts, a healthy starter develops complex aromas and a natural preservative effect through fermentation. These microbes not only help the bread rise but also break down gluten and other compounds, making the bread easier to digest and more nutritious. When you nurture it daily, it becomes a resilient, self-sustaining culture that can last for years—like a pet that rewards your care with delicious bread.
Understanding why this matters extends beyond just baking. The microbes in your starter influence the bread’s flavor profile—ranging from mild and nutty to sharp and tangy—depending on their composition and activity. This microbial ecosystem also impacts the bread’s texture, crust development, and shelf life. The process of fermentation can reduce anti-nutrients and improve digestibility, making your bread not only tastier but also healthier. Recognizing these implications helps you appreciate the importance of maintaining a healthy starter: neglect can lead to stagnation or spoilage, while attentive care fosters a thriving, flavorful culture that elevates your baking to a craft. This understanding empowers you to troubleshoot effectively—knowing that temperature, feeding consistency, and flour choice directly influence microbial health and, consequently, your bread’s final quality.

Complete Sourdough Starter Kit, Sourdough Bread Baking Supplies, Banneton Bread Proofing Basket with Sourdough Starter Jar, 9inch Round Bread Proofing Basket, for Bread Baking
700ml Sourdough Starter Jar:Around 24 oz capacity is enough to make 2-4 sourdough loaves. You can easily add…
As an affiliate, we earn on qualifying purchases.
As an affiliate, we earn on qualifying purchases.
The simple ingredients and equipment you’ll need to start
All you need is flour and water. Most bakers prefer unbleached bread flour or whole wheat for a richer culture, but you can also experiment with rye or gluten-free blends. Different flours introduce various nutrients and microbes, influencing how quickly your starter develops and its flavor profile. For instance, whole wheat and rye contain more wild yeasts and bacteria naturally present on their surfaces, which can accelerate fermentation and add complexity. Choosing the right flour impacts not only the speed of microbial colonization but also the diversity of flavors and resilience of your starter. A more nutrient-rich flour provides a broader array of microbes, leading to a more vigorous and stable culture, whereas refined flours may result in a slower, less robust development. This tradeoff means you might prefer a quicker start with whole wheat but sacrifice some of the subtle flavors that develop with longer fermentation on more refined flours. The type of flour also influences the acidity and sourness of your starter—more complex, whole-grain flours tend to produce a tangier flavor over time. Understanding these nuances allows you to tailor your starter to your taste preferences and baking needs, while also considering the microbial diversity that underpins a strong, healthy culture.
Essential equipment includes a kitchen scale for accuracy, a wide-mouth glass jar or plastic container, and a cloth or breathable cover to keep out dust and insects while allowing air flow. No fancy gadgets required—just a little patience and a clean workspace. Using precise measurements ensures consistent results, especially during the early stages when microbial populations are fragile. The container should be transparent so you can observe bubbles and rising, which are visual cues of microbial activity. The cover should be breathable—like a cloth or paper towel—so gases can escape, preventing pressure buildup while keeping contaminants out. This setup creates an environment that fosters microbial growth while allowing you to monitor progress visually, helping you identify when your starter is thriving or needs adjustments.

King Arthur 100% Organic Bread Flour, Unbleached, 5 lb (Pack of 1) – Non-GMO Project Verified, No Preservatives
High Protein Flour: 12.7% protein – a full point more than other national brands, King Arthur flour ensures…
As an affiliate, we earn on qualifying purchases.
As an affiliate, we earn on qualifying purchases.
Day-by-day: How to build your starter from scratch
Starting your starter is like nurturing a tiny ecosystem. Here’s a clear plan:
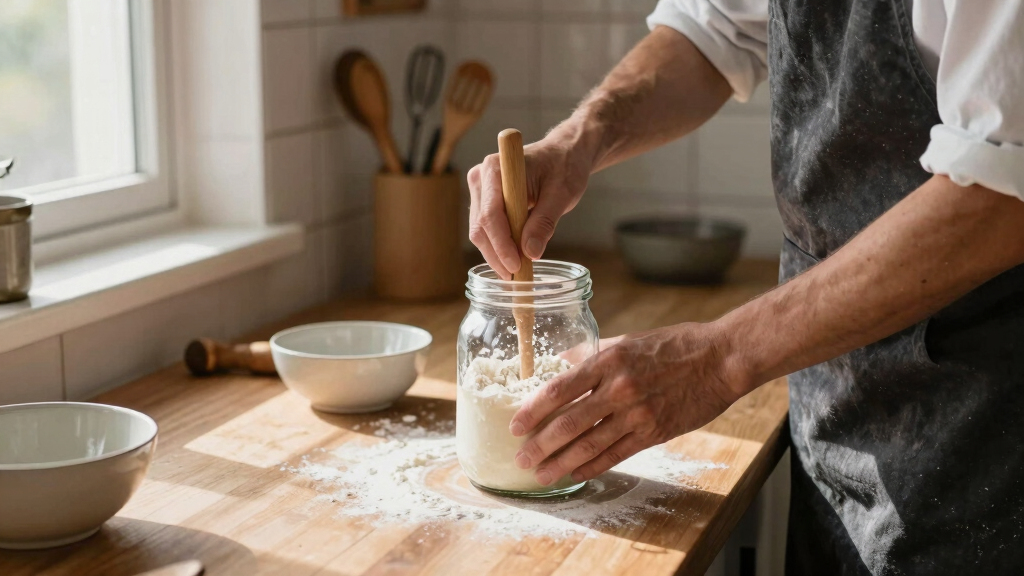
- Day 1: Mix 50g flour with 50g water in your jar. Stir until smooth. Cover loosely. Expect a mild, floury smell. At this stage, microbial activity is minimal, but you’re laying the foundation for microbial colonization.
- Day 2: Discard half the mixture. Add 50g flour + 50g water. Mix well. This refreshes the environment, encouraging microbes to multiply and establish dominance. Discarding some of the mixture prevents overgrowth of undesirable bacteria and maintains a manageable environment for the beneficial microbes to flourish. This step is crucial because it helps balance the microbial ecosystem, promoting the growth of yeast and bacteria that contribute to leavening and flavor development.
- Day 3-7: Repeat the discard and feed process daily. You should start seeing bubbles, a tangy aroma, and some rise. These signs indicate growing microbial activity and fermentation. If not, keep going—sometimes environmental factors like temperature affect development. Patience is key because microbial populations need time to establish a stable, resilient community capable of leavening bread effectively. During this period, the microbes are competing and establishing dominance; consistent feeding encourages a healthy, balanced ecosystem that can produce reliable leavening power and flavor.
By Day 5 or 6, your starter should double in size within 4-6 hours after feeding. That’s your green light to start baking. This process is about developing a balanced microbial ecosystem—too much yeast too early can lead to overly sour or flat bread, while insufficient microbes may result in a sluggish starter. The timing and consistency of feeding influence this balance, affecting the flavor, rise, and overall health of your starter. Recognizing these signs and understanding the microbial dynamics helps you fine-tune your process for optimal results, ensuring your starter is both vigorous and flavorful.

Digital Candy Thermometer with Pot Clip, 10" Long Stainless Steel Probe, Instant Read Kitchen Thermometer for Cooking, Baking, and Candy Making
Pot Clip Design for Safer Operation: This candy thermometer digital with clip can be fixed to the pot…
As an affiliate, we earn on qualifying purchases.
As an affiliate, we earn on qualifying purchases.
Troubleshooting: What to do when your starter doesn’t rise or smells off
If your starter shows no bubbles or rise after a week, it might need more warmth, longer feeding, or a different flour. Microbial activity is highly sensitive to temperature; cooler environments slow fermentation, while warmth accelerates it. Keeping your starter in a consistent warm spot—around 75°F—helps microbes thrive and develop the necessary leavening power. If it remains sluggish, consider giving it an extra day or two of feeding, or switching to a more nutrient-rich flour like whole wheat, which contains more natural microbes. Sometimes, a sluggish starter is a sign that the microbial community is underdeveloped or imbalanced. Adjusting environmental factors—primarily temperature—and providing consistent nourishment can tip the microbial balance in favor of active, leavening microbes. Patience and observation are key: a dormant starter can often be revived by creating optimal conditions, but persistent inactivity may indicate contamination or poor microbial health, necessitating starting fresh to ensure safety and effectiveness.
If it develops a foul smell, mold, or pinkish hue, discard and start over. A healthy starter smells tangy, yeasty, and slightly sour—these are signs of a balanced microbial community. A rotten or moldy smell indicates spoilage, often caused by contamination or environmental stress. Mold can produce mycotoxins harmful to health, so never use a starter with mold. Recognizing these signs early prevents wasted ingredients and ensures your baking results are safe and flavorful. Adjusting factors like cleanliness, temperature, and feeding frequency can help troubleshoot stubborn starters, but sometimes starting fresh is the safest choice to ensure microbial health and safety. Remember, microbial imbalance or contamination can compromise your entire batch, so prioritizing safety by discarding suspicious starters is essential for successful baking.

Sourdough Proofing Basket Gift Set, 9" Round and 10" Oval Banneton Bread Baking Supplies, Sourdough Baskets with Bread Lame, Danish Whish, Bowl Scraper, Sourdough Scraper, and Linen Liner
What You Get: 1 9-inch round banneton bread proofing basket , 1 10-inch oval proofing basket, 2 liners,…
As an affiliate, we earn on qualifying purchases.
As an affiliate, we earn on qualifying purchases.