
TL;DR
Properly chilling cookie dough enhances flavor, reduces spread, and improves texture. Aiming for 30 minutes to 24 hours of chilling makes a real difference in how your cookies turn out, especially for thicker, chewier results.
Ever pulled a tray of cookies from the oven and wondered why they spread too thin or lack flavor? The secret isn’t just in the ingredients—it’s in how you treat the dough before baking. Proper chilling isn’t just a step; it’s a game-changer that transforms your cookies from average to irresistible.
In this guide, you’ll learn the best ways to chill cookie dough, how long to do it, and why it truly matters. Whether you’re after thick, chewy bites or perfectly shaped cut-outs, understanding the ‘right way’ to chill makes all the difference in your baking success.
The Right Way to Chill Cookie Dough—and Why It Matters
TL;DR: A cold rest solidifies fat, relaxes gluten and gives flavors time to deepen. Chill dough for at least 30 minutes; aim for 1–24 hours when you want thicker, chewier cookies with controlled spread.
The cold-rest effect
Chilling is not idle time. It changes the physical behavior of butter, flour and gluten before the tray reaches the oven—giving the cookie enough structure to set before the fat fully melts.
Butter firms up
Cold fat melts more slowly in the oven. The cookie begins setting before the butter can run outward, producing less spread and a thicker center.
Ingredients harmonize
Sugar, butter, vanilla and flour have time to integrate. The result is a rounder, more complex flavor than dough baked immediately after mixing.
Gluten relaxes
Rested gluten becomes less tense, supporting a tender, chewy crumb instead of a cookie that feels tough, dense or irregularly shaped.
Five steps from mixing bowl to oven
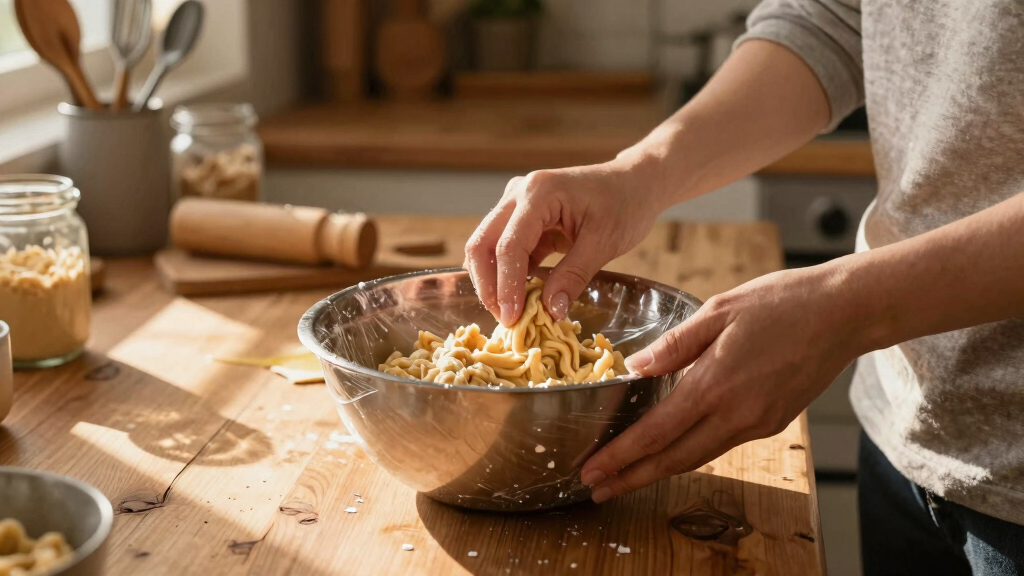
Seal it tightly
Use plastic wrap or an airtight container to prevent drying and fridge-odor absorption.
Portion smartly
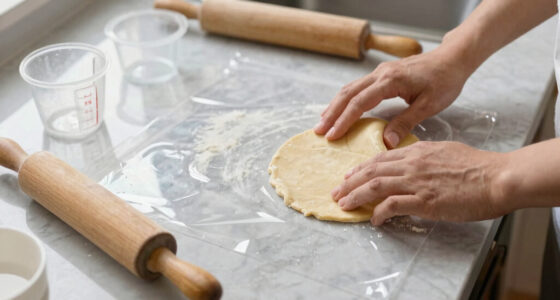
Scoop drop cookies now, or flatten bulk dough into a disk so the center chills evenly.
Label and date
Note the dough type and time refrigerated, especially when several batches share the fridge.
Rest 1–24 hours
Thirty minutes helps; one to two hours is versatile; overnight develops maximum character.
Check before shaping
If rock-hard, let the dough sit briefly until scoopable—cool, but never warm or greasy.
Divide the dough into small portions and freeze for 15–30 minutes. Set a timer: frozen-solid dough can crack, crumble and become difficult to shape.
How long should dough chill?
There is no single magic number. The best duration depends on the cookie style, available time and how much flavor or shape control you want.
| Duration | Flavor | Spread + texture | Best use |
|---|---|---|---|
| Under 30 min | ~Minimal development | ✗More spread; softer fat | Only when the recipe is designed to bake immediately |
| 30 min | ~Light improvement | ✓Slightly thicker | Quick fixes and very soft drop-cookie dough |
| 1–2 hours | ✓Clearly richer | ✓Controlled and workable | Most recipes, cut-outs and thicker cookies |
| 12–24 hours | ✓Deepest development | ✓Maximum chew and thickness | Chocolate chip, snickerdoodles and bakery-style batches |
| Over 48 hours | ~Diminishing returns | ✗May crack or dry out | Use only when the specific recipe calls for it |
Do this—not that
Small handling choices determine whether chilling protects the dough or leaves it dry, odor-tainted and difficult to portion.
✓ Do
✗ Don’t
Under-chilled, balanced or over-chilled?
Read the dough before baking. Its temperature and handling texture offer reliable clues about how it will spread, shape and brown.
Under-chilled
Signs: glossy, greasy, sticky and difficult to shape. Expect wider spread, thinner centers and less developed flavor.
Properly chilled
Signs: cool, firm and cleanly scoopable. Expect controlled spread, chewy centers, crisp edges and richer aroma.
Over-chilled
Signs: rock-hard, cracked or crumbly. Let it soften briefly while keeping the butter cool and structurally firm.
Cold dough becomes a better cookie
Chilling does not make raw dough safe to eat. Raw flour and eggs may carry harmful bacteria. Keep dough cold for storage and bake it thoroughly according to the recipe.
Why Chill Cookie Dough? The Surprising Reasons That Make a Difference
Chilling cookie dough isn’t just about waiting; it’s about improving your cookies’ entire personality. When dough hits the fridge, several magic things happen.
First, flavors meld and deepen—think of it as giving your ingredients a chance to get to know each other better. This process allows the individual flavors of sugar, butter, vanilla, and other ingredients to harmonize, resulting in a more complex and satisfying taste. Second, fats in the dough solidify, which helps control how much the cookies spread during baking. When fats are solid, they melt more slowly, giving your cookies a thicker, more controlled shape. Lastly, gluten relaxation occurs—gluten strands that develop during mixing soften, leading to a softer, chewier texture rather than a tough or overly dense one.
Understanding these effects is crucial because each impacts the final cookie’s appearance and taste. For instance, deeper flavor development means richer cookies, while better shape control prevents cookies from becoming flat and spread out. Relaxed gluten contributes to a tender crumb, making each bite more enjoyable. The tradeoff is that longer chilling times require planning, but the payoff is significantly improved results. Without this step, cookies often turn out overly crisp, unevenly shaped, or bland—underscoring why chilling is a vital part of the baking process.

Webake Silicone Cookie Dough Freezer Tray with Lids, 2 Pack Cookie Dough Mold for Freezing and Storing Consistently Sized Cookies, Butter, Garlic, Sauce, Great for Portioned Baking Egg Bite, Peanut
- Food Grade Silicone: BPA-free, safe, flexible, reusable silicone
- Perfect Portion Control: Each cavity holds 1.14oz for easy portioning
- Convenient Freezer Storage: Lidded tray for easy freezing and storage
As an affiliate, we earn on qualifying purchases.
As an affiliate, we earn on qualifying purchases.
How to Chill Cookie Dough the Right Way — Step-by-Step
- Wrap your dough tightly in plastic wrap or place it in an airtight container. This prevents the dough from drying out and absorbing fridge odors, which can compromise flavor and texture. Proper wrapping ensures the dough remains moist and fresh, leading to better baking results.
- Label the container with the date—most dough benefits from at least 30 minutes, but 1-24 hours yields the best flavor and shape. Longer chilling allows flavors to meld more thoroughly and fats to solidify, giving you a richer taste and better control over spreading. However, excessively long chilling (beyond 48 hours) can sometimes lead to overly firm dough, making shaping difficult and potentially dulling flavors if the fats become too hard.
- Keep your dough at or below 40°F (4°C). Use a refrigerator thermometer if you’re unsure. Maintaining a consistent, cool temperature is crucial for predictable results—warm spots or fluctuating temperatures can cause uneven chilling, affecting texture and flavor development.
- If you’re in a rush, chill smaller portions or use the freezer for 15-30 minutes as a quick fix. Smaller pieces chill faster and more evenly, but be careful not to forget them, as over-freezing can make dough too hard to work with.
- For longer storage, freeze the dough in portions, wrapped well, up to 3 months. Thaw in the fridge before baking. Freezing halts fermentation and flavor development temporarily, but if properly wrapped, it preserves the dough’s quality for later use. Thawing in the fridge allows the fats to soften gradually, preventing cracks or crumbling during shaping.

Homelove 200pcs Bowl Covers Bread Proofing – Plastic Wrap for Food Sourdough Bread Baking Rising Elastic Reusable Plate Covers Outdoor Food Fresh Keeping Bags Shower Cap Hair Deep Conditioning
- Material: Food-grade transparent PE material
- Durability: Tear-resistant and durable
- Bread Proofing: Keeps dough moist during proofing
As an affiliate, we earn on qualifying purchases.
As an affiliate, we earn on qualifying purchases.
Compare Short vs. Long Chilling: Which Is Better for Your Cookies?
| Chilling Duration | Effects on Cookies | Best For |
|---|---|---|
| 30 minutes | Light flavor development, slight thickening | Quick fixes, soft dough |
| 1-2 hours | More flavor, better shape control, moderate solidification of fats | Most recipes, especially cut-outs and thicker cookies |
| 12-24 hours | Deep flavor, maximum control, chewy and thick texture, fully relaxed gluten |

200 PCS Unbleached Parchment Paper Sheets for Baking 12×16 Inches, Non-Stick and Non-Toxic Pre-cut Parchment Sheets for Oven, Cooking, Grilling, Air Fryer and Steaming – Fit for Half Sheet Pans
- Natural, Unbleached Material: Made from food-grade, non-toxic wood pulp
- Pre-cut and Sized for Convenience: 200 sheets, 12×16 inches, fits standard pans
- Oil-resistant and Waterproof: Prevents tearing, soaking, and sticking
As an affiliate, we earn on qualifying purchases.
As an affiliate, we earn on qualifying purchases.
- Do wrap dough tightly to prevent drying out and odor absorption, which can negatively impact flavor and texture.
- Do chill for at least 30 minutes—longer for more flavor, better shape, and improved texture. Extended chilling allows flavors to meld deeply and fats to solidify, resulting in cookies that hold their shape and have richer taste.
- Don’t leave dough at room temperature for too long—bacteria can develop, and the fats can soften prematurely, affecting the final texture and flavor.
- Don’t forget to label and date your dough, especially if freezing multiple batches. Proper labeling helps you keep track of optimal freshness and prevents over-chilling, which can make dough too hard to work with.
- Do consider using a dedicated dough chiller or a cool, dark spot if your fridge is too warm. This can help maintain a consistent temperature, ensuring even chilling and better control over the final outcome.

Zopnny 3 Pack Pizza Dough Proofing Box, 17 x 12.6-Inch, Proofing Container
- Material: Food-grade, BPA-free, durable plastic
- Size: 17.32 x 12.63 x 4.56 inches
- Design: Stackable with secure covers
As an affiliate, we earn on qualifying purchases.
As an affiliate, we earn on qualifying purchases.
What Happens When You Over-Chill or Under-Chill?
If you chill dough too long—say, over 48 hours—it can become too hard to work with, making shaping a chore. The fats may become overly solid, leading to dough that cracks or crumbles when you try to roll or scoop. Additionally, prolonged chilling can cause flavors to plateau or even diminish slightly, as the ingredients reach a point of diminishing returns in flavor development. Over-chilling can also dull the aroma, resulting in cookies that taste less vibrant and have a tougher, less appealing texture. This is because the fats become so solid that they don’t melt properly during baking, and the ingredients can become overly dried out, reducing overall flavor complexity.
On the other hand, under-chilling—less than 30 minutes—means fewer flavor benefits and more spreading during baking. The fats are still soft, which causes the dough to spread more readily, often resulting in flatter, less uniform cookies with less developed flavor since the ingredients haven’t had time to meld. Without adequate chilling, the gluten strands haven’t relaxed enough, leading to a weaker structure and potentially a tougher or less tender cookie. The key is finding a balance—most bakers find that 1-2 hours strikes the optimal middle ground, allowing enough flavor and shape control without making the dough too rigid to handle comfortably. Recognizing these effects helps prevent common pitfalls and ensures your cookies turn out just as you envision.
How Proper Chilling Elevates Your Baking Game
Chilling cookie dough isn’t just a step—it’s a secret weapon for bakers who want consistent, bakery-quality treats. When dough is well-rested, cookies turn out thicker, chewier, and packed with richer flavor. This process allows the ingredients to fully meld, resulting in a more balanced and complex taste profile that’s often missing in hurried baking. Moreover, proper chilling enhances the cookie’s structure—thicker, more uniform, and less prone to spreading out of control—making your presentation more professional.
Picture your favorite bakery cookies: they’re often thick, with a deep aroma that hits you even before the first bite. That’s because of proper chilling, which allows the flavors to develop fully and the fats to set, giving cookies that desirable chewy center and crisp edges. It’s a small investment of time that yields bakery-level results at home. Additionally, chilled dough is easier to handle—less sticky, more predictable—reducing frustration and mess during shaping. This not only improves the quality of your cookies but also makes the baking process more enjoyable. The science behind this is straightforward: when fats are solid, they melt slowly during baking, supporting the cookie’s structure and preventing excessive spreading, which is crucial for achieving the perfect texture and appearance.
Key Takeaways: Chill Like a Pro
- Chilling dough deepens flavor and improves texture—don’t skip this step. It allows the ingredients to meld, creating richer, more balanced cookies.
- Most recipes benefit from 1-2 hours, but up to 24 hours yields more flavor and better shape control. Longer chilling lets fats solidify and gluten relax fully, resulting in thicker, chewier cookies.
- Wrap dough tightly and store at or below 40°F to prevent drying and odor absorption, which can compromise flavor and texture. Proper storage preserves dough quality over time.
- Quick chilling in the freezer works in a pinch, but longer is better for flavor and shape. Short bursts are useful when time is limited, but extended chilling maximizes benefits.
- Over-chilling can make dough too hard and difficult to work with; under-chilling reduces flavor development and control. Finding the right balance is key to baking success.
Frequently Asked Questions
How long should I chill my cookie dough for best results?
Most recipes benefit from 1-2 hours of chilling, but up to 24 hours can deepen flavor and improve shape. Even a quick 30-minute rest helps, but longer chilling allows flavors to meld and fats to solidify fully, giving you thicker, chewier, and more flavorful cookies.
Can I skip chilling cookie dough?
You can, but cookies may spread too much and lack flavor. Chilling helps control shape by solidifying fats and allows flavors to develop fully, resulting in better texture and taste—so it’s worth the wait.
Is it okay to freeze cookie dough for longer storage?
Yes, most doughs freeze well for up to 3 months. Proper wrapping prevents freezer burn and flavor loss. Thaw in the fridge to allow fats to soften gradually, which helps maintain the dough’s structure and flavor for baking later.
Does chilling affect the flavor of my cookies?
Absolutely. Chilling allows ingredients to meld deeply, creating richer, more complex flavors that aren’t as prominent in freshly mixed dough. It’s a key step in developing the depth and balance that make cookies truly memorable.
What’s the impact of over-chilling my dough?
Over-chilling can make dough too firm and difficult to work with, especially if kept beyond 48 hours. It can also dull the flavors if fats become too hard or if the dough becomes too dry, leading to cookies that are less flavorful and more prone to cracking. Recognizing the signs—such as excessive hardness or dryness—and sticking to recommended chilling times, typically 1-2 days, helps you avoid these pitfalls and achieve optimal results.
Conclusion
Chilling cookie dough is a small step with a big payoff. It’s about patience—giving your ingredients time to develop and relax. When done right, it turns ordinary cookies into memorable bites.
Next time you bake, remember: good things come to those who wait. Rest your dough, and your taste buds will thank you.