TL;DR

Get baking supplies delivered free with Prime
- Fast, free delivery on millions of items
- Prime Video, Amazon Music and more included
- Member-only deals all year
You don’t need special piping tips to decorate like a pro. Using household items like plastic bags and careful techniques, you can create beautiful designs with ease. Practice and patience are your best tools.
You can create professional-looking piping designs using household items like plastic bags, straws, and squeeze bottles.
Achieving the right frosting consistency—similar to thick toothpaste—is crucial for clean, precise lines.
Steady pressure, a gentle hand, and consistent speed make all the difference, regardless of your tools.
Practice simple drills regularly to build control and confidence in your piping skills.
Clean your DIY tools immediately after use to keep them safe and ready for your next decorating session.
Why You Don’t Need Fancy Tips to Pipe Perfect Lines
Most people think professional piping requires expensive tips, but that’s not true. Household items can do the job just fine—if you know how to use them. For example, a simple plastic sandwich bag can be transformed into a piping bag with just a few cuts. Consistency comes from steady pressure and a stable hand, not the tool itself.
Imagine piping delicate rosettes on cupcakes—using a zip-top bag, you can achieve the same look as with a fancy tip. It’s about technique, not the equipment. Even a small plastic straw can serve as a makeshift round tip for precise dots or borders.
Understanding that household items can replace professional tips is crucial because it shifts the focus from expensive equipment to skill development. When you master controlling pressure and speed, you unlock the ability to create intricate designs with simple tools. This approach also offers flexibility—if a tip breaks or isn’t available, you can improvise without sacrificing your decorating plans. The key tradeoff is that it requires more practice to achieve the same precision as specialized tools, but the cost savings and resourcefulness outweigh this initial hurdle.
Products Worth Considering

Ninja Kitchen System Pro, 1500W, 72oz Pitcher, 8-Cup, Black, BL770

De'Longhi TrueBrew Drip Coffee Maker with Built-In Grinder, Thermal Carafe, and Iced Coffee Settings

Vitamix Propel Series 510 Professional-Grade Blender, 3 Programs, Black
As an affiliate, we earn on qualifying purchases.
How to Turn Common Kitchen Items Into Piping Tools
- Choose your container: Use a sturdy zip-top bag, a plastic sandwich bag, or a squeeze bottle. Think about the size and shape of your designs—larger bags for big swirls, smaller for detail work.
- Prep your bag: Fill it with frosting or batter, then squeeze out excess air to prevent bubbles. Removing air is vital because trapped air can cause uneven piping and mess up your designs.
- Create a makeshift tip: Cut a tiny hole in the corner of the bag—start small, and make it bigger if needed. Use a sharp knife or scissors for a clean cut. The size of this hole directly impacts your piping—smaller for fine lines, larger for bold designs. Experimenting with different hole sizes allows you to control the flow and detail, making your tools more versatile.
- Practice your grip: Hold the bag at a 45-degree angle and apply gentle, even pressure. Practice on parchment paper to get a feel for the flow and speed. Consistent pressure ensures uniform lines, which is essential for professional-looking results.
- Adjust as you go: If the frosting is too stiff or too runny, modify the consistency for better control. Thicker frosting holds shape better but is harder to pipe; thinner frosting flows easily but can lose form. Finding the right balance is key to achieving clean, sharp designs.
For instance, a small plastic straw can become a round tip for dots or borders. Just cut the end, insert it into the bag, and squeeze. This simple hack allows you to customize your tools on the fly, saving money and space while expanding your decorating options. The implication is that with minimal investment, you can tailor your piping setup to match your project’s needs, fostering creativity and resourcefulness.
Choosing the Right Consistency for Smooth, Precise Piping
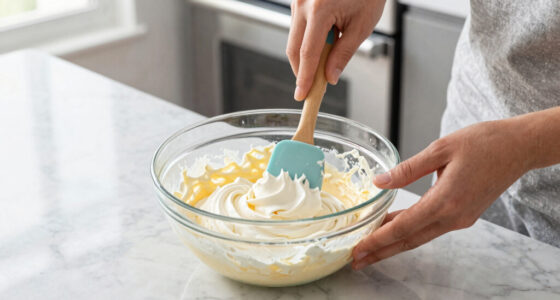
Get your frosting or batter to the perfect consistency, and your piping will look flawless. Too stiff, and it won’t flow smoothly, leading to uneven lines and frustration. Too soft, and it will lose shape quickly, causing designs to spread or sag, which diminishes the professional appearance.
For buttercream or royal icing, aim for a texture similar to thick toothpaste—firm enough to hold peaks yet soft enough to pipe without cracking. The tradeoff here involves balancing control and ease of use; overly stiff frosting can be difficult to squeeze, while overly soft frosting can be hard to control and may result in messy designs. Achieving this balance is crucial because it directly impacts the precision and neatness of your piping work.
Here’s a quick test: squeeze a small amount onto parchment. If it holds a shape without spreading or sagging, you’re good to go. If it spreads out or drips, adjust by adding a little powdered sugar to stiffen or a few drops of milk to loosen. This simple test saves time and ensures your frosting is ready for detailed work, avoiding costly mistakes or rework.
According to Aromas Healthy Bake, maintaining the right consistency is the cornerstone of professional-looking designs—more so than the choice of tool. This underscores the importance of mastering frosting preparation, as it empowers even the most basic household tools to produce polished results. The tradeoff is that it requires attentiveness and practice to perfect your consistency, but the payoff is significantly improved decorating quality.