
TL;DR
Open a free Amazon Business account
Business pricing, bulk buying and tax-exempt orders.
Create a free accountAs an affiliate, we earn on qualifying purchases.
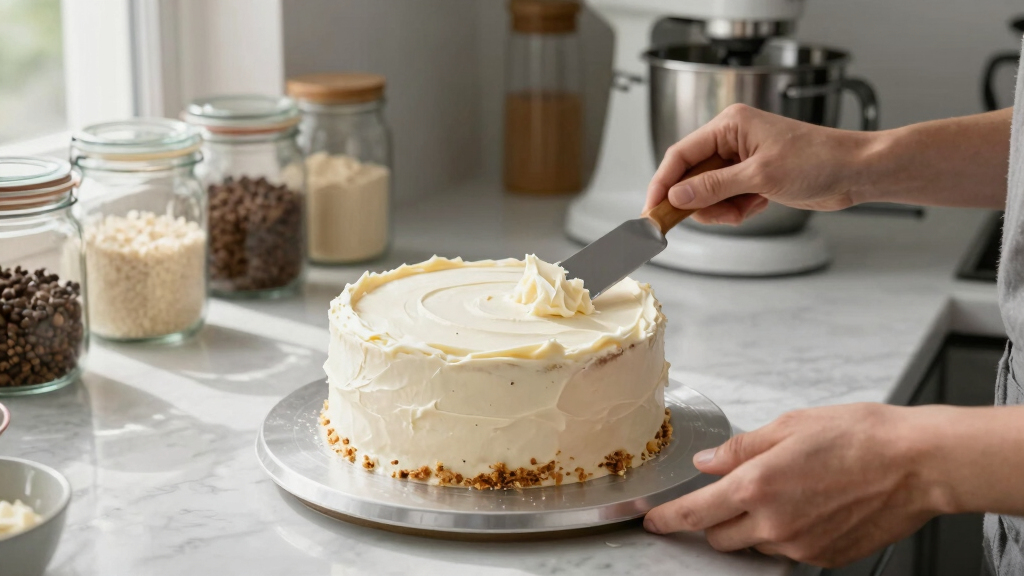
A perfect crumb-coat seals in crumbs and creates a smooth surface for your final layer. Chilling the cake after applying the thin coat is essential, and using the right frosting consistency makes all the difference.
Imagine biting into a cake with a perfectly smooth, flawless finish—no crumbs in sight, just a sleek surface ready for decoration. That’s what a professional crumb-coat achieves. It’s the secret behind those Instagram-worthy cakes that look like they came from a bakery, but it’s surprisingly simple to learn.
In this guide, you’ll discover exactly how to apply a crumb-coat that seals in crumbs, sets the stage for the final layer, and makes decorating a breeze. Whether you’re preparing a birthday cake or a fancy celebration dessert, mastering this step will elevate your baking game and boost your confidence.
Apply a thin, even layer of frosting to seal in crumbs without overloading the cake.
Chill the cake for at least 30 minutes after the crumb-coat to set the layer and improve final smoothing.
Use the right tools—offset spatula, bench scraper, turntable—for a smooth, professional finish.
Adjust frosting consistency to be thick but workable, avoiding runny or overly stiff textures.
Don’t rush the process; patience and practice make perfect.
Why Your Crumb-Coat Is the Foundation of a Perfect Cake
The crumb-coat is the thin layer of frosting that acts like a barrier, catching crumbs and creating a smooth surface for the final coat. Think of it as the primer on a wall—without it, your paint (or frosting) can’t look its best.
Applying a good crumb-coat means fewer crumbs in your final layer, less mess, and a cleaner finish. It’s especially vital if you plan to cover the cake with fondant or intricate piping, where imperfections show.
For example, I once baked a tall chocolate layer cake. Skipping the crumb-coat left crumbs peeking through the final layer, making it look messy. After learning to do a proper crumb-coat, that same cake looked magazine-ready.
Understanding why the crumb-coat matters goes beyond just aesthetics. It impacts the structural integrity of your decorating process. A well-applied crumb-coat provides a uniform base, preventing crumbs from shifting or breaking loose during subsequent layers. This stability is crucial when decorating with delicate piping or fondant, as any loose crumbs or uneven surfaces can compromise the entire look. The crumb-coat also helps to lock in moisture and stabilize the cake, which can prevent cracks or sinking during storage or decorating.
However, it’s a tradeoff—applying a very thin coat requires patience and finesse. Too thick, and it might trap air bubbles or cause uneven surfaces. Too thin, and it might not catch all crumbs, defeating its purpose. Mastering the right thickness and technique is key to setting a solid foundation for your cake’s professional look. Investing time in perfecting this step ensures your final decoration will look seamless and polished, making all your efforts worthwhile.

PUCKWAY Angled Icing Spatula, Stainless Steel Offset Spatula, Cake Spatula Set of 2 Black 6, 8 inch Blade
- Set Includes Two Sizes: 6-inch and 8-inch blades for versatility
- Ergonomic Non-Slip Handles: Comfortable, lightweight grip for precise control
- Multi-Purpose Use: Ideal for icing, spreading, and cutting tasks
As an affiliate, we earn on qualifying purchases.
As an affiliate, we earn on qualifying purchases.
Step-by-Step: How to Apply a Crumb-Coat Like a Pro
- Start with a cooled, leveled cake. Warm or uneven cakes make applying frosting tricky and less smooth.
- Choose the right frosting consistency. It should be thick enough to hold shape but soft enough to spread easily—think peanut butter, not stiff cement.
- Apply from the top down. Use an offset spatula or bench scraper to spread a thin layer over the top, then work your way down the sides. Aim for a layer about 1/8 inch thick.
- Focus on sealing in crumbs. Don’t worry about perfection—just cover everything evenly.
- Chill the cake for at least 30 minutes. This step sets the crumb-coat, making it easier to apply the final layer smoothly.
For example, I once forgot to chill my cake before the final coat, and the frosting slid or pulled away from the edges. Chilling really makes a difference.
Applying the crumb-coat correctly isn’t just about aesthetics; it’s about creating a stable, crumb-free surface that will support your final decoration. Proper chilling allows the frosting to firm up, which reduces the risk of dents, smudges, or uneven surfaces during the smoothing process. It also prevents the cake from shifting or cracking under the weight of the final coat. This stability is especially critical when working with delicate piping or fondant, where even minor imperfections can be amplified. Taking the time to chill the cake after the initial coat ensures a more controlled and professional finish, saving you time and frustration in the long run.

Kootek Aluminum Cake Stand Turntable for Party, Base Giratoria Para Pastele
- Heavy-duty Construction: Made from durable aluminum alloy
- Smooth 360° Rotation: Built-in hidden ball bearings for easy turning
- Non-slip Surface: 12-inch non-slip surface with rubber feet
As an affiliate, we earn on qualifying purchases.
As an affiliate, we earn on qualifying purchases.
Best Tools and Techniques for a Flawless Finish
Using the right tools makes all the difference. An offset spatula, a bench scraper, and a turntable are your best friends for smooth, even layers.
Here’s a quick rundown:
- Offset spatula: For spreading and smoothing the frosting.
- Bench scraper: For sharp edges and straight sides.
- Turntable: To rotate your cake easily and achieve even coverage.
Pro tip: Keep a cup of hot water nearby to dip your spatula or scraper—warm tools help smooth out frosting even more.
One baker I know swears by using a silicone smoothing mat after applying the final coat to get that silk-like finish.
Choosing the right tools isn’t just about convenience; it directly affects the quality of your finish. A well-maintained, sharp bench scraper allows for cleaner, more precise edges, which are vital for a professional look. The turntable helps maintain consistent thickness around the cake, reducing the risk of uneven surfaces or accidental dents. Investing in these tools saves time and effort, and the quality of your finish will reflect that. Additionally, mastering the technique of gentle, even pressure when smoothing with these tools ensures a more uniform and polished surface, which is essential for a truly professional appearance.

Bakerdale Large Bench, Dough, Cake Scraper, Icing Smoother Spreader, 10-inch Long Stainless Steel Blade, with White Polypropylene Handle
- Ergonomic Design: Comfortable for daily professional use
- Non-slip Handle: Textured polypropylene grip, even when wet
- Durable Stainless Steel Blade: Sturdy, long-lasting for frequent use
As an affiliate, we earn on qualifying purchases.
As an affiliate, we earn on qualifying purchases.
Common Mistakes and How to Fix Them
Ever applied a crumb-coat that looked bumpy or uneven? It happens. The key is to identify common mistakes and fix them early.
For instance:
- Too thick or thin frosting: Too thick, and it’s hard to spread; too thin, crumbs sneak through. Adjust by adding a bit more powdered sugar or cream.
- Not chilling enough: Soft frosting or warm cakes make smoothing impossible. Always chill after the crumb-coat.
- Applying too much frosting: Remember, less is more. Use a thin layer. Extra frosting just adds weight and mess.
If your surface is bumpy after the first coat, chill it again, then use a hot spatula or bench scraper to gently smooth out imperfections. Recognizing these issues early can save you from having to redo the entire layer, which can be frustrating and time-consuming. The tradeoff here is patience—you might need to wait a bit longer for the frosting to set, but this step is crucial for a clean, professional look. Imperfections often stem from frosting that is too soft or uneven application, which makes smoothing difficult and can lead to unsightly bumps or ridges. Paying attention to frosting consistency and ensuring proper chilling can prevent these issues from escalating, ultimately saving you time and effort in the decorating process.

Anaeat Icing Spatula, 3 Pieces Professional Angled Offset Frosting Spatulas with 6", 8", 10" Stainless Steel Blades & 4 Pack Cake Smoother Scraper for Cake Decorating, Baking & Pastry (Set of 7)
- Optimal Balance of Stiffness and Flexibility: Provides better control for icing and smoothing
- Ergonomic Non-Slip Handle: Ensures comfort and control during use
- High-Quality Stainless Steel Blades: Lightweight, flexible, and durable for various tasks
As an affiliate, we earn on qualifying purchases.
As an affiliate, we earn on qualifying purchases.
Frequently Asked Questions
How thick should the crumb coat be?
The crumb coat should be very thin—about 1/8 inch—just enough to seal in crumbs. Think of it as a light layer of frosting that’s barely there but does its job.
Can I crumb-coat a warm cake?
It’s best to work with cooled or room-temperature cakes. Warm cakes can cause frosting to melt or slide, making it harder to get a smooth surface.
What if my crumb coat isn’t smooth?
Chill the cake for 30 minutes, then use a hot spatula or bench scraper to gently smooth out the surface. Applying a second thin layer after chilling can also help achieve a sleek finish.
How long should I chill the cake after crumb-coating?
At least 30 minutes to 1 hour. Longer if your cake is large or frosting soft. Chilling helps set the layer and makes final smoothing easier.
Can I skip the crumb coat?
Technically, yes, but skipping it often results in crumbs in the final layer and a less polished look. It’s worth the extra step for professional results.
Conclusion
Crumb-coating might seem simple, but it’s the secret to a cake that looks polished and professional. Take your time, use the right tools, and don’t skip the chilling step. With practice, your cakes will look like they just came from a bakery, even if you’re baking at home.
Remember, every great decorator started with a perfect crumb-coat. So next time you bake, focus on that thin, even layer. Your final cake will thank you—and so will everyone who gets to enjoy it.
Labor Day sales Picks
labor day deals
As an affiliate, we earn on qualifying purchases.