
TL;DR

Get baking supplies delivered free — and shop member deals
- Fast, free delivery on millions of items
- Access to Prime Big Deal Days deals on October 6–7
- Prime Video, Amazon Music and more included
Maintaining and seasoning your baking equipment involves regular cleaning, applying the right oils, and proper storage. These steps create a non-stick surface, prevent rust, and ensure your tools last for years. Recent innovations make this process easier and more eco-friendly than ever.
Ever grabbed your favorite cast iron baking pan and wondered why food sticks or why it’s covered in rust? The secret lies in how well you maintain and season your equipment. Keeping your tools in top shape isn’t just about longevity — it’s about making your baking experience smoother, healthier, and more satisfying.
In this guide, you’ll learn exactly how to care for your baking gear, from initial seasoning to everyday upkeep. Whether you’re working with cast iron, stoneware, or non-stick pans, mastering these simple steps will turn your kitchen into a well-oiled baking machine.
Regularly cleaning with hot water and avoiding harsh detergents preserves seasoning.
Apply a thin layer of high-smoke-point oil and bake at high heat to develop a durable non-stick surface.
Dry equipment immediately after washing to prevent rust buildup.
Re-season when food starts sticking or rust appears — it can be quick and simple.
Proper storage, like stacking with paper towels, keeps your tools rust-free and ready to use.
How to Maintain & Season Your Baking Equipment
Seasoning is a polymerization process: oil bonds to metal under high heat, forming a hard, slick, natural non-stick layer. Master cleaning, oiling, and storage — and your tools will perform for decades, not months.
Five Habits That Keep Your Bakeware Battle-Ready
Seasoning creates a natural, durable non-stick surface that lasts for years with proper care. These are the five pillars of maintenance every baker should know.
Clean Gently, Clean Often
Use hot water and a stiff brush — never harsh detergents, which strip the seasoning layer that gives non-stick properties and rust resistance.
Thin Oil, High Heat
Apply a thin layer of high-smoke-point oil and bake at high temperature. Polymerization bonds it into a durable, slick coating.
Dry Immediately
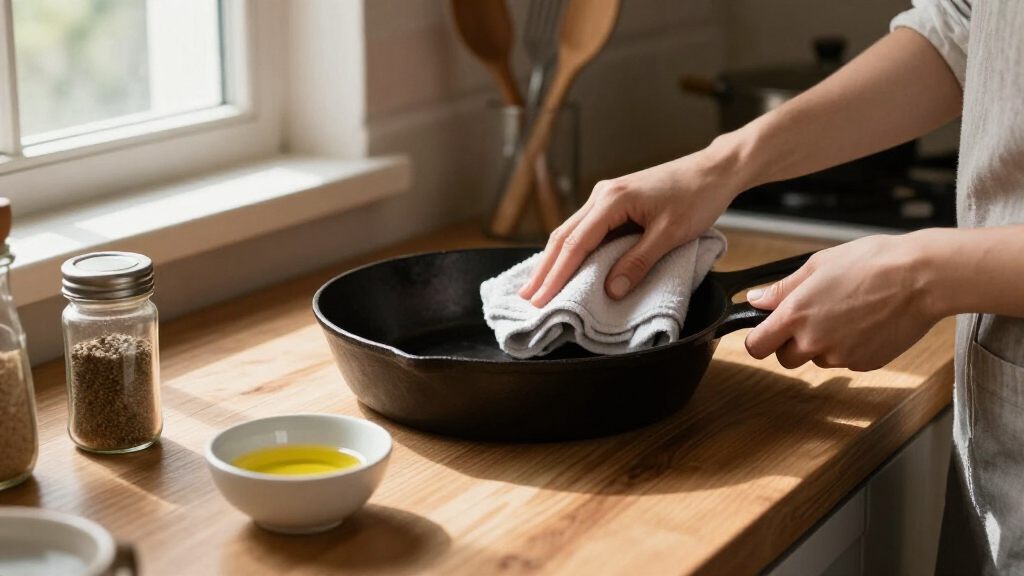
Moisture is the main enemy of seasoned cookware. Towel-dry right after washing — or warm the item in the oven — to prevent rust buildup.
Respond to Warning Signs
Sticking food, dull patches, or rust spots mean the layer is degrading. A quick touch-up with oil and a short bake restores it.
Stack Smart
Store in a dry, ventilated place with paper towels between stacked pans to absorb moisture and prevent scratches.
Care = Longevity
Well-maintained equipment heats evenly, releases baked goods effortlessly, and resists corrosion — saving money and frustration.
Clean Without Ruining the Surface
Cleaning correctly preserves the seasoning on cast iron and carbon steel, while protecting delicate coatings on non-stick pans and silicone molds.
Do This
- Wash cast iron and carbon steel with hot water and a stiff brush or scraper
- Use coarse salt as a natural abrasive for stubborn stuck-on bits
- Scrape dried dough with a spatula — quick and gentle on the seasoning
- Towel-dry pans immediately after washing to block rust
- Hand-wash non-stick pans and silicone molds in warm, soapy water
Avoid This
- Harsh detergents on seasoned surfaces — they strip the protective layer
- Metal scrubbers on non-stick coatings — they scratch and shorten lifespan
- Leaving equipment wet or air-drying — moisture causes rust
- Excessive scrubbing that compromises surface integrity
- Soap on seasoned cast iron — it degrades the polymerized coating
Season Your Equipment From Scratch
Six steps from bare or rusty metal to a hard, slick, professionally-seasoned surface. Repeat 2–3 rounds for new or heavily rusted pieces.
Wash Thoroughly
Remove manufacturing residues, dirt, and rust so nothing interferes with seasoning adhesion.
Dry Completely
Moisture prevents oil from bonding. Towel-dry or warm briefly in the oven.
Apply Thin Oil
Flaxseed, vegetable, or shortening — an even, thin layer. Too much causes sticky patches.
Bake Upside Down
Preheat to 375–450°F (190–230°C) and bake at least one hour so the oil polymerizes.
Cool in Oven
Gradual cooling prevents warping and lets the seasoning set properly.
Repeat Layers
Multiple rounds build a more resilient, non-stick surface that improves with use.
Best Oils for Seasoning Your Bakeware
Choose your oil based on smoke point and the job at hand — hard initial seasoning versus light maintenance. Pair with stiff brushes, scrub pads, and soft cloths for even application.
| Oil Type | Smoke Point | Relative Durability | Why It Works |
|---|---|---|---|
| Flaxseed Oil | ~225°C / 437°F | ★★★ Initial seasoning | Polymerizes into a hard, durable, slick layer. Rapid bonding means fewer coats, but apply carefully to avoid sticky patches. |
| Vegetable Oil | ~210°C / 410°F | ★★ Routine upkeep | Affordable, widely available, and versatile. Not as hard a finish as flaxseed, but easy for regular seasoning and touch-ups. |
| Shortening | ~180°C / 356°F | ★ Light maintenance | Neutral flavor, spreads evenly, and convenient for quick jobs. Lower smoke point suits reinforcing an existing layer, not initial seasoning. |
When Should You Re-Season?
Read your pan’s surface like a car’s paintwork — consistent upkeep keeps tools performing at their best. Inspect regularly to catch wear before problems escalate.
Typical re-seasoning cycle for home bakers: every 3–6 months depending on usage, washing frequency, and storage conditions
Store It Right, Bake It Better
- 🧻Paper towels between pans — absorbs trapped moisture and prevents scratches when stacking.
- 🌬️Dry, ventilated storage — humidity is the #1 accelerator of rust on seasoned surfaces.
- 🫒Light oil after each use — reinforces seasoning and blocks moisture penetration.
- 🔍Regular inspection — catch early wear before it turns into repairs, rust, or replacement.
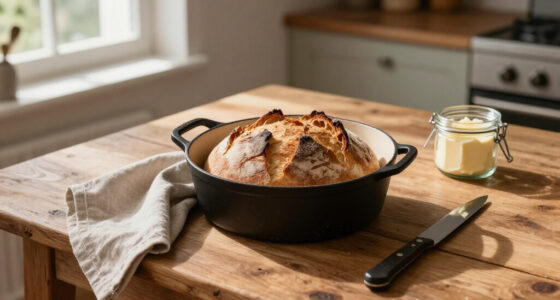
A cast iron skillet that’s properly seasoned and dried after each use can last for decades — its surface prevents sticking and forms a natural barrier against rust.
Why Maintenance MattersCommon Questions, Answered
Typically after every few uses, or whenever food begins to stick or rust appears. For most home bakers that means every 3–6 months.
It’s generally discouraged. Use hot water and a stiff brush instead to preserve the polymerized seasoning layer.
Scrub with steel wool or a brush and coarse salt, wash, dry thoroughly, then re-season from scratch.
Usually not — but lightly oiling the surface helps maintain it and prevents sticking over time.
With proper care, years. Avoid soap, dry immediately, and apply thin oil layers to keep it intact.
Keep it in a dry, well-ventilated area and stack with paper towels or cloth between pans to absorb moisture.
Why Proper Maintenance Keeps Your Baking Equipment in Top Shape
Maintaining your baking tools isn’t just about appearance. It’s about performance, safety, and longevity. Well-maintained equipment heats evenly, releases baked goods effortlessly, and resists rust and corrosion.
For example, a cast iron skillet that’s properly seasoned and dried after each use can last for decades. Its seasoned surface not only prevents sticking but also creates a natural barrier against rust, ensuring safety and flavor integrity. Neglecting maintenance, on the other hand, accelerates deterioration, leading to rust, uneven heating, and compromised food quality. The tradeoff is clear: investing time in proper care saves you money and frustration over replacing damaged tools. Moreover, good maintenance promotes more consistent baking results, as evenly heated, well-seasoned surfaces produce better browning and release.
Regular cleaning, thorough drying, and proper storage form the foundation of good maintenance. These habits keep your tools performing like new, saving you money and frustration in the long run.
As an affiliate, we earn on qualifying purchases.
How to Properly Clean Your Baking Equipment Without Ruining It
Cleaning your baking equipment correctly preserves its surface and prevents damage. For cast iron or carbon steel, avoid harsh detergents because they strip away the seasoning layer that provides non-stick properties and rust resistance. Instead, use hot water and a stiff brush or scraper, which effectively removes residue without damaging the seasoned surface. For stubborn stuck-on bits, coarse salt acts as a natural abrasive that gently scours without stripping the seasoning, allowing you to clean thoroughly without compromising the surface integrity.
Imagine scraping off dried dough from a cast iron skillet with a spatula — it’s quick and gentle, and it won’t strip away your seasoning. After cleaning, dry your pan immediately with a towel to prevent rust, since moisture is the main enemy of seasoned cookware. This quick-drying step ensures the protective layer remains intact and effective.
For non-stick pans or silicone molds, gentle hand washing with warm, soapy water is fine. Just avoid metal scrubbers that could scratch and damage the delicate non-stick coating, which can lead to increased sticking and reduced lifespan. Proper cleaning preserves the surface’s smoothness and non-stick qualities, which are crucial for consistent baking results.
As an affiliate, we earn on qualifying purchases.
Step-by-Step: How to Season Your Baking Equipment from Scratch
- Wash your new or rusty pan thoroughly to remove any manufacturing residues, dirt, or rust spots. This initial cleaning is crucial because any contaminants can interfere with the adhesion of the seasoning layer or cause uneven coating.
- Dry completely — moisture is your enemy in seasoning because it prevents the oil from bonding properly and can cause rust. Use a clean towel or place the item in a warm oven for a few minutes to ensure thorough dryness.
- Apply a thin, even layer of high-smoke-point oil like flaxseed, vegetable, or shortening all over the surface. Using too much oil can lead to sticky patches, so careful application is key. This layer serves as the foundation for creating a durable, non-stick surface through polymerization during baking.
- Place the equipment upside down in an oven preheated to 375–450°F (190–230°C). Bake for at least one hour. The high heat causes the oil to polymerize, forming a hard, slick coating that bonds to the metal.
- Let it cool inside the oven before removing. This gradual cooling prevents warping and ensures the seasoning sets properly. Repeat the process if necessary to build a stronger, more resilient layer, especially for new or heavily rusted pieces. Multiple rounds of seasoning create a more robust non-stick surface that improves with use.
For example, a cast iron skillet might need 2-3 rounds of seasoning to develop that shiny, slick surface you see in professional kitchens. Each layer enhances the durability and non-stick qualities, but patience and proper technique are essential for optimal results.
As an affiliate, we earn on qualifying purchases.
How Often Should You Re-Season and Maintain Your Tools?
Re-season your baking equipment whenever food begins to stick excessively or rust spots appear, which indicates the seasoning layer is degrading. For most home bakers, this might mean re-seasoning every 3–6 months depending on usage, washing frequency, and storage conditions. Regular inspection helps catch early signs of wear before problems escalate, saving you time and effort in repairs.
If you notice a dull, patchy, or uneven surface, it’s a sign that the seasoning has worn thin or been compromised. A quick touch-up with a light coating of oil and a short bake cycle can restore the non-stick layer and prevent rust. Think of this process like maintaining a car’s paintwork — consistent upkeep keeps your tools performing at their best and extends their lifespan. Applying a thin layer of oil after each use, especially after cleaning, helps reinforce the seasoning and prevents moisture from penetrating, which could lead to rust and deterioration over time.
As an affiliate, we earn on qualifying purchases.
Best Oils and Tools for Seasoning Your Bakeware
| Oil Type | Smoke Point | Why It’s Good |
|---|---|---|
| Flaxseed Oil | ~225°C (437°F) | Polymerizes into a durable, slick layer — ideal for initial seasoning because it creates a hard, resilient surface that improves with each layer. Its rapid polymerization also means fewer coats are needed to build a strong non-stick coating, but it requires careful application to avoid sticky patches. |
| Vegetable Oil | ~210°C (410°F) | Affordable and widely available, vegetable oil is versatile for routine maintenance. While it may not produce as hard a finish as flaxseed, its ease of use makes it a popular choice for regular seasoning and touch-ups, helping maintain a smooth, non-stick surface over time. |
| Shortening | ~180°C (356°F) | Neutral flavor and easy to spread evenly, shortening is convenient for quick seasoning jobs. Its lower smoke point means it’s better suited for light maintenance rather than initial seasoning, but it helps reinforce the existing layer without adding complexity. |
Tools like stiff brushes, scrub pads, and soft cloths help apply oil evenly and scrub off debris. Avoid metal scouring pads on seasoned surfaces to prevent stripping the protective layer, which can compromise non-stick qualities and lead to rust or sticking issues.
Common Mistakes That Ruin Your Seasoning and How to Avoid Them
- Using soap on seasoned cast iron — it strips away the oil layer that provides non-stick properties and rust resistance. This can undo months of seasoning and require re-seasoning. Instead, clean with hot water and a brush, which cleans effectively without damaging the protective coating.
- Applying too much oil — excess oil can create sticky patches instead of a smooth, durable surface. Over-oiling leads to a tacky finish that attracts dirt and food residues, diminishing non-stick qualities. Use a paper towel to wipe off excess oil before baking.
- Skipping thorough drying — moisture causes rust and weakens the seasoning. Always dry your equipment immediately after washing, even if it means placing it briefly in a warm oven or on a stove top to evaporate residual water.
- Not reheating after oil application — the oil needs to reach high temperatures to polymerize properly. Failing to do this results in a soft, uneven coating that wears off quickly. Proper heating ensures a hard, protective layer that lasts longer and performs better.
For example, leaving a cast iron pan wet overnight might lead to rust, undoing months of seasoning in a single night. Proper maintenance involves understanding these tradeoffs and carefully balancing cleaning, oiling, and heating to achieve the best results.
How to Remove Rust and Revive Old or Damaged Bakeware
Rust is a common enemy for cast iron or carbon steel tools. To remove it, scrub with steel wool or a coarse salt and brush combo. For stubborn spots, a vinegar soak for an hour can help dissolve rust, but it’s important to understand that vinegar can also slightly etch the surface if left too long, potentially weakening the metal if overused. This method should be used carefully and sparingly, only when necessary. Once the rust is removed, rinse thoroughly and dry immediately to prevent re-oxidation. Then, re-season your equipment to restore that smooth, slick surface, which is crucial for performance and longevity.
Imagine rescuing a rusty skillet and turning it back into your favorite baking companion — it’s satisfying and saves money. Properly removing rust and re-seasoning ensures your tools continue to perform reliably, maintaining their non-stick and rust-resistant qualities for years to come.
Smart Storage Tips to Keep Your Equipment in Prime Condition
Store your baking tools in a dry, well-ventilated space. Use paper towels or cloth between stacked pans to absorb moisture and prevent scratches. This prevents moisture buildup that can lead to rust and keeps surfaces smooth. For cast iron, placing a paper towel inside the pan acts as a barrier against humidity, especially in humid environments, ensuring the seasoning stays intact. Hanging or wall-mounted racks also work well for easy access and airflow, reducing the chance of moisture accumulation. Proper storage not only preserves the seasoning but also prevents accidental damage, such as dents or scratches, which can compromise performance. Think of your equipment sitting happily in a cozy, dry cabinet, ready to bake without fuss, maintaining its integrity over time.
Frequently Asked Questions
How often should I re-season my cast iron skillet?
Re-season every few months or when food begins to stick or rust appears. Regular light seasoning after use also helps maintain the surface.What’s the best oil for seasoning my bakeware?
Flaxseed oil is popular for its durability, but vegetable oil or shortening work well for regular maintenance. Choose high-smoke-point oils for best results.Can I use soap to clean my seasoned cast iron?
It’s best to avoid soap, as it can strip the seasoning. Use hot water and a stiff brush instead, then dry thoroughly.How do I remove rust from my cast iron cookware?
Scrub with steel wool or coarse salt, then re-season. For stubborn rust, soak in vinegar for an hour before scrubbing, but be cautious to avoid over-etching the surface.Is seasoning necessary for non-stick bakeware?
Usually not, but lightly oiling the surface can help maintain non-stick qualities and prevent sticking over time.Conclusion
Investing a little time in caring for your baking equipment pays off in the long run. With proper cleaning, seasoning, and storage, your tools become more reliable, healthier, and last for decades.
Think of your baking gear as a trusted partner — treat it well, and it will reward you with perfect baked goods every time. Now, go grab that cast iron skillet and give it the love it deserves.
Fall Picks
fall essentials
As an affiliate, we earn on qualifying purchases.