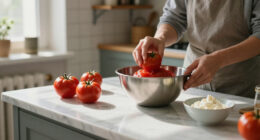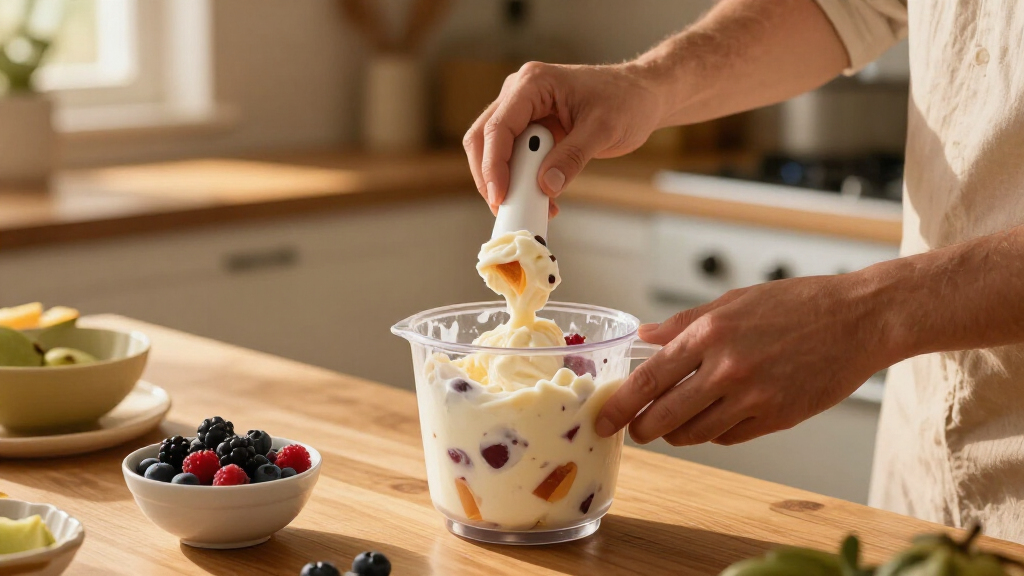
This guide helps beginners choose an ice cream maker and use it to prepare a homemade frozen dessert with ingredients such as fruit, dairy or fortified alternatives, and measured sweetener. You will learn how to match the machine to your kitchen, prepare and chill a base, churn it, and store the finished treat. Allow 30-60 minutes of active work; bowl-freezer machines and some recipes also need 12-24 hours of advance chilling.

Get baking supplies delivered free with Prime
- Fast, free delivery on millions of items
- Prime Video, Amazon Music and more included
- Member-only deals all year

Yonanas Classic Frozen Fruit Soft Serve Maker, 200W
- ✔ Power: 200W
- ✔ Serving capacity: Single serving or family-size portions
- ✔ Preparation: Freeze fruit in small pieces; thaw 7–10 minutes before use

Ninja CREAMi 7-in-1 Ice Cream Maker, NC301
- ✔ Programs: 7: Ice Cream, Gelato, Sorbet, Milkshake, Smoothie Bowl, Lite Ice Cream, and Mix-In
- ✔ Pint capacity: 16 oz
- ✔ Included: Motor base with dual-drive motors, 2 pint containers, and lids

DASH My Mug Ice Cream Maker 2-Pack Bundle, Aqua
- ✔ Capacity: 0.5 pints per mug
- ✔ Included: Two freezer mugs, motor with lid, stirring paddle, recipe guide, instruction manual, warranty
- ✔ Preparation: Freeze mugs for 24–48 hours
Difficulty: Beginner | Time: 30-60 minutes active time, plus 12-24 hours for freezing a bowl or mixture
What You’ll Need
Tools & Materials:
- Ice cream maker with its instruction manual
- Freezer space for the machine bowl, if using a freezer-bowl model
- Measuring cups or kitchen scale
- Blender or whisk, depending on the recipe
- Chilled mixing bowl and airtight freezer-safe container
- Spatula
Knowledge:
- Basic measuring and mixing
- Ability to identify food ingredients that do not suit your dietary needs
“Healthy” depends on your needs and portion size; a homemade dessert can still contain substantial sugar, saturated fat, or calories. Check the maker’s capacity, preparation instructions, and cleaning guidance before selecting a recipe. For food allergies, check every ingredient label and prevent cross-contact with shared equipment.
Yonanas Classic Frozen Fruit Soft Serve Maker, 200W
For shoppers who mean “healthy” as fruit-first and free from added sugar, fat, and dairy, Yonanas is the most direct match in this group. Its 200W motor processes frozen fruit into a soft serve-style dessert, so we can start with ingredients rather than a pre-made ice cream base. That makes it simpler than the Ninja CREAMi for a basic fruit treat and more naturally aligned with a dairy-free approach than a machine whose results depend heavily on the recipe.The tradeoff is that fruit needs a little preparation: we must freeze it in small pieces and let it sit for 7–10 minutes before processing. That is less of a long-range commitment than Ninja’s 24-hour base freeze or DASH’s 24–48-hour mug freeze, but it is not an instant solution when fruit is not already prepped. Yonanas can handle single servings or family-size portions, which gives it an advantage over DASH’s half-pint mugs when serving more than one person. Its recipe booklet and top-rack dishwasher-safe chute, plunger, and blade also make it easier to get started and clean up. We should skip it if we want conventional scooped ice cream or frequent recipe changes involving many textures: that is where Ninja has the broader toolkit.
Pros:
- Makes fruit-based soft serve without adding sugar, fat, or dairy
- Handles single servings as well as family-size portions
- Includes a 36-page recipe booklet
- Chute, plunger, and blade are top-rack dishwasher safe
Cons:
- Fruit must be frozen in small pieces and thawed for 7–10 minutes before use
- Focused on fruit soft serve rather than a broad range of frozen dessert styles
Best for: People who want a straightforward fruit-based, dairy-free soft serve option and can keep frozen fruit ready.
Not ideal for: Buyers seeking traditional ice cream textures, many preset treat styles, or a machine that needs no ingredient preparation.
Bottom line: We recommend Yonanas as the strongest overall fit when healthy means simple fruit-based soft serve with minimal added ingredients.
“We recommend Yonanas as the strongest overall fit when healthy means simple fruit-based soft serve with minimal added ingredients.”
Ninja CREAMi 7-in-1 Ice Cream Maker, NC301
The Ninja CREAMi is our pick when “healthy” means choosing and adjusting the ingredients ourselves, rather than relying on a fruit-only method. We can prepare bases for ice cream, gelato, sorbet, milkshakes, smoothie bowls, Lite Ice Cream, and mix-ins. That range makes it more adaptable than Yonanas, which is best understood as a dedicated fruit soft serve maker. The Re-spin function can also soften the finished texture, giving us another adjustment when a batch comes out firmer than we prefer.That flexibility comes with advance planning. Each base needs to freeze for 24 hours before processing, so this is not the best choice for an unplanned dessert. Its two 16-ounce pints provide more room for recipe experimentation than DASH’s half-pint mugs, though we still need to make and freeze each base ahead of time. Ninja’s settings can accommodate ingredient choices, but they do not make a recipe automatically low in sugar or otherwise healthy; that depends on what we put in the container. The pint, storage lid, and Creamerizer Paddle are top-rack dishwasher safe, making routine cleanup more convenient than DASH’s hand-wash-only care. Choose it over Yonanas for variety and customization, but not if fruit-only simplicity is the priority.
Pros:
- Seven programs cover a broad range of frozen treats
- Customizable bases and mix-ins allow ingredient control
- Re-spin can help create a softer, creamier texture
- Two 16-ounce pints and selected top-rack dishwasher-safe parts are included
Cons:
- Bases must freeze for 24 hours before processing
- Healthfulness depends on the ingredients and mix-ins we choose
- Offers more recipe flexibility than a quick, fruit-only routine requires
Best for: Home cooks who want to control ingredients and make several kinds of frozen treats from prepared bases.
Not ideal for: Anyone who wants dessert on demand, prefers a fruit-only process, or does not want to freeze bases a day in advance.
Bottom line: We choose Ninja when ingredient customization and dessert variety matter more than short preparation time.
“We choose Ninja when ingredient customization and dessert variety matter more than short preparation time.”
DASH My Mug Ice Cream Maker 2-Pack Bundle, Aqua
DASH is the most compact and portion-focused choice here. The bundle includes two half-pint freezer mugs, so two people can prepare separate servings instead of sharing a larger batch. It can make soft serve, ice cream, gelato, sorbet, and frozen yogurt, including dairy-free recipes. Compared with Yonanas, it is less specifically geared toward fruit-only desserts; compared with Ninja, it trades recipe capacity and program range for a small format that stores inside its mugs.The mug system can help us keep portions defined, but the small capacity is also a real limit: each mug holds just 0.5 pints, making it a poor fit for family-size batches. We also have to freeze the mugs for 24–48 hours before use, a longer window than Ninja’s stated 24-hour base preparation. Once chilled, the automatic machine prepares a serving in about 20 minutes, and the ingredient chute lets us add mix-ins. Unlike the other two picks, however, DASH’s components are hand-wash only. It makes the most sense for a small kitchen or occasional personal treat, not for people who want low-effort cleanup, larger output, or Yonanas-style fruit processing as the central feature.
Pros:
- Two mugs allow separate servings or flavors
- Compact design stores components inside the mugs
- Ingredient chute accommodates mix-ins
- Can make several frozen treat styles, including dairy-free options
Cons:
- Each mug holds only half a pint
- Mugs must freeze for 24–48 hours before use
- Care is hand-wash only
Best for: Individuals or couples who want compact storage and separate, small servings of homemade frozen treats.
Not ideal for: Families, batch makers, or anyone unwilling to plan ahead for freezer mugs and wash parts by hand.
Bottom line: We recommend DASH for compact, individual servings, but its small mugs and hand-wash care make it less versatile for frequent family use.
“We recommend DASH for compact, individual servings, but its small mugs and hand-wash care make it less versatile for frequent family use.”
As an Amazon Associate we earn from qualifying purchases.
Before You Start
Read the manual before handling or running the machine. Check whether it uses a bowl that must be frozen, a built-in compressor, or ice and salt. A freezer-bowl model will not churn properly unless its bowl is frozen as directed, often for at least 12-24 hours. Clear a level work surface and make room in the freezer for the bowl and finished dessert. Refrigerate the base until cold; warm mixture can churn slowly and produce a less even texture.
Choose a recipe intended for your machine’s capacity. Do not fill beyond its maximum line: the base expands as it freezes. Use a tested recipe as your starting point rather than removing all sweetener or fat at once, since these ingredients affect softness and texture as well as flavor.
Step-by-Step Instructions
Step 1: Choose a machine that fits your routine
Compare machines by capacity, counter and freezer space, cleaning requirements, and how often you expect to make frozen desserts. A freezer-bowl model usually costs less but requires advance freezer space and planning. A compressor model chills its own bowl and can be ready sooner, but it is typically larger and more expensive. An ice-and-salt model needs ice and salt during operation. Check that the bowl size suits your recipe, that replacement parts are available, and that the machine can make the style of dessert you want.
Tip: Do not pick a machine based only on the word “healthy” in its marketing. The ingredients and serving size determine much of the nutritional profile.
Check: You can name the machine type, confirm it fits your freezer or counter, and match its capacity to a recipe.
Step 2: Select a balanced base recipe
Choose a recipe with a clear ingredient list and quantities scaled to your machine. For a fruit-forward option, use ripe fruit with plain yogurt or a suitable dairy-free alternative. For a creamier base, use milk or an unsweetened fortified alternative, yogurt, or a measured amount of cream. Add sweetener according to the recipe and your taste; honey, maple syrup, and dates still contribute sugars. If you have diabetes, an allergy, or another dietary requirement, use guidance suited to that need and check labels rather than assuming a substitute behaves the same way.
Tip: Avoid making several substitutions at once. Different milks, sweeteners, and fruit amounts change how a base freezes, so adjust one ingredient at a time.
Check: The ingredients meet your dietary needs, the recipe fits the maker’s capacity, and the sweetener amount is measured rather than guessed.
Step 3: Prepare the freezer bowl and ingredients
Freeze the bowl for the full time specified in the manual, keeping it upright and level. If you have a compressor machine, follow its instructions for pre-chilling or cooling. Wash fruit and utensils, remove pits, stems, and inedible peel, then measure the ingredients. Blend or whisk the base until smooth or until it reaches the texture specified by your recipe. Keep raw ingredients and the finished dessert separate from unwashed surfaces and utensils.
Tip: If you are unsure whether a freezer bowl is ready, keep it in the freezer longer. A bowl that is not fully frozen is a common cause of thin, slushy results.
Check: The bowl has completed its required freeze or chill time, and the measured base is mixed without large unwanted lumps.
Step 4: Chill the base thoroughly
Cover the base and refrigerate it until it is cold throughout, usually at least 2-4 hours or overnight, unless the recipe gives a different time. Do not pour a warm mixture into a freezer-bowl machine. Keep the base refrigerated while you set up the machine, and avoid leaving dairy-based mixtures at room temperature for extended periods.
Tip: Chilling the base in a shallow covered container can help it cool faster than leaving it in a deep, warm mixing bowl.
Check: The mixture feels refrigerator-cold, not merely cool on the surface, before you start churning.
Step 5: Assemble and churn the mixture
Set the machine on a stable, level surface and assemble it as directed in the manual. Start the dasher or motor before pouring in the base if the manual instructs you to do so; this helps prevent mixture from freezing onto the bowl. Pour slowly and stop at the fill limit. Churn for the recipe’s suggested time, watching for a thick, soft-serve texture. Add small mix-ins, such as chopped fruit or nuts, near the end if the recipe and machine instructions allow it.
Tip: Do not force the paddle or scrape a frozen layer from a running machine. Turn the machine off before checking or cleaning it.
Check: The mixture thickens and moves with the paddle, and the machine runs without unusual noises or strain.
Step 6: Freeze to the texture you want
Serve the dessert immediately if you prefer a soft texture. For firmer scoops, transfer it with a clean spatula to a shallow, airtight freezer-safe container and freeze for about 2-4 hours, checking sooner if your freezer is very cold. Press a piece of baking paper or suitable reusable wrap against the surface if the recipe tends to form ice crystals. Label the container with the preparation date.
Tip: Homemade frozen desserts without commercial stabilizers can freeze harder than store-bought ice cream. Let the container stand in the refrigerator for 10-15 minutes, or on the counter briefly, before scooping; do not leave it out to soften for a long period.
Check: The dessert is either soft enough to serve from the machine or firm enough to scoop after freezing, with no signs of freezer burn.
Step 7: Clean and store the machine
Switch off and unplug the maker before taking it apart. Follow the manual to wash removable parts; do not immerse a motor or compressor housing. Wipe the housing with a damp cloth and dry parts fully before storing them. Clean sticky base from tools and surfaces promptly, and return the dessert to the freezer in its sealed container.
Tip: Some freezer bowls have coatings that can be damaged by abrasive pads or dishwasher heat. Use only the cleaning method approved by the manufacturer.
Check: Food-contact parts are clean and dry, the motor housing remains dry, and the dessert is covered and back in the freezer.
Common Mistakes to Avoid
- Using a freezer bowl before it is fully frozen. — Follow the manual’s freeze time and keep the bowl level in the freezer. Freeze it longer if you are uncertain.
- Adding a warm base or filling the bowl too high. — Chill the base completely and follow the maker’s fill line so the mixture has room to expand.
- Removing all sweetener or changing several ingredients at once. — Use a tested recipe first. Sweeteners affect texture as well as taste, and multiple substitutions make it difficult to identify what caused a problem.
- Expecting homemade dessert to stay as soft as commercial ice cream. — Store it airtight, plan to soften it briefly before scooping, and make smaller batches if it is often left in the freezer for a long time.
Troubleshooting
Problem: The mixture stays thin or slushy after the recommended churn time.
Solution: Stop the machine and check that the bowl was fully frozen, the base was thoroughly chilled, and the recipe amount was within capacity. If the machine is not cooling effectively, follow its manual before trying again; do not keep running it beyond its stated operating limit.
Problem: The motor struggles, the dasher stalls, or the machine makes an unusual noise.
Solution: Turn the machine off and unplug it. Check for overfilling, a jammed mix-in, or incorrect assembly. Remove any obstruction only when the machine is stopped, then reassemble according to the manual. Contact the manufacturer if the problem continues.
Problem: The dessert freezes too hard to scoop.
Solution: Let it soften briefly in the refrigerator or on the counter, then scoop. For the next batch, follow a tested recipe with its specified sweetener and fat amounts; avoid changing ratios at random.
Problem: The finished dessert feels icy or grainy.
Solution: Blend the base until smooth, chill it well before churning, and avoid adding watery fruit without accounting for its liquid. Use ripe fruit or a recipe that cooks or drains high-moisture ingredients as directed.
What Success Looks Like
Your chosen machine suits your space and recipe size. The base was prepared with measured ingredients and chilled fully, and the maker churned it without stalling or exceeding its capacity. The finished dessert has the texture you intended, tastes acceptable to you, and is stored in a sealed container. The machine’s food-contact parts are clean and dry. For nutrition, check the actual recipe and serving size rather than relying on a “healthy” label or ingredient alone.
Next Steps
Record the recipe, churn time, and any changes you made so you can repeat a batch you liked. If the dessert was too hard, icy, or sweet, adjust one factor in a tested recipe on the next attempt. Clean the machine after every use and store a freezer bowl as the manual directs. Discard food that has been left at unsafe temperatures or shows signs of spoilage, and contact the machine’s manufacturer for persistent mechanical faults.
Frequently Asked Questions
Do healthy ice cream makers make the dessert healthy automatically?
No. The machine only churns and freezes the ingredients. The recipe, portion size, and your dietary needs determine whether a dessert fits your idea of healthy. Fruit, yogurt, or a dairy alternative can be useful ingredients, but added sweeteners still contribute sugar.
How long should I freeze a freezer-bowl machine’s bowl?
Use the time in the machine’s manual; many bowls need 12-24 hours. Keep the bowl upright and level, and leave it longer if you cannot tell whether it is fully frozen.
Can I use a sugar substitute in an ice cream recipe?
Only use a substitute in a recipe designed or tested for it. Sweeteners behave differently in frozen mixtures, so swapping an equal volume may affect sweetness, texture, and how hard the dessert freezes.
Can I make dairy-free frozen dessert in an ice cream maker?
Yes, if the machine instructions allow it. Choose a recipe formulated for an appropriate dairy-free base, such as a suitable fortified alternative or coconut-based mixture. Check labels for allergens and clean equipment carefully to prevent cross-contact.
How long can I store homemade ice cream?
Follow the recipe’s storage guidance and keep the dessert sealed in a consistently cold freezer. Homemade mixtures can develop ice crystals or lose quality sooner than commercial products. Label the container with its preparation date, and discard it if it has been stored unsafely or shows signs of spoilage.