
TL;DR

Get baking supplies delivered free — and shop member deals
- Fast, free delivery on millions of items
- Access to Prime Big Deal Days deals on October 6–7
- Prime Video, Amazon Music and more included
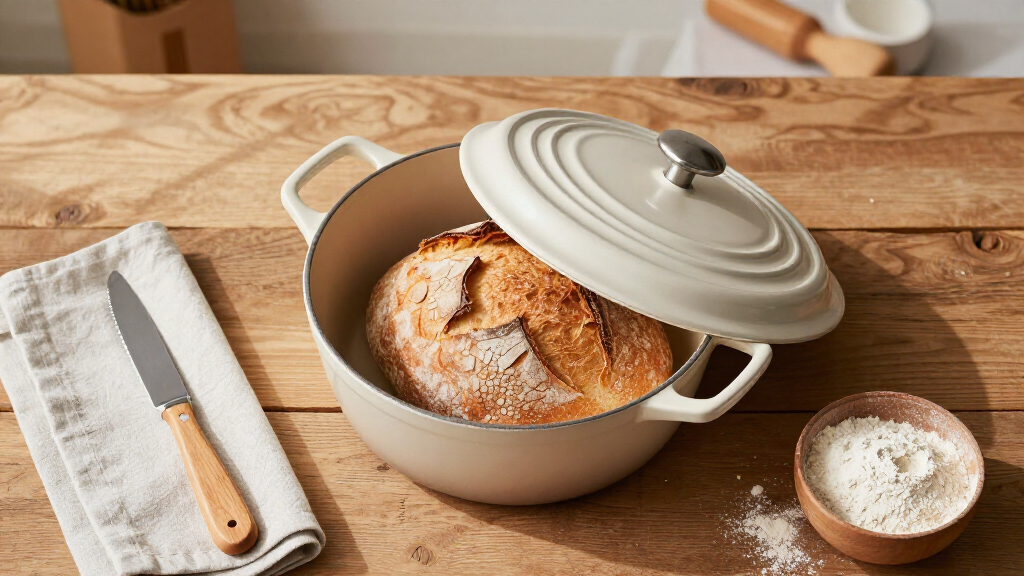
The Dutch oven bread method creates bakery-style crust and crumb by trapping steam in a heavy pot. It involves simple ingredients, long fermentation, and high-temperature baking for best results.
Preheat your Dutch oven thoroughly for a crust that crackles and shines.
Long fermentation (12-24 hours) develops flavor and airy texture without kneading.
Use parchment paper for easy transfer and to prevent sticking.
Let the bread cool completely before slicing to maximize crust and crumb quality.
Adjust proofing times and oven settings based on your environment and oven quirks.
What Makes the Dutch Oven Method a Game-Changer?
The magic of the Dutch oven bread method lies in how it traps steam during baking. This creates an environment similar to a professional bread oven, helping the bread expand rapidly (what bakers call oven spring) and develop that iconic crispy crust. It’s a simple trick that makes a huge difference. Imagine how a thick blanket of steam surrounds your dough, allowing it to stretch and rise beautifully before setting into that perfect crust.
Using a Dutch oven isn’t just about convenience; it’s about results. The heavy cast iron retains heat evenly, while the lid seals in moisture. The result? An exterior that crackles with every bite and an interior that’s soft, open, and full of flavor.
As an affiliate, we earn on qualifying purchases.
Step 1: Mix Your Ingredients—Keep it Simple
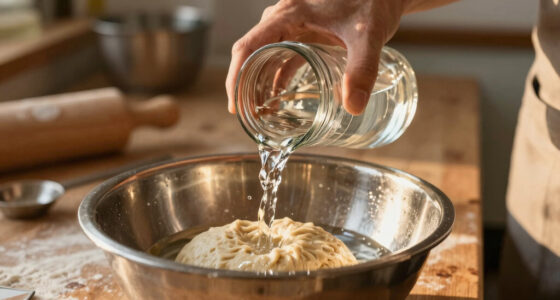
Start with just four ingredients: flour, water, salt, and yeast. No fancy additives needed. For a typical loaf, use about 3 cups of bread flour, 1 1/4 cups of water, 1 1/2 teaspoons of salt, and 1 teaspoon of active dry or instant yeast.
Mix everything in a large bowl until it forms a shaggy, sticky dough. Don’t overthink kneading—this dough benefits from a long, slow fermentation rather than vigorous kneading. Think of it as giving the gluten time to develop naturally.
As an affiliate, we earn on qualifying purchases.
Step 2: Let the Dough Ferment—Patience Pays Off
This is where the magic begins. Cover your bowl loosely with plastic wrap or a damp towel. Let it rest at room temperature for 12 to 24 hours. The longer, the better—flavor deepens, and the dough develops a beautiful, bubbly surface.
Fermentation is critical because it allows enzymes in the flour to break down complex carbohydrates into simpler sugars, which yeast then consumes to produce carbon dioxide and alcohol. This process not only develops flavor but also creates the gluten network that gives the bread its structure. Longer fermentation typically results in a more complex flavor profile, with hints of nuttiness or sourness, depending on the yeast and fermentation conditions. It also improves the bread’s texture, making it lighter and more open-crumbed. Rushing this step can lead to dense bread, so patience here is a true baker’s virtue.
As an affiliate, we earn on qualifying purchases.
Step 3: Shape and Final Proof—Get It Ready to Bake
Gently turn your dough onto a floured surface. Shape it into a round loaf by folding the edges underneath, which helps create surface tension that contributes to a better oven spring. Let it rest for another 1 to 2 hours, covered with a towel, until slightly puffed up. This final proof is essential because it allows the dough to relax and expand slightly, ensuring the bread will rise well in the oven. Proper shaping and proofing also influence the crust’s final texture—tight surface tension helps produce those characteristic cracks and ridges. Under-proofed dough can lead to flat, dense bread, while over-proofed dough might collapse. Striking the right balance ensures a well-structured loaf with a pleasing crumb and crust.
As an affiliate, we earn on qualifying purchases.
Step 4: Preheat Your Dutch Oven—Set the Stage
Preheat your oven to 450°F (230°C) at least 30 minutes before baking. Place your Dutch oven (with the lid on) inside while it warms. This ensures the cast iron is blazing hot, ready to create that perfect crust. The high initial heat is crucial because it causes the dough to expand rapidly—what bakers call oven spring—before the crust sets. If the Dutch oven isn’t preheated properly, the crust may be dull, thick, or lack that desirable crackle. Think of it like warming up a stage before a performance; the hotter the stage, the more impressive the show (or in this case, the bread). The preheating process also helps the dough to develop a better oven spring, resulting in a lighter, more open crumb.
Step 5: Bake with Steam—Activate the Crunch
Carefully transfer your shaped dough onto parchment paper. Use tongs to place it into the hot Dutch oven. Cover with the lid and bake for 20 minutes. Then, remove the lid and bake for another 20-25 minutes until deep golden brown. The initial steaming environment created by the lid traps moisture, which keeps the crust soft during the first phase of baking. As the moisture evaporates, the crust begins to form, and the high heat causes caramelization of the sugars in the dough, developing that rich, golden color. Removing the lid allows excess moisture to escape, enabling the crust to fully develop its signature crunch and crackle. This process mimics professional baking environments, where steam is used to achieve a shiny, blistered crust that’s both flavorful and visually appealing.
Step 6: Cool and Enjoy—Patience Again
Once out of the oven, let your bread cool on a rack for at least 1 hour. Cutting into it too early can squish the airy crumb and soften the crust. Patience here is essential because the cooling process allows the internal steam to escape, which helps the crust to set and the crumb to stabilize. If you cut too soon, the residual heat and moisture can cause the bread to become gummy or collapse, ruining the texture and flavor. This resting period also allows the flavors to fully develop and the crust to become crisp and shiny. Think of it as letting the bread settle after a big performance—only then does it reveal its full beauty and flavor. The longer you wait, the better the eating experience, with a crust that crackles and a crumb that’s light and tender.
How to Troubleshoot Common Issues
Did your bread turn out dense? It might be under-proofed or over-kneaded. Under-proofed dough lacks sufficient gas bubbles, resulting in a tight crumb and less oven spring. Over-kneading can lead to a tough gluten network that restricts expansion. A flat loaf? Possibly insufficient oven spring, which can be caused by not preheating the Dutch oven properly, or inadequate steam during baking. If it’s too pale, increase baking time or temperature slightly to promote Maillard browning. Remember, practice makes perfect—and each oven is a little different. Adjusting proofing times, oven temperature, and steam application based on your environment will help you improve with each bake. Understanding these tradeoffs and their effects helps you troubleshoot more effectively, leading to consistent, beautiful loaves over time.
Small mistakes are part of the learning process. Recognizing what went wrong—whether it’s too dense, flat, pale, or overly dark—gives you clues to refine your technique. With patience and experimentation, your bread will improve, and soon, you’ll be baking artisan-quality loaves regularly.
Frequently Asked Questions
How long does it take to make Dutch oven bread from start to finish?
Typically, it takes around 4 to 24 hours, including fermentation, shaping, and baking. The long ferment is what really develops flavor and texture, so plan accordingly.Can I use any Dutch oven for this method?
A heavy, oven-safe Dutch oven with a tight-fitting lid—like cast iron—is ideal. It needs to withstand high heat and trap steam effectively.Do I need to knead the dough?
Not necessarily. No-knead recipes rely on long fermentation to develop gluten. Minimal handling keeps the dough sticky but easier to shape.What if I don’t have a Dutch oven?
You can use any heavy oven-safe pot with a lid, or create steam by placing a baking sheet filled with water in the oven. Just ensure it can handle high temperatures.How do I prevent sticking or dough tearing?
Use parchment paper generously, and flour your work surface and dough well. Proper shaping and gentle handling also help maintain the loaf’s structure.Conclusion
Your oven isn’t just a heat source—it’s a magic box that transforms simple ingredients into bread that feels like it came from a bakery. With patience and a few key steps, you can create crusty, flavorful loaves right in your kitchen. Remember, every loaf is a lesson—each bake brings you closer to perfect bread. So, dust off that Dutch oven and get baking. Your taste buds will thank you.Fall Picks
fall essentials
As an affiliate, we earn on qualifying purchases.