
TL;DR

Get baking supplies delivered free — and shop member deals
- Fast, free delivery on millions of items
- Access to Prime Big Deal Days deals on October 6–7
- Prime Video, Amazon Music and more included
Pita puffs into a perfect pocket when baked at very high heat, with thin, even dough that’s rested properly. Using the right dough hydration and preheated surface dramatically improves success rates, making home baking feel like a bakery experience.
Ever wonder why some pitas puff into a perfect pocket, while others flop flat? The secret isn’t in a mysterious ingredient but in the heat, dough, and technique. Baking that pocket-sized masterpiece at home is totally doable—once you understand what makes it happen.
In this guide, you’ll learn how to craft dough that puffs reliably, the best way to roll it thin and even, and how to set up your oven or baking surface for maximum puff. Ready to turn your kitchen into a pita factory? Let’s get started.
Achieve a perfect puff by baking at 500°F+ on a preheated stone or steel for maximum heat transfer.
Use bread flour with about 60% hydration to develop elastic dough that can stretch without tearing.
Even, thin rolling to about ¼ inch and a 15–30 minute resting period are critical for reliable puffing.
Rest the baked pita in a towel to keep the pocket soft and pliable for stuffing.
Troubleshooting common issues like uneven rolling or insufficient heat can turn your flatbread into bakery-quality pockets.
How to Make Pita That Puffs Into a Perfect Pocket
The secret isn’t a mystery ingredient — it’s heat intensity, dough condition, and rolling technique. Master three variables and your home oven turns into a pita factory: blistering heat, elastic 55–65% hydration dough, and a rested, evenly rolled ¼-inch disc.
Steam inflation · Gluten elasticity · Surface thermodynamics
The Pocket Is a Steam Balloon
Intense heat converts internal moisture to steam faster than the crust can set. The dough inflates like a balloon before the walls harden — then the two layers fuse back together as it cools. Blow a balloon up slowly and it never fills; blast it and it pops to shape. High heat is that blast.
475–550°F surface hits the dough bottom instantly
Internal moisture vaporizes in seconds, not minutes
Thin, elastic dough stretches over the steam bubble
2–4 min bake locks the shape before walls harden early
Towel-wrapped rest keeps layers soft and separable
An Ordinary Dough, Precisely Tuned
The formula is classic — flour, water, yeast, salt, a little olive oil. What matters is gluten development and balance: elastic enough to stretch over the steam bubble, strong enough not to tear.
Bread Flour First
Higher protein builds the elastic gluten network that stretches thin without ripping. A bread/AP blend works; 100% whole grain puffs less reliably — 50/50 blends are the sweet spot.
Smooth, Elastic, Risen
Knead to a smooth, near-windowpane dough — not full sandwich-bread development. Overproofed dough puffs poorly, so watch the volume, not the clock.
Tight Balls, Even Discs
Round divided dough into tight balls — surface tension encourages even inflation. Roll from the center outward; tears and thick spots are the enemies of the puff.
Six Moves to a Bakery Pocket
The most-skipped step is the bench rest after rolling — tight gluten resists expansion, and a tense disc cracks instead of inflating. Cover with a damp towel and let it relax.
Mix & Knead
Bread flour, water, yeast, salt, olive oil. Knead until smooth and elastic.
8–10 min kneadBulk Ferment
Let rise until roughly doubled. Don’t overproof — exhausted dough won’t puff.
1–1.5 hoursDivide & Round
Portion and shape tight balls to build the surface tension that drives even inflation.
8–10 ballsRoll Thin & Even
Center-out strokes to ¼ inch. Dust lightly — excess flour blocks layer fusion and burns.
¼ in / 6 mmBench Rest
Rest rolled rounds under a damp towel so gluten relaxes and stops resisting expansion.
15–30 min — don’t skipBake Hot & Fast
Onto a 45–60 min preheated stone or steel, rack in the lower third. Watch it inflate.
2–4 min @ 500°F+Where the Puff Is Won or Lost
Instant bottom heat drives the steam explosion. A baking steel transfers heat fastest — the measurable upgrade home bakers are switching to — but every method below can work.
| Surface / Method | Preheat | Puff Reliability | Char & Flavor | Verdict |
|---|---|---|---|---|
| Baking steel | 45–60 min @ 500°F+ | ✓ Excellent | Good spotting | The upgrade pick — fastest heat transfer |
| Baking stone | 45–60 min @ 500°F+ | ✓ Excellent | Classic bakery finish | Consistent, bakery-quality pockets |
| Outdoor pizza oven | Until 700°F+ | ✓ Outstanding | Best char of all | Puffs in under a minute |
| Flipped sheet pan | 30–45 min @ 500°F | ~ Good | Light spotting | Budget option — preheat is non-negotiable |
| Cast-iron skillet (stovetop) | Until ripping hot | ~ Moderate | Attractive charring | Cover briefly to trap steam; smaller pockets |
| Air fryer | 5 min @ max temp | ✗ Inconsistent | Uneven | Emerging method — one pita at a time |
Heat Delivery, Visualized
Illustrative reliability index based on heat intensity and transfer speed — assuming proper dough, even rolling, and a full bench rest.
Index 0–100 · Illustrative relative performance, not lab-measured data
From Flat Flop to Bakery Pocket
Most failures trace back to three causes: insufficient heat, uneven rolling, or skipped rest. Diagnose, fix, rebake.
Stayed completely flat
✗ Cause — oven or surface not hot enoughSteam escaped slowly instead of exploding. Verify with an oven thermometer, preheat the stone or steel a full 45–60 minutes, and move the rack to the lower third.
Puffed on one side only
✓ Fix — roll evenly to a uniform ¼ inchUneven thickness means thin spots set before thick spots inflate. Roll from the center outward in all directions and check for thick edges.
Cracked or tore while baking
✗ Cause — tight gluten or tears in the discThe rest after rolling was skipped or too short, or the disc had a weak spot. Rest 15–30 minutes under a damp towel and patch no holes — re-roll instead.
Puffed, then went hard and dry
✓ Fix — towel-wrap straight from the ovenStack hot pitas in a clean towel or covered container for at least 10 minutes. Trapped residual steam keeps the pocket soft, pliable, and stuffable.
The Full Pocket Chain
Why Heat Is Your Most Important Pita Secret
The puffing action in pita happens when super-hot temperatures turn internal moisture into steam, inflating the dough like a tiny balloon. For this to happen effectively, you need an oven or surface that hits at least 475°F (245°C) — ideally up to 550°F (290°C). Without this heat, the steam escapes slowly, and the pita stays flat.
Think of it like blowing up a balloon: if you blow it up slowly, it won’t puff as well as when you give it a quick, strong blast. That’s exactly what high heat does—delivers a quick burst that traps steam before the crust hardens.
Using a pizza stone or steel preheated for at least 45 minutes is the best way to get this intense heat. Budget option? A flipped, preheated sheet pan can work too, but the stone gives a more consistent, bakery-quality puff.
As an affiliate, we earn on qualifying purchases.
How to Prepare Dough That Loves to Puff
The dough’s hydration and elasticity are the backbone of a puffing pita. Use bread flour, which has about 12-13% protein, to develop the gluten needed for stretch without tearing. Aim for a hydration level of 55–65%. Too dry? The dough won’t stretch evenly. Too wet? It may tear or collapse.
But why do these factors matter? Higher hydration levels generally create a more flexible, extensible dough that can stretch thin without ripping, which is essential for creating a pocket. However, too much water can weaken the gluten network, leading to tearing or collapsing during baking. Conversely, too little hydration results in a stiff dough that can’t expand properly. Resting the dough after kneading allows the gluten to relax, making it easier to roll out thinly and evenly, which is critical because uneven dough won’t puff uniformly, resulting in flat pockets or cracks. Achieving the right balance requires understanding that dough is a living system—adjusting hydration and resting times based on flour type and environmental conditions can significantly influence your success. A well-prepared dough with optimal hydration and gluten development creates a resilient structure that can trap steam effectively, leading to consistent puffing and a light, airy pocket.
As an affiliate, we earn on qualifying purchases.
Master the Art of Rolling Even, Thin Pitas
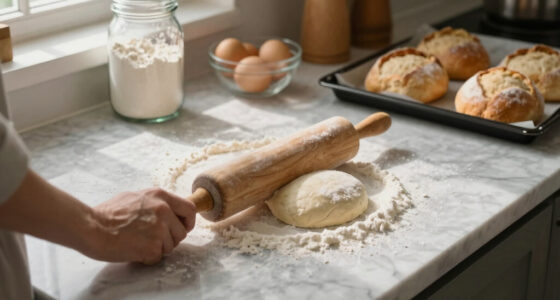
The secret to a good puff is rolling your dough **evenly and to about ¼ inch (6 mm)** thickness. Use a rolling pin and start from the center, pressing outward in all directions. Avoid tears or thick spots—they’re the enemies of puffing.
Pro tip: dust lightly with flour, but don’t overdo it. Excess flour can create a barrier that inhibits layer fusion and burns in the oven. Keep the dough surface dry and smooth for best results.
Imagine rolling out a perfect circle that’s uniformly thin—this guarantees even heat exposure and steam expansion. Uneven thickness can cause parts of the pita to puff while others remain flat, or lead to cracks that leak steam, preventing a proper pocket. Resting the rolled dough for 15–30 minutes helps relax the gluten further, reducing resistance during baking and promoting uniform expansion. The goal is to create a smooth, thin, and even disc that heats evenly, allowing the internal moisture to vaporize uniformly, which is essential for a reliable puff.
As an affiliate, we earn on qualifying purchases.
Why Resting Before Baking Is the Step Most People Skip
The single most overlooked step? Resting the rolled dough. After shaping, give your pitas 15–30 minutes to relax. This allows gluten strands to loosen, reducing resistance to expansion when exposed to high heat.
Why does this matter? When dough is rolled out immediately before baking, the gluten network is tight and resistant to expansion. Resting relaxes these strands, making the dough more pliable and capable of expanding evenly during baking. Without this step, the pita may crack, tear, or fail to puff because the gluten matrix is too tense, preventing the internal steam from creating a uniform pocket. Resting also helps the dough develop a slightly more uniform temperature and moisture distribution, which enhances puffing consistency. Covering the dough with a damp towel during this period prevents it from drying out, maintaining elasticity and preventing cracks. Skipping this step might seem minor, but it directly impacts the pita’s ability to puff reliably, making it a crucial part of the process.
dough roller for thin evenly rolled bread
As an affiliate, we earn on qualifying purchases.
As an affiliate, we earn on qualifying purchases.
How to Bake Pitas That Puff Like a Bakery
Preheat your oven to at least 500°F (260°C) with a baking stone or steel for 45–60 minutes. Place the rack in the lower third for maximum heat transfer. Slide the pita onto the hot surface and bake 2–4 minutes.
Watch for the puff—if you see it expanding rapidly, you’re doing it right. The high heat causes the internal moisture to turn into steam, inflating the pita almost instantly.
Tip: For extra charred flavor, briefly flip the pita or use a cast-iron skillet on the stovetop. Covering the skillet traps steam, helping the puff too, but oven baking generally produces larger pockets.
Understanding the baking process is crucial: the rapid rise is driven by the internal steam explosion, which only occurs under conditions where heat and dough thinness are optimized. Using a preheated surface ensures that the exterior heats quickly enough to trap the internal moisture, creating the steam necessary for puffing. The shorter baking time prevents the crust from hardening too early, allowing the pocket to expand fully before setting. Recognizing these nuances helps you fine-tune your baking setup for consistent results—each oven and surface may behave slightly differently, so adjustments might be needed to achieve perfect puffs every time.
How to Keep Your Pita Pocket Soft and Ready for Stuffing
Once baked, wrap your hot pitas in a clean towel or place them in a covered container. The steam trapped inside keeps the pocket soft and pliable. Let them rest for at least 10 minutes before stuffing.
This step is crucial—if you cut into a hot pita too soon, it can deflate or tear. Stacking warm pitas allows the residual steam to keep them tender.
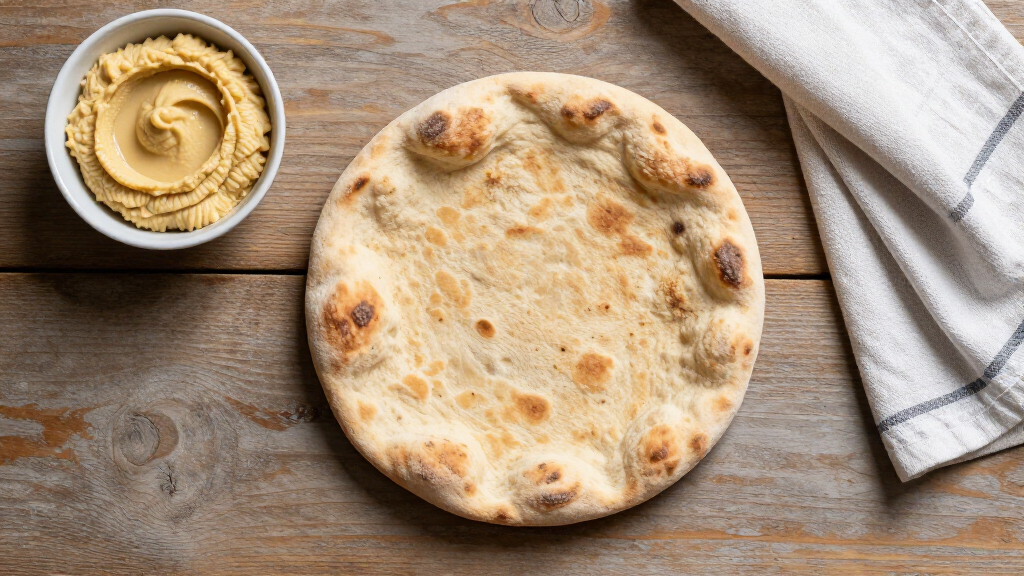
Example: I made a batch, wrapped them in a towel, and let them sit for 15 minutes. The pockets stayed soft and perfect for stuffing with hummus, falafel, or grilled veggies.
Additionally, storing pitas in a sealed container or wrapping them in foil while slightly warm helps retain moisture, preventing them from drying out. This is especially important if you plan to store them for later use, as it preserves the soft, airy texture of the pocket. Proper handling at this stage ensures your pita remains flexible and easy to stuff, making every bite enjoyable.
Troubleshooting: Why Didn’t My Pita Puff?
If your pita stayed flat, check these common issues: oven not hot enough, dough rolled too thick or uneven, tears or leaks in the surface, insufficient resting time, old or inactive yeast, or dough dried out on the surface.
For example, I once used an oven at 450°F and wondered why my pitas flopped. Cranked it up to 520°F, used a preheated stone, and suddenly—puffs galore. This illustrates how critical oven temperature is, as even a small temperature difference can mean the difference between a pocket and a pancake. Additionally, inconsistent dough thickness or surface tears can create escape points for steam, preventing a proper puff. Ensuring your dough is well-rested and uniformly rolled minimizes these issues. Remember, high heat and uniform dough are your best friends in this process—small adjustments can significantly improve your success rate.
Understanding common pitfalls allows you to troubleshoot effectively and adapt your technique, ensuring more consistently puffed pita pockets in future batches.
Quick Tips for Perfect Pita Every Time
- Use bread flour for better elasticity.
- Preheat your baking surface for at least 45 minutes.
- Roll dough evenly to ¼ inch (6 mm).
- Rest the shaped dough 15–30 minutes.
- Bake at 500°F+ (260°C+) for 2–4 minutes.
- Wrap hot pitas in a towel to keep them soft.
Frequently Asked Questions
Why didn’t my pita puff?
Most often, it’s because the oven wasn’t hot enough, the dough was rolled too thick, or the surface wasn’t properly preheated. Ensuring high heat and thin, even dough are your best bets for success.
Why did only part of the pita puff?
This usually happens when there’s an uneven roll or a cooler spot on your baking surface. Make sure to roll evenly and use a fully preheated stone or steel for uniform heat exposure.
Can I make pita without a baking stone?
Yes. An upside-down, preheated baking sheet or cast iron skillet can work. Just make sure it’s hot enough—at least 500°F—and preheated for at least 45 minutes.
Why is my pita hard instead of soft?
Overbaking, or not wrapping in a towel after baking, can dry out the pita. Wrap it warm to trap steam and keep the pocket tender and flexible.
Can I use all-purpose flour?
Yes. But bread flour with higher protein content makes the dough more elastic and puffs more reliably. Whole wheat or gluten-free flours tend to puff less without adjustments.
Conclusion
Mastering the art of puffing pita isn’t about secret ingredients—it’s about heat, dough, and technique working together. Once you get the hang of it, every batch can puff up beautifully, transforming simple ingredients into a pocket of endless possibilities.
So next time you bake, remember: a hot surface, even dough, and patience make all the difference. Your perfect pita pocket is just a few simple steps away—time to get baking.
Fall Picks
fall essentials
As an affiliate, we earn on qualifying purchases.