TL;DR
Open a free Amazon Business account
Business pricing, bulk buying and tax-exempt orders.
Create a free accountAs an affiliate, we earn on qualifying purchases.
The dough setting in bread machines automates mixing, kneading, and the first rise—saving time and effort. Proper use involves accurate measurements, checking dough consistency, and shaping for final baking. Once mastered, it opens the door to countless fresh baked goodies.
Imagine pulling warm, fragrant bread out of your oven—without the mess or fuss of traditional kneading. Your bread machine’s dough setting makes that possible, handling the repetitive work so you can focus on shaping and baking. But knowing how it works turns this handy feature into a powerful tool in your baking arsenal.
From pizza crusts to dinner rolls, understanding the ins and outs of the dough cycle helps you get consistent results. You’ll learn what the cycle does, how to adapt recipes, and tips to avoid common pitfalls. Ready to turn simple ingredients into bakery-quality bread with minimal effort? Let’s dive in.
The dough cycle automates mixing, kneading, and the first rise, saving you time and effort.
Accurate measurement and ingredient order are key to consistent, good results.
Always check dough during kneading and make small adjustments for best texture.
Don’t overload your machine—respect its capacity limits for reliable performance.
A second proof after shaping enhances bread volume and crumb quality.
The Beginner’s Guide to a Bread Machine Dough Setting
Your machine mixes, kneads, and manages the first rise. You take over for shaping, final proofing, and baking—getting fresh bread with less mess and more creative control.
Your shortcut from ingredients to shape-ready dough
The Dough program stops before baking. Some machines begin with a short rest or preheat, but the essential sequence remains the same.
Rest or preheat
Optional temperature-balancing stage on some models.
Mix
Ingredients combine and the dough begins to form.
Knead
The paddle develops a smooth, elastic gluten network.
First rise
Yeast fermentation expands and flavors the dough.
Remove
The signal sounds: shape, proof if needed, then bake.
Measure precisely. Load in the right order.
Flour-to-liquid balance determines whether the paddle can build strong, workable dough. A digital scale offers the most repeatable result.
Follow your machine’s order
Machines may require liquids first or dry ingredients first. The manufacturer’s sequence improves mixing and protects yeast during a delayed start.
Weigh flour when possible
A cup can vary by roughly 10 grams depending on how it is filled. If using cups, spoon flour in lightly and level it—never compress it.
Use biological leavening
Bread-machine and instant yeast generally mix directly with dry ingredients. Active dry yeast may require a different quantity or proofing method.
Respect the capacity
Heavy whole-grain, bagel, pretzel, and low-hydration doughs strain the motor more than soft white dough. Reduce oversized recipes.
Look inside after 5–10 minutes
Humidity, egg size, ingredient temperature, and flour storage can all shift hydration. Let each small correction mix in fully before adding more.
Too dry
Crumbly pieces, a stiff mass, or dough that makes the motor strain.
Add liquid: 1 teaspoon at a timeJust right
A soft, smooth, slightly tacky ball that clears most of the pan’s sides.
Hold steady: let the cycle continueToo wet
Batter-like dough or a sticky mass that smears heavily around the pan.
Add flour: 1 tablespoon at a timeCorrect the symptom, not the timer
Small, deliberate changes protect gluten development and improve rise, crumb structure, softness, and chew.
| What you see | Best response | Likely cause | Avoid |
|---|---|---|---|
| Soft ball, slightly tacky | ✓ Continue unchanged | Balanced flour and liquid | Adding flour merely because it feels tacky |
| Dry crumbs or stiff dough | ~ Add 1 tsp liquid | Too much flour or dry conditions | Pouring in a large amount at once |
| Wet, batter-like mixture | ~ Add 1 tbsp flour | Excess liquid or humid flour | Dumping in several scoops |
| Dough does not rise | ~ Check yeast and temperature | Expired yeast or liquid too hot/cold | ✗ Using chemical leavener |
| Paddle struggles or stalls | ✗ Stop and reduce the load | Overcapacity or unusually stiff dough | Forcing the motor to finish |
The machine finishes the first rise—not always the last
After shaping, many loaves and rolls need another rise for better volume, a lighter crumb, and fuller flavor.
Needs more time
The dough is still tight and underproofed.
Ready to bake
The dough is puffy and holds a shallow impression.
May be overproofed
Bake promptly and handle gently to retain volume.
Order. Accuracy. Observation. Capacity. Final proof.
Master these five habits and the Dough setting becomes a reliable baking assistant—doing the repetitive work while leaving shape, crust, toppings, and presentation in your hands.
What the dough setting does—your shortcut to homemade bread
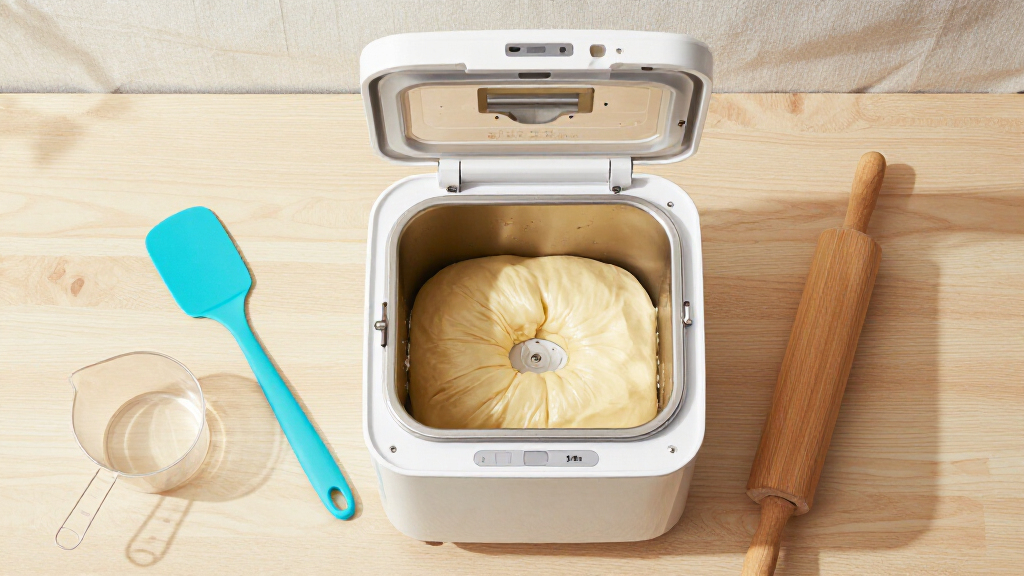
The dough setting in a bread machine is a magic button that handles mixing, kneading, and the first rise. It doesn’t bake the bread—that’s still up to you. Instead, it prepares the dough to be shaped and baked in a conventional oven or other method.
Most cycles run between 60 and 120 minutes, depending on your machine and program. During this time, the machine combines ingredients into a smooth, elastic ball—ready for shaping and a second proof if needed.
Think of it as your dedicated sous-chef for bread-making—saving you from manual kneading and timing the first rise perfectly.

Bread Measuring Cup Bread Making Accessories Measuring Spoon Paddle Removal Tool Kit for Bread Maker Machine Spare Parts
- Measurement Options: 240ml and quarter cup
- Measuring Spoon Sizes: 10g and 5g powder spoons
- Hook Types: Large for bread bucket, small for mixing blade
As an affiliate, we earn on qualifying purchases.
As an affiliate, we earn on qualifying purchases.
Why using the dough setting makes baking easier and better
The dough setting is your best friend for making versatile, homemade baked goods. It’s perfect for everything from soft dinner rolls to crispy pizza crusts. Plus, it frees you from kneading by hand or in a mixer, saving time and effort.
Using this setting also gives you more control over your final product. You shape, proof, and bake—tailoring crust color, toppings, and presentation. It’s especially handy for shaping shaped loaves or flatbreads that need a second rise.
For instance, you can mix up a batch of pizza dough, let the machine do its thing, then toss it onto a hot baking stone for a restaurant-quality pie.
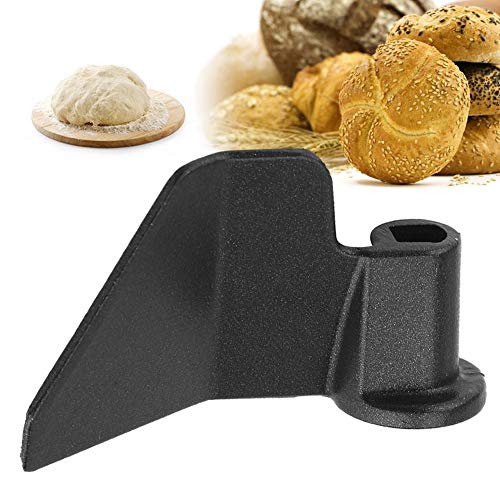
Stainless Steel Bread Maker Kneading Blade Replacement – Mixing for Most Bread Makers
- Material: High-quality non-stick coated carbon steel
- Ease of Use: Non-stick design for easy mixing
- Compatibility: Fits most bread makers
As an affiliate, we earn on qualifying purchases.
As an affiliate, we earn on qualifying purchases.
Follow the right order and measure ingredients like a pro
Getting the ingredients right is critical for good dough. Always follow your machine’s instructions for the order—whether liquids go in first or dry ingredients. This keeps the yeast separate from liquids until mixing begins, preventing early activation or clumping.
Use a digital scale for the most accuracy—especially for flour. Lightly spoon flour into your measuring cup and level it off, avoiding packing. Remember, a cup of flour can vary by 10 grams depending on how it’s measured.
For example, a recipe calling for 3 cups of bread flour (about 360 grams) can vary if you scoop straight from the bag. Weighing ensures consistent results, especially if you bake often.
Sourdough Bread Machine Cookbook: Easy, Flavorful Sourdough Recipes for Every Bread Machine – From Classic Loaves to Sweet Holiday Treats for Home Bakers
As an affiliate, we earn on qualifying purchases.
As an affiliate, we earn on qualifying purchases.
Check and tweak dough during kneading—don’t just set and forget
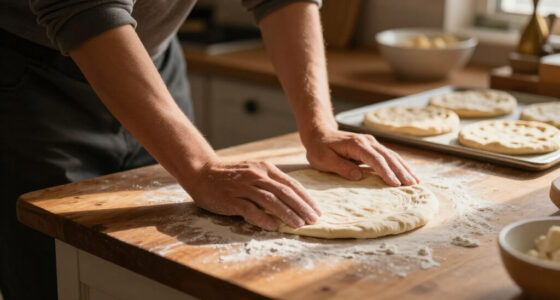
The dough setting isn’t entirely hands-off. About 5–10 minutes after kneading begins, open the lid and peek. The dough should form a soft, slightly tacky ball, pulling away from the sides of the pan.
If it looks dry or crumbly, add water—just a teaspoon at a time. If it’s too sticky or batter-like, sprinkle in a tablespoon of flour. Adjust gradually, allowing each addition to fully incorporate.
Making these tiny adjustments during kneading is crucial because it directly influences the development of gluten, which affects the bread’s final texture. Proper gluten formation results in a well-structured crumb with good rise, while improper hydration can lead to dense or flat bread. Monitoring and adjusting dough consistency during this stage ensures you achieve a balanced dough that bakes evenly and has the desired chewiness or softness.

OSIPOTO 2LB Bread Maker, 17 in 1 Automatic Stainless Steel Bread Machine
- Beginner-Friendly Operation: Easy to use with automatic kneading and baking
- 17 Custom Programs: Includes options for bread, cake, jam, yogurt, and more
- Large 2LB Capacity: Bakes bigger loaves for family or gatherings
As an affiliate, we earn on qualifying purchases.
As an affiliate, we earn on qualifying purchases.
Choose the right yeast and avoid common pitfalls
Using the correct yeast ensures your dough rises properly and develops flavor. Bread-machine yeast and instant yeast are designed for quick incorporation and can be added directly to dry ingredients, which simplifies the process. However, active dry yeast often needs proofing—dissolving in warm water with a pinch of sugar until bubbly—to confirm its activity before adding to the main ingredients.
Don’t confuse baker’s yeast with baking powder or baking soda—they are chemical leaveners, not biological. Using the wrong leavening agent can cause your dough to either not rise or develop off-flavors.
For example, if your dough isn’t rising, check the freshness of your yeast—an expired packet may be dead, preventing fermentation. Store yeast in a cool, dry place or the fridge, and use it before the expiration date. Also, consider the temperature of your liquids; if they’re too hot, they can kill the yeast, and if too cold, fermentation slows down significantly.
Understanding yeast types and their proper handling is essential because it impacts the entire fermentation process. Using stale or incompatible yeast can result in dense, flat bread, wasting time and ingredients. Ensuring freshness and correct usage helps you consistently achieve a good rise and rich flavor.
Don’t overload your machine—know its limits
Every bread machine has a maximum capacity—usually around 2 pounds of dough. Overloading strains the motor and can lead to uneven kneading or even damage.
For stiff, dense doughs like bagel or pretzel recipes, reduce batch size or choose a smaller recipe. Whole-grain or high-fiber doughs are heavier and need more careful handling.
For example, trying to make a 3-pound loaf in a machine rated for 2 pounds will likely cause trouble. Stick to the manufacturer’s guidelines for best results.
Respectting your machine’s capacity is vital because overloading can cause mechanical failure, uneven kneading, or poor dough development. When you exceed the recommended weight, the motor strains, and the kneading paddle may not turn properly, leading to inconsistent texture or even damaging the appliance. By understanding your machine’s limits and adjusting recipes accordingly, you ensure reliable performance and extend the lifespan of your device.
When and why you might need a second rise after the machine
The machine’s first rise usually produces a well-inflated dough, but many recipes benefit from a second proof. Shaped loaves or rolls often need this extra step for perfect volume and airy texture.
Look for dough that’s puffy, gently springs back when pressed, or has doubled in size. A quick test: press lightly with your finger; if the indentation remains, it’s ready to bake.
Why this matters: A second rise, or proof, allows the gluten network to strengthen and the dough to develop more complex flavors and a lighter crumb. Skipping this step can result in dense, heavy bread, especially with enriched or whole-grain recipes that need additional fermentation time to fully develop their structure and flavor. Recognizing when and why to proof again is key to achieving baked goods with optimal volume, lightness, and flavor complexity.
From ingredients to perfect baking—your step-by-step workflow
To get consistent results, follow this simple process:
- Check that the kneading paddle is installed properly.
- Add ingredients in the order recommended by your machine.
- Select the dough cycle and press start.
- Check early dough consistency—add liquid or flour if needed.
- Let the machine complete the cycle.
- Remove the dough promptly and shape as desired.
- Allow a final proof, then bake in your oven.
- Cool on a rack before slicing or serving.
This routine ensures you get well-developed dough ready for shaping and baking every time.
What each ingredient does in your dough—and how to tweak it
Flour provides the gluten structure—bread flour makes a chewier, more elastic dough. Water hydrates, forming gluten and activating enzymes that convert starches to sugars. Yeast ferments sugars, releasing carbon dioxide for rise.
Salt enhances flavor and strengthens gluten. Sugar aids browning and feeds yeast. Fat tenderizes the crumb, while eggs add richness and stability. Whole-grain adds flavor and fiber but can make the dough denser due to bran interference.
For example, replacing part of the bread flour with whole wheat may require a little extra water to keep the dough workable.
How temperature and fermentation influence your dough’s rise
Warm environments speed fermentation, cold slows it. Hot liquids can kill yeast, so room-temperature ingredients work best. If your kitchen is chilly, expect longer proofing times outside the machine.
For instance, proofing dough in a warm oven (turned off) can take less than an hour, while a cool basement might extend it to several hours. Slow fermentation often develops better flavor and texture.
Adjust proofing times based on your environment. Don’t rush—look for puffiness and gentle spring-back as signs it’s ready.
Why this matters: Temperature directly influences yeast activity. Too hot, and yeast dies or produces off-flavors; too cold, and fermentation stalls, leading to dense, underdeveloped bread. Properly managing fermentation conditions allows you to control flavor development, texture, and timing, giving you flexibility to adapt to your schedule and environment while ensuring consistent quality in your bread.
Adapting traditional recipes for your bread machine’s dough cycle
Most hand-kneaded yeast recipes can be adapted for the dough cycle—if you keep the ingredient ratios right and stay within capacity. Use standard yeast, and add-ins like nuts or herbs during the last kneading phase.
For example, a classic French bread recipe with 3 cups of flour, 1 cup of water, and 2 teaspoons of yeast often works in the machine. Just check dough consistency during kneading and make small adjustments.
Special doughs—like sourdough or laminated pastries—may need different handling, but for everyday bread, the machine does most of the heavy lifting.
Why this matters: Converting traditional recipes allows you to leverage the convenience of your bread machine while maintaining the qualities you love. Understanding how to adapt recipes ensures you don’t sacrifice texture or flavor, and it empowers you to experiment with different ingredients and techniques, expanding your baking repertoire.
Troubleshooting common dough problems—what to do next
If your dough’s too dry or crumbly, it probably needs more liquid—add a teaspoon at a time. Wet or sticky dough needs a tablespoon of flour gradually. If it won’t form a ball, check ingredient freshness or temperature.
Overproofed dough may collapse or produce dense bread—reduce yeast or proofing time. Dough that overflows suggests too much yeast or liquid, or a warm environment—stop and adjust.
For example, if your loaf turns out dense, extend the final proof or check if you used enough gluten-strengthening flour.
Remember, small tweaks make a big difference in bread quality. Recognizing and correcting these issues early can save ingredients and time, ensuring your bread turns out as intended. Developing an understanding of how each problem relates to dough conditions allows you to troubleshoot effectively, leading to more consistent and successful baking experiences over time.
Baking your shaped dough—timing and signs of doneness
Baking times vary with bread type. Roll and crust color are good indicators: a deep golden crust often signals doneness. For lean loaves, internal temperature of 93–99°C (200–210°F) is typical.
For softer or enriched bread, slightly lower internal temperatures around 88–93°C (190–200°F) are common. Use your eyes and ears—hollow sounds and firm structures help judge readiness.
For example, a perfectly baked baguette will be deeply golden, with a crackly crust, and sound hollow when tapped.
Why this matters: Recognizing the visual and auditory cues of doneness helps ensure you don’t under- or overbake your bread. Proper timing preserves moisture and flavor, preventing dry or doughy textures. Developing these sensory skills allows you to bake with confidence, achieving consistent, bakery-quality results every time.
Keep your machine happy—maintenance and safety tips
Unplug before cleaning or removing the paddle. Use non-metal tools to avoid scratching nonstick surfaces. Wash the pan with warm, soapy water—avoid immersing the entire body unless specified.
Check for stuck paddles or dough remnants that can cause noise or malfunction. Store ingredients properly and avoid leaving perishable items in the machine during long delays.
For example, if dough is stuck on the paddle, soak the pan briefly and gently scrub. Regular maintenance keeps your machine running smoothly for years.
Why this matters: Proper maintenance prevents mechanical issues and ensures safety during operation. Regular cleaning and cautious handling extend the lifespan of your appliance while reducing the risk of electrical or mechanical failure. Well-maintained equipment produces more consistent results and keeps your baking experience enjoyable and worry-free.
Latest trends—what’s new in bread machine baking?
Emerging trends focus on convenience, dietary needs, and tech. More machines now offer gluten-free, sourdough, and specialty cycles. Programmable models allow precise control over mixing, kneading, and rising times.
Home bakers experiment with whole grains, low-sugar recipes, and even hybrid sourdough starters. Connected devices provide recipe tips and remote monitoring, making bread baking more accessible than ever.
For instance, a new bread machine might have a dedicated gluten-free cycle, recognizing that these doughs don’t behave like traditional wheat doughs.
Why this matters: Staying current with innovations helps you leverage new features for better results. These advancements enable more dietary options, greater customization, and smarter baking, making bread-making more inclusive and engaging for home bakers of all skill levels.
Your top questions answered—quick tips for perfect dough
- Does the dough setting bake the bread? No, it only mixes, kneads, and makes the first rise. You finish baking in the oven.
- Can I leave dough in the machine after the cycle? Usually, yes—but don’t delay too long. Remove promptly to avoid overproofing.
- Should dough rise again after the machine? Often, yes. Shape it, then proof for best volume and texture.
- Can I use all-purpose flour instead of bread flour? Yes, but expect a softer, less chewy crumb.
- Can I make gluten-free dough in the machine? Not reliably. Use a specific gluten-free program or prepare manually.
Conclusion
Mastering your bread machine’s dough setting transforms simple ingredients into bakery-level bread—without the hassle. It’s all about understanding the process, checking your dough, and shaping with care. Once you get the hang of it, the possibilities are endless—pizza, rolls, or a rustic loaf, all made with your own hands.
So next time you press start, remember: you’re not just making dough—you’re creating delicious, healthy bread that’s just a few simple steps away from the oven.
Pool season Picks
robotic pool cleaners
As an affiliate, we earn on qualifying purchases.