
TL;DR
Listen free for 30 days with Audible
Thousands of audiobooks and originals — cancel anytime.
Start your free trialAs an affiliate, we earn on qualifying purchases.
Big, open holes in bread come from a well-balanced dough that’s strong yet extensible, fermenting just right, and handling with care. Hydration helps but isn’t everything—technique and timing matter most.
Nothing beats biting into bread with a light, airy interior, big holes that ripple with every chew. It’s the visual and tactile hallmark of artisan loaves—and yet, getting that open crumb often feels like a tricky art. What if it’s less about throwing in more water and more about mastering the dance of fermentation, handling, and gluten?
This guide unlocks the secrets to creating bread with those inviting, cavernous holes. You’ll learn how to tune your dough’s strength, fermentation timing, and shaping techniques for a crumb that’s both beautiful and practical. Ready to make your bread look as irresistible as it tastes?
Use a strong, well-milled flour with adequate gluten development for support.
Hydration is important but should be tailored; the right water content depends on flour and handling.
Fermentation timing dictates crumb openness—look for signs of readiness, not just clock time.
Gentle shaping with surface tension preserves internal gas and supports big holes.
Bake in a hot, steamy environment to maximize oven spring and crumb size.
How to Get Big, Open Holes in Your Crumb
A dramatic crumb is not a hydration stunt. It comes from balancing a strong yet extensible gluten network, well-timed fermentation, careful shaping, and enough heat and steam to turn retained gas into lift.
Five levers shape the crumb
Open crumb emerges when every stage supports the next. Flour holds the gas, water enables expansion, folds organize gluten, fermentation creates the internal structure, and shaping preserves it.
Strong, not stubborn
Bread flour or strong all-purpose flour usually offers enough gluten strength to stretch around bubbles without collapsing. Excessive protein can create dough that resists expansion.
Match water to flour
More water can increase extensibility, but excess hydration may produce slack dough, spreading, gumminess, or weak shaping. Include starter flour and water in the calculation.
Build a trampoline
Moderate mixing, stretch-and-folds, coil folds, and rest periods create strength gradually. The goal is a resilient dough that holds gas while remaining flexible.
Read the dough
A well-fermented dough looks aerated, feels lighter, jiggles when moved, and shows bubbles at its surface or container walls. Percentage rise beats a fixed timetable.
Preserve gas, add tension
Avoid crushing the whole dough, but remove badly positioned giant bubbles. Build a taut outer skin so the loaf stands upright and directs expansion into oven spring.
Convert gas into lift
A fully heated oven and strong early steam delay crust setting. That gives trapped gases time to expand before the loaf’s exterior becomes rigid.
Hydration helps. Control wins.
These influence scores are directional—not a recipe formula. They show why chasing water percentage alone often disappoints: timing, strength, and gas retention have more direct control over the final structure.
Relative influence on crumb openness
Practical importance when all other variables are reasonably controlled
Interpretation: extra water cannot rescue weak gluten, premature shaping, overfermentation, or a collapsed proof.
The loaf leaves evidence
Large holes are not automatically a sign of success. Read them alongside the surrounding crumb, loaf height, texture, crust, and oven spring to identify what actually happened.
| Condition | What the dough feels like | Crumb evidence | Oven behavior | Best correction |
|---|---|---|---|---|
| Underfermented | ✗ Tight, resistant, heavy | ~ Giant tunnels beside dense or gummy areas | Irregular expansion; possible blowouts | Extend bulk; track rise and bubbles |
| Well fermented | ✓ Light, aerated, elastic, gently jiggly | ✓ Open, varied holes with thin supporting walls | Strong, controlled oven spring | Repeat temperature and rise targets |
| Overfermented | ✗ Sticky, fragile, spreading | ✗ Weak, flattened, uniformly porous or collapsed | Limited spring and poor score opening | End bulk sooner; cool or reduce inoculation |
| Overhydrated | ~ Slack despite adequate folds | ~ Irregular, gummy, potentially compressed base | Spreads outward more than upward | Reduce water until shaping is reliable |
| Overhandled | ✗ Tightened or visibly degassed late | ✗ Smaller, more uniform holes | Reduced volume despite adequate fermentation | Fold earlier; shape with fewer motions |
A better workflow than watching the clock
Temperature, flour, inoculation, and starter activity make every timetable conditional. Follow a repeatable chain of physical cues instead.
Moderate development
Combine thoroughly and create an initial network without forcing maximum strength immediately.
Fold early
Use two to four gentle folds while the dough still needs organization and support.
Track the rise
Watch volume, bubbles, surface aeration, jiggle, resilience, and dough temperature.
Gas plus tension
Preserve the aerated interior while creating a taut skin that supports upward expansion.
Heat and steam
Give retained gases one final expansion window before the crust becomes fixed.
Visible bubbles along the surface and container walls.
The dough jiggles as a cohesive, aerated mass.
Light and resilient—not dense, soupy, or fragile.
Gentle does not mean passive
The goal is not to save every bubble. Preserve useful internal gas, redistribute disruptive pockets, and build enough surface tension to prevent the loaf from spreading.
Protect the structure
- Use deliberate, economical shaping motions.
- Keep the interior aerated while tightening the outer skin.
- Remove obvious giant bubbles near the surface or seam.
- Use bench flour sparingly so the seam can seal.
- Stop once the loaf holds its form with visible tension.
Avoid false shortcuts
- Do not add water solely to chase a dramatic crumb photo.
- Do not perform aggressive folds late in bulk fermentation.
- Do not treat isolated tunnels as proof of good fermentation.
- Do not rely on extreme gentleness to compensate for weak dough.
- Do not proof by clock time without checking dough condition.
Every open cell has a history
Bottom line: Build enough strength to retain gas, enough extensibility to let it expand, and enough judgment to end fermentation and proofing at the right moment.
Choose the Right Flour to Build a Strong, Extensible Gluten Network
The foundation of big holes? A flour with enough strength to hold gas without resisting expansion. Bread flour or strong all-purpose flour is your best bet. They develop a gluten network that stretches like a rubber band—elastic but resilient.
For example, bread baking at Aromas Healthy Bake often starts with a flour protein level around 12-14%. Too high, and the dough becomes tough and resistant. Too low, and the crumb collapses under its own weight.
Whole wheat and whole grain flours can weaken this network because bran interrupts gluten strands and absorbs water. A common trick? blend 70% bread flour with 30% whole wheat for flavor and fiber without sacrificing too much extensibility.
Tip: Use fresh, well-stored flour. Old flour loses its gluten-forming potential, making it harder to develop that perfect, stretchable dough that holds big bubbles.
Why this matters: Choosing the right flour affects the dough’s ability to trap and support large gas bubbles. A weak flour leads to a dense crumb with limited openness, while a very strong flour might resist expansion if not handled properly. Balancing flour strength with proper technique ensures your dough can support the desired big holes without collapsing or tearing.

Sourdough Proofing Basket Gift Set, 9" Round and 10" Oval Banneton Bread Baking Supplies, Sourdough Baskets with Bread Lame, Danish Whish, Bowl Scraper, Sourdough Scraper, and Linen Liner
- Complete Baking Gift Set: Includes baskets, lame, scrapers, and liners
- 9-inch Round & 10-inch Oval: Two sizes for versatile proofing needs
- High-Quality Rattan Material: Smooth, splinter-free, non-stick, durable
As an affiliate, we earn on qualifying purchases.
As an affiliate, we earn on qualifying purchases.
Hydrate Wisely — More Water isn’t Always Better
Hydration level—how much water you add relative to flour—is a key player. But more isn’t always better. It’s about finding that sweet spot where your dough is extensible and easy to shape without becoming slack or gummy.
For white-flour sourdough, hydration around 70-75% is a good starting point. Think of it as watering your garden: too little and the soil stays hard; too much and it becomes muddy. For example, a 75% hydration means 75 grams of water for every 100 grams of flour.
Adjust based on your flour’s absorption and your handling comfort. When you increase hydration, your dough becomes more elastic and can support larger bubbles, but it also becomes trickier to handle. The goal? The highest hydration you can work with that still allows proper shaping and fermentation.
Remember: hydration includes starter flour and water, so calculate carefully. The right level helps your dough stretch and hold those big, open tunnels during baking.
Why this matters: Proper hydration influences the dough’s extensibility and gas retention. Too dry, and the dough can’t support large bubbles; too wet, and it may become unmanageable or collapse. Finding the optimal hydration enhances the dough’s ability to form those big, beautiful holes without sacrificing strength or shape.

Superbaking Sourdough Banneton Bread Proofing Basket, 9" Round, Set of 2
- Bake Two Loaves Simultaneously: Includes two 9-inch round proofing baskets
- Splinter-Free, Smooth Finish: Made of premium Indonesian Rattan with polished surface
- Includes BakeSide App Access: AI baking assistant for guidance and scheduling
As an affiliate, we earn on qualifying purchases.
As an affiliate, we earn on qualifying purchases.
Develop Dough Strength Without Making It Rigid
Big holes need a dough that’s strong yet flexible—like a trampoline. Too stiff, and it resists expansion; too loose, and it collapses.
Use gentle mixing, stretch-and-folds, and coil folds to build strength gradually. For example, during bulk fermentation, perform 2-4 folds at intervals—each fold gently stretches the dough, aligning gluten fibers without tearing them apart.
An autolyse—resting flour and water before adding salt and starter—can boost extensibility, making the dough easier to shape and capable of supporting large bubbles. Aromas bakers often autolyse for 30-60 minutes, depending on flour quality.
Tip: Rest periods allow gluten to relax and strengthen. Avoid aggressive kneading late in fermentation; it can deflate your air pockets.
Why this matters: Building dough strength through gentle handling creates a resilient structure that can support large gas pockets without tearing or collapsing. Overly aggressive mixing or over-strengthening the dough can make it too tight, limiting expansion and reducing open crumb formation. The key is a delicate balance—enough strength to hold big holes, but enough extensibility to allow their formation during shaping and baking.

"SAINT GERMAIN Premium Hand Crafted Bread Lame for Dough Scoring Knife, Lame Bread Tool for Sourdough Bread Slashing with 10 Blades Included with Replacement with Authentic Leather Protector Cover"
- Premium Handcrafted Design: Wood handle with stainless steel stick
- Ergonomic and Secure Grip: Comfortable handle for precise scoring
- Lifetime Warranty on Blades: Includes 10 replaceable blades with warranty
As an affiliate, we earn on qualifying purchases.
As an affiliate, we earn on qualifying purchases.
Fermentation Is Your Secret Weapon for Open Crumb
The timing of fermentation is what determines whether you get a giant tunnel or a beautifully open crumb. Underfermented dough tends to trap large bubbles, creating some huge tunnels. Overfermented dough, on the other hand, loses its structure and collapses.
Look for signs of perfect fermentation: a bubbly, aerated surface, a slight jiggle when moved, and a dough that feels light but resilient. For example, in Aromas’ bakery, ending bulk fermentation when the dough has roughly doubled and shows visible bubbles ensures the best open-crumb results.
Temperature matters too. Keep your dough around 24-27°C for steady fermentation. Use visual cues—like a light, springy feel—to guide your timing rather than fixed hours.
Why this matters: Proper fermentation timing influences the internal gas structure and the dough’s ability to expand during baking. Underfermented dough may have insufficient gluten development, leading to dense, tunnel-prone loaves, while overfermentation weakens the gluten network, causing collapse and irregular holes. Achieving the right fermentation balance allows the dough to develop a strong, elastic structure that supports large, uniform holes, ensuring both aesthetic appeal and good oven spring.
Tracking fermentation signs—such as bubbles, surface texture, and dough resilience—provides a more reliable guide than time alone. This ensures your loaf’s internal structure is optimized for openness without risking collapse or tunneling.
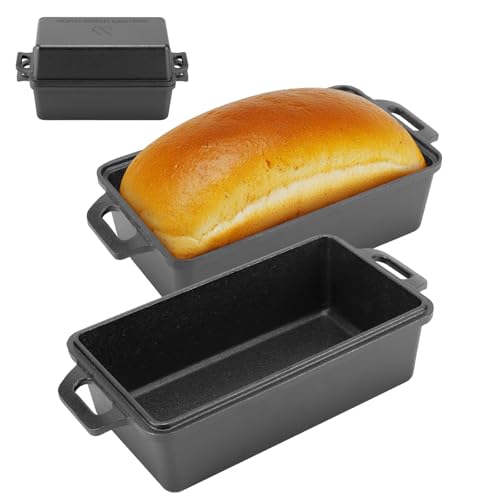
Northriver Casting 9×5 Inch Cast Iron Loaf Pan with Lid | Bread Baking Pan | Even Heat Distribution for Homemade Bread, Cake, and Meatloaf | 2 Piece Set
- Material: High-grade cast iron for even heat
- Size: 9×5 inch standard loaf pan
- Versatile Use: Use separately or as lids
As an affiliate, we earn on qualifying purchases.
As an affiliate, we earn on qualifying purchases.
Control Dough Temperature for Consistent Results
Temperature speeds up or slows down fermentation. A warmer dough ferments faster, while cooler temperatures slow it down. For big holes, aim for a dough temperature around 24-27°C.
For example, if your kitchen is cold, you might need to warm your dough slightly—placing it in a warm corner or using a proof box. Conversely, if it’s hot, cool it with a short rest or cooler environment.
Consistent temperature tracking helps you repeat successful bakes. Use a simple thermometer and note your dough’s temperature at mixing and during bulk fermentation.
Why this matters: Small adjustments in temperature make a big difference in fermentation speed and crumb openness. Too cold, and fermentation stalls, leading to dense, tight crumb; too hot, and overfermentation can occur quickly, risking collapse or tunnels. Maintaining a stable, optimal temperature ensures predictable fermentation, better gas retention, and a more open crumb structure.
Shape Gently but Tension the Dough for Gas Retention
Shaping is where you lock in the air and create surface tension that supports big holes. The key? Handle the dough delicately but with enough tension. Think of shaping as tightening a drum skin—too loose, and the air escapes; too tight, and it tears.
For example, preshape lightly, let it rest, then shape with a gentle but firm pull to develop surface tension. This tension helps the loaf hold its shape during proofing and baking.
Pop large bubbles when shaping, or redistribute them if needed. This prevents giant tunnels that ruin the crumb’s evenness.
Why this matters: Proper shaping creates surface tension that traps gas inside. If you handle the dough too roughly or fail to develop enough tension, the gas escapes or forms unevenly, resulting in a crumb with irregular holes or tunnels. Conversely, over-stretching can tear the dough, damaging the gluten network. The art is to shape with confidence—firm enough to hold the gas, gentle enough to preserve the structure, ensuring the big holes stay intact during baking.
Mastering tension during shaping directly influences the size and distribution of those big holes, making your loaf both beautiful and structurally sound.
Proof to the Perfect Point — Not Too Little, Not Too Much
Proofing is your final chance to develop that open, airy structure. Underproof, and you risk huge tunnels and dense crumb. Overproof, and the loaf collapses or fails to spring in the oven.
Use visual cues: the dough should be slightly domed, soft yet resilient, and respond to gentle poking. For example, perform the finger poke test—if the indentation slowly springs back, it’s ready.
Cold proofing offers better control, especially for scheduling. Remember, the goal is a dough that’s expanded but still has strength.
Why this matters: Proper proofing timing ensures the dough has developed enough internal gas to support big holes without collapsing. Underproofed dough lacks sufficient expansion, resulting in tight, tunnel-prone bread. Overproofed dough loses its elasticity, causing collapse and irregular holes. Watching for signs like a slight spring-back and a domed shape helps you hit that sweet spot where the big, open holes are preserved, and the loaf achieves its maximum oven spring.
Score for Controlled Expansion and a Beautiful Oven Spring
A sharp, confident score creates a weak point for the oven to expand the loaf evenly. Use a very sharp blade, hold it at a shallow angle, and make a single, decisive cut. This controls how the bread opens up.
For example, a single straight slash along the length of a bâtard helps the oven spring expand the crumb evenly, forming a nice ear—and big holes.
Remember, scoring isn’t about just decoration; it guides expansion. If your oven spring is weak, look at fermentation and dough strength first.
Tip: Master your scoring technique to support the big, open holes you’re aiming for.
Why this matters: Proper scoring directs the expansion of the loaf during oven spring, influencing the final crumb pattern. A well-placed, confident score allows the dough to expand uniformly, creating the large, open holes you desire. Poor scoring can cause uneven expansion, resulting in irregular tunnels or deflation. Developing a clean, decisive scoring technique is essential for harnessing oven spring and achieving a consistent, open crumb.
Bake Hot & Steamy for a Cracking, Open Crust
High heat and steam are the secret to a big, open crumb. Preheat your oven thoroughly—ideally to 230°C or higher. Use a Dutch oven or baking stone for even heat.
Generate steam by placing a tray of hot water at the bottom of the oven or using a spray bottle before loading the bread. The steam delays crust hardening, giving your dough room to expand rapidly.
For example, Aromas bakers often bake in a hot Dutch oven for 20-30 minutes with steam, then uncover to brown and crisp the crust.
Tip: Don’t skip the steaming step; it’s what makes the difference between a tight loaf and a wide-open crumb.
Why this matters: Creating a steamy environment during initial baking phase allows the bread to expand fully before the crust sets. Without sufficient steam, the crust hardens prematurely, limiting oven spring and reducing the size of the holes. The combination of high temperature and steam ensures maximum oven spring, resulting in a crust that cracks beautifully and a crumb with those big, inviting holes.
Bake Fully & Cool Completely Before Slicing
Patience pays off. Bake until the crust is deeply browned and the loaf sounds hollow when tapped. Internal temp can be around 98°C, but visual cues matter more.
Allow the bread to cool at least two hours. Cutting too early compresses those delicate, open cells, ruining the look and texture.
For example, a loaf that’s cool and firm to the touch will have set its crumb structure and will slice beautifully, revealing those big, inviting holes.
Tip: Resist the urge to cut warm bread. The crumb needs time to firm up and showcase its full openness.
Why this matters: Cooling allows the gluten and starch structures to stabilize, preventing collapse or deflation of the large holes formed during baking. Cutting too early can cause the delicate open cells to compress or tear, ruining the aesthetic and texture. Ensuring full cooling preserves the integrity of the open crumb, making your loaf both beautiful and enjoyable.
Interpreting Crumb Patterns — What They Say About Your Process
| Crumb Pattern | Likely Cause |
|---|---|
| Large tunnels, dense areas | Underfermentation, poor shaping, trapped bubbles |
| Tight but even crumb | Low hydration, limited fermentation, strong degassing |
| Open crumb with good height | Balanced fermentation, proper shaping, correct proofing |
| Very open but flat loaf | Excess hydration, overfermentation, weak shaping tension |
| Gummy crumb | Underbaking, underfermentation, excessive water |
| Dense line near bottom | Underfermentation, poor shaping, insufficient heat |
| Large hole beneath crust | Underproofing, shaping flaws, poor gas distribution |
| Collapsed crumb | Overproofing, weak flour, rough handling |
Reading the crumb is a skill. Combining visual clues with your baking notes helps refine your process for next time.
Why this matters: Understanding what your crumb pattern indicates about your process allows you to troubleshoot effectively. For example, large tunnels often point to underfermentation or shaping issues, while a gummy crumb suggests underbaking or excessive water. Recognizing these signs helps you adjust your technique, timing, and ingredient ratios to consistently produce the open, airy bread you desire.
Myths & Misconceptions About Big Holes
Many believe that higher hydration always leads to bigger holes—but that’s not true. Proper gluten development and fermentation are more important. A well-managed 72% hydration dough can be more open than an 85% one that’s underfermented or overhandled.
Another myth? Huge holes mean perfect fermentation. In reality, giant tunnels often signal underfermentation or shaping issues, not perfection.
And don’t forget: touching or popping bubbles during shaping can help distribute gas evenly, preventing hollow tunnels.
Finally, more folds don’t always mean more open crumb—overworking the dough can tighten it up and reduce overall openness. Balance is key.
Why this matters: Debunking these myths helps bakers focus on the actual variables that influence crumb openness, like fermentation and handling, rather than chasing hydration levels or overfolding, which can backfire. Understanding the tradeoffs allows for more predictable outcomes and better control over your bread’s final appearance.
Latest Trends & Practical Tips for Making Larger Holes
Today’s bakers focus on precise fermentation timing, temperature control, and gentle handling. Using tools like straight-sided containers to track rise, or measuring dough temperature, helps repeat success.
Practices like coil folds and low-inoculation long fermentations build structure without over-tightening the dough. Blending heritage grains with bread flour can also create a balanced, flavorful crumb with sizable holes.
Focus less on chasing giant holes and more on achieving a well-fermented, resilient dough that supports a light, airy crumb. The trend emphasizes consistency and flavor over spectacle.
Tip: Record your dough temperature, rise times, and handling steps to improve batch-to-batch results.
Why this matters: Staying current with techniques that emphasize fermentation control and gentle handling allows bakers to produce more reliably open crumbs, reducing guesswork and improving overall quality.
Build a Simple Workflow for Consistent Big-Holed Bread
- Select a strong, well-milled flour and start with 70-75% hydration.
- Use a lively starter or yeast, mixed until fully incorporated.
- Mix gently, then perform 2-4 folds during bulk fermentation.
- Monitor dough temperature and ferment until aerated, bubbly, and slightly expanded.
- Preshape lightly, rest, then shape with tension—don’t overhandle.
- Proof until the dough is expanded but resilient.
- Score confidently and bake in a hot, steamy environment.
- Cool fully before slicing to reveal the big, inviting holes.
- Adjust one variable at a time for next bake based on results.
This simple, step-by-step process maximizes your chances of producing a loaf with those big, beautiful holes.
Frequently Asked Questions
What hydration level produces the biggest holes?
There’s no universal number. Most white-flour sourdoughs open up well around 70-80% hydration, but the best level depends on your flour’s absorption, fermentation, and handling skills. Experiment within this range to find what works for you.
Why does my bread have one enormous tunnel and dense crumb elsewhere?
This usually indicates underfermentation, shaping trapped air, or poor gas distribution. It’s not the same as a properly open crumb, which has a network of interconnected holes. Adjust fermentation time and shaping technique to improve consistency.
Why is my high-hydration dough flat?
It may lack gluten strength, be overfermented, or contain more water than the flour can support. Proper handling, timing, and hydration are key; don’t just add water to chase big holes without supporting structure.
How do I know when bulk fermentation is finished?
Look for a dough that’s risen visibly, feels light and aerated, and shows bubbles on the surface. It should jiggle slightly when moved and have doubled in size—visual cues are more reliable than clock time.
Should the dough double during bulk fermentation?
Not always. Some formulas or colder temperatures require less rise. The focus should be on signs of readiness—bubbles, elasticity, and aeration—rather than a strict doubling rule.
Conclusion
Big, open holes aren’t a matter of luck—they come from a balance of strong gluten, precise fermentation, and gentle handling. Focus on mastering these basics, and your bread will become not just beautiful but reliably airy.
Think of your dough as a delicate sculpture—kindness during shaping and patience during baking unlocks that cavernous, inviting crumb you’re after. Keep practicing, and soon, every loaf will be a showstopper.
Grilling season Picks
grills
As an affiliate, we earn on qualifying purchases.