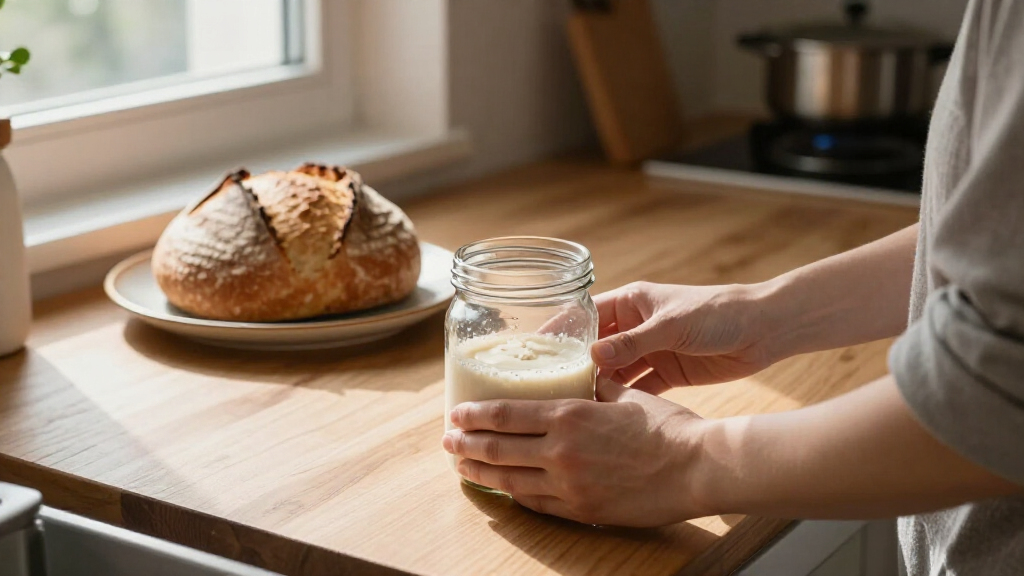

TL;DR

Get baking supplies delivered free — and shop member deals
- Fast, free delivery on millions of items
- Access to Prime Big Deal Days deals on October 6–7
- Prime Video, Amazon Music and more included
Building a sourdough schedule around your life is all about understanding fermentation flexibility and using techniques like cold proofing. With some planning, you can bake delicious bread on your own timetable, even with a busy schedule.
Imagine biting into a crusty loaf—its aroma filling your kitchen, textures that make your teeth sing. Now, picture doing that on your schedule, not just weekends or days off. Sourdough isn’t just about ingredients; it’s about timing. The trick is learning how to shape your baking routine so it works with your life, not against it.
In this guide, you’ll discover how to build a sourdough routine that fits your daily rhythm, making bread baking less of a weekend project and more of a daily joy. From managing your starter to choosing the right fermentation times, I’ll share practical tips to help you enjoy fresh, healthy bread whenever it suits you.
A flexible sourdough schedule hinges on understanding fermentation’s adaptability and using cold proofing to fit your day.
Maintaining a healthy starter with a consistent feeding routine makes timing predictable and baking straightforward.
Longer, cooler fermentation times deepen flavor and improve digestion—embrace patience for richer bread.
Planning your steps—mixing, fermenting, proofing—around your daily rhythm turns sourdough from a weekend project into a daily pleasure.
Tools like timers and apps can help track your schedule, making sourdough baking more manageable.
The flexible baker’s field guide
How to Build a Sourdough Schedule Around Your Life
Sourdough should work with your calendar—not compete with it. Control temperature, understand your starter, and use the refrigerator as a pause button to turn a long process into short, manageable moments.
Warm, faster fermentation for a mild loaf when your day is open.
Cold fermentation distributes the work and builds deeper flavor.
Warmer dough moves faster; cooler dough gives you breathing room.
Fermentation is flexible
Natural yeast and bacteria respond to their environment. Temperature sets the pace; time shapes flavor, texture, and digestibility. Your schedule is built by choosing where to accelerate and where to slow down.
Speed when you need it
A warmer room encourages faster activity. Expect a milder flavor and a tighter planning window, ideal for a same-day loaf.
Flavor with flexibility
Longer, cooler fermentation develops nuanced flavor and can improve digestibility while spreading the work across two days.
Use both gears
Begin warm to establish fermentation, then refrigerate to slow it. This combines momentum with a generous baking window.
What changes as fermentation gets longer and cooler?
Match the method to the day
There is no single perfect schedule. Choose based on when you can mix, when you can shape, and when you want fresh bread. The dough can move quickly on the counter or wait patiently in the fridge.
| Decision factor | Same-day / warm | Overnight / cold | Hybrid schedule |
|---|---|---|---|
| Total timeline | About 4–6 hours | About 24–48 hours | Usually 18–36 hours |
| Calendar fit | ~Open day required | ✓Excellent for workdays | ✓Highly adaptable |
| Flavor depth | ~Mild and clean | ✓Deep and nuanced | ✓Balanced complexity |
| Timing tolerance | ✗Narrower window | ✓Generous window | ✓Easy to adjust |
| Best for | Weekends and home days | Busy weeks and morning bakes | Changing or irregular plans |
| Main watch-out | Dough may move quickly | Risk of over-proofing | Track both warm and cold time |
Five moments, one loaf
The process feels manageable when treated as a chain of short actions. Use a timer or app for reminders, but judge readiness through volume, bubbles, strength, and feel.
Feed
Refresh the starter at a repeatable time and wait until active.
Mix
Choose a morning or evening window that suits the route.
Bulk
Ferment warm for speed or cool the dough to gain time.
Shape
Build tension, then proof briefly or refrigerate overnight.
Bake
Score and bake when the dough—and your calendar—are ready.
Evening mix, morning bake
Mix dough and begin warm bulk fermentation.
Shape, cover, and place the dough in the refrigerator.
Preheat, score, and bake directly from cold.
Morning mix, evening loaf
Mix with an active starter and begin warm bulk.
Shape when the dough is airy, stronger, and expanded.
Complete the final proof, then bake for dinner.
Your starter sets the clock
A healthy starter produces reliable fermentation. Consistent feeding reduces guesswork, but the right routine depends on where you keep it and how often you bake.
Store for your real life
Keep a frequently used starter at room temperature. For occasional baking, refrigerate it and refresh on a predictable weekly schedule.
Check activity, not just time
Feed ahead of your mixing window and look for several signs together. A starter’s pace will vary with room temperature, flour, and feeding ratio.
The schedule-to-loaf chain
Five rules for a calmer bake
Use cold proofing to create a wider, more convenient baking window.
Feed consistently so the starter behaves predictably when time is tight.
Embrace slow fermentation for deeper flavor and improved digestibility.
Plan backward from the time you want to bake or serve the loaf.
Track the process with timers, notes, or apps—then adjust from experience.
Understand Sourdough Fermentation: The Flexible Process
Sourdough fermentation is a natural dance between yeast and bacteria. It’s not a race—more like a slow, flavorful simmer. This process matters because the length and temperature of fermentation influence the bread’s flavor, texture, and digestibility. Short, warm ferments tend to produce milder, lighter loaves with less complexity, suitable for quick schedules. Longer, cooler ferments allow the development of deeper, more nuanced flavors, but require planning and patience. The tradeoff is that extended fermentation can slightly alter the bread’s rise, sometimes resulting in a denser crumb if not managed properly. Understanding this balance helps you decide whether you prioritize speed or flavor, and how to adjust fermentation times to fit your day-to-day life without sacrificing quality.
Imagine starting your bulk fermentation in the evening, then refrigerating overnight. When you wake up, your dough has developed complex flavors, and you’re ready to shape it for baking. That’s the beauty of understanding fermentation’s flexibility: it empowers you to optimize flavor development while fitting baking into your schedule.
As an affiliate, we earn on qualifying purchases.
Master Your Starter: Keep It Healthy & Ready When You Are
Your starter is the heart of sourdough. Keeping it healthy means regular feedings—about once a week if stored in the fridge, or daily if kept at room temp. For busy schedules, a weekly feeding schedule works fine—just remember to feed it at the same time each week to keep it predictable. This consistency matters because a healthy, active starter produces reliable fermentation, which is crucial when you’re working around a tight schedule. A weak or neglected starter can lead to inconsistent rises and flavor, making your baking less predictable and more frustrating. By maintaining a regular feeding routine, you create a dependable foundation for your baking, reducing the guesswork and ensuring your bread turns out well even if your timing varies. The tradeoff is that infrequent feedings require you to plan ahead—your starter needs to be active when you’re ready to bake, so understanding its rhythm helps you synchronize your schedule effectively.
For example, you might feed your starter every Sunday morning, then refrigerate until next week. When you’re ready to bake, take it out, let it warm up, and feed it again. An active, well-maintained starter is your time-saving secret weapon, ensuring predictable fermentation even with irregular routines.
As an affiliate, we earn on qualifying purchases.
Schedule Your Bulk Fermentation & Proofing Like a Pro
Scheduling fermentation is about choosing the right window for your life. Bulk fermentation can be quick or slow—anywhere from 4 hours at room temp to 24 hours in the fridge. The longer the bulk ferment, the more flavor complexity develops, but it also requires planning ahead. Proofing is even more flexible: you can proof at room temp for a few hours or refrigerate overnight for a slower, flavor-enhancing rise. The timing affects not only flavor but also the dough’s structure—long, cold proofing can strengthen gluten and develop a more open crumb, but it also demands patience and anticipation. Here’s the key: understanding how fermentation times influence flavor, structure, and scheduling allows you to adapt your baking to your daily rhythm. For example, mixing in the evening and refrigerating overnight lets you wake up to ready-to-bake dough, turning a potentially stressful morning into a relaxed bake. Conversely, starting early in the day for a same-day loaf requires precise timing but offers fresh bread with less planning. The tradeoff involves balancing flavor development with your available time, so knowing how each step impacts the final bread empowers you to make choices that fit your schedule without sacrificing quality.
As an affiliate, we earn on qualifying purchases.
Use Cold Fermentation & Retardation to Fit Baking Into Your Day
Cold fermentation, or retarding, is a powerful tool that allows you to extend fermentation times and fit baking into unpredictable schedules. It involves slowing down yeast activity by refrigerating the dough during bulk fermentation or proofing, which enhances flavor and texture through extended enzymatic activity. This process matters because it gives you flexibility—dough can be prepared hours or even a day ahead, then baked when convenient. The tradeoff is that over-reliance on cold fermentation without proper timing can lead to over-proofed dough or diminished oven spring if not monitored. For example, mixing your dough Sunday night and refrigerating it overnight means you can wake up to ready-to-bake dough, making your morning routine more relaxed. Additionally, cold fermentation can improve gluten development and flavor complexity, but it requires understanding how long to keep the dough in the fridge to avoid over-fermentation. This technique shifts the baking process from a rigid schedule to a more adaptable one, accommodating busy lives without sacrificing the quality of your bread.
As an affiliate, we earn on qualifying purchases.
Create a Simple, Actionable Baking Routine
Here’s a step-by-step plan to build your schedule:
- Feed your starter weekly or as needed, always at the same time to keep it predictable and active.
- Mix your dough when you have a window—morning, evening, or overnight—considering your fermentation method and timing preferences.
- Choose your fermentation method: quick at room temp for same-day baking or slow in the fridge for flavor and schedule flexibility.
- Shape and proof based on your timing—proof overnight in the fridge for convenience or a few hours at room temp for quicker baking.
- Bake when the dough is ready, ideally early in the day or evening, aligning with your routine and desired bread characteristics.
Frequently Asked Questions
How long does it take to make sourdough bread from start to finish?
Typically, it takes about 4–6 hours for same-day baking, but with cold fermentation, you can extend the process over 24–48 hours. It depends on your method and schedule.Can I make sourdough bread if I have a busy schedule?
Absolutely. Using cold retardation and planning your fermentation times around your day makes it possible to bake bread even on a tight schedule.What is the best way to fit sourdough baking into a workweek?
Start your dough in the evening, refrigerate overnight, then shape and bake in the morning. Alternatively, prepare dough on weekends for weekday baking.How do I maintain my starter with limited time?
Feed your starter once a week if refrigerated, always at the same time. Keep it in a jar with a loose lid, and discard or refresh as needed.What are the benefits of cold fermentation, and how do I do it?
Cold fermentation develops richer flavors and offers scheduling flexibility. Mix your dough, refrigerate for 12–24 hours, then shape and bake when ready.Conclusion
Building a sourdough routine around your life isn’t just smart—it’s liberating. You get to enjoy the sensory pleasure of bread without the stress of strict timing. With a little planning and the right techniques, fresh, wholesome sourdough can fit seamlessly into your daily rhythm.
Imagine waking up to the smell of baking bread, knowing it’s a simple step away. Your schedule no longer limits your baking—your bread does. Now, go ahead—shape your routine and savor every slice.
Fall Picks
fall essentials
As an affiliate, we earn on qualifying purchases.




![Dove Mangiare A Milano: Le Nuove Aperture [In Aggiornamento]](https://aromashealthybake.com/wp-content/uploads/2026/09/dove-mangiare-a-milano-le-nuove-aperture-in-aggiornamento-featured-260x140.jpg)