
TL;DR
Proofing is about more than timing. Use visual cues, touch tests, and environment control to tell when dough has truly risen enough. Relying on these signs ensures your bread will have perfect volume, texture, and flavor.
Ever opened your oven, only to find a flat, dense loaf instead of the airy, crusty bread you envisioned? That’s often a proofing problem. Proofing, or fermentation, is what transforms a lump of dough into a fluffy, flavorful masterpiece. But how do you tell when it’s actually ready? Forget strict timers—your senses are your best tools here. In this guide, you’ll learn how to spot the real signs of proofing perfection, so your bread turns out just right, every single time.
With a few simple observations—like how the dough looks, feels, and even how it responds to a poke—you’ll gain confidence in your baking. No more guessing games or relying solely on recipes’ suggested times. Whether you’re baking a rustic sourdough or a simple sandwich loaf, recognizing proofed dough makes all the difference. Let’s dive into the practical tips that turn you into a proofing pro.
Look for about double in size as a primary proofing cue.
Use the poke test: a slow spring back indicates readiness.
Temperature and environment are key—warm, humid spots speed proofing.
Visual cues like smooth, domed surface and airy feel confirm perfect proofing.
Over- or under-proofing affects bread’s texture—recognize signs early to avoid dense results.
How to Recognize When Your Dough Has Doubled in Size
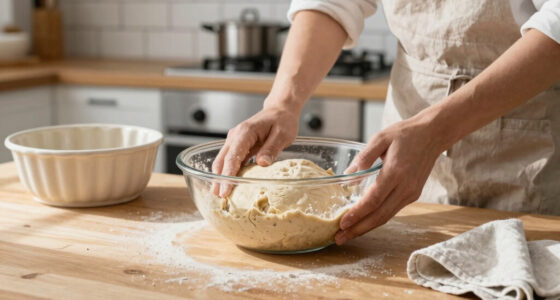
The first and most obvious sign of proper proofing is that your dough has roughly doubled in size. Imagine a small ball of dough that, after proofing, puffs up like a balloon, filling your bowl or proofing basket. This increase in volume indicates that yeast has produced enough carbon dioxide to create a light, airy structure. But why does this matter? Because it shows the yeast has been active enough to generate sufficient gas to lift the dough, which is crucial for achieving a good rise in the oven. If the dough hasn’t doubled, it may still be under-fermented, resulting in a denser loaf with less open crumb. Conversely, over-proofed dough might have expanded too much, weakening the gluten structure and risking collapse during baking. Recognizing the right size change ensures you strike the perfect balance—neither under- nor over-proofing, which directly influences the final texture and volume of your bread.
Keep in mind that the exact timing varies depending on temperature and dough ingredients. A warm kitchen speeds things up, while a cooler room slows down the process. Simply observing the size change is your most straightforward cue. When your dough has doubled, it’s usually a sign it’s ready for shaping or baking.

Superbaking Sourdough Banneton Bread Proofing Basket, 9" Round, Set of 2
- Bake Two Loaves Simultaneously: Includes two 9-inch round proofing baskets
- Splinter-Free, Smooth Finish: Made of premium Indonesian Rattan with polished surface
- Includes BakeSide App Access: AI baking assistant for guidance and scheduling
As an affiliate, we earn on qualifying purchases.
As an affiliate, we earn on qualifying purchases.
The Poke Test: Your Secret Weapon for Proofing Success
The poke test is a quick, reliable way to see if your dough has reached the right level of proofing. But it’s more than just pressing and checking—it’s about understanding what the response indicates about the dough’s internal structure. When you gently press your finger into the dough—about half an inch deep—you’re testing the elasticity of the gluten network. If the indentation springs back slowly and leaves a slight mark, it suggests that the gluten has developed enough to trap gas but still retains some flexibility. This balance is essential; if it springs back too quickly, the gluten isn’t sufficiently developed, meaning the dough may be under-proofed and won’t achieve good oven spring. If it collapses or remains indented, it’s over-proofed, and the gluten network has weakened, risking collapse in the oven. Understanding this helps you avoid common pitfalls—under-proofing leads to dense bread, while over-proofing can cause flat loaves or a gummy crumb. The key tradeoff is timing; knowing when the dough responds just right ensures optimal rise, airy texture, and good oven spring, resulting in a beautifully risen loaf with a tender crumb.
Picture this: you gently poke the dough, and it responds like a soft sponge—slightly resilient but not stiff. That’s your cue to move to the next step. This simple test works because it mirrors how the gluten structure has developed—elastic enough to hold gas but not so tight that it can’t expand further.
As an affiliate, we earn on qualifying purchases.
Visual and Textural Cues That Show Your Dough Is Perfectly Proofed
Beyond size and the poke test, your senses can tell you a lot. Well-proofed dough should look puffy, with a smooth, slightly domed surface. It shouldn’t be dry or cracked, as cracks can indicate over-drying or over-proofing, which weakens the gluten network. When you gently lift or shape it, it should feel soft, airy, and elastic—almost like a marshmallow but firm enough to hold shape. This elasticity signifies that the gluten has developed enough to trap gases effectively, which is crucial for structure and oven spring. If handling the dough feels dense, sticky without elasticity, or overly stiff, it suggests under-proofing or over-proofing, respectively. Recognizing these signs helps you gauge the dough’s readiness—aiming for a lively, springy, smooth texture ensures your bread will have a light, open crumb and good volume. These sensory cues are critical because they reflect the internal gluten development and fermentation progress, which are key to achieving bakery-quality results.
kitchen thermometer for bread proofing
As an affiliate, we earn on qualifying purchases.
As an affiliate, we earn on qualifying purchases.
Frequently Asked Questions
How do I know when my dough is fully proofed?
Your dough should have roughly doubled in size, look puffy and slightly domed, and pass the poke test—springing back slowly and leaving a slight indentation. These signs confirm it’s ready for shaping or baking.Can I over-proof or under-proof my dough?
Yes. Over-proofed dough may collapse or be overly sour, while under-proofed dough will be dense and won’t rise properly. Recognizing the signs early helps you correct course.What are the best conditions for proofing?
A warm, humid environment around 75-80°F (24-27°C) works best. Cover your dough well with a damp cloth or plastic wrap to retain moisture and maintain consistent temperature.How long should proofing take?
It varies with conditions—typically 1-2 hours for the first rise, 30 minutes to an hour for the final proof. Cold fermentation can extend proofing to 12-24 hours, developing richer flavors.Can I proof bread in the fridge?
Absolutely. Cold proofing slows fermentation, giving more time for flavor development and flexibility in timing. Just cover your dough well and plan ahead.As an affiliate, we earn on qualifying purchases.
Conclusion
Proofing isn’t just about waiting; it’s about *watching* and *feeling* your dough. With practice, you’ll develop an instinct for perfect proofing, turning humble ingredients into bakery-quality bread. Remember, your senses are the best tools—trust them, and your bread will always rise to the occasion.
Next time you bake, pay close attention. Your bread’s personality depends on those subtle signs. After all, baking is as much art as science—your nose, fingertips, and eyes are your best guides.