TL;DR
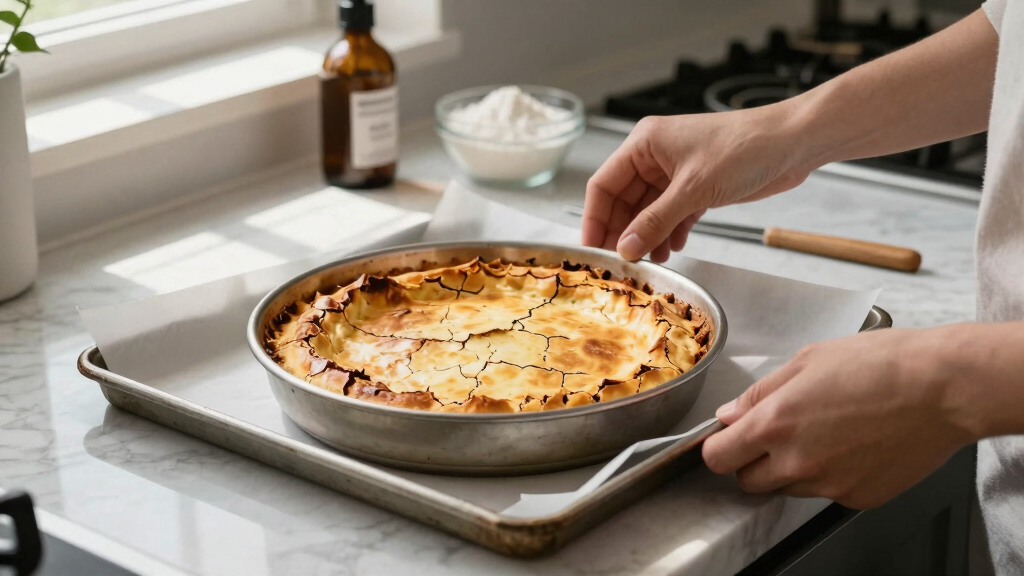
Achieving a crackly crust at home hinges on controlling oven heat, generating steam, and using a preheated baking surface. Simple tools like a baking stone or steel, plus proper cooling, make all the difference.
Think a professional oven is the only way to get that perfectly crackly crust? Think again. Many home bakers achieve bakery-worthy crusts using simple tricks that turn your ordinary kitchen into a mini bakery.
In this guide, you’ll learn how to harness heat, moisture, and clever techniques to make your bread’s crust crispy, glossy, and irresistibly crackly. No fancy tools or commercial ovens required—just practical steps you can follow today.
Preheat a baking stone or steel for at least 45 minutes at 450°F–500°F to mimic professional baking conditions.
Generating steam—via water in a hot pan or spritzing—delays crust formation and promotes crackliness.
Hydration levels of 70-80% in dough help create a moist interior and crispy exterior.
Cooling bread on a wire rack immediately after baking preserves its crunch.
Using a reliable oven thermometer ensures consistent high temperatures necessary for crust development.
Start with the Right Dough for a Crispy Finish
Your crust’s texture begins with your dough. Use high-protein bread flour for better gluten development. Aim for around 70-80% hydration—meaning for every 100 grams of flour, add 70-80 grams of water. This balance creates a moist interior and a crust that crisps up nicely.
For example, a simple sourdough or rustic country loaf with this hydration level will develop a lovely crust. Incorporating a long fermentation or autolyse helps develop flavor and gluten—both crucial for that crackly exterior.
Remember: more water equals more steam in the oven, which is key for cracking. So don’t shy away from slightly wetter doughs.
It’s important to understand that higher hydration doughs tend to produce a more open crumb and a thinner, crispier crust because the moisture inside turns to steam during baking. However, too much water can make handling and shaping more challenging, and may lead to a dough that collapses if not managed well. Finding the right balance is a tradeoff—slightly wetter doughs require careful shaping and handling but reward you with that desirable crackly exterior.

Brod & Taylor Bread Steel Max for Baking Bread & Cooking Pizza (14" x 14" x 0.15")
- Bakery-Quality Bread at Home: Achieve professional crust and crumb
- Heats Up Quickly: Preheats fast and retains heat
- Lightweight and Easy to Handle: Simplifies handling and storage
As an affiliate, we earn on qualifying purchases.
As an affiliate, we earn on qualifying purchases.
Use a Hot, Preheated Surface to Mimic Bakery Ovens
Getting that crackly crust starts with heat—lots of it. Place a baking stone, steel, or an inverted heavy-duty baking sheet in your oven and preheat it for at least 45 minutes at 450°F–500°F (230°C–260°C). This creates a blazing hot surface that instantly transfers heat to your dough.
For example, a baker might place a pizza stone in the oven, preheat it along with the oven, then slide the dough directly onto it. This quick heat transfer helps form a thick, crackly crust.
Pro tip: Using a steel instead of a stone can boost heat transfer, making the crust even crispier.
It’s worth noting that the choice of surface impacts how quickly and evenly heat is transferred. Steel conducts heat faster than stone, leading to a more immediate and intense heat burst, which can produce a more uniform and crackly crust. However, steels are often more expensive and heavier to handle. A preheated baking sheet can serve as a compromise, but the key is ensuring your surface is thoroughly preheated to maximize heat transfer and crust development.
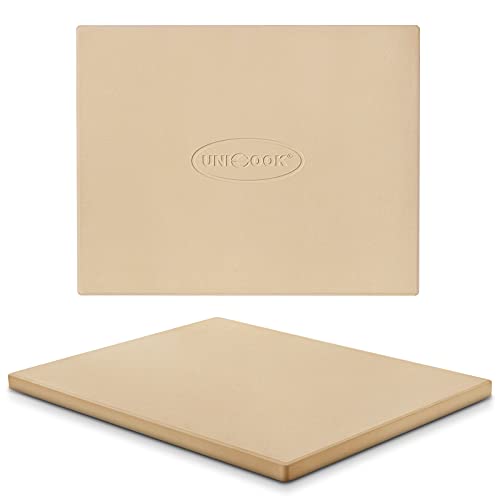
Unicook 15 x 12 Inch Rectangular Pizza Stone for Oven and Grill, 6.8 Lbs
- Rectangular Baking Surface: 15 x 12 inches, 0.6 inch thick
- Heavy Duty Material: Made of durable Cordierite
- High Temperature Resistance: Up to 1450°F (787°C)
As an affiliate, we earn on qualifying purchases.
As an affiliate, we earn on qualifying purchases.
Create Steamy Conditions Without a Professional Oven
Steam is the secret sauce for a crackly crust. It delays crust formation, giving the bread room to expand and develop a glossy, crispy exterior. You can generate steam at home with simple tools.
For example, place a metal pan or cast-iron skillet on the bottom rack when preheating your oven. Just before baking, pour hot water or ice cubes into the pan. The immediate steam will envelop your dough, mimicking professional steam injection systems.
Another option: spritz water onto the dough with a spray bottle just before baking. Repeat once or twice during the first 10 minutes for best results.
Creating steam is a balancing act—too little won’t delay crust formation enough, resulting in a softer crust. Too much steam, especially if prolonged, can make the crust soggy instead of crackly. The goal is to generate enough steam early on to keep the crust flexible and prevent premature hardening, then allow it to dry out and crisp up as baking continues. This controlled approach ensures a glossy, crackly crust rather than a soggy or chewy one.

Miele DG Clean Combi-Steam Oven Cleaner Spray, Food-Safe Formula
- Product Size: 8.5 fl oz
- Cleaning Compatibility: Suitable for Combi-Steam Ovens
- Powerful Cleaning: Cuts grease effectively
As an affiliate, we earn on qualifying purchases.
As an affiliate, we earn on qualifying purchases.
Bake at the Right Temperature for a Perfect Crackle
High heat is non-negotiable. Aim for 450°F–500°F (230°C–260°C). This temperature range encourages Maillard reaction, giving your crust color and crunch. It also helps the crust set quickly, trapping steam inside for that crackly finish.
For example, a typical baking process might involve 30-45 minutes at 475°F (246°C). Keep an oven thermometer inside to verify your temperature—home ovens often run a bit cooler than the dial indicates.
Longer baking at high heat results in a darker, crunchier crust. Just keep an eye on the color to prevent burning. The tradeoff here is between crust color and potential burning; monitoring closely allows you to find the optimal balance for your oven and dough type, ensuring a deeply caramelized, crackly crust without overdoing it.

Etekcity Infrared Thermometer Laser Temperature Gun 774
- Versatile Measurement Applications: Measures objects indoors and outdoors
- High Accuracy: 12:1 distance-to-spot ratio for precise readings
- Easy to Use: Quick temperature readings on bright LCD display
As an affiliate, we earn on qualifying purchases.
As an affiliate, we earn on qualifying purchases.
Cool Properly to Keep That Crunch
Cooling your bread correctly locks in the crispy crust. Place your loaf on a wire rack immediately after baking. This allows moisture to escape, preventing sogginess and keeping that crackle intact.
For example, resist the urge to cover your bread with a towel or plastic wrap. Instead, give it at least 20-30 minutes to cool completely before slicing.
Skipping this step often results in a softer crust—so patience here pays off. Cooling on a wire rack ensures that moisture doesn’t accumulate beneath the loaf, which would soften the crust and compromise its crunch. This step is critical because residual heat and trapped moisture are the main culprits that turn a crispy crust soggy if not properly managed. Essentially, patience in cooling preserves the integrity of that delicate, crackly exterior.
Compare Common Tools for Cracking the Crust at Home
| Tool | Benefit | Drawback |
|---|---|---|
| Baking Stone | Excellent heat retention, mimics professional ovens | Requires long preheat time |
| Steel | Heats faster, produces very crispy crust | More expensive |
| Inverted Baking Sheet | Accessible, cheap alternative | Less effective heat transfer |
| Steam Pan | Creates authentic steam environment | Needs careful handling |
Troubleshooting Common Crispy Crust Problems
If your crust isn’t crispy enough, check your oven temperature first. Many home ovens run cooler than the dial shows—using an oven thermometer can help you verify.
Too soft? Make sure you’re generating enough steam and baking long enough at high heat. Remember, patience is key—crisp crusts develop with extended baking and cooling.
For example, if your bread feels soft after 30 minutes, try extending baking time or increasing oven temperature slightly, always watching to prevent burning.
Additionally, consider the quality of your dough. If it’s too wet or lacks sufficient gluten development, it may not crisp up properly. Adjusting hydration or fermentation time can make a big difference in the final crust texture. Sometimes, a slight increase in baking temperature or time helps, but always balance this with careful monitoring to prevent burning or over-drying.
Frequently Asked Questions
Can I get a crackly crust without a Dutch oven?
Absolutely. Use a preheated baking stone or steel, and generate steam with a pan of water or ice cubes. These create the high heat and moisture needed for that crackly crust, even without a Dutch oven.
How do I prevent my crust from being soft or chewy?
Ensure your oven hits at least 450°F, generate enough steam, and bake long enough for crust to set and color. Cooling on a wire rack immediately helps maintain crispness.
How important is dough hydration for crust texture?
Very important. Hydration levels of 70-80% produce a moist crumb and a crisp crust. Wetter doughs create more steam during baking, enhancing crackliness.
Can I still get a good crust if I bake on a regular baking sheet?
It’s possible, but less effective. A heavy-duty baking sheet doesn’t transfer heat as efficiently as a stone or steel, so results may vary. Preheating the sheet helps but isn’t quite the same. Adjusting baking time and ensuring the sheet is hot can improve results.
How long should I bake my bread for a crispy crust?
Typically 30-45 minutes at high heat. Keep an eye on the color. Longer baking at high temperature helps deepen the crust’s crunch and color.
Conclusion
Achieving a crackly crust at home isn’t about fancy equipment—it’s about controlling heat and moisture. With a few simple tools and techniques, you can turn your everyday oven into a bakery.
Remember: patience and attention to detail make all the difference. Next time you bake, imagine that satisfying crackle—your bread’s best feature—and aim for that perfect, crispy finish.