
TL;DR
Swapping pans requires adjusting baking time, ingredients, and monitoring doneness. Use volume comparisons and test often to prevent ruined bakes and maintain perfect results.
Ever opened your oven, only to realize your favorite cake pan isn’t available? Suddenly, you’re faced with a familiar dilemma: how to switch pan sizes without turning your bake into a disaster. The good news? With a few simple tricks, you can confidently swap pans and still get that fluffy, golden finish.
This guide walks you through understanding volume differences, adjusting baking times, and choosing the right materials. Whether you’re working with a different shape or a slightly larger or smaller pan, you’ll learn how to keep your baked goods consistent and delicious.
Always compare pan volumes before swapping to understand how much batter to use.
Adjust baking time based on pan size—thinner layers bake faster, thicker layers take longer.
Scaling ingredients proportionally preserves the balance of your recipe when changing pan sizes.
Material and shape influence heat conduction and baking time—adjust oven settings accordingly.
Monitor your bake visually and with tests like toothpicks to prevent over or under-baking.
How to Quickly Compare Pan Volumes and Know What You’re Working With
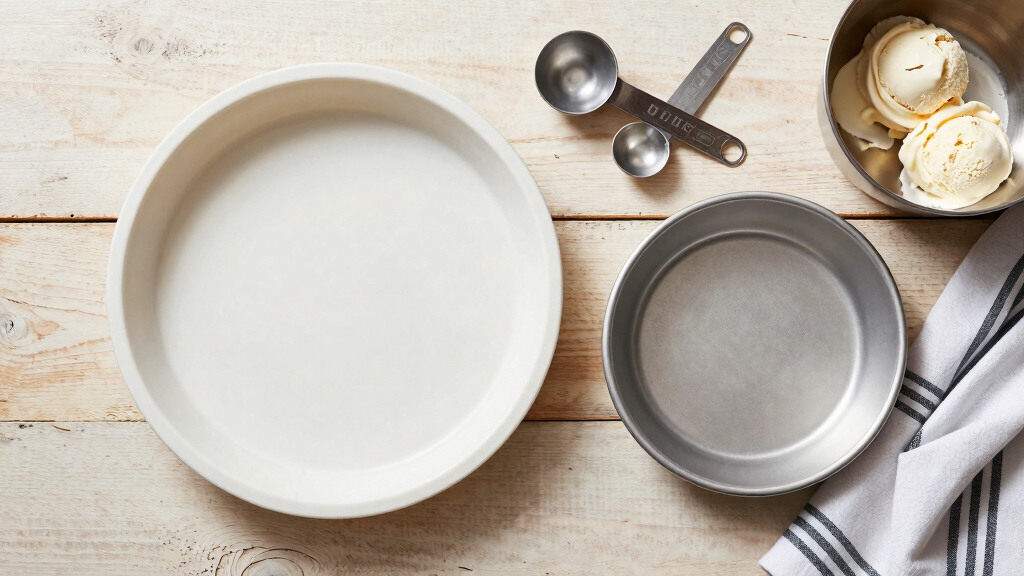
Understanding pan volume is the first step. An 8-inch round pan typically holds about 4 cups of batter, while a 9-inch pan can hold roughly 5 cups. That 1-cup difference might not seem huge, but it can change your baking time and texture.
Use a simple volume comparison to decide if you need to scale ingredients or adjust baking times. For example, if your recipe calls for 2 cups of batter, and your new pan only holds 1.5 cups, you should reduce the ingredients accordingly.
Here’s a quick way to compare: measure the actual volume of your pans either by filling them with water or by looking up standard sizes. This helps you visualize how much batter they can hold and plan accordingly. Recognizing these differences allows you to make informed adjustments, preventing under- or over-filling, which can lead to uneven baking or spills. Knowing your pan’s capacity also helps avoid common pitfalls like overly thin layers that bake too quickly or thick ones that remain raw in the center, ensuring a more predictable and controlled baking process.
As an affiliate, we earn on qualifying purchases.
Adjust Your Recipe and Baking Time When Switching to a Different Pan Size
When you change pan sizes, you must tweak your recipe and baking time. Larger pans spread the batter thinner, which usually shortens baking time because heat penetrates more quickly, potentially risking overbaking or burning the edges if you don’t adjust. Smaller pans, with thicker batter layers, retain heat longer and require more baking time to ensure the center is fully cooked.
For example, if you swap a 9-inch round for an 8-inch, expect to reduce baking time by 5-10%. This is because the batter layer is thinner, so heat reaches the center faster, risking overbaking if not monitored. Conversely, moving from a 9-inch to a 10-inch pan means the batter is thicker, which can extend baking time by 10-15%. This ensures the heat has enough time to cook the center thoroughly, preventing a raw or gummy texture. Always test for doneness with a toothpick or cake tester, but also pay attention to visual cues like color and crust development. Understanding these tradeoffs helps you prevent common issues like overbaked edges or undercooked centers, giving you more control over your baked goods’ final texture and appearance.
As an affiliate, we earn on qualifying purchases.
How to Scale Ingredients for Different Pan Sizes Without Wrecking Your Recipe
If your new pan’s volume differs significantly from the original, scaling ingredients keeps the batter balanced. Use this step-by-step process:
- Find the volume of your original pan and your new pan.
- Calculate the ratio (new volume ÷ original volume).
- Multiply each ingredient by this ratio.
- Adjust baking time based on the size difference.
For example, a recipe designed for a 9-inch round (about 5 cups) can be scaled down for a 7-inch pan (roughly 3.5 cups) by multiplying all ingredients by 0.7. This proportional scaling preserves the batter-to-pan ratio, which is crucial for maintaining the intended texture and rise. It prevents issues like overly dense cakes or overly airy textures that result from improper ingredient ratios. However, be aware that very small or large scale adjustments might require additional tweaks, especially for delicate or layered desserts, to ensure even baking and proper structure. Accurate scaling maintains the recipe’s integrity, ensuring your final product matches the intended flavor and consistency without the risk of under- or over-baking.
As an affiliate, we earn on qualifying purchases.
Using Different Materials and Shapes: What Changes When You Swap from Metal to Glass or Silicone
Pan material impacts heat conduction and baking time. Metal pans heat quickly and give a crisp crust, which can accelerate browning and potentially lead to over-baking if not monitored. Glass pans heat more slowly and distribute heat evenly, often resulting in a more uniform bake but requiring a lower oven temperature—about 25°F less—and longer baking times to prevent over-browning. Silicone pans are non-stick and flexible, making them excellent for releasing baked goods easily, but they insulate heat, which can extend baking times. Adjustments like lowering oven temperature and increasing bake time ensure your baked goods develop the right crust and doneness without overcooking or undercooking. Shape also influences heat distribution; for example, square or rectangular pans have corners that tend to cook faster, risking uneven browning. Recognizing these differences allows you to adapt your baking process, ensuring consistent results regardless of the pan material or shape. For delicate recipes, these considerations are crucial to achieving a uniform bake and optimal texture.
As an affiliate, we earn on qualifying purchases.
Top Tips to Prevent Common Pitfalls When Changing Pan Sizes
- Grease and flour or line pans with parchment paper to avoid sticking, which could ruin the appearance and texture of your baked goods. Proper preparation ensures easy removal and a smooth surface.
- Preheat your oven fully before baking. Uneven heat distribution can cause uneven rising or browning, especially when switching to different pan materials or shapes. A proper preheat helps maintain consistent baking conditions.
- Check baked goods early—don’t rely solely on time. Visual cues like color, crust firmness, and using a toothpick are more reliable indicators of doneness, reducing the risk of overbaking or underbaking.
- Use visual cues, like a golden crust and a springy top, in addition to toothpicks. These signs help you judge doneness more accurately, especially when adjusting for different pans.
- Keep a baking journal to note how different pans affect baking times and results. This record helps you make better adjustments in future bakes, saving time and preventing mistakes.
For example, switching to a darker pan can cause baked goods to brown faster. Knowing this, you can lower oven temperature slightly or check earlier to prevent burning. These proactive steps help you maintain control over your baking process, ensuring consistent, high-quality results.
Frequently Asked Questions
How do I convert a recipe from a 9-inch pan to an 8-inch pan?
Calculate the volume difference—an 8-inch pan holds about 4 cups, while a 9-inch holds roughly 5 cups. Reduce your ingredients by about 20% and keep an eye on baking time, checking for doneness earlier.
Can I use a loaf pan instead of a round cake pan?
Yes, but expect different results. Loaf pans are taller and narrower, so baking times increase. Adjust your baking time by 10-20% and check for doneness with a toothpick.
What if my pan is glass instead of metal?
Glass pans require lower oven temperatures—about 25°F less—and longer baking times. Watch for early browning and test with toothpicks to prevent overbaking.
How do I know when my baked goods are done with a different pan?
Use visual cues like a golden crust and a clean toothpick inserted in the center. Also, gently press the top—if it springs back, it’s likely ready.
Are there tools to help me convert pan sizes and adjust recipes?
Yes, online calculators and smartphone apps can help quickly determine the right ingredient adjustments and baking times based on your pan sizes.
Conclusion
Changing pan sizes doesn’t have to ruin your baked good. The key is understanding the volume difference, adjusting your recipe, and keeping a close eye on baking cues. With a little practice, you’ll see that flexibility in pans actually opens up more baking possibilities.
Next time you’re short a pan or want a different shape, remember: a smart adjustment is your secret weapon for perfect results every time.