
TL;DR

Get baking supplies delivered free with Prime
- Fast, free delivery on millions of items
- Prime Video, Amazon Music and more included
- Member-only deals all year
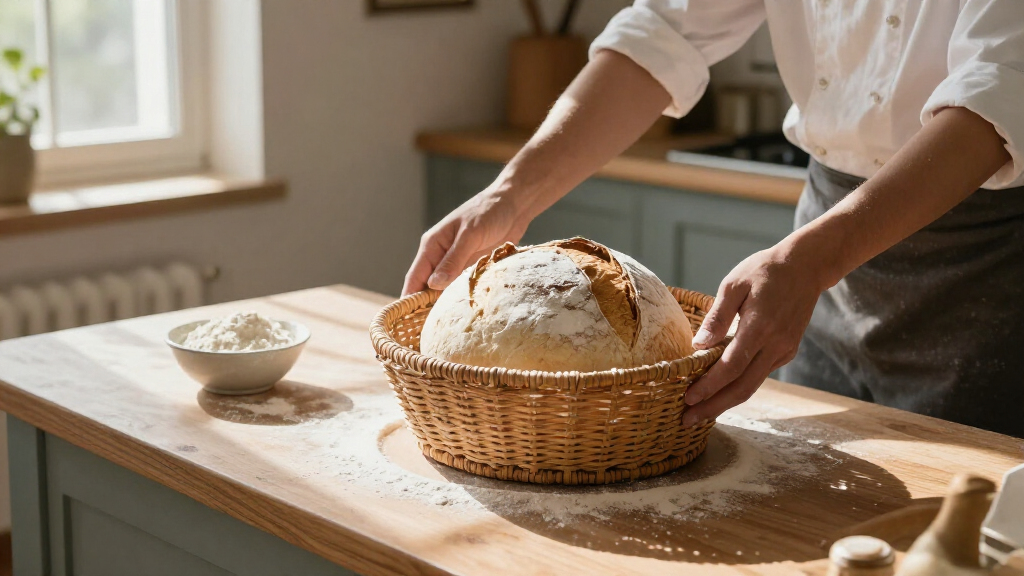
A proofing basket, also called a banneton, supports shaped dough during its final rise and can leave a decorative pattern on the loaf. Choose a size and shape to fit your dough, flour it well, and turn the dough out before baking; a floured cloth-lined bowl works as a substitute.
A loaf can spread across the counter in the time it takes to preheat the oven. That is one reason bakers reach for a proofing basket: it gives shaped dough a snug place to rise before baking. The basket can also leave a pretty spiral or ribbed pattern, though that pattern is decoration, not a secret ingredient.
A proofing basket is also called a banneton. It supports bread dough during its final rise, then the dough comes out and goes onto a baking surface. You’ll learn how to choose the right shape and size, flour and use the basket, handle a sticky loaf, and care for the basket afterward.
You do not need one to bake good bread. A bowl lined with a well-floured tea towel can do the same basic job. The useful question is whether your dough needs more support—and whether the basket makes your routine easier.
A proofing basket, also called a banneton, supports shaped dough during its final rise; turn the dough out before baking.
Choose a round basket for boules or an oval basket for batards, and match its capacity to the recipe’s dough quantity.
Dust the base, sides, and creases thoroughly; rice flour tends to stick less than wheat flour, and blends can work.
Use recipe timing and dough cues to judge proofing; the basket does not tell you when the rise is complete.
Brush out dried flour and let rattan air-dry fully; a floured cloth-lined bowl can substitute for a basket.
Bread craft · A practical guide
The Proofing Basket Explained for Better Bread
A snug place for the final rise. A proofing basket, also called a banneton, supports shaped dough before baking and may leave a decorative spiral or ribbed pattern. Choose a shape and size that fit your loaf, flour it thoroughly, and turn the dough out before it goes into the oven.
01 / Why use one?
What the basket does for a loaf
Free-form dough can relax and spread as it rests. A close-fitting basket gives it sides to lean against through the final rise.
Holds the form
Especially useful for soft or slack dough that needs support before baking.
Leaves a pattern
Rattan ridges can create spiral or ribbed marks. They are decorative, not a flavor boost.
Helps form a skin
A lightly floured surface may dry slightly, which can make scoring easier.
Turns out first
The basket supports the rise; the dough leaves it for parchment, a peel, or a baking surface.
Reusable tool
Many shapes and materials are available, but good shaping and handling matter more.
Use a lined bowl
A bowl with a well-floured tea towel can provide the same basic support.
02 / Choose your fit
Match shape, capacity, and routine
Follow the recipe’s dough quantity and the basket maker’s capacity guidance. A poor fit can encourage spreading or leave too little room to expand.
| Basket option | Useful for | Tradeoff |
|---|---|---|
| Round rattan | Round boules and visible spiral marks | Needs careful drying and brushing |
| Oval rattan | Longer batards | Shape should match the recipe’s loaf |
| Lined or synthetic | Bakers who prefer a liner or different care routine | May leave less of a basket pattern |
| Floured cloth-lined bowl | Occasional baking or a first trial | Pattern and fit depend on the bowl and cloth |
Quick fit check: a round basket suits a boule; an oval basket suits a batard. Too large can mean spreading; too small can limit expansion.
03 / The workflow
Five steps from shaping to bake
Prepare the basket before the dough goes in, and set up the landing surface before turning it out.
Shape
Shape the dough after its first rise, building surface tension.
Flour
Dust the base, sides, and creases evenly with rice flour or a blend.
Place + cover
Often seam-side up, then cover and proof by the recipe’s method.
Turn out
Invert gently onto parchment or a peel. Pause if the dough sticks.
Score + bake
Score the loaf and bake as directed by your recipe.
Proofing cue
The basket does not tell you when the rise is complete. Check recipe timing, dough expansion, and a gentle indentation that springs back slowly.
Seam position
Many bakers set dough seam-side up so it lands seam-side down after turning. Recipes vary, so follow yours.
04 / Flour + care
Prevent sticking; let rattan dry
Most release problems come down to flour coverage, dough moisture, or a basket that has not dried fully.
Even coverage matters
Dust every surface
Rice flour tends to stick less than wheat flour; a blend can work too. Use a small sieve or your fingers to reach the base, sides, ridges, and corners.
If the dough clings, avoid yanking it free. Brush the basket clean, let it dry fully, and apply a more generous, even coating next time.
- 1Let excess flour dry, then brush it out.
- 2Air-dry rattan completely before storing.
- 3Avoid soaking rattan or storing it damp; trapped moisture can encourage mold.
- 4For lined or synthetic baskets, follow the maker’s care instructions.
05 / Common questions
Small details, better handling
Keep the turn gentle, have your tools ready, and let the recipe guide the final rise.
Do I need one for sourdough?
No. A bowl lined with a well-floured tea towel can support the dough.
Can it go in the oven?
Usually no. Turn the dough out first unless the product is specifically designed for oven use.
Which flour helps prevent sticking?
Rice flour is commonly used because it tends to adhere less than wheat flour. A blend is another option.
Why did the dough stick?
The basket may need more flour, the dough may be very wet, or the basket may still be damp.
What a proofing basket does for your loaf
A proofing basket is a container that supports shaped bread dough during its final rise, helping it hold a round or oval form before baking. It is also called a banneton, and you turn the dough out of it before the loaf goes into the oven. The basket supports the dough; it does not bake with it.
That support is handy for free-form loaves, especially when a soft dough tends to relax and spread. Imagine shaping a round sourdough boule on the counter: it looks taut at first, then slowly slumps as it rests. A close-fitting basket gives the dough sides to lean against while it proofs.
Some baskets leave a spiral or ribbed pattern on the dough. It can make a loaf look bakery-ready, but the marks are decorative; they do not improve the bread’s flavor. A lightly floured surface may also form a slightly dry skin that helps you score the dough, though your dough and fermentation have a greater say in how the loaf behaves.
A basket is most useful when you need support through the final rise. It is optional equipment, not a requirement for sourdough. If your dough holds its shape well on a tray or in a bowl, you may not see much benefit from adding another item to your cupboard.
Products Worth Considering

Le Creuset Enameled Cast Iron Round Bread Oven, 9.5-Inch, Cerise

Le Creuset Signature 6.5-Quart Deep Round Dutch Oven with Light Gold Crucible Knob, Enameled Cast Iron, Bleu Riviera

Le Creuset Enamemed Cast Iron Oval Dutch Oven, 5 qt., White/Crucible
As an affiliate, we earn on qualifying purchases.
Pick a basket that matches your dough
A proofing basket works best when its shape and capacity suit the loaf you plan to bake. A round basket suits a boule, while an oval basket suits a batard; a basket that is too large can let dough spread, and one that is too small leaves little room for expansion. Match the basket to the recipe’s dough quantity and intended shape.
For example, if your recipe makes an oval loaf, an oval basket gives the shaped dough support along its length. Putting that dough in a broad round basket may still work, but the loaf can spread into a different shape. When comparing sizes, check the capacity guidance from the basket maker and the recipe’s dough weight rather than choosing by appearance alone.
Rattan is a traditional material, and its ridges can make the familiar spiral marks. Cloth-lined and synthetic options are also available. A liner can reduce direct contact with the basket, though it may soften or hide the ridged pattern. Different materials and liners suit different routines, so care instructions matter as much as looks.
Here is a simple comparison to guide your choice:
| Basket option | Useful for | Tradeoff |
|---|---|---|
| Round rattan | Round boules and visible spiral marks | Needs careful drying and brushing |
| Oval rattan | Longer batards | Shape should match the recipe’s loaf |
| Lined or synthetic | Bakers who prefer a liner or different care routine | May leave less of a basket pattern |
| Floured cloth-lined bowl | Occasional baking or a first test run | Pattern and fit depend on the bowl and cloth |
If you bake only once in a while, try the bowl-and-cloth option first. It can help you find out whether the support is useful before you buy a dedicated basket.
Flour the basket well to prevent sticking
To prepare a proofing basket, dust its base, sides, and creases with flour before adding the dough. Rice flour is popular because it tends to stick less than wheat flour, and a blend can work too. A thin dusting that leaves bare patches may fail where damp dough presses against the basket.
Use a small sieve or your fingers to distribute the flour evenly, paying attention to the ridges and corners. For example, a wet sourdough can settle firmly into the grooves of a rattan basket; a generous, even coating gives you a better chance of turning it out cleanly. If sticking has happened before, add more flour next time and check that the basket has dried fully.
Here’s a simple preparation routine:
- Check the basket: It should be clean and completely dry.
- Dust every surface: Cover the bottom, sides, and any creases with rice flour or a flour blend.
- Shape the dough: Build enough surface tension to help it hold its form.
- Set it in the basket: Follow your recipe’s directions for seam position.
- Cover and proof: Use the recipe’s timing and cues rather than treating the basket as a timer.
A cloth liner can reduce sticking, but flour the liner too. If the dough clings when you turn it out, avoid yanking at it: a tear can spoil the surface you want to score. Review the flouring, moisture, and drying steps, then adjust one at a time on your next loaf.
Place the dough seam-side up, then turn it out gently
Many bakers place shaped dough in the proofing basket seam-side up so it lands seam-side down when turned out for baking. That is a common approach, but recipes can differ, so follow the method you are using. The basket supports the dough; it does not decide whether the final rise is complete.
After the dough has proofed, place parchment or a peel over the basket, hold both securely, and turn them over in one smooth motion. Lift the basket carefully. The loaf should settle onto the baking surface without being pulled or stretched. If the dough resists, pause and check for sticking rather than forcing it.
For instance, a home baker working with an oval loaf might proof it seam-side up, invert it onto parchment, score the top, and transfer it to a preheated baking surface. The turn is easier when the parchment is already in place and the peel is within reach. A calm setup matters: dough can be delicate after proofing, and scrambling for tools adds extra handling.
Use the recipe’s timing and look at the dough’s expansion. A gentle indentation that springs back slowly is one useful cue, although dough temperature and recipe methods affect timing. Score with a sharp blade after turning out, then bake according to the recipe. Do not put a typical rattan basket in the oven; only use a basket in the oven if its manufacturer specifically says it is designed for that purpose.
Fix sticking and care for the basket between loaves
When dough sticks to a proofing basket, common causes include too little flour, very wet dough, or a basket that is damp. Let the loaf come away gently; pulling can tear its surface and make scoring harder. For the next bake, brush the basket clean, let it dry completely, and apply an even, generous dusting of flour.
After baking, let any excess flour dry, then brush it out. Air-dry the basket fully before putting it away. Rattan should not be soaked or stored damp, since trapped moisture can encourage mold. If you use a lined or synthetic basket, follow its manufacturer’s care instructions.
Picture a basket still cool and slightly damp from a rinse, with a new loaf due in an hour. That is a poor moment to load it: flour can clump on the wet surface, and dough may stick more readily. Give the basket time to dry, or use a clean, dry, floured cloth-lined bowl for that bake instead.
Care stays simple when you keep moisture out and remove old flour between uses. You do not need to wash a rattan basket after every loaf; brushing and thorough drying are the practical routine. If you spot mold, stop using the basket until you have followed its care guidance and can confirm it is clean and safe to use.
Use a bowl and towel when you do not own a banneton
A bowl lined with a well-floured tea towel can stand in for a proofing basket by supporting shaped dough during its final rise. Choose a bowl close to the loaf’s intended size and shape, then flour the cloth thoroughly so the dough can release. This is a practical way to try the technique before buying dedicated equipment.
For example, if you are baking your first free-form sourdough and only have a mixing bowl, drape a clean tea towel inside it and dust the fabric with rice flour. Shape the dough, place it in the lined bowl according to your recipe, cover it, and let it proof. When it is ready, turn it out onto parchment as you would from a basket.
The bowl will not leave the same crisp ridges as rattan, and a very broad bowl may not support the dough as closely. Still, the central job is support, and a suitable bowl can provide that. If the cloth sticks, use more flour next time and check that the towel was dry before you lined the bowl.
This substitute also gives you a low-cost way to learn how your dough behaves. If the loaf holds its shape and releases cleanly, you may decide that a basket would be a convenience rather than a necessity. If it spreads, revisit shaping and proofing as well as the container; the basket alone cannot correct every dough problem.
Frequently Asked Questions
Do I need a proofing basket to make sourdough?
No. A bowl lined with a well-floured tea towel can support shaped dough during its final rise. A basket is useful when you want a closer fit or a decorative pattern, but good shaping and proofing still matter more.
Can I put a proofing basket in the oven?
Usually, no. Turn the dough out onto parchment, a peel, or another baking surface before baking. Use a basket in the oven only if the manufacturer specifically identifies it as oven-safe.
Which side of the dough goes up in a banneton?
Many bakers place the dough seam-side up so it lands seam-side down when turned out. Recipes vary, so follow the directions for your loaf and proofing method.
What flour helps stop dough sticking to the basket?
Rice flour is commonly used because it tends to adhere less than wheat flour, though a blend can work too. Dust the base, sides, and creases evenly, and check that the basket is completely dry.
Why did my dough stick to the proofing basket?
The basket may have been under-floured or damp, or the dough may have been very wet. Let excess flour dry after use, brush it out, air-dry the basket fully, and apply a more generous coating before the next loaf.
Does a proofing basket improve flavor or make crust crispier?
Not directly. The basket mainly supports the dough and may leave a surface pattern; flavor and crust depend more on the dough, fermentation, and baking method.
Conclusion
Use a proofing basket when your shaped dough needs support or when you want the pattern it leaves. Match the basket to the loaf, flour it well, and turn the dough out before baking; a lined bowl can serve just as well while you learn the routine.
Remember the order: shape the dough, let it rise, turn it out, then bake. The basket is a helpful stage for the loaf, not the star of the show.